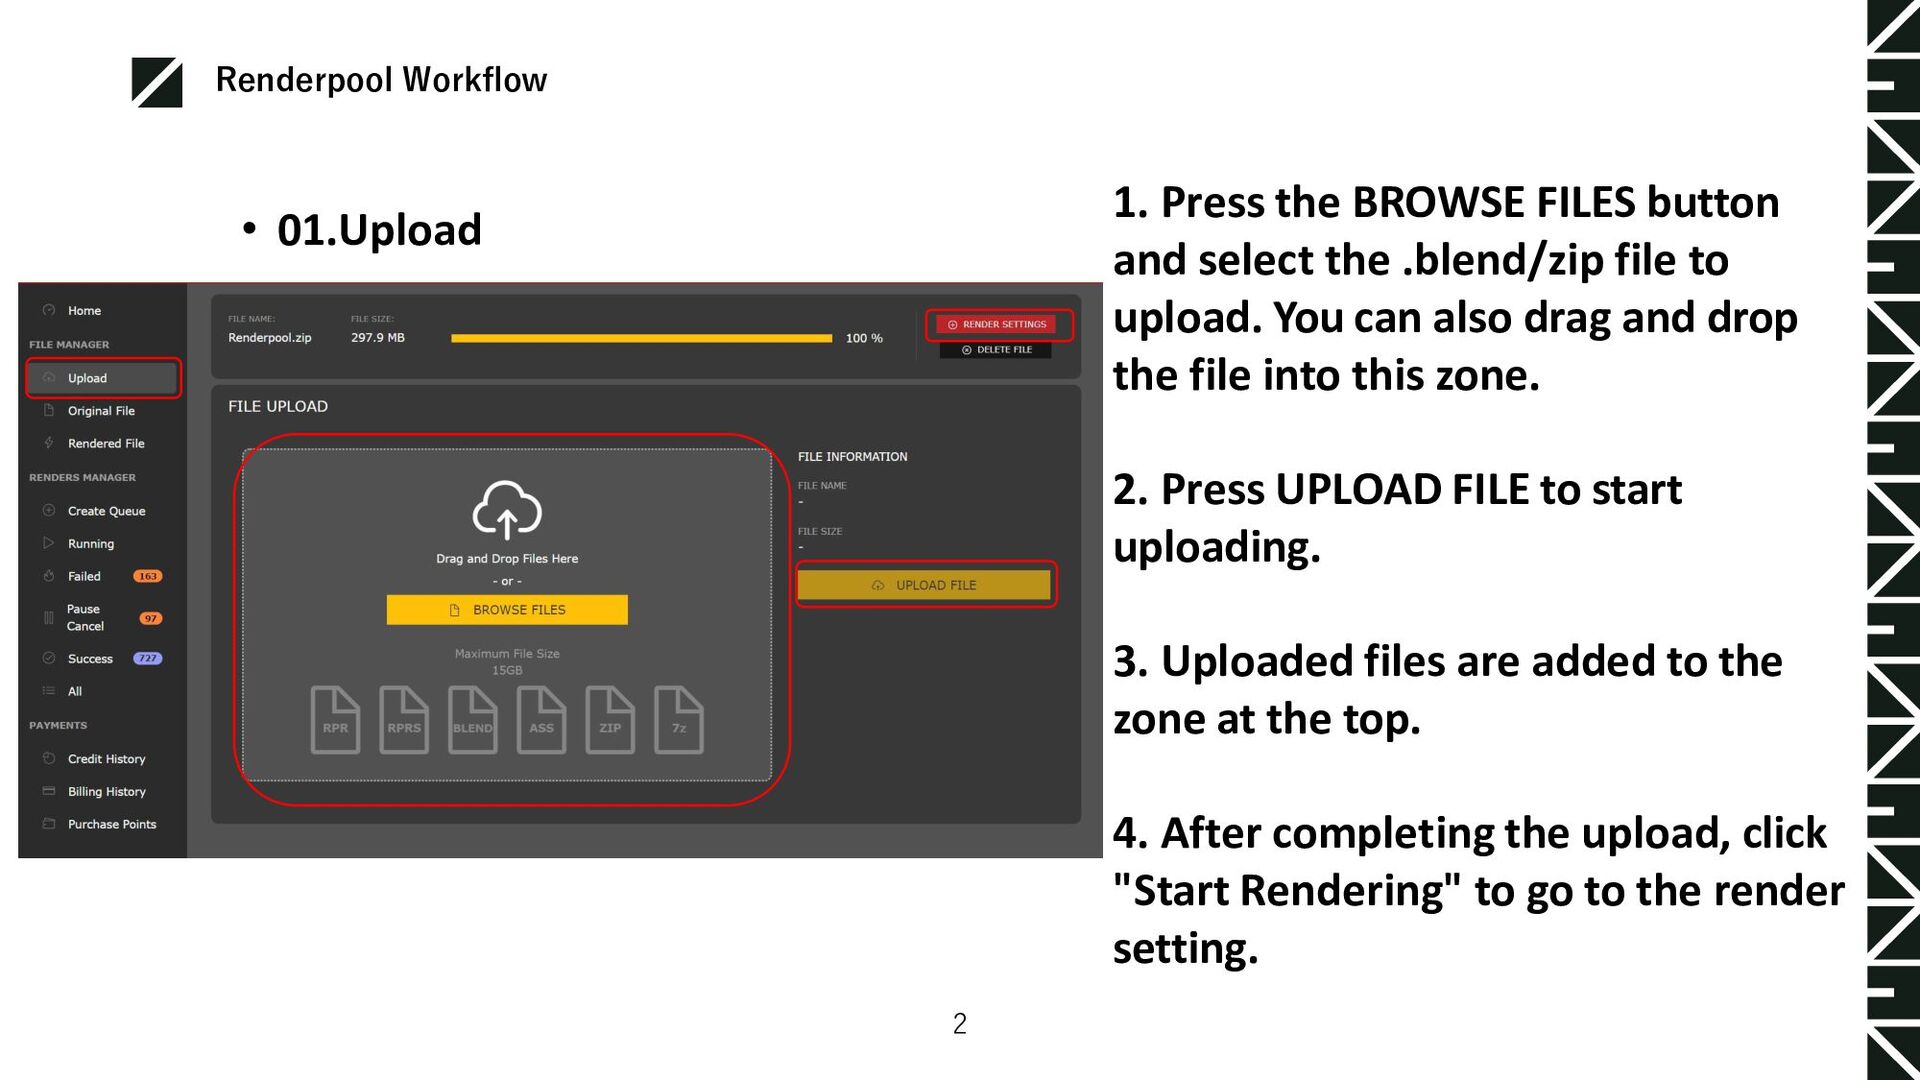
button and select the .blend/zip file to upload. You can also drag and drop the file into this zone. 2. Press UPLOAD FILE to start uploading. 3. Uploaded files are added to the zone at the top. 4. After completing the upload, click "Start Rendering" to go to the render setting.
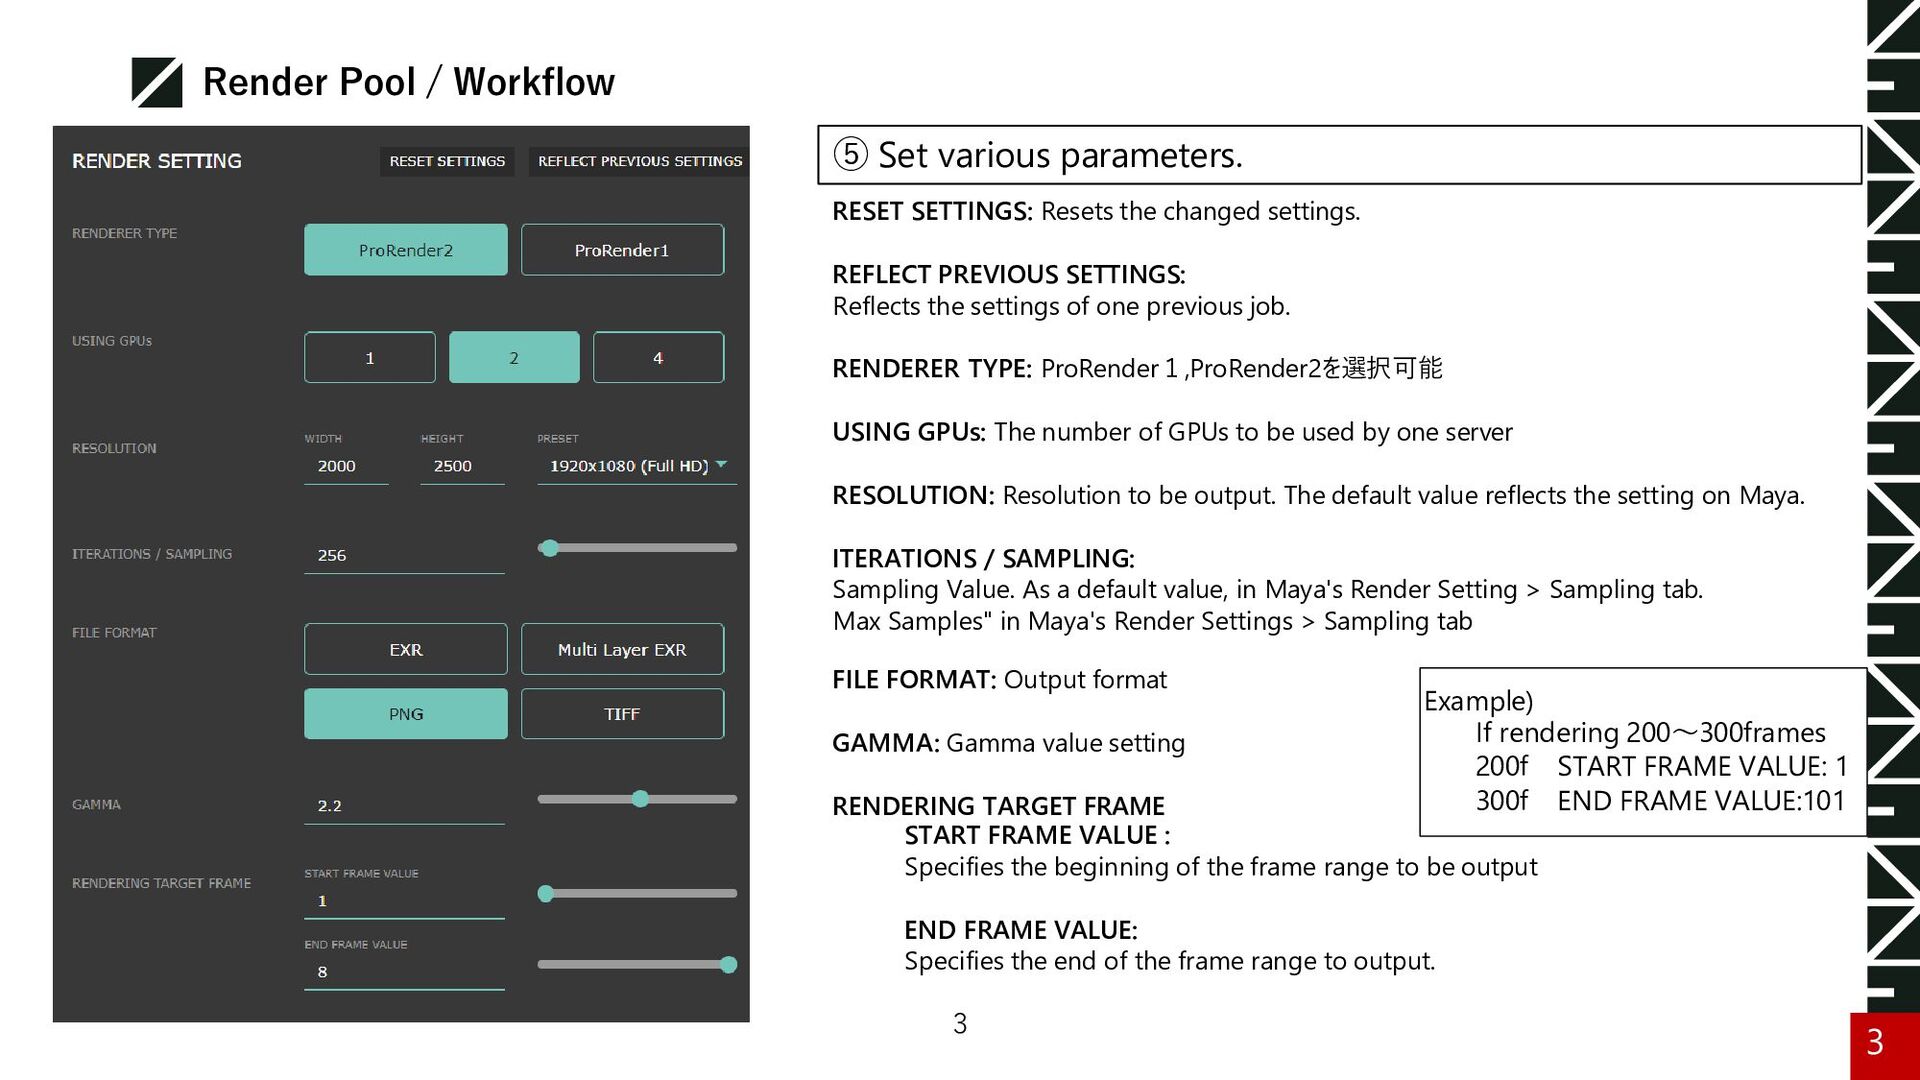
REFLECT PREVIOUS SETTINGS: Reflects the settings of one previous job. RENDERER TYPE: ProRender1,ProRender2を選択可能 USING GPUs: The number of GPUs to be used by one server RESOLUTION: Resolution to be output. The default value reflects the setting on Maya. ITERATIONS / SAMPLING: Sampling Value. As a default value, in Maya's Render Setting > Sampling tab. Max Samples" in Maya's Render Settings > Sampling tab FILE FORMAT: Output format GAMMA: Gamma value setting RENDERING TARGET FRAME START FRAME VALUE : Specifies the beginning of the frame range to be output END FRAME VALUE: Specifies the end of the frame range to output. ⑤ Set various parameters. Example) If rendering 200~300frames 200f START FRAME VALUE: 1 300f END FRAME VALUE:101 3 3
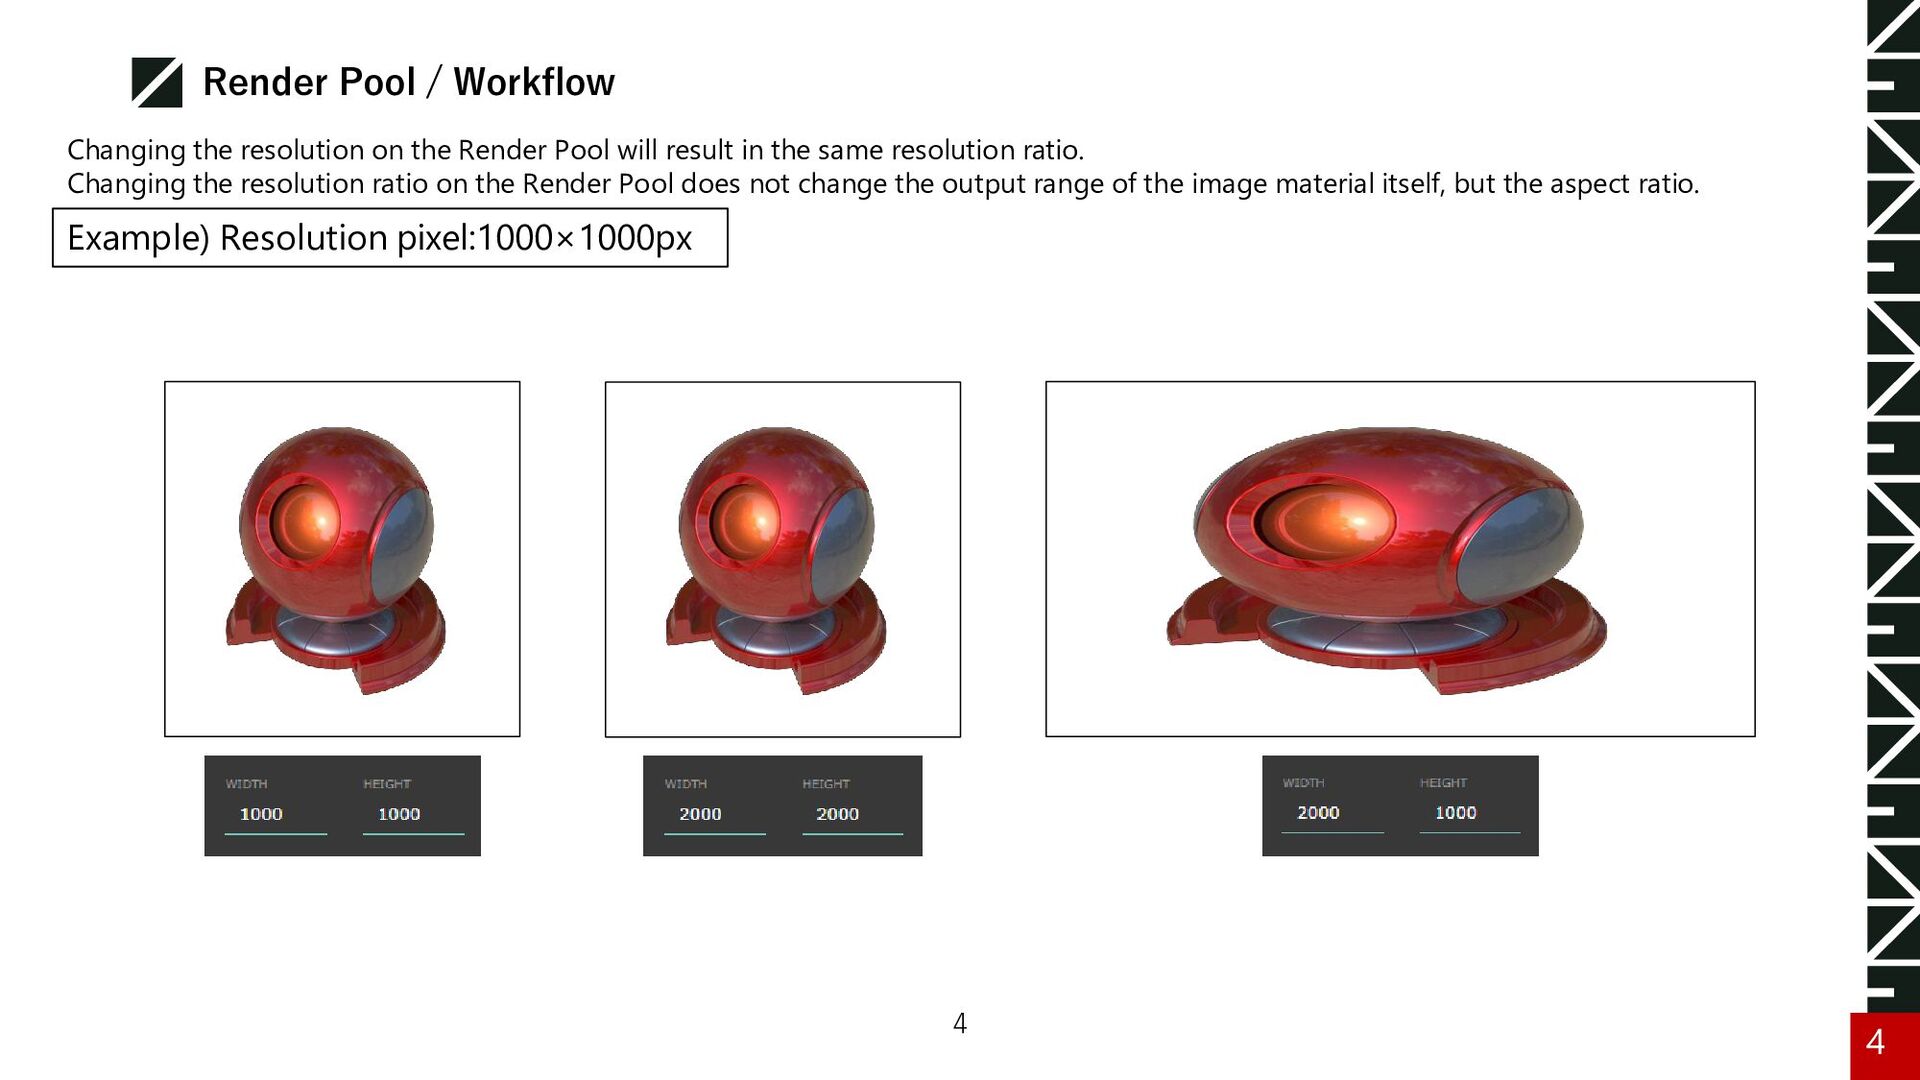
on the Render Pool will result in the same resolution ratio. Changing the resolution ratio on the Render Pool does not change the output range of the image material itself, but the aspect ratio. 4 4
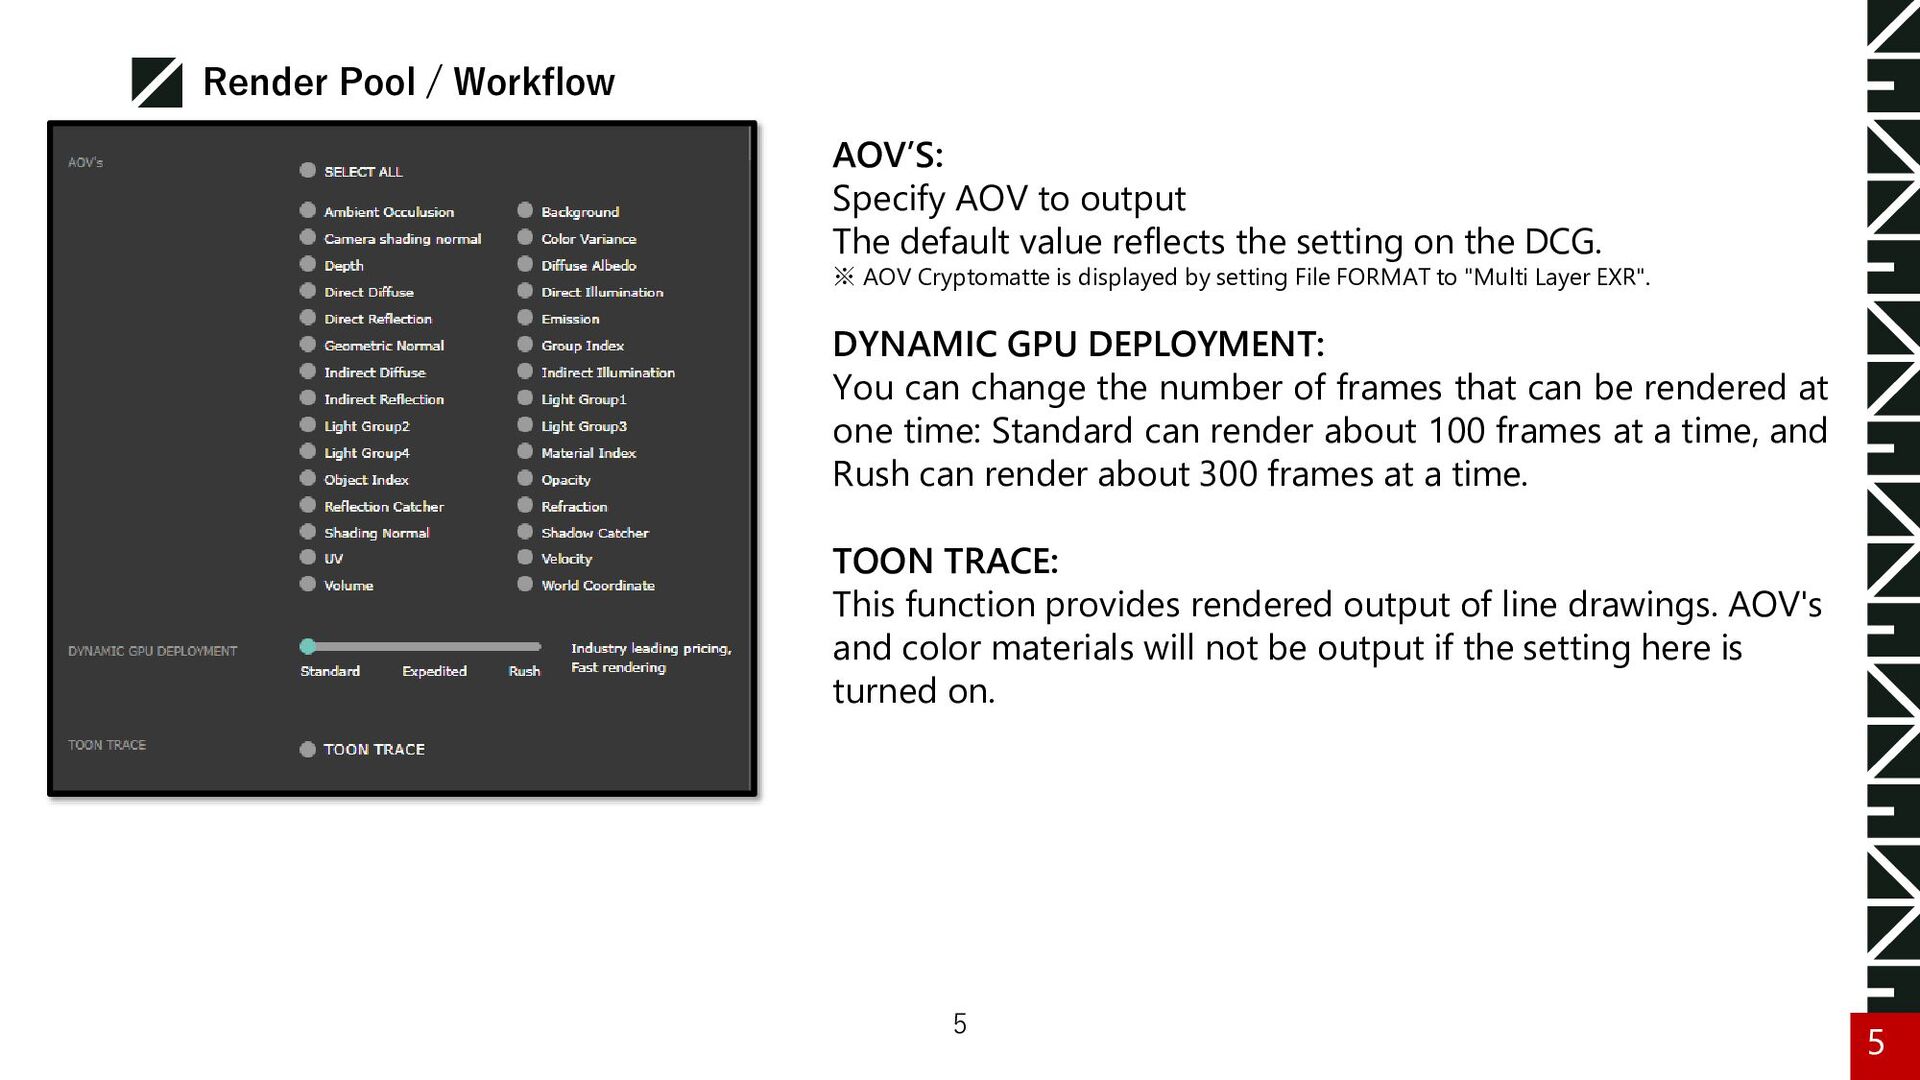
default value reflects the setting on the DCG. ※ AOV Cryptomatte is displayed by setting File FORMAT to "Multi Layer EXR". DYNAMIC GPU DEPLOYMENT: You can change the number of frames that can be rendered at one time: Standard can render about 100 frames at a time, and Rush can render about 300 frames at a time. TOON TRACE: This function provides rendered output of line drawings. AOV's and color materials will not be output if the setting here is turned on. 5 5
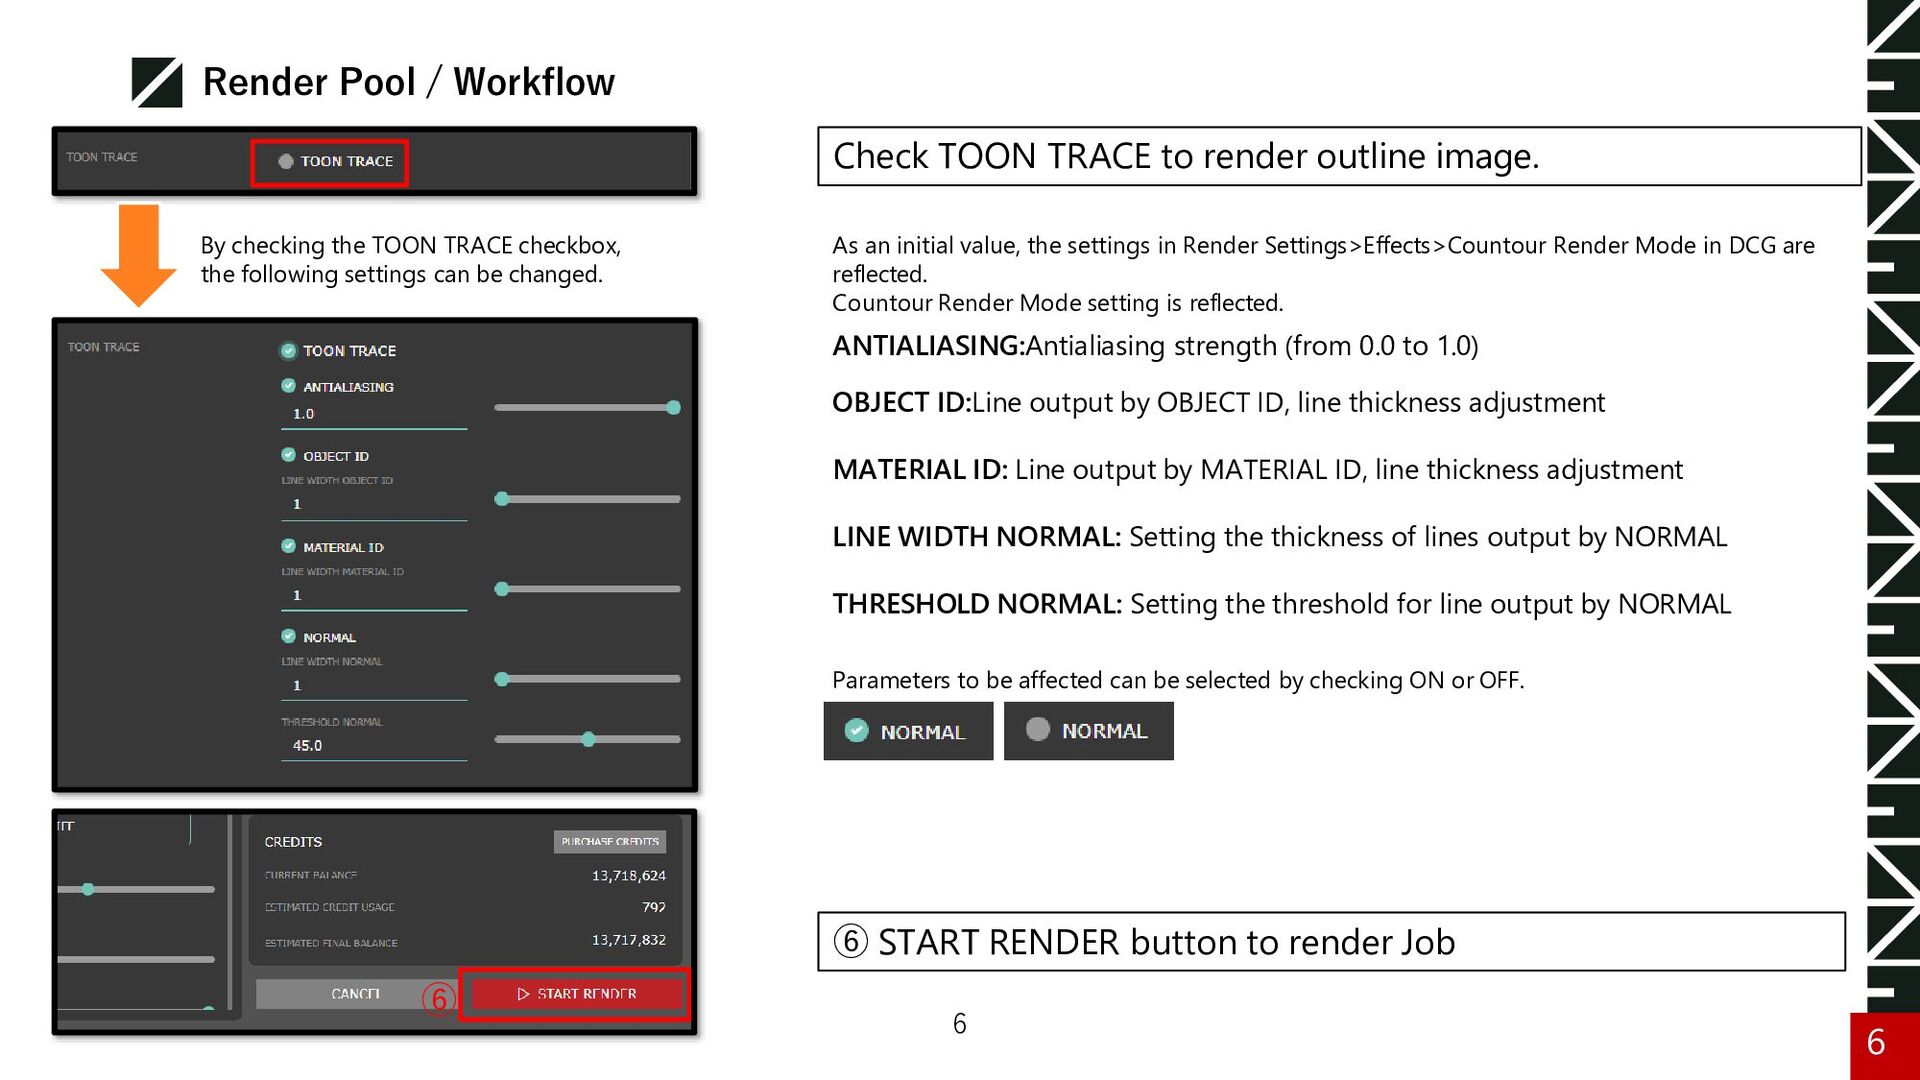
image. As an initial value, the settings in Render Settings>Effects>Countour Render Mode in DCG are reflected. Countour Render Mode setting is reflected. ANTIALIASING:Antialiasing strength (from 0.0 to 1.0) OBJECT ID:Line output by OBJECT ID, line thickness adjustment MATERIAL ID: Line output by MATERIAL ID, line thickness adjustment LINE WIDTH NORMAL: Setting the thickness of lines output by NORMAL THRESHOLD NORMAL: Setting the threshold for line output by NORMAL Parameters to be affected can be selected by checking ON or OFF. By checking the TOON TRACE checkbox, the following settings can be changed. ⑥ ⑥ START RENDER button to render Job 6 6
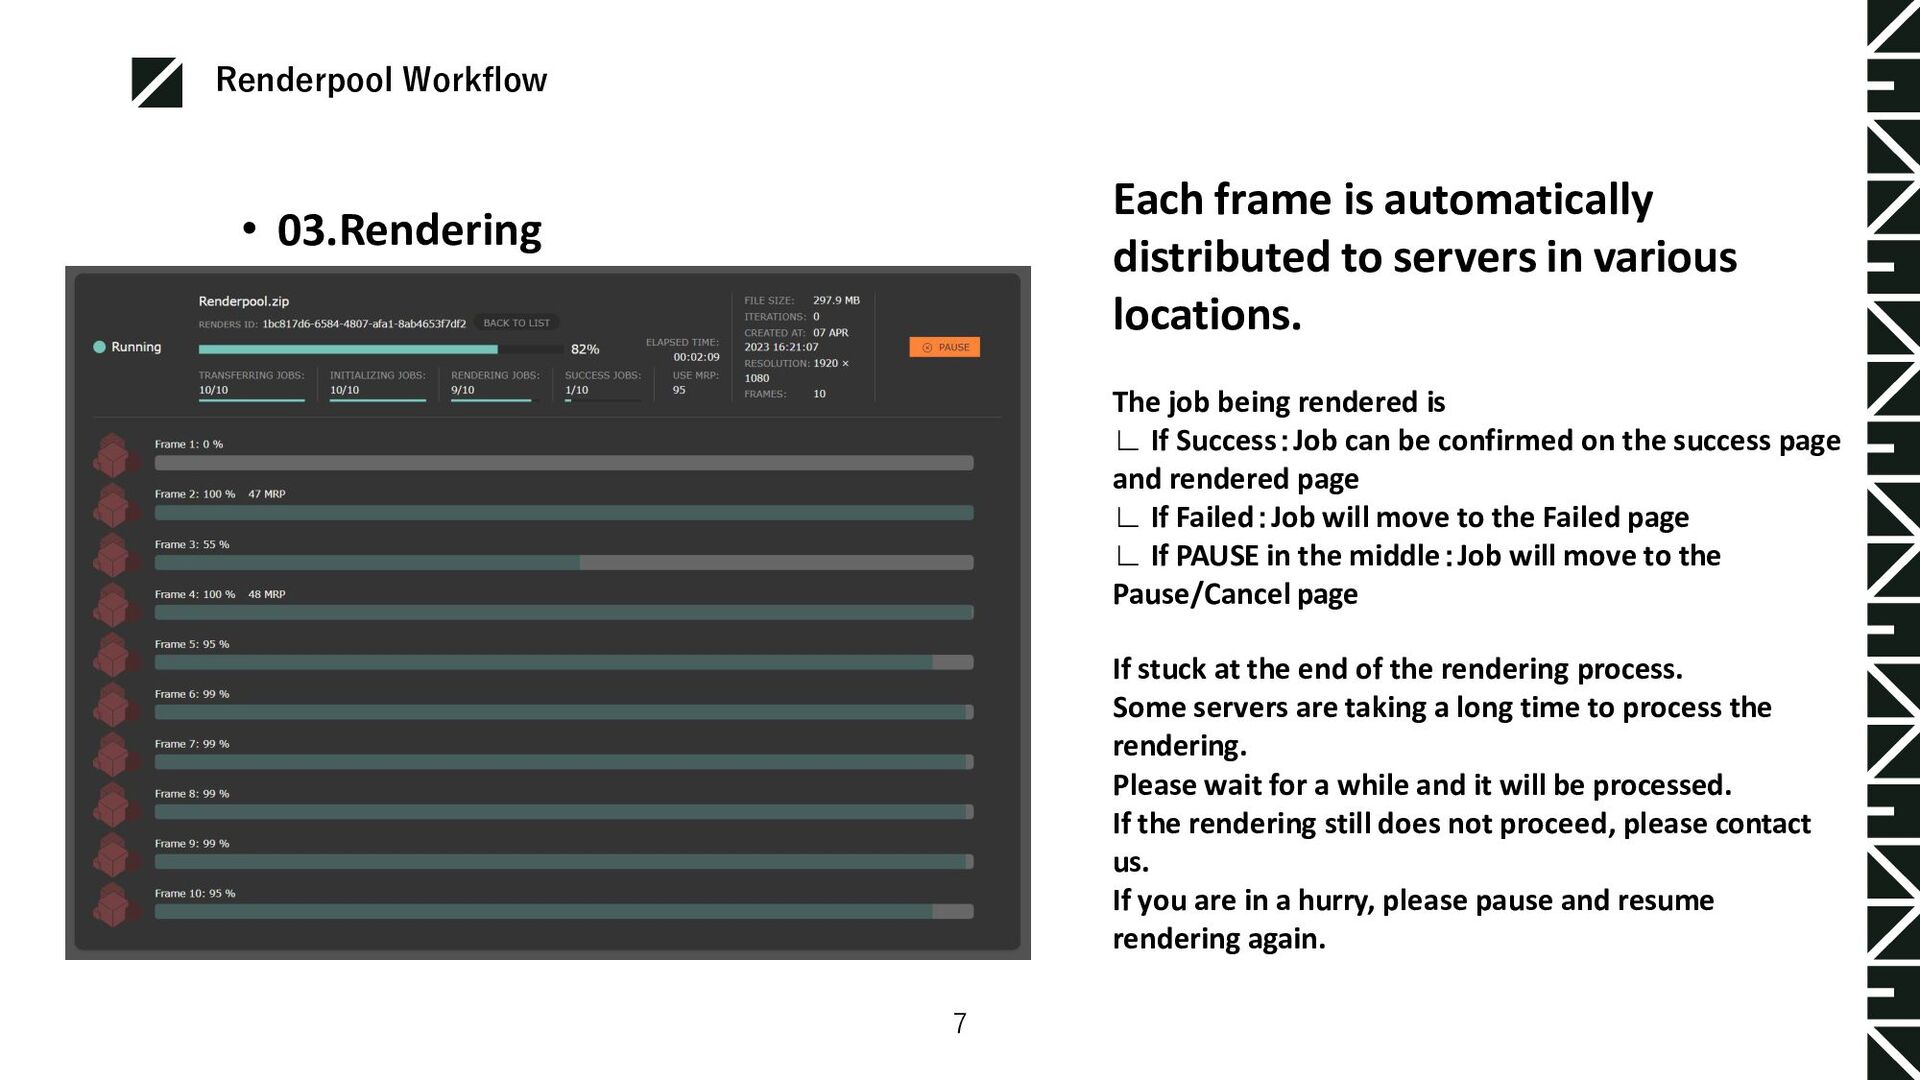
to servers in various locations. The job being rendered is ∟ If Success:Job can be confirmed on the success page and rendered page ∟ If Failed:Job will move to the Failed page ∟ If PAUSE in the middle:Job will move to the Pause/Cancel page If stuck at the end of the rendering process. Some servers are taking a long time to process the rendering. Please wait for a while and it will be processed. If the rendering still does not proceed, please contact us. If you are in a hurry, please pause and resume rendering again.
image on the Rendered File page from the cloud Icon. And you can download render pass/AOV from “GENERATE AOV” Add a check on the AOV you want to download.
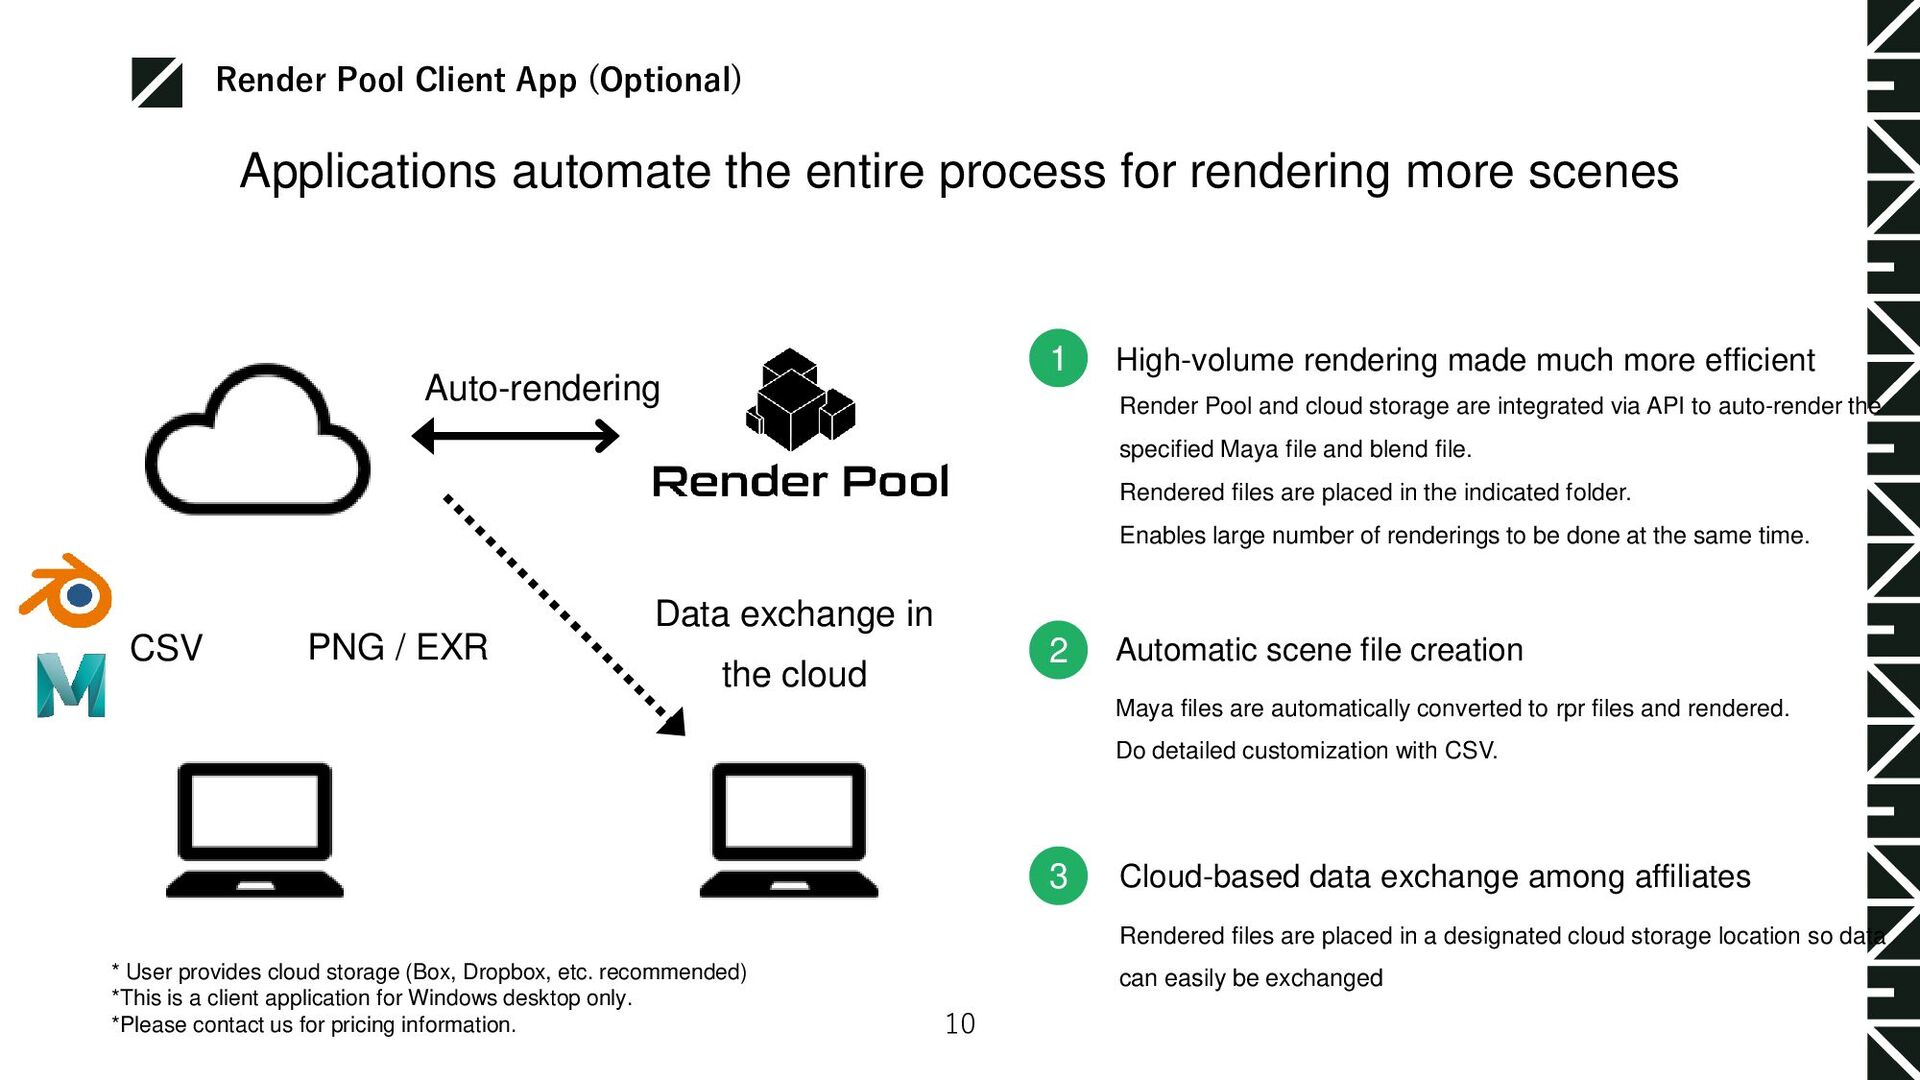
Pool and cloud storage are integrated via API to auto-render the specified Maya file and blend file. Rendered files are placed in the indicated folder. Enables large number of renderings to be done at the same time. Automatic scene file creation Maya files are automatically converted to rpr files and rendered. Do detailed customization with CSV. Rendered files are placed in a designated cloud storage location so data can easily be exchanged Cloud-based data exchange among affiliates PNG / EXR Data exchange in the cloud * User provides cloud storage (Box, Dropbox, etc. recommended) *This is a client application for Windows desktop only. *Please contact us for pricing information. Applications automate the entire process for rendering more scenes Auto-rendering CSV Render Pool Client App (Optional) 10
App To cloud storage File Upload Scene files/CSV files Upload to cloud storage at once full automation Run in Render Pool Client App Create scene files Execute rendering with Render Pool DL the rendering result to the specified entire period Composite Copy images in a specified folder to a working folder Copy the images in the designated folder to the working folder and work on them Typical could rendering services Create scene Compile and zip data for scene Upload to site Download Rendering setup and start Copy to work folder Upload from software Render Pool Client App (Optional) 11