Upgrade to Pro
— share decks privately, control downloads, hide ads and more …
Speaker Deck
Features
Speaker Deck
PRO
Sign in
Sign up for free
Search
Search
How to Create a Form that Accepts Payment
Search
Sponsored
·
Your Podcast. Everywhere. Effortlessly.
Share. Educate. Inspire. Entertain. You do you. We'll handle the rest.
→
8terabytes8
July 03, 2013
How-to & DIY
93
0
Share
Embed
Copy iframe code
Copy JS code
Copy link
Start on current slide
How to Create a Form that Accepts Payment
Original Youtube Video:
http://youtu.be/PLvnwD4h5ss
8terabytes8
July 03, 2013
More Decks by 8terabytes8
See All by 8terabytes8
How to Install Windows 8.1 on a Virtual Machine
8terabytes8
0
91
How to Install Linux Through Windows
8terabytes8
0
94
How to Create a Virtual Machine
8terabytes8
0
90
How to Create an Online Form
8terabytes8
0
63
How to Forward Gmail to Another Email
8terabytes8
0
69
How to Block Ads
8terabytes8
0
66
How to Get Spotify Online
8terabytes8
0
100
How to Play Pokemon Online, Free, With Friends
8terabytes8
0
540
How to Get Windows 8 as an ISO File
8terabytes8
0
490
Other Decks in How-to & DIY
See All in How-to & DIY
OpenClawハンズオンでのトラブルとデバイス向けなんちゃらクロー #IoTLT vol133
n0bisuke2
0
270
Node-REDで制御できるエッジカメラのreCameraを触る #iotlt #JLCPCB #recamera
n0bisuke2
0
190
登壇資料を素早く作るための順番
kotomin_m
8
2.2k
生成AIは 『コードを書く』だけじゃない アーキテクチャ設計から環境構築まで——社内データ活用DXの全貌
punipuni_mint
0
210
JAWS-UG初心者支部 JAWS-UG Updates
awsjcpm
4
140
エッジAIでBBQの肉の焼き加減判定をやってみた #iotlt #seeed
n0bisuke2
2
310
AWS Community/JAWS-UG Update - JAWS-UG 上越妙高支部リブート
awsjcpm
2
130
ネガティブをねじ伏せ、n=1のキャリアに変える技術
subroh0508
1
1.2k
JAWS-UG/AWS Community Update - 2026/6/13 JAWS-UG TOHOKU 仙台
awsjcpm
0
1.2k
【ふりかえりワークショップ】Tryを決めるだけじゃない!感情にフォーカスした、ふりかえりを体験しよう!
scrummasudar
0
1.5k
Burnoutとの「対話」 〜 アジャイルコーチングを活用した、燃え尽き症候群を克服するスキル 〜 / Dialogue with Burnout by Using Agile Coaching Skills
hageyahhoo
0
990
LLMを「機能」として組み込む技術:「Figma to はてなCMS」におけるプロンプトエンジニアリングからAIエージェント構築にわたる精度向上の軌跡
nanimonodemonai
0
550
Featured
See All Featured
Odyssey Design
rkendrick25
PRO
2
730
HDC tutorial
michielstock
2
740
Practical Orchestrator
shlominoach
191
11k
The Straight Up "How To Draw Better" Workshop
denniskardys
239
140k
Creating an realtime collaboration tool: Agile Flush - .NET Oxford
marcduiker
35
2.5k
Mozcon NYC 2025: Stop Losing SEO Traffic
samtorres
1
360
Optimising Largest Contentful Paint
csswizardry
37
3.8k
CSS Pre-Processors: Stylus, Less & Sass
bermonpainter
360
30k
Testing 201, or: Great Expectations
jmmastey
46
8.2k
Why Your Marketing Sucks and What You Can Do About It - Sophie Logan
marketingsoph
0
260
Let's Do A Bunch of Simple Stuff to Make Websites Faster
chriscoyier
508
140k
How to Align SEO within the Product Triangle To Get Buy-In & Support - #RIMC
aleyda
2
1.7k
Transcript
HOW TO CREATE A FORM THAT ACCEPTS PAYMENT By 8terabytes8
Step 1 • Go to http://bit.ly/19SVr21 and create an account.
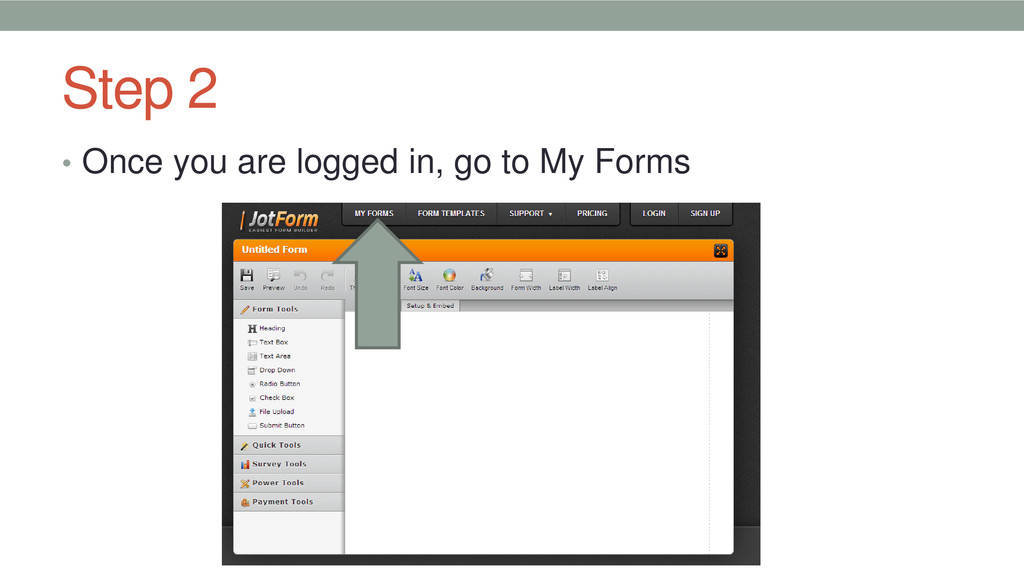
Step 2 • Once you are logged in, go to
My Forms
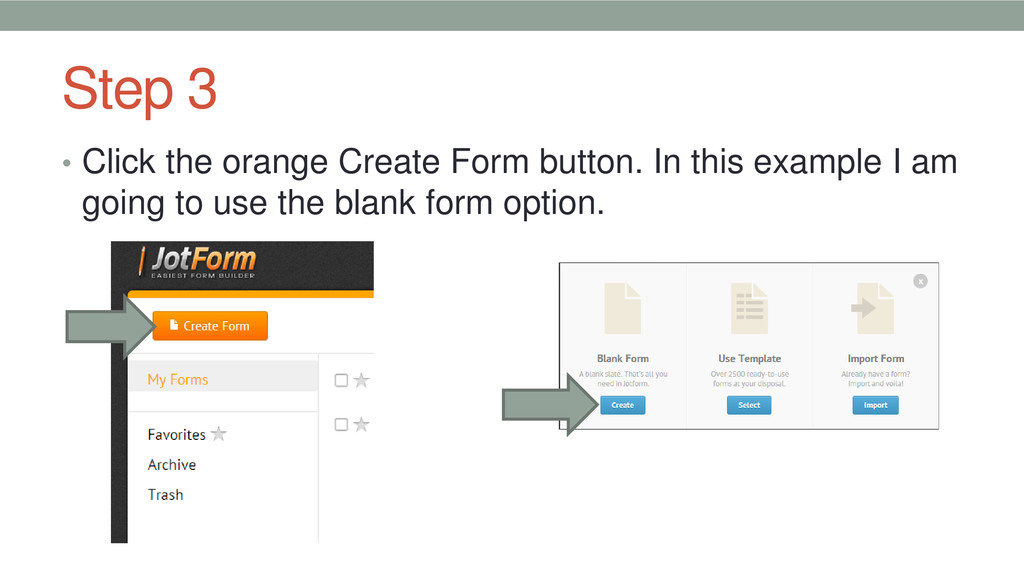
Step 3 • Click the orange Create Form button. In
this example I am going to use the blank form option.
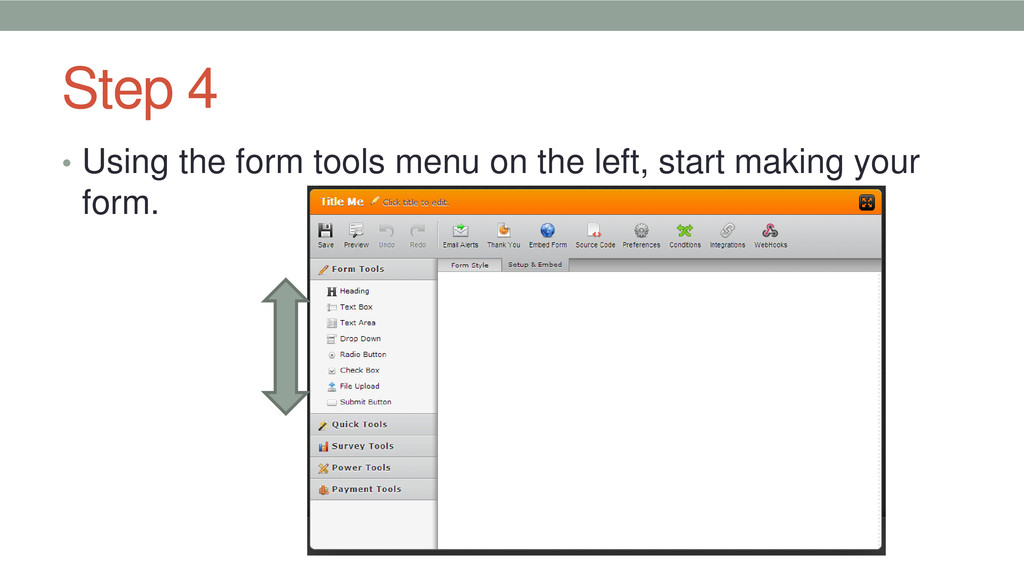
Step 4 • Using the form tools menu on the
left, start making your form.
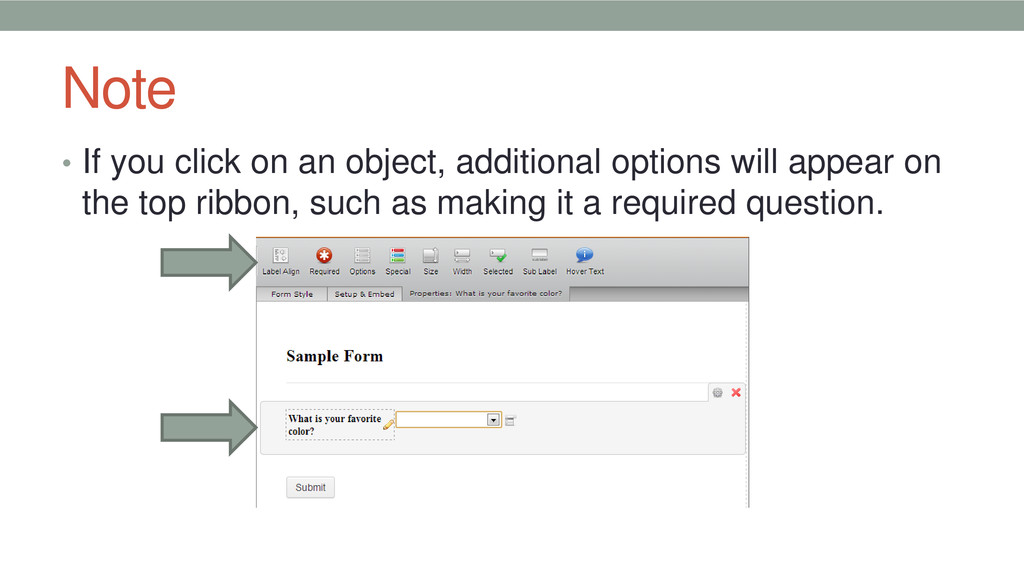
Note • If you click on an object, additional options
will appear on the top ribbon, such as making it a required question.
Step 5 • When you want to add the payment
option, click on the payment tools option. Then drag the option you want to the form (in this example I’m using PayPal)
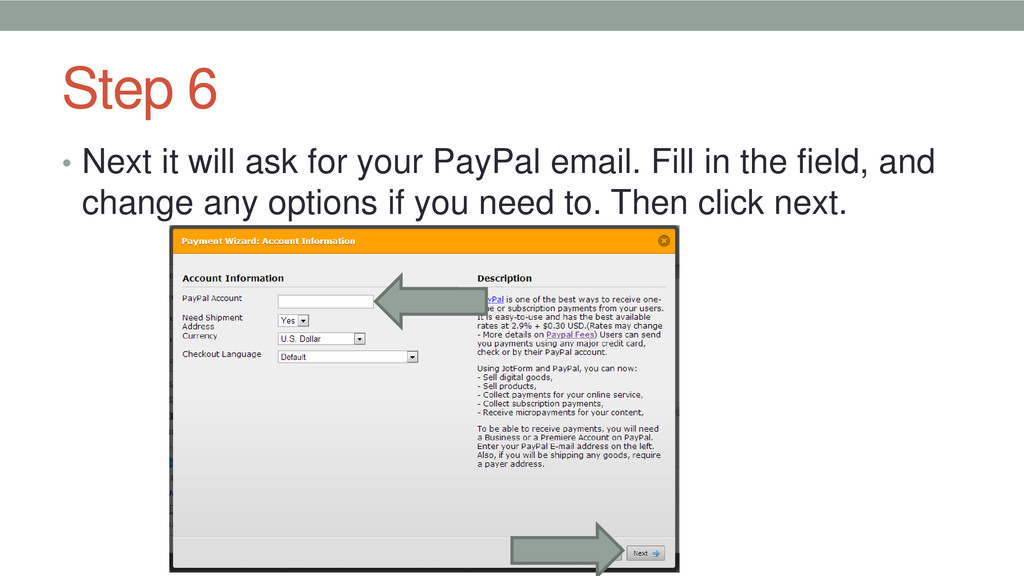
Step 6 • Next it will ask for your PayPal
email. Fill in the field, and change any options if you need to. Then click next.
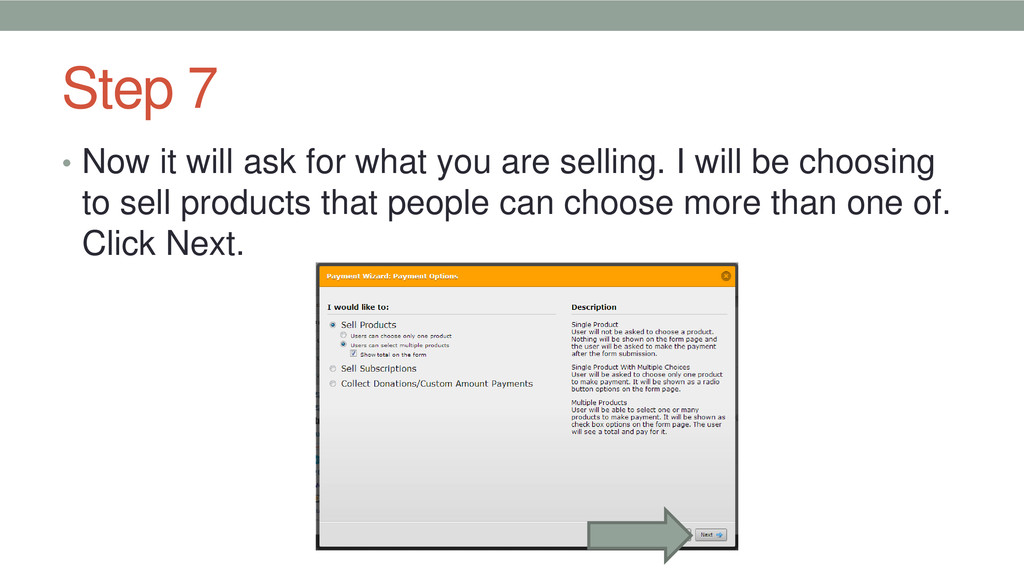
Step 7 • Now it will ask for what you
are selling. I will be choosing to sell products that people can choose more than one of. Click Next.
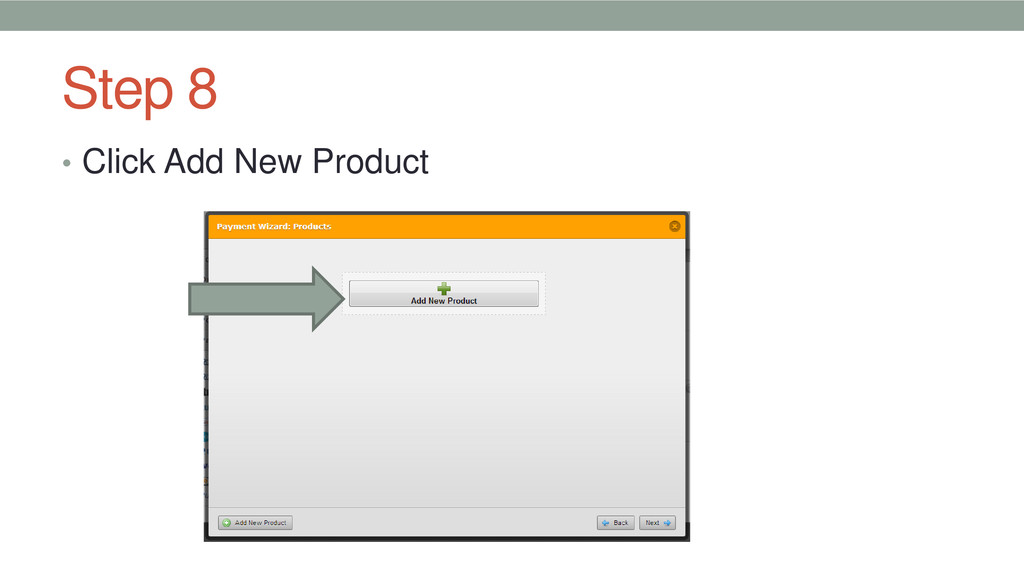
Step 8 • Click Add New Product
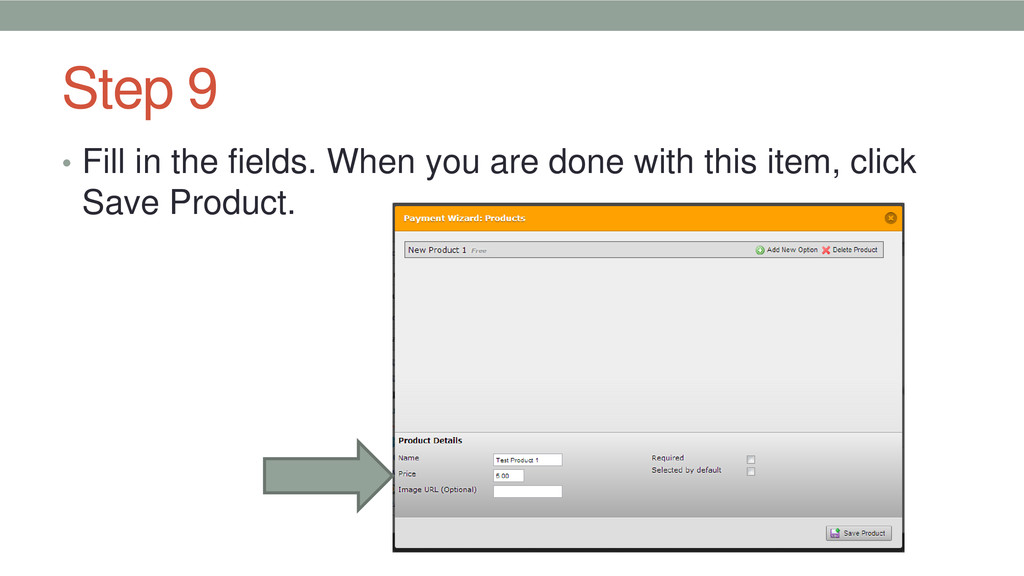
Step 9 • Fill in the fields. When you are
done with this item, click Save Product.
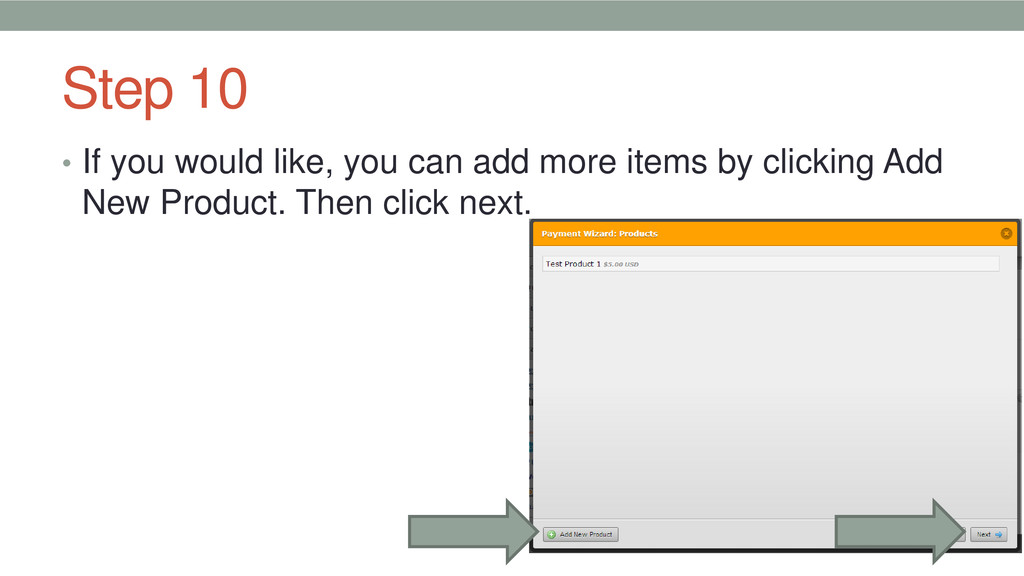
Step 10 • If you would like, you can add
more items by clicking Add New Product. Then click next.
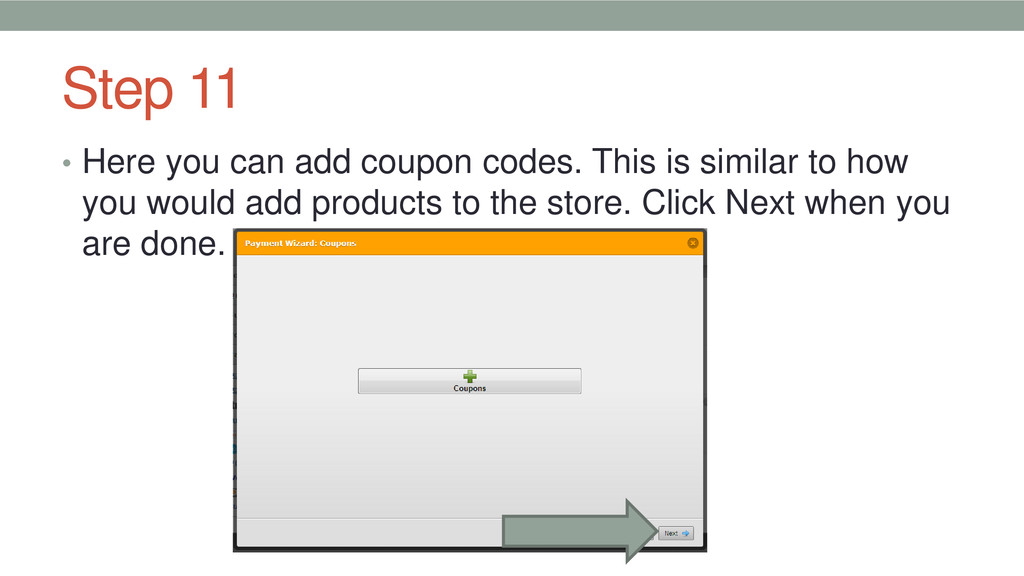
Step 11 • Here you can add coupon codes. This
is similar to how you would add products to the store. Click Next when you are done.
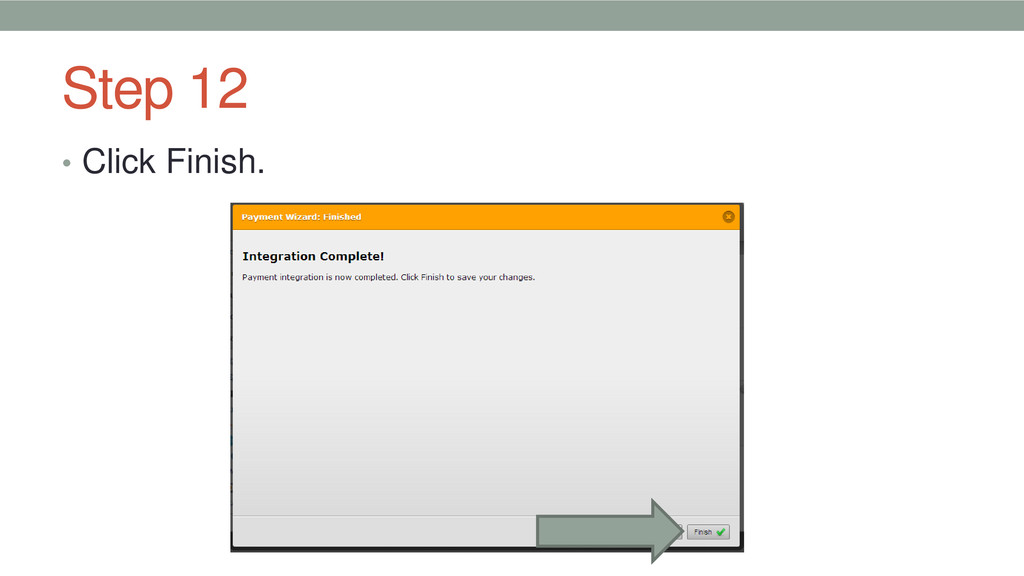
Step 12 • Click Finish.
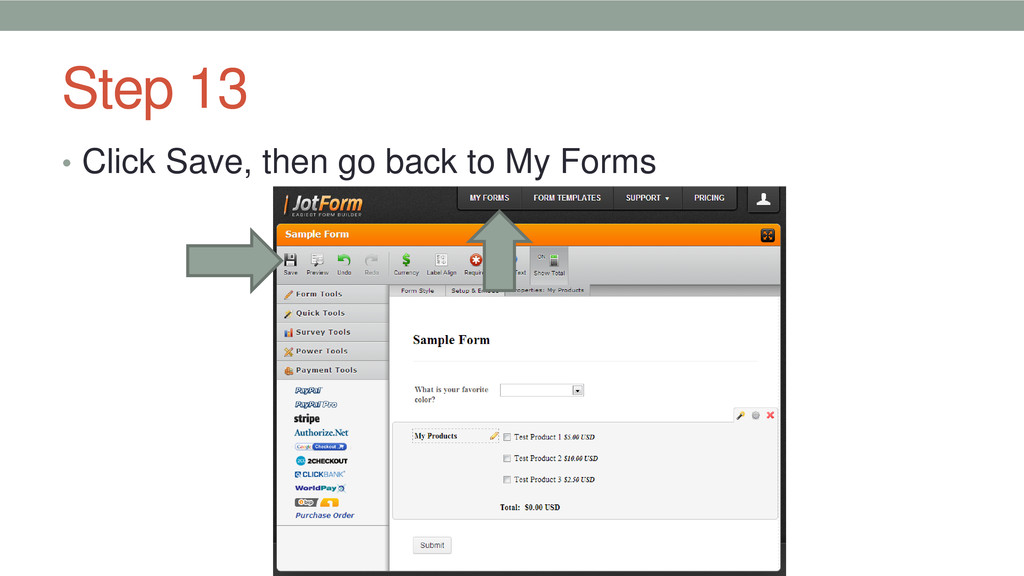
Step 13 • Click Save, then go back to My
Forms
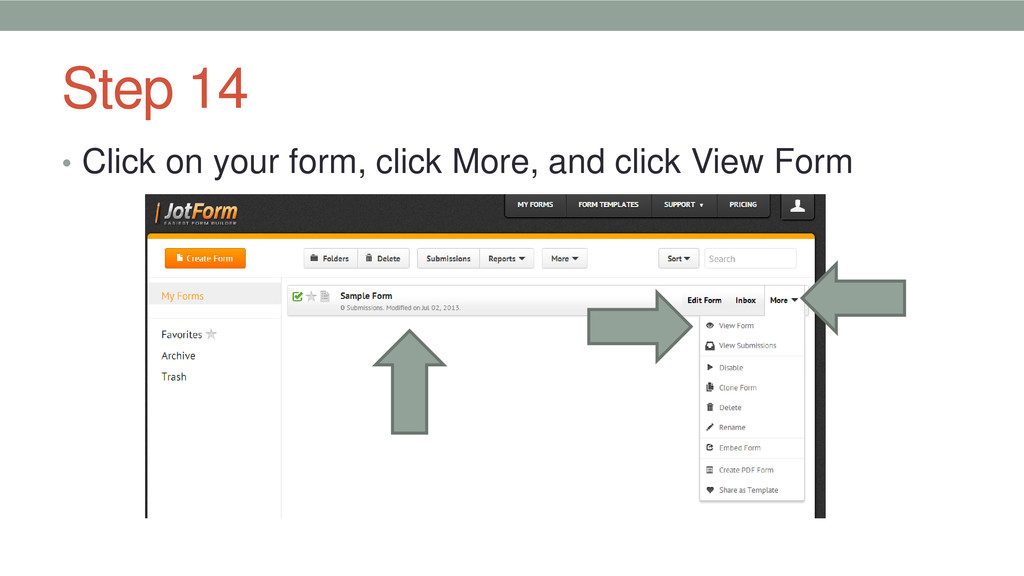
Step 14 • Click on your form, click More, and
click View Form
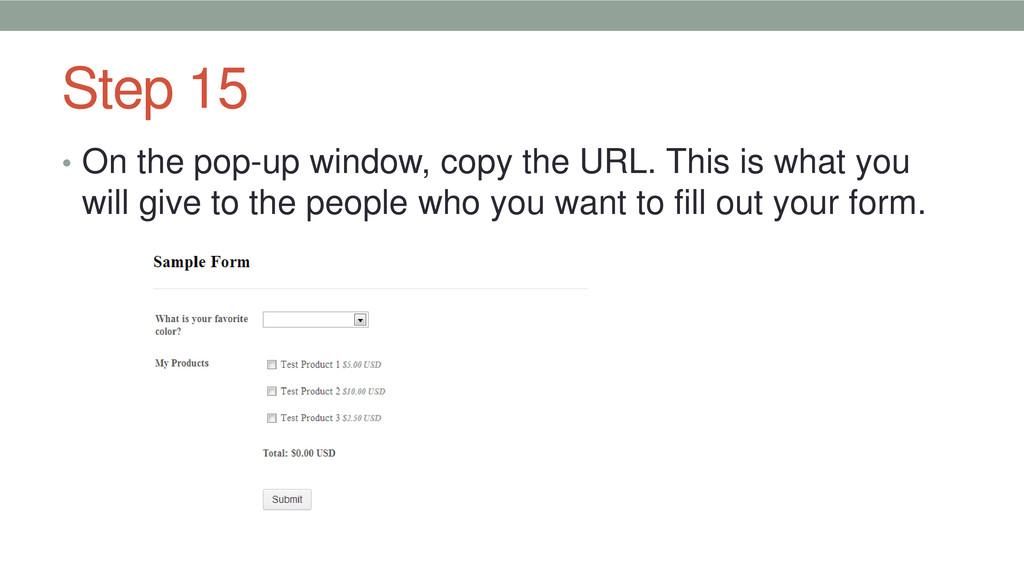
Step 15 • On the pop-up window, copy the URL.
This is what you will give to the people who you want to fill out your form.
Warning • When I was testing this, PayPal sometimes had
processing errors. If you get an error, check your PayPal account to see if you have paid/gotten paid before resubmitting the form.
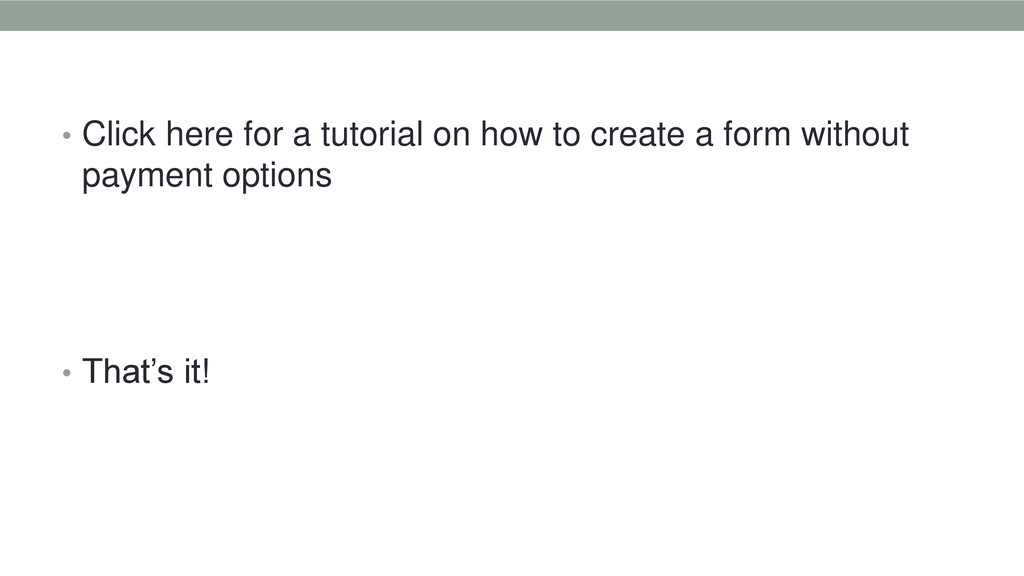
• Click here for a tutorial on how to create
a form without payment options • That’s it!