Upgrade to Pro — share decks privately, control downloads, hide ads and more …

Making Sculptural Prints

Making Sculptural Prints

goloborotko

April 12, 2020
Tweet

More Decks by goloborotko

Other Decks in Education

Transcript

  1. Materials: • Cardboard Box • Box Cutter • Packing Tape

    • Sharpie • Pencil • Recycled Prints • Ruller • Scissors • Cutting Board
  2. Making a Shape: • Cut cardboard in the size desired

    • Score the cardboard with box cutter using light pressure • Fold cardboard • Note: scored lines are folded to the outside of the shape
  3. Folding the Shape: • Tape the sides of your shape

    with a Sharpie • Trace the bottom on the cardboard • Using the box cutter, cut the shape of the side of the shape
  4. Cutting and Taping the sides: • Position the side on

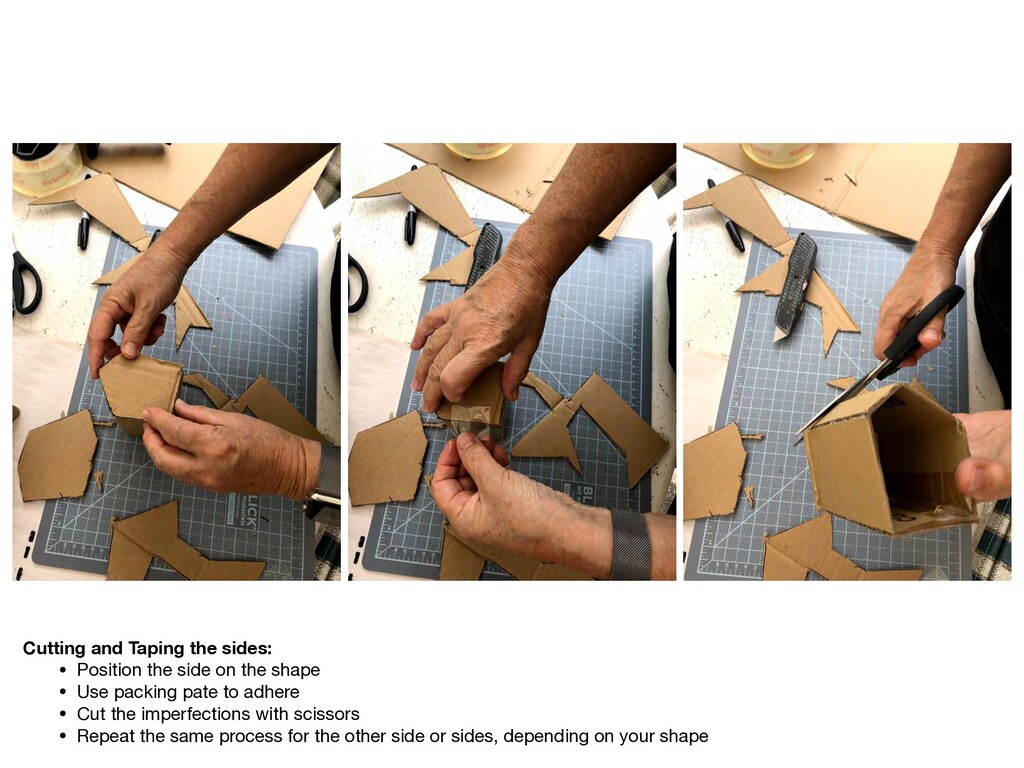
    the shape • Use packing pate to adhere • Cut the imperfections with scissors • Repeat the same process for the other side or sides, depending on your shape
  5. Mixing the Glue: • PVA Glue (White Glue, Elmers, Tacky)

    • Brush • Recycled Container • Water
  6. Mixing the Glue: • One portion of PVA glue •

    One portion of water • Mix thoroughly
  7. Preparing the Print: • Chose a print that will seat

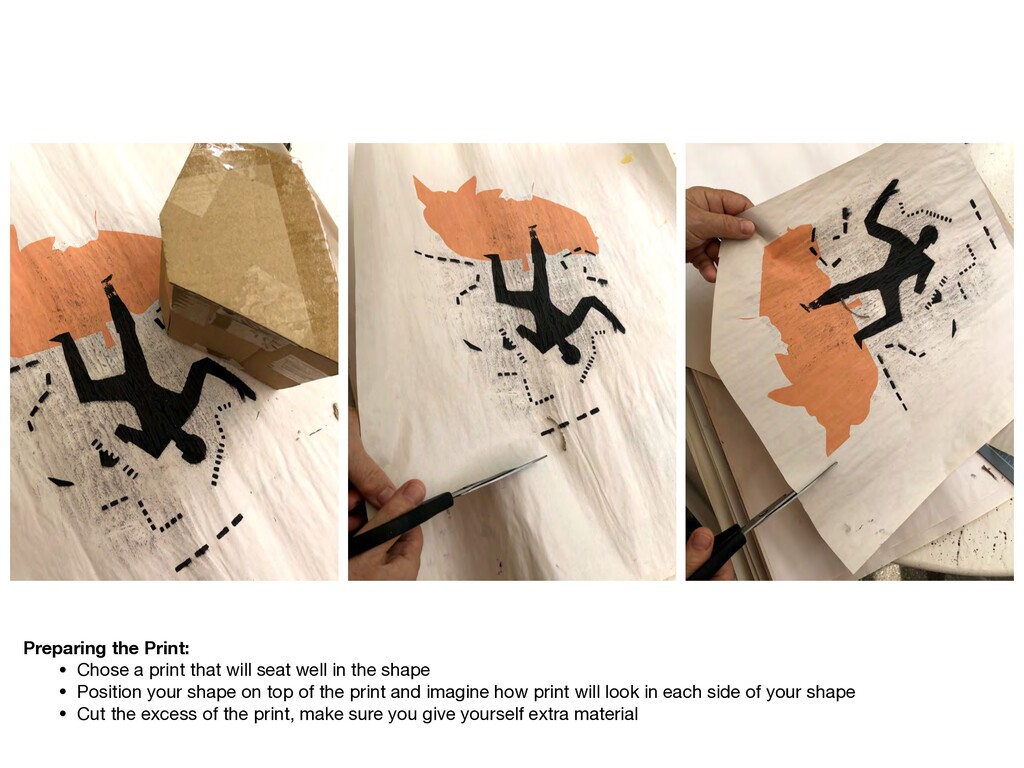
    well in the shape • Position your shape on top of the print and imagine how print will look in each side of your shape • Cut the excess of the print, make sure you give yourself extra material
  8. Folding the Print: • Set up your shape on top

    of print • Start by marking the sides to be folded with a pencil • Use a ruler to help you fold the paper
  9. Gluing the Print: • Apply a bit of glue directly

    from the container • Spread using with the glue mix and brush on cardboard • On the print, use only the glue mix
  10. Gluing the Print: • Once both cardboard and print have

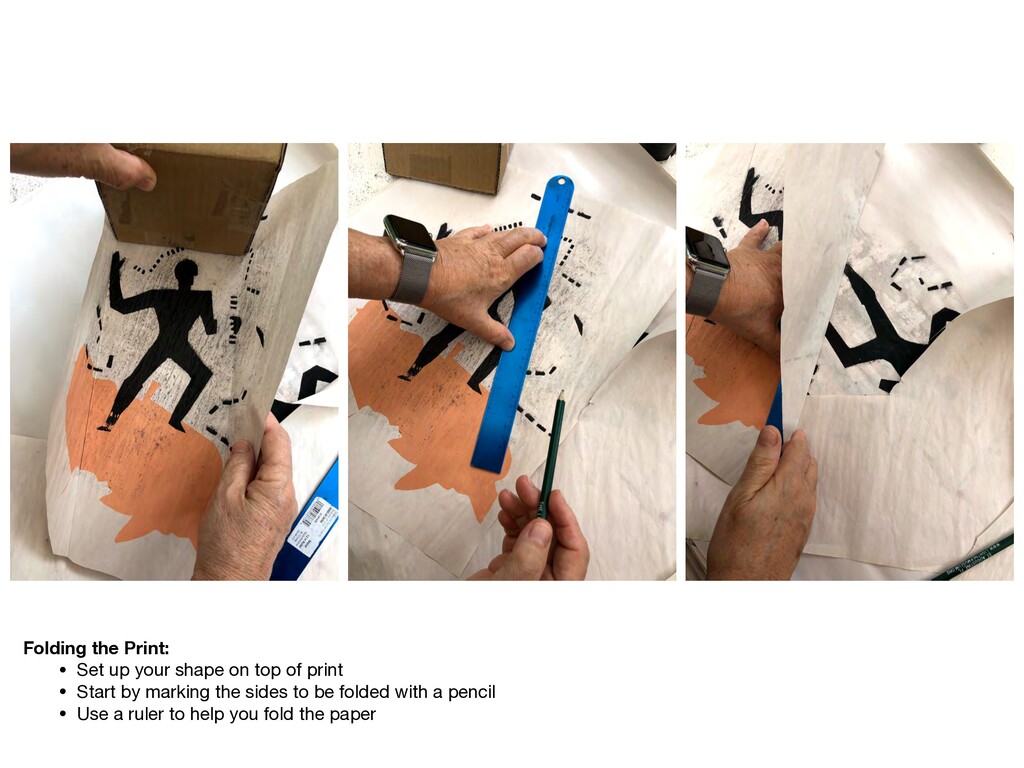
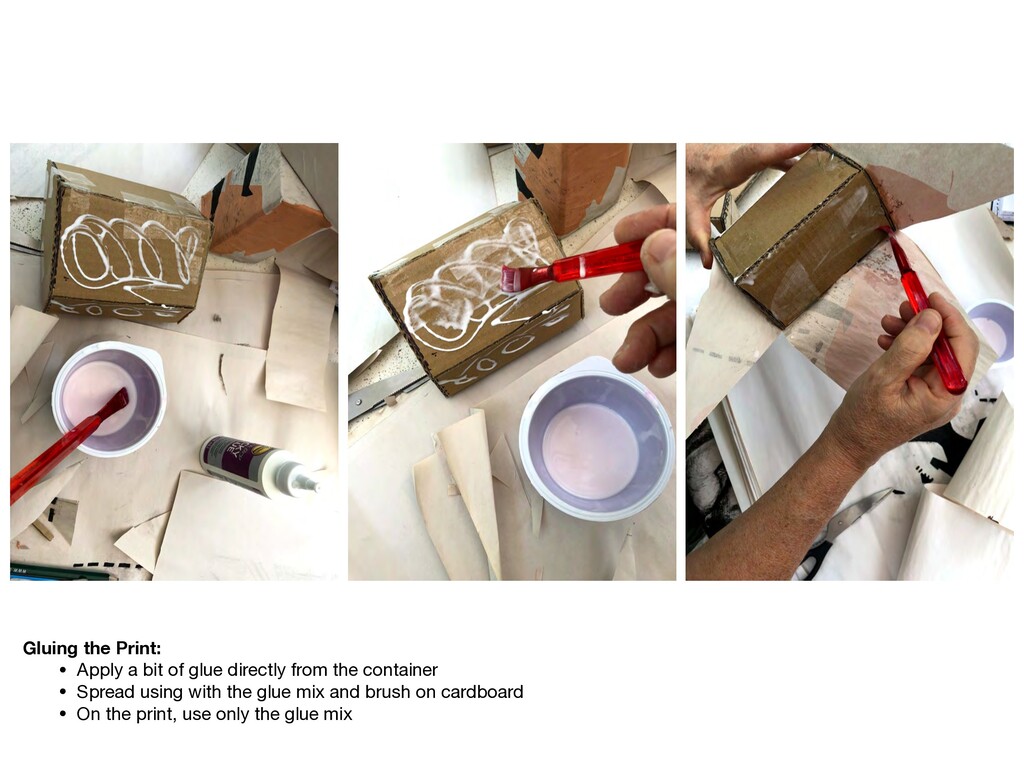
    glue and mix, set up the shape onto the print • Repeat application of glue on the sides and start folding the print • Cut the corners so print can fold onto the shape