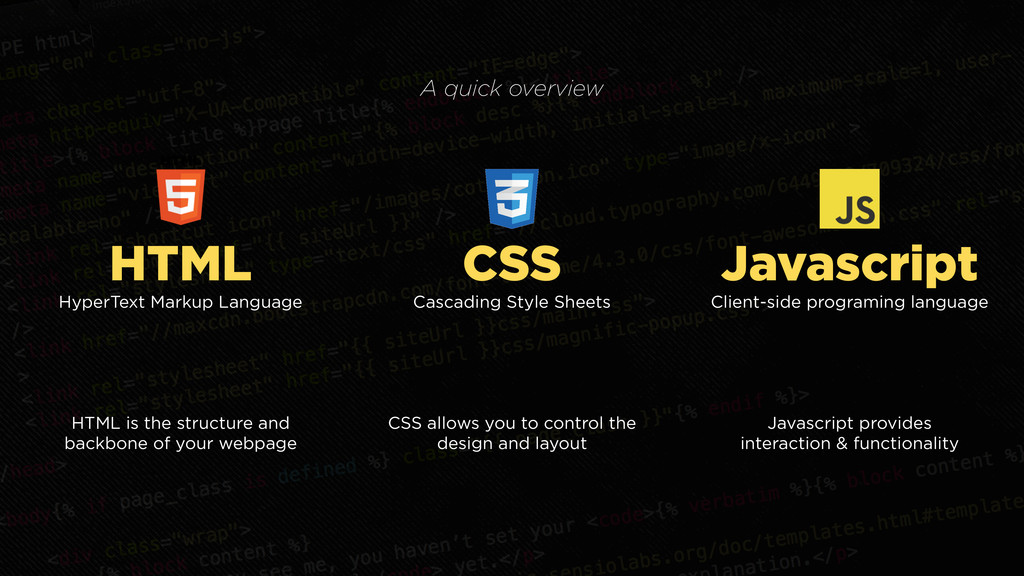
programing language A quick overview HTML is the structure and backbone of your webpage CSS allows you to control the design and layout Javascript provides interaction & functionality
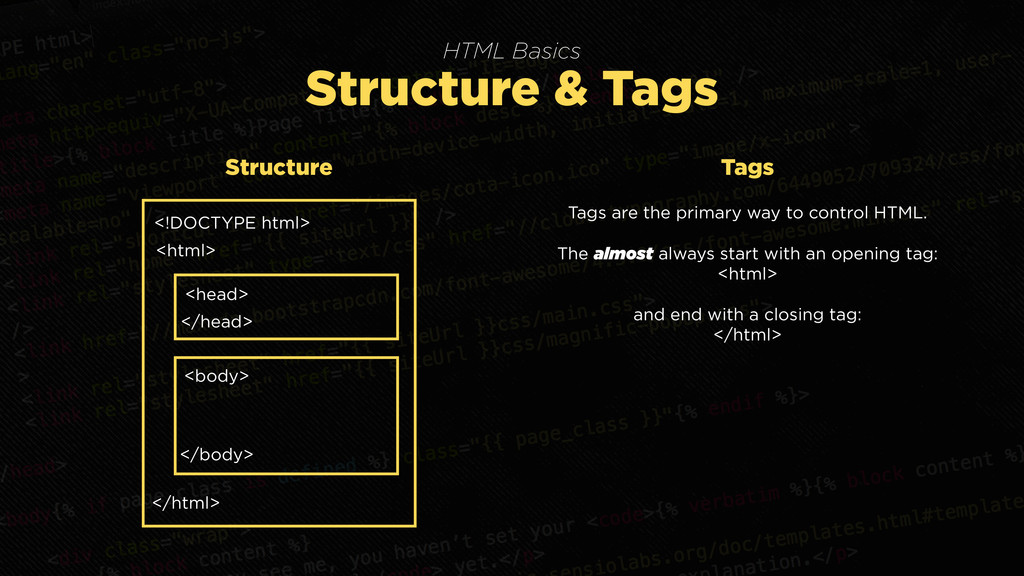
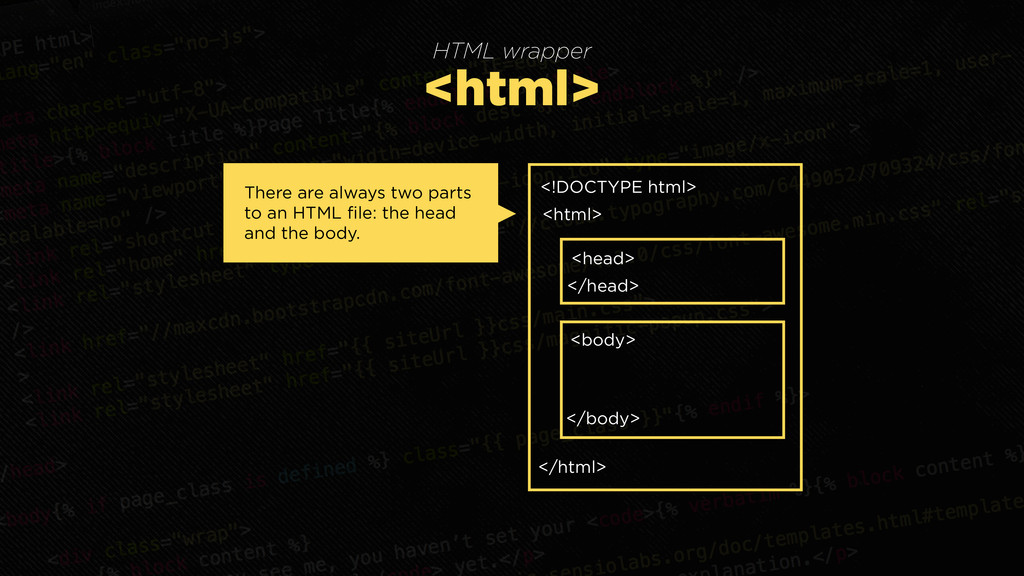
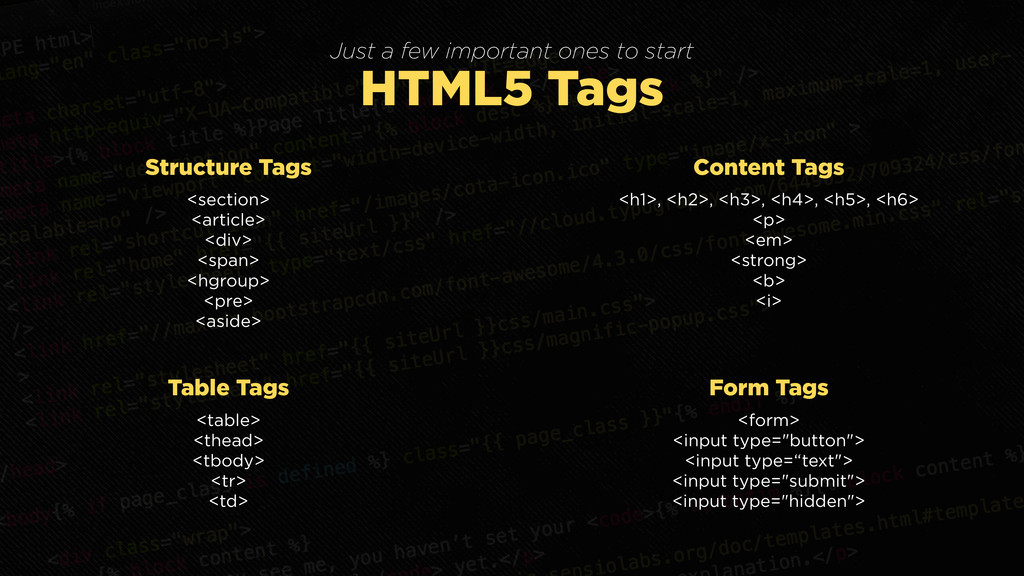
to control HTML. The almost always start with an opening tag: <html> and end with a closing tag: </html> <html> <body> </body> <head> </head> </html> <!DOCTYPE html> Structure Tags
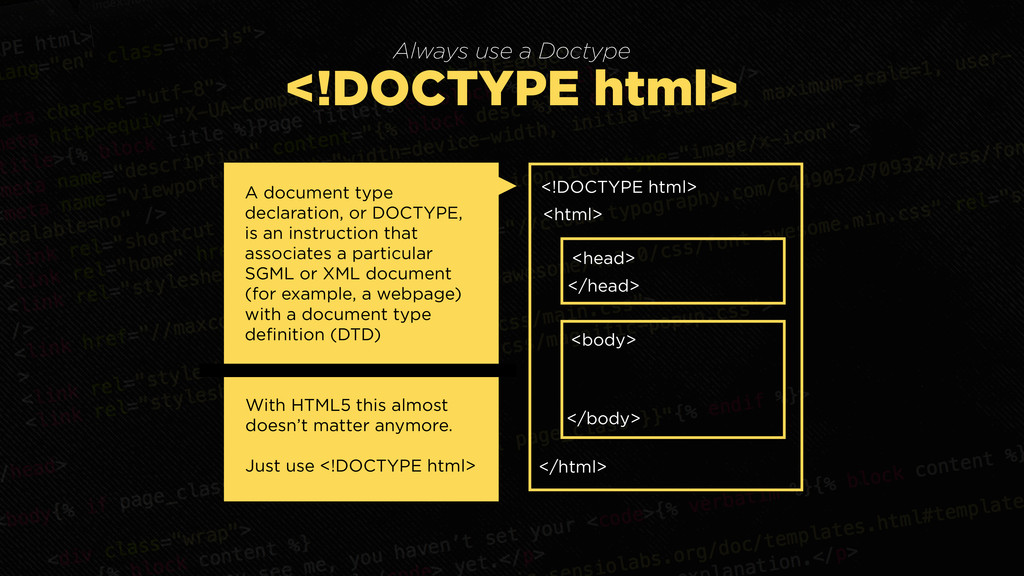
</head> </html> <!DOCTYPE html> A document type declaration, or DOCTYPE, is an instruction that associates a particular SGML or XML document (for example, a webpage) with a document type definition (DTD) With HTML5 this almost doesn’t matter anymore. Just use <!DOCTYPE html>
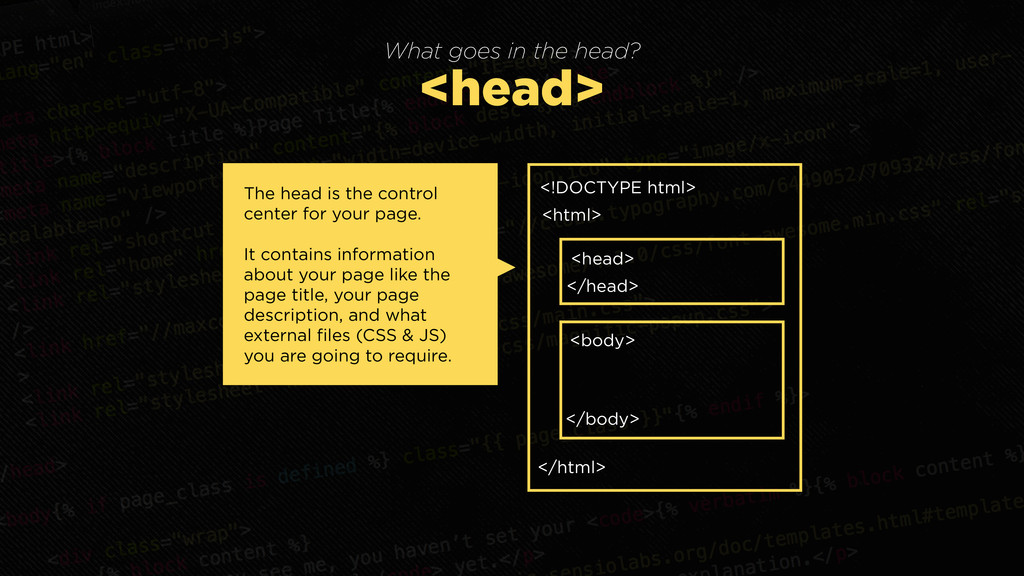
</head> </html> <!DOCTYPE html> The head is the control center for your page. It contains information about your page like the page title, your page description, and what external files (CSS & JS) you are going to require.
</head> </html> <!DOCTYPE html> The body tag contains all the information that you want your browser to display. Place all of your images, text links here.
the src attribute to set the url of the image. You can also add specific width and heights to your images, but we’ll leave that to CSS. <img src=“/images/apple.jpg“ />
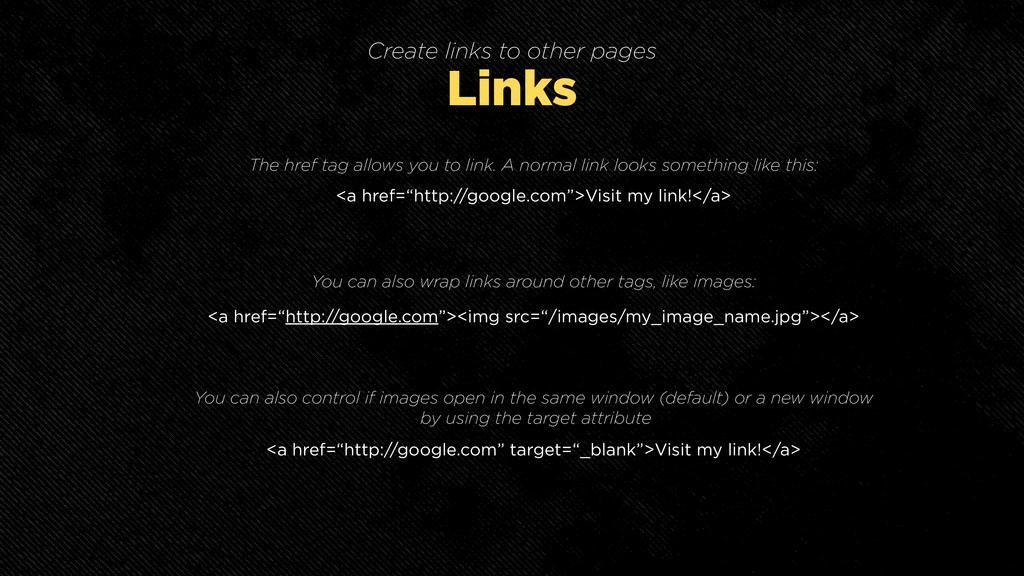
you to link. A normal link looks something like this: <a href=“http://google.com”>Visit my link!</a> You can also wrap links around other tags, like images: <a href=“http://google.com”><img src=“/images/my_image_name.jpg”></a> You can also control if images open in the same window (default) or a new window by using the target attribute <a href=“http://google.com” target=“_blank”>Visit my link!</a>
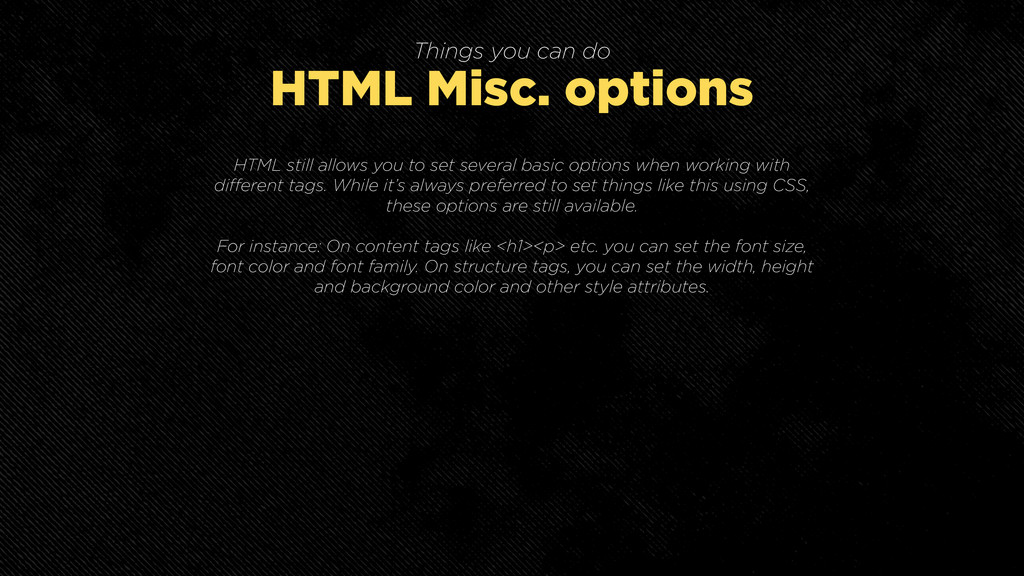
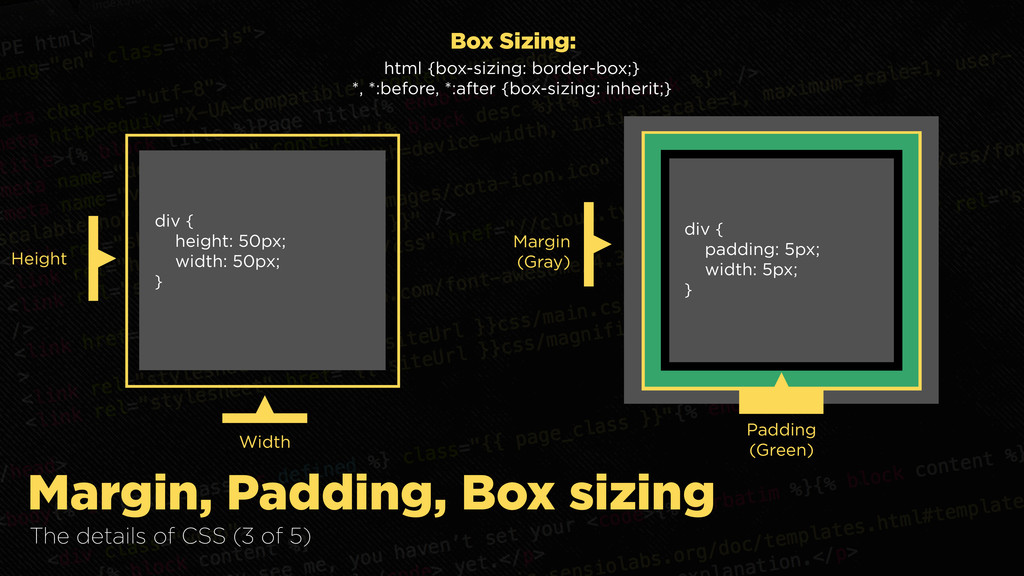
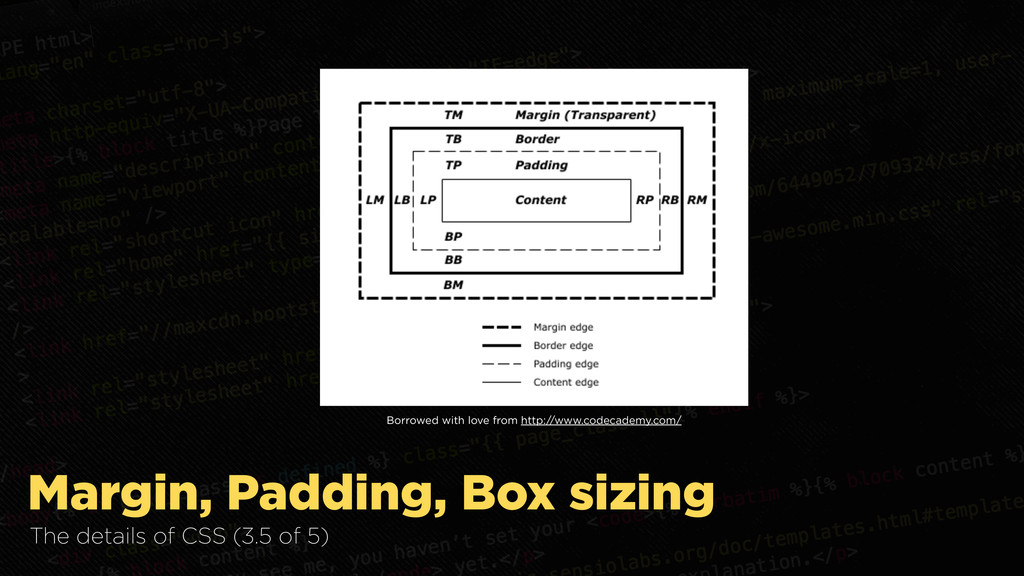
you to set several basic options when working with different tags. While it’s always preferred to set things like this using CSS, these options are still available. For instance: On content tags like <h1><p> etc. you can set the font size, font color and font family. On structure tags, you can set the width, height and background color and other style attributes.
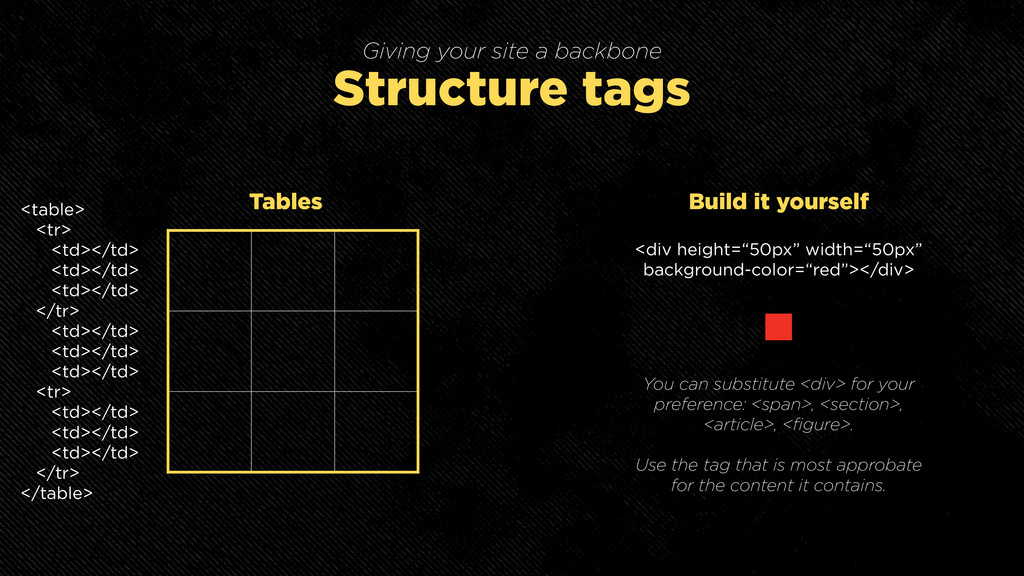
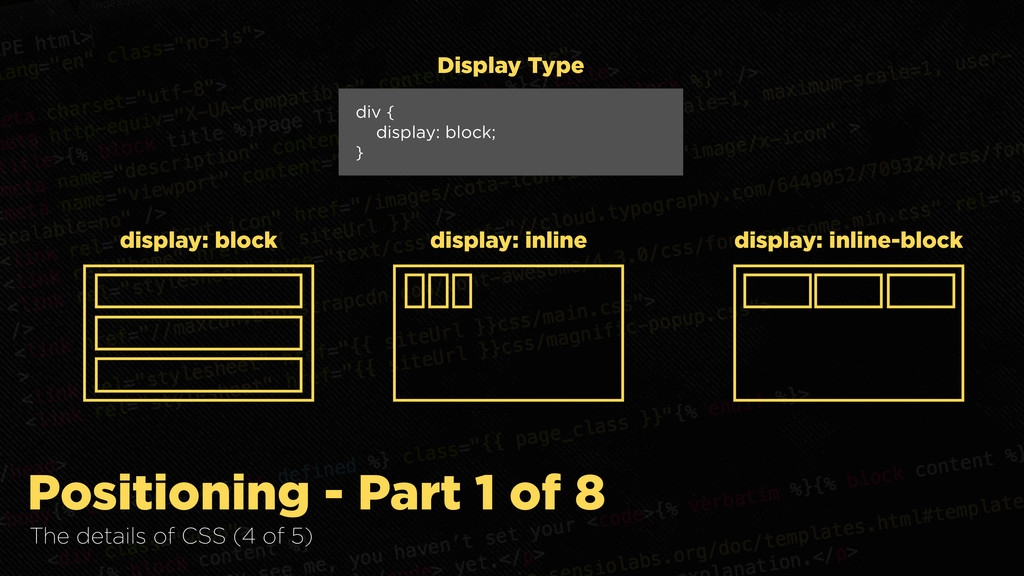
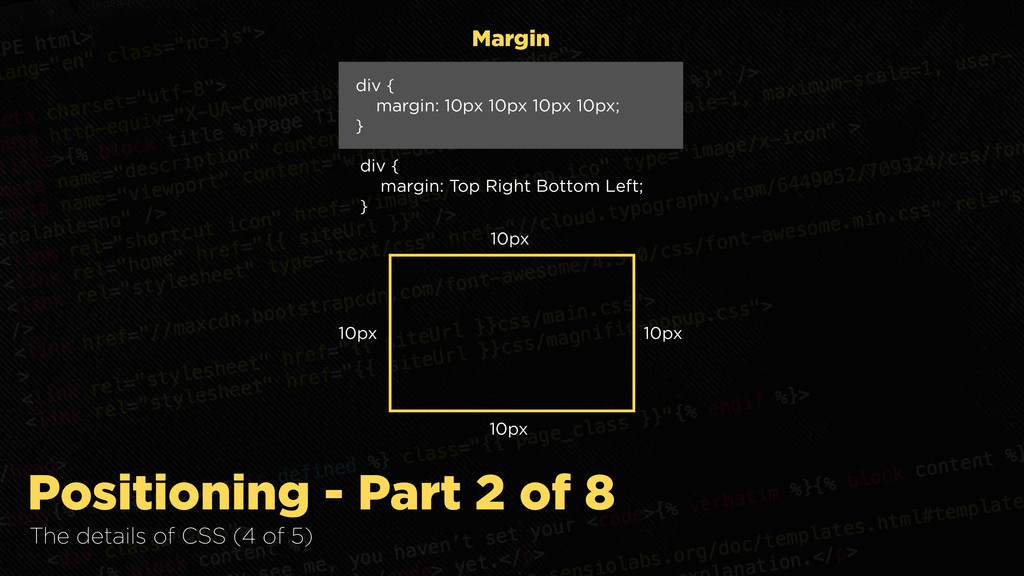
yourself <table> <tr> <td></td> <td></td> <td></td> </tr> <td></td> <td></td> <td></td> <tr> <td></td> <td></td> <td></td> </tr> </table> <div height=“50px” width=“50px” background-color=“red”></div> You can substitute <div> for your preference: <span>, <section>, <article>, <figure>. Use the tag that is most approbate for the content it contains.
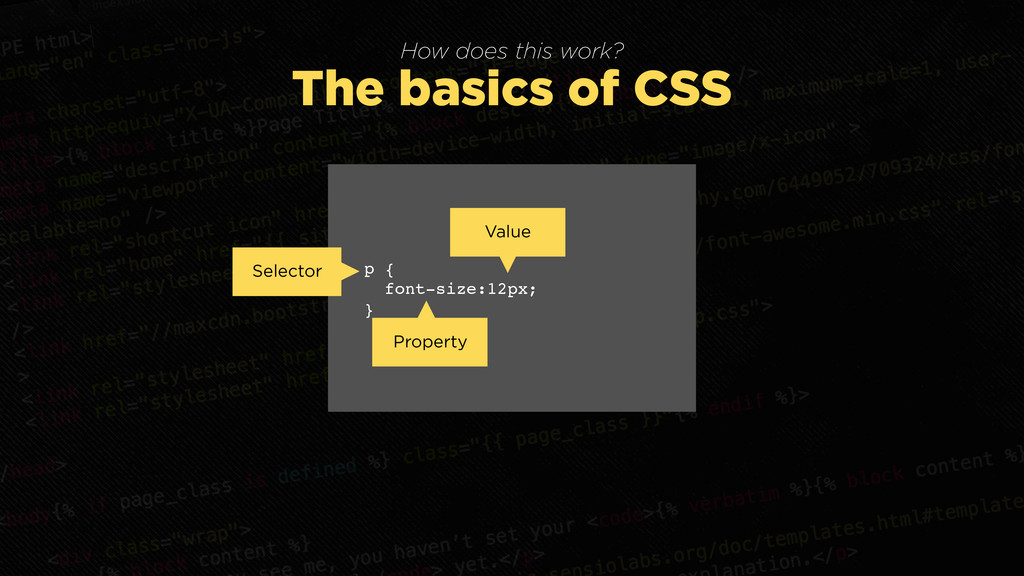
to control how your webpage looks. CSS can be augmented by preprocessors like Sass, less and PostCSS. But this is a lesson for another day. Recently, CSS has started being referred to as vanilla CSS because of it’s straightforward and minimal functionality.
own style • CSS exists to keep your front-end markup (html) clean. • In the “old days” we wrote everything inline • You can write both inline CSS and Styles in the <head> (But you shouldn’t) • CSS evolves just like any other language • CSS3 means CSS version 3 • More changes are coming to CSS! • Ask yourself: Should I write it on one line? Should my brackets be on one line? Should I include a space? • Be consistent! Write each of your decorations the same way so it’s easy to read. • Make comments above sections to keep track of your code • Most companies will ask you to write CSS in some sort of ‘spec’. Be flexible.
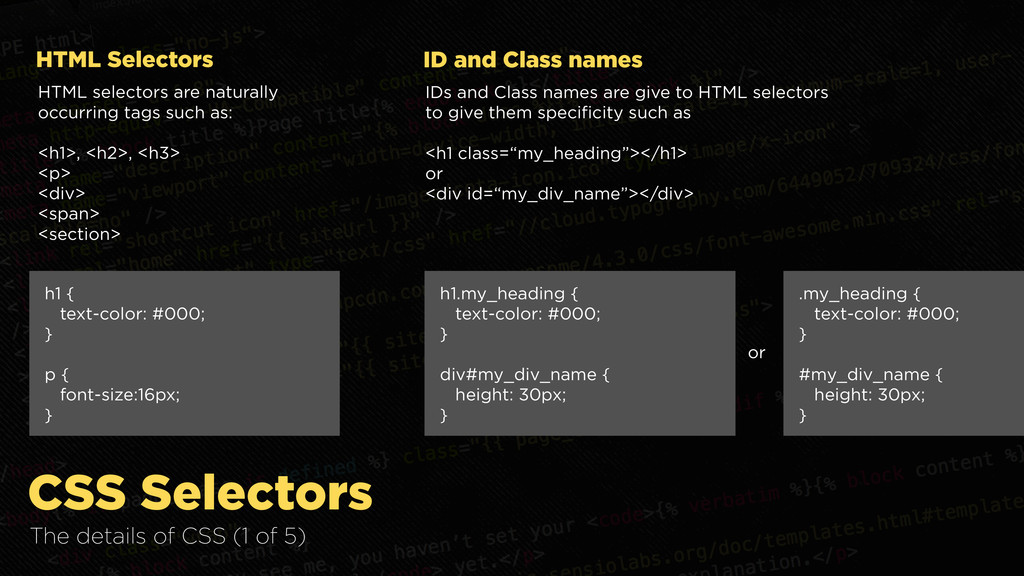
Selectors ID and Class names HTML selectors are naturally occurring tags such as: <h1>, <h2>, <h3> <p> <div> <span> <section> IDs and Class names are give to HTML selectors to give them specificity such as <h1 class=“my_heading”></h1> or <div id=“my_div_name”></div> h1 { text-color: #000; } p { font-size:16px; } h1.my_heading { text-color: #000; } div#my_div_name { height: 30px; } .my_heading { text-color: #000; } #my_div_name { height: 30px; } or
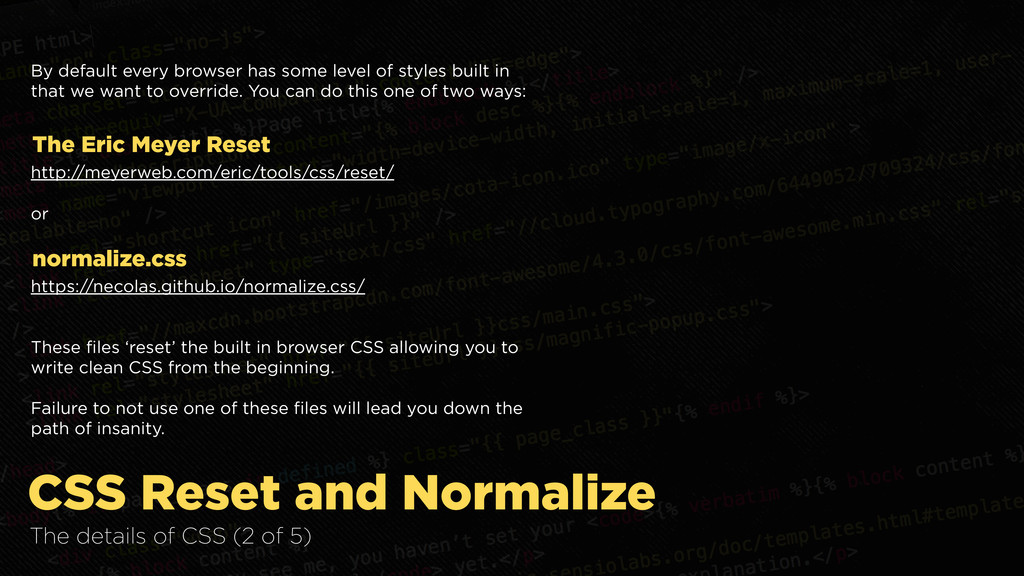
5) By default every browser has some level of styles built in that we want to override. You can do this one of two ways: The Eric Meyer Reset http://meyerweb.com/eric/tools/css/reset/ or normalize.css https://necolas.github.io/normalize.css/ These files ‘reset’ the built in browser CSS allowing you to write clean CSS from the beginning. Failure to not use one of these files will lead you down the path of insanity.
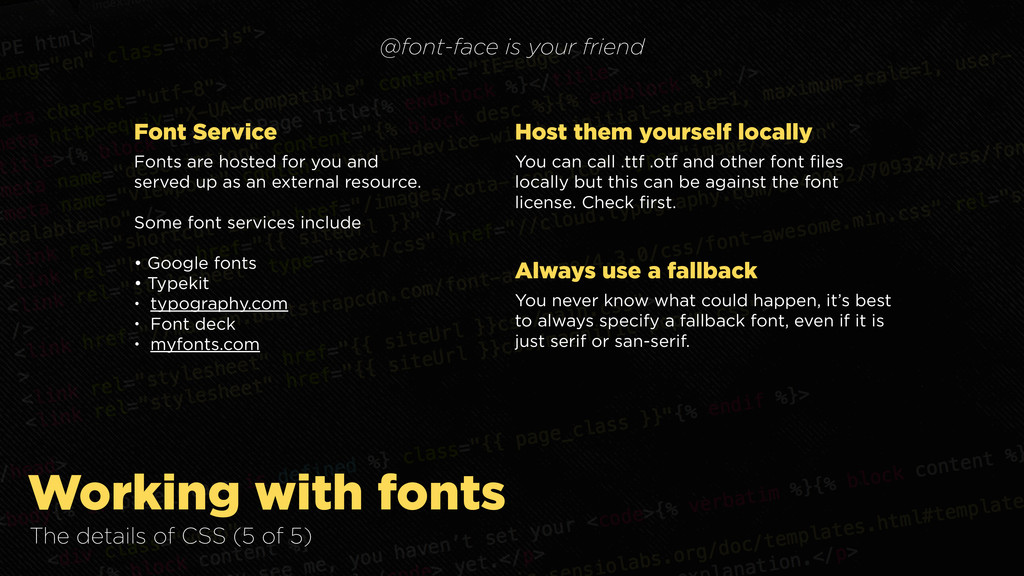
@font-face is your friend Font Service Fonts are hosted for you and served up as an external resource. Some font services include • Google fonts • Typekit • typography.com • Font deck • myfonts.com Host them yourself locally You can call .ttf .otf and other font files locally but this can be against the font license. Check first. Always use a fallback You never know what could happen, it’s best to always specify a fallback font, even if it is just serif or san-serif.
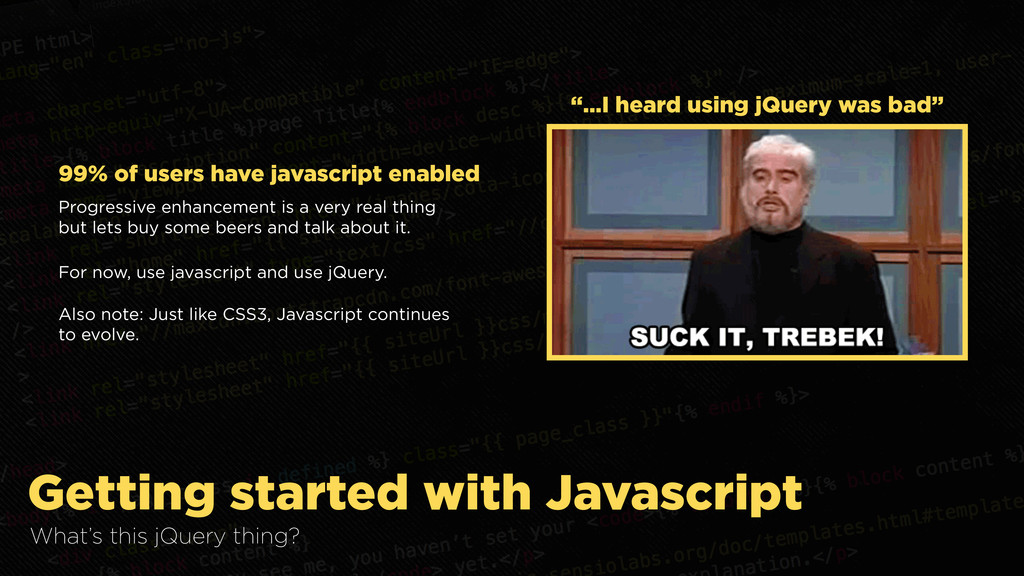
users have javascript enabled Progressive enhancement is a very real thing but lets buy some beers and talk about it. “…I heard using jQuery was bad” For now, use javascript and use jQuery. Also note: Just like CSS3, Javascript continues to evolve.
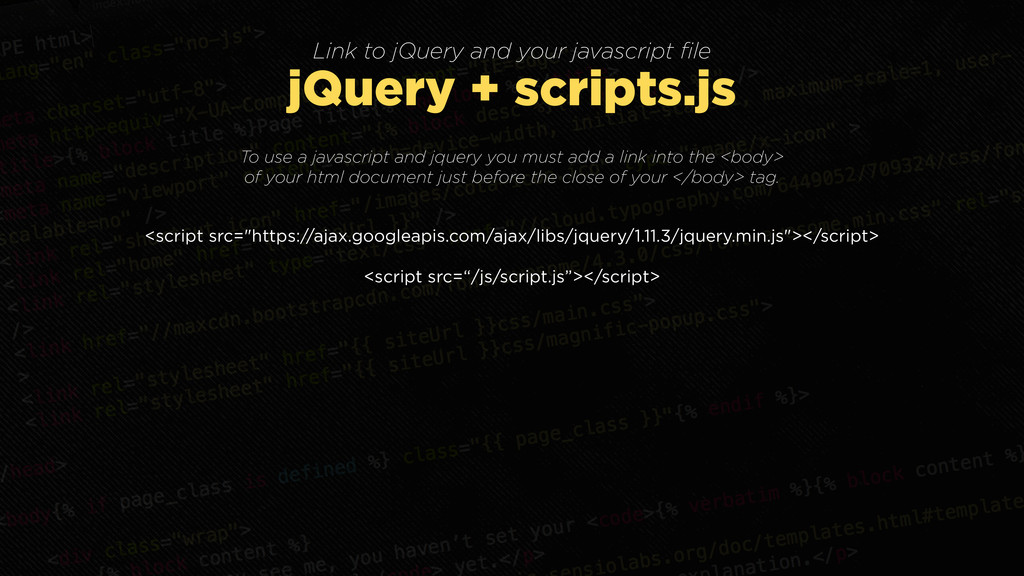
<script src="https://ajax.googleapis.com/ajax/libs/jquery/1.11.3/jquery.min.js"></script> <script src=“/js/script.js”></script> To use a javascript and jquery you must add a link into the <body> of your html document just before the close of your </body> tag.
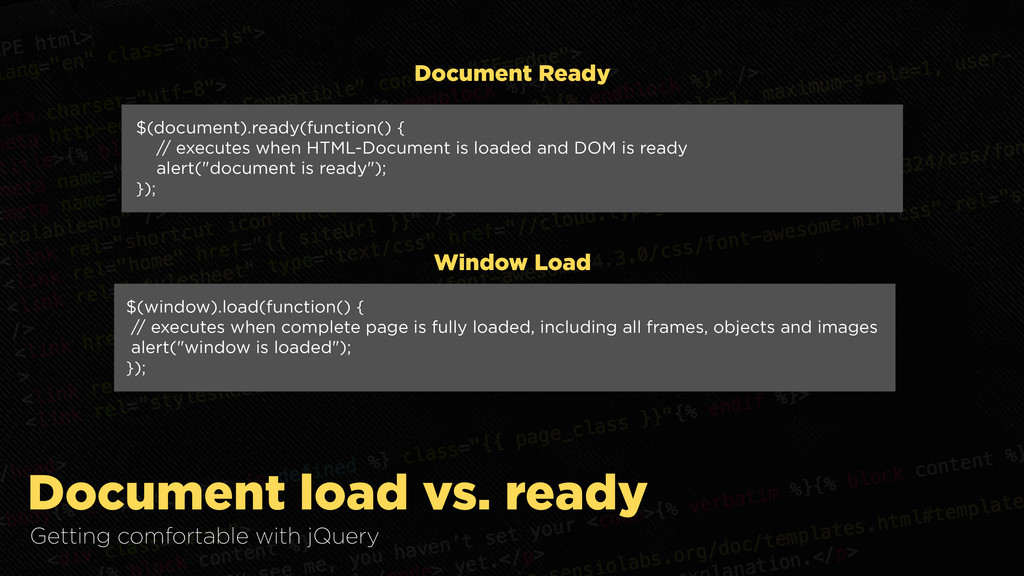
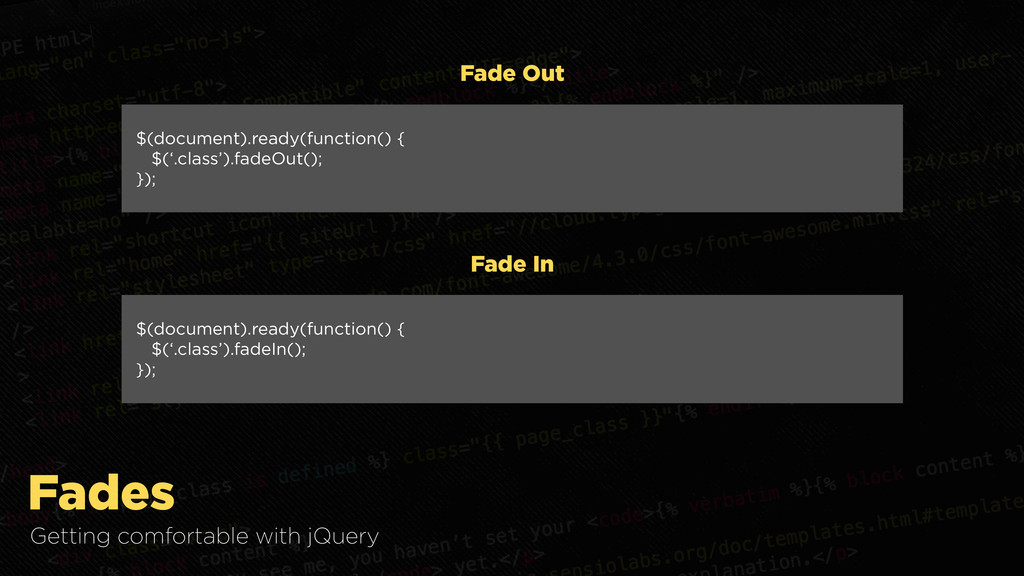
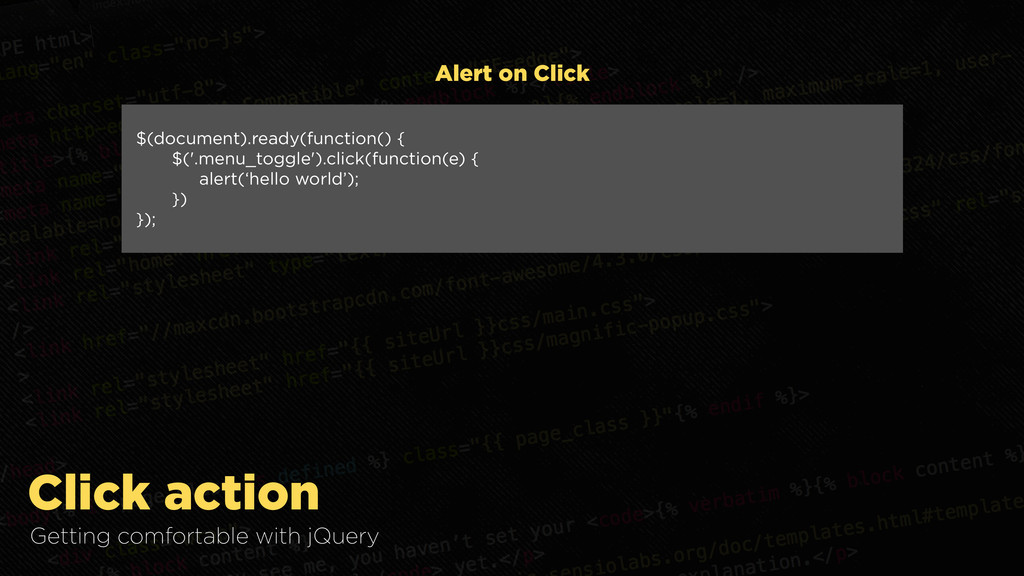
Window Load $(document).ready(function() { // executes when HTML-Document is loaded and DOM is ready alert("document is ready"); }); $(window).load(function() { // executes when complete page is fully loaded, including all frames, objects and images alert("window is loaded"); });
![Introduction to [vanilla] Cascading Style Sheets Style sheets allow you](https://files.speakerdeck.com/presentations/063db2cc341849b68020065782a3fe00/slide_21.jpg)
![Codepen.io Example #001 - [mccombs/pen/EjwrzM]](https://files.speakerdeck.com/presentations/063db2cc341849b68020065782a3fe00/slide_46.jpg)
![Codepen.io Example #002 - [mccombs/pen/XbeOvO]](https://files.speakerdeck.com/presentations/063db2cc341849b68020065782a3fe00/slide_47.jpg)