Upgrade to Pro — share decks privately, control downloads, hide ads and more …

Kintone Customization Tutorial by Gusuku Customine en01

Kintone Customization Tutorial by Gusuku Customine en01

R3 institute

October 30, 2018
Tweet

More Decks by R3 institute

Other Decks in Technology

Transcript

  1. What is “Customine” A no-code customization platform for Kintone. It

    automatically generats JavaScript and send it to Kintone App by one click.
  2. Kintone App: “Costumer database” Goal1: Color the fields whose status

    is “Not handled yet” Goal2: Apply the same customization to the field “Organization Name”.
  3. Here are the Apps that we have installed from the

    package. We are going to customize these 2 Apps in this tutorial. “Customer database” & “Inquiry Management”
  4. Go to the setting menu of the App “Customer Database”

    Set the field of “Contact Name” Make sure “Prohibit duplicate values” are checked
  5. Set the fields “Sales” to match the data of the

    related app“Inquiry Management”
  6. Add a new Customization and choose your Kintone app to

    customize. (It will automatically create a new document when there’s no docs in the drive.)
  7. Tips for Customizaton Make sure your Kintone Apps are almost

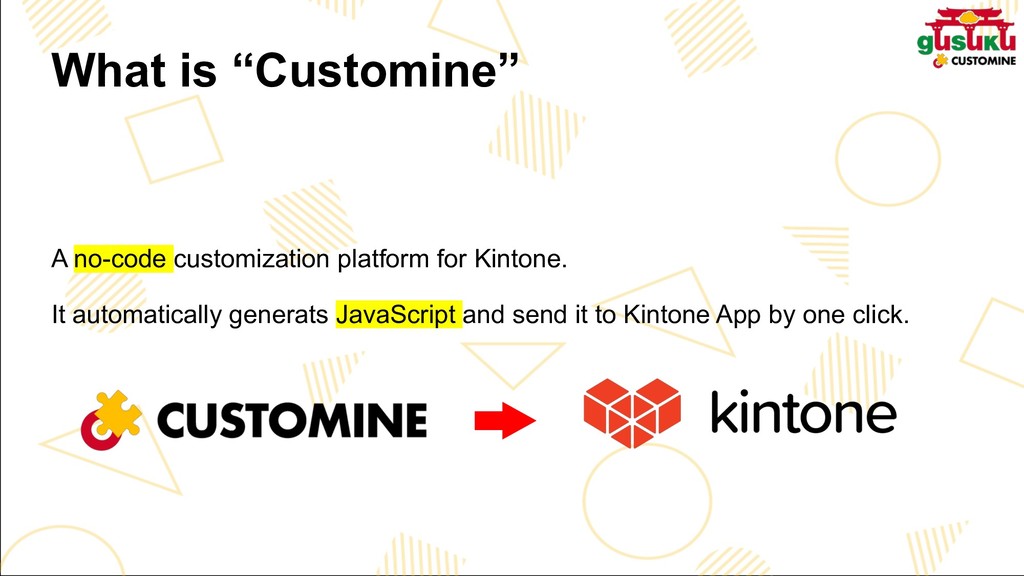
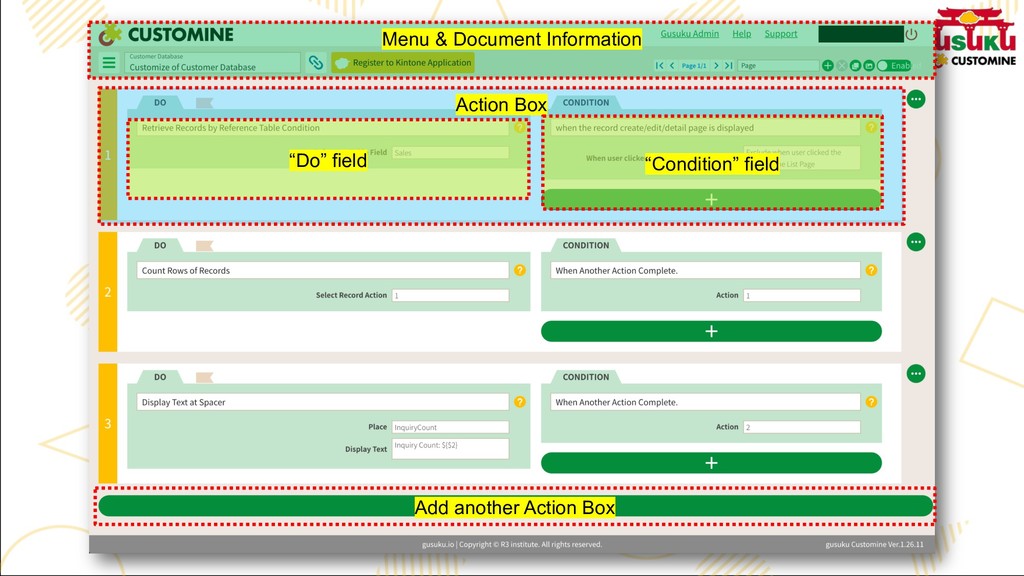
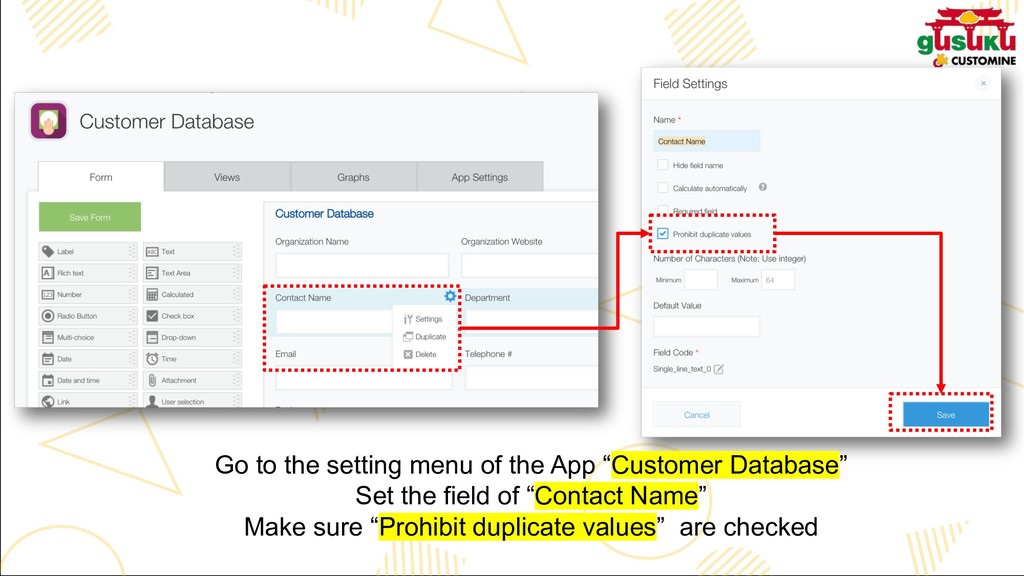
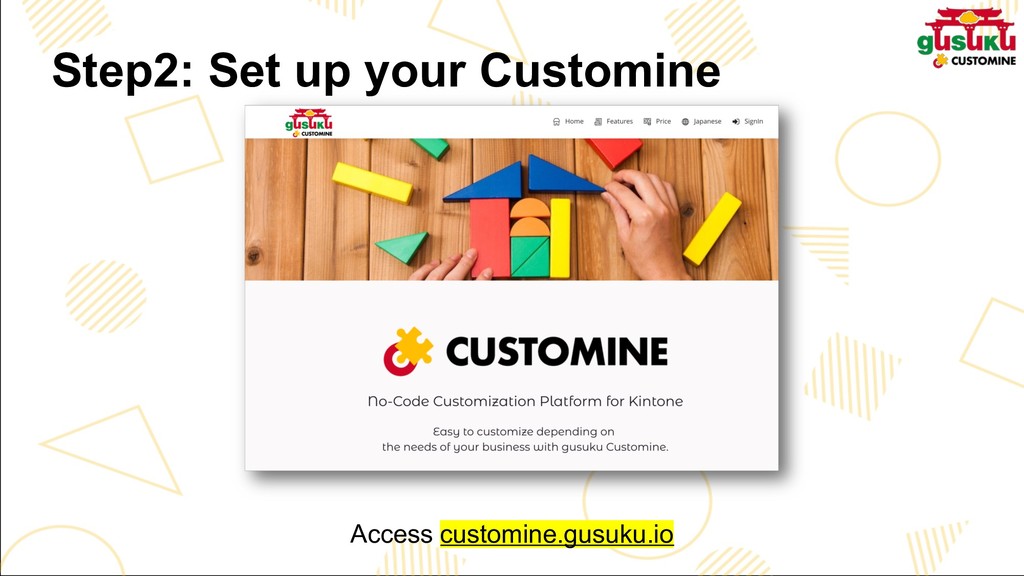
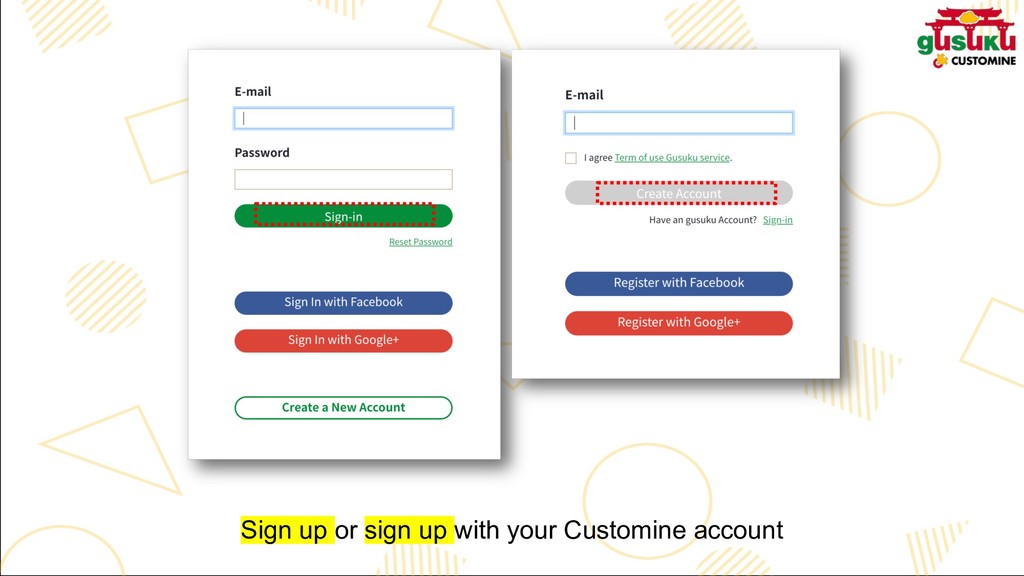
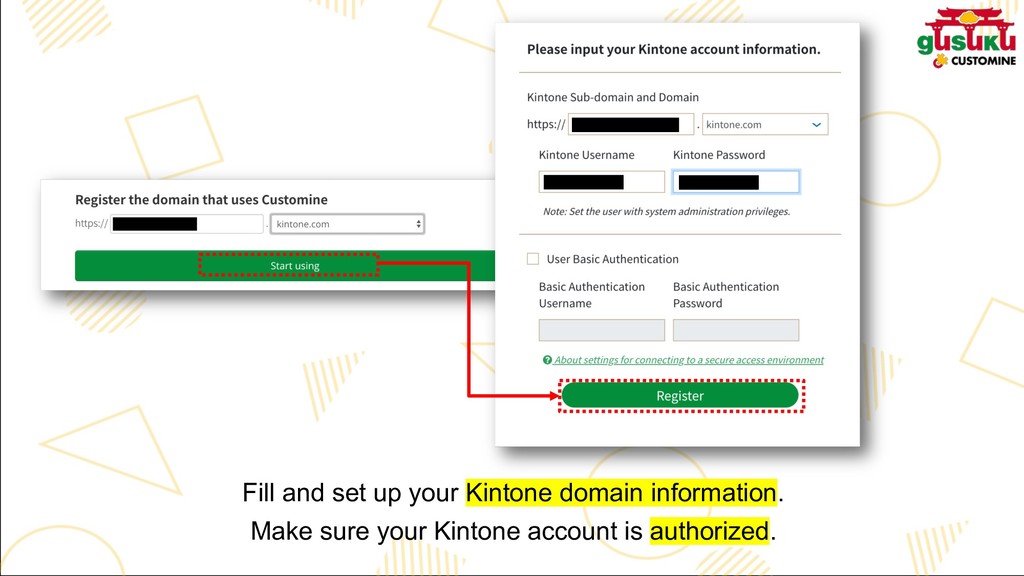
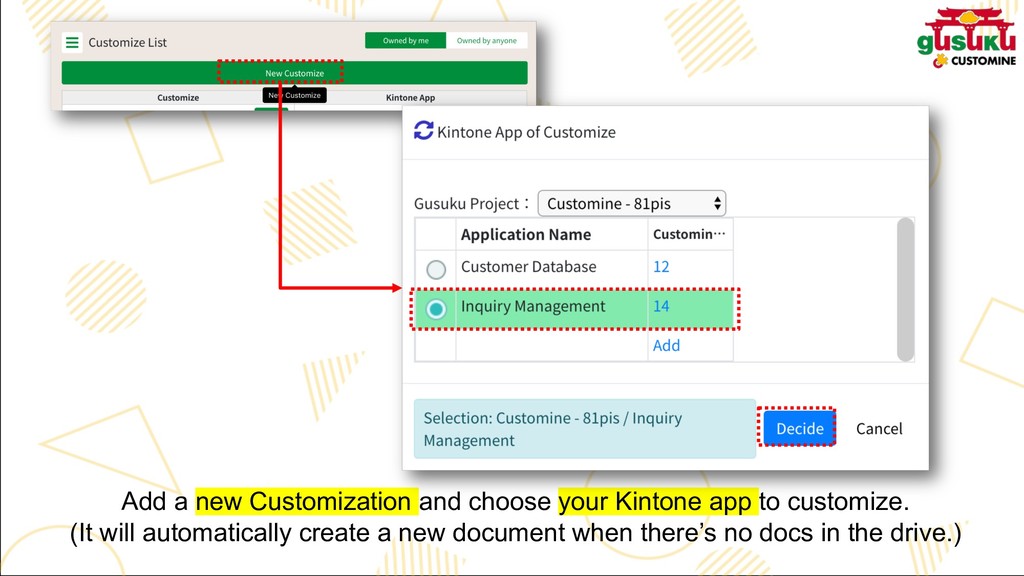
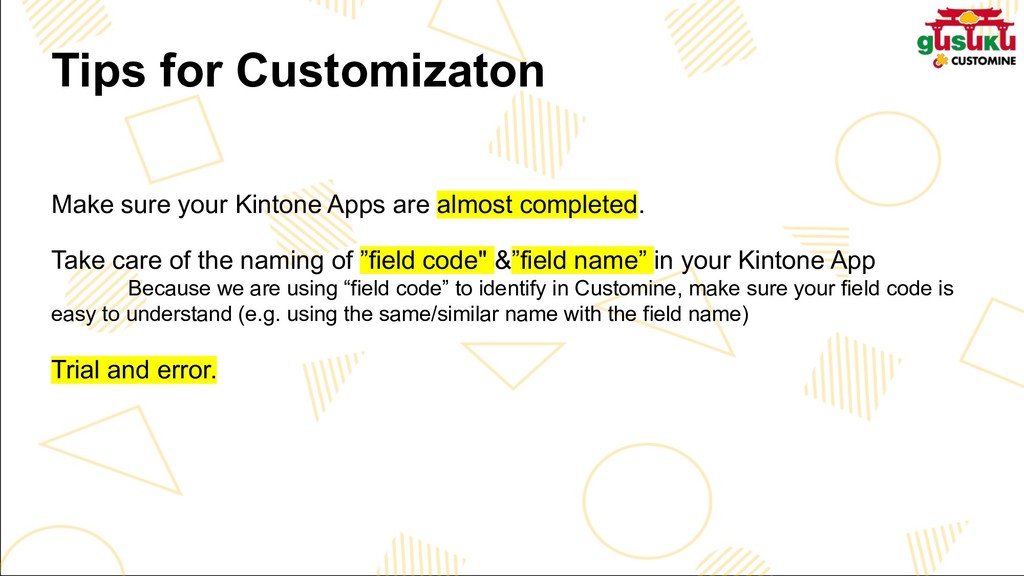
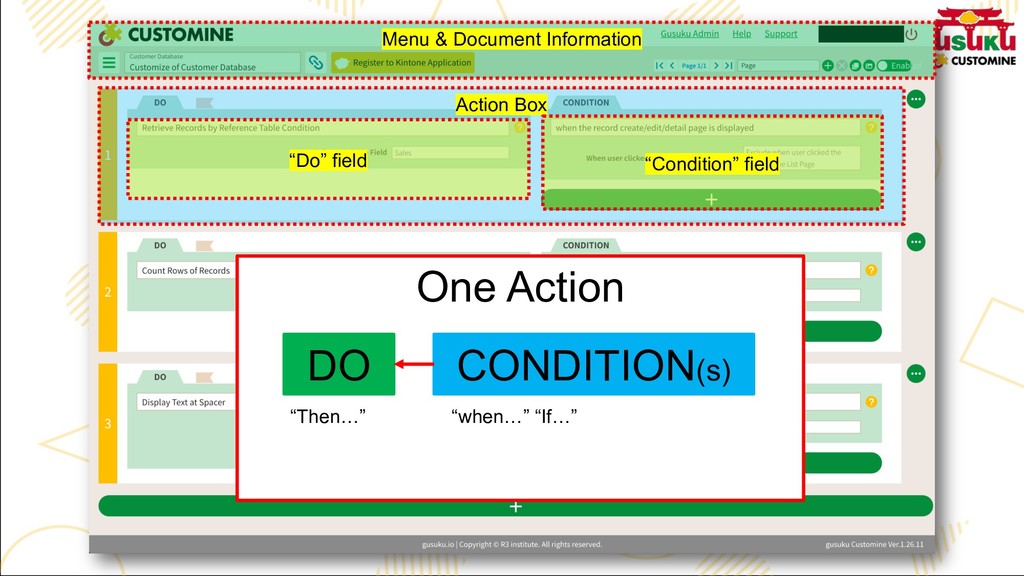
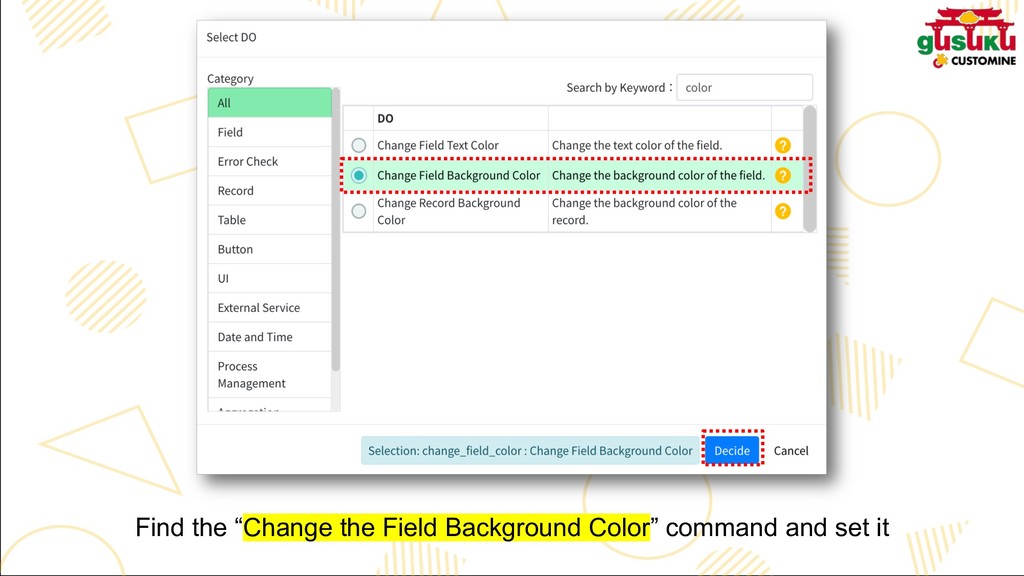
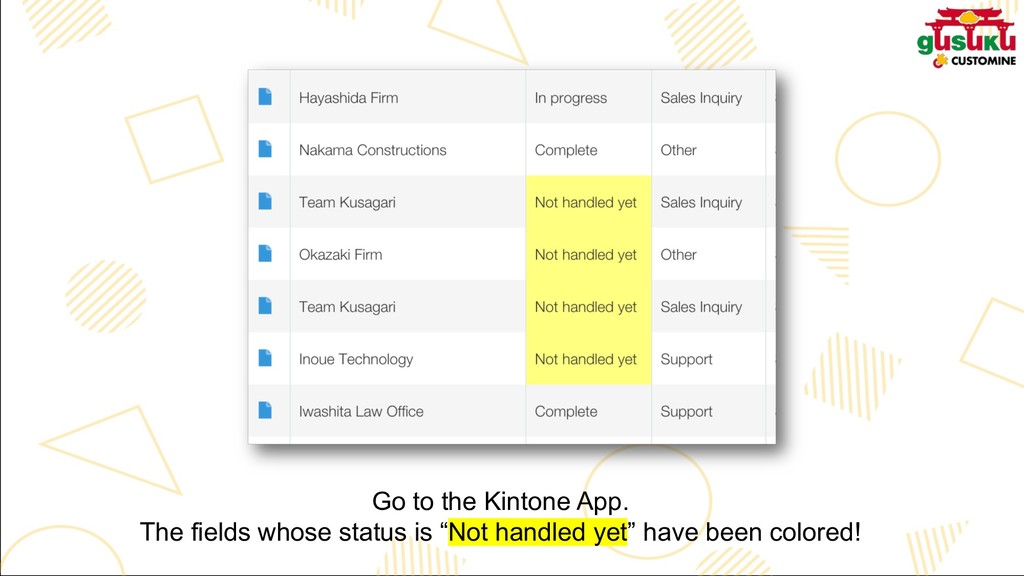
    completed. Take care of the naming of ”field code" &”field name” in your Kintone App Because we are using “field code” to identify in Customine, make sure your field code is easy to understand (e.g. using the same/similar name with the field name) Trial and error.
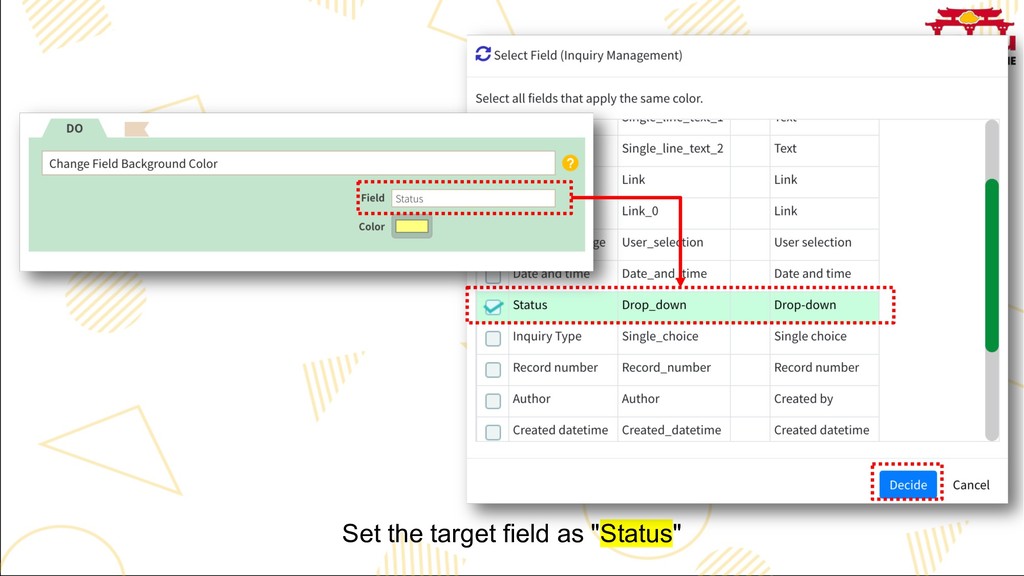
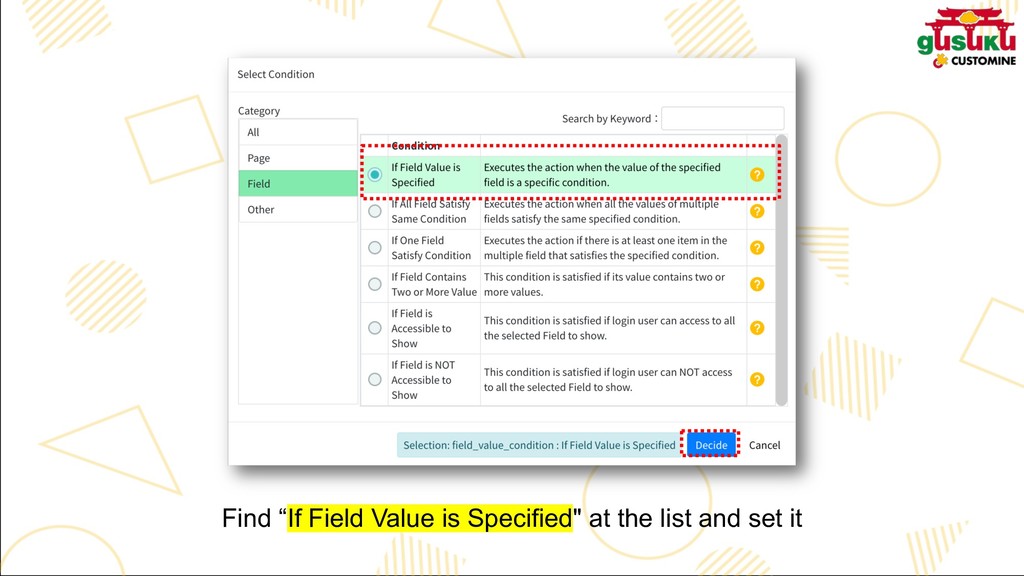
  8. Menu & Document Information Action Box “Do” field “Condition” field

    One Action DO CONDITION(s) “when…” “If…” “Then…”
  9. Go to the “CONDITION” field. Click the "Add" button to

    add one more Condition to the Action Box.
  10. You're all set! Let’s apply it to your Kintone App

    and check out how your customization work. Apply to the Kintone App
  11. Go to the Kintone App. The fields whose status is

    “Not handled yet” have been colored!
  12. Go to your Kintone App’s settings, add a Blank Space

    and set its Element ID as “InquiryCount” Set up your Kintone app
  13. If you are a free plan user and don’t have

    enough App Slot, check it out here and release your current App. Option: Release your App Slot
  14. Create a new customize from the menu and choose “Customer

    Database” as the target App Let’s go Customine!
  15. Set up the “Action Boxes” Set “Retrieve Records by Reference

    Table Condition” command at the “DO” field
  16. Create another Action Box of “Count Rows of Records” and

    set the Condition field as “When Another Action Complete” to make sure the 2nd action works right after the 1st action.
  17. Caution The Actions are NOT running with the order of

    Action number. They normally run parallelly. We have to specify the order of the action list with this command.
  18. Check out your Customine again to make sure the order

    of the Actions 2 runs after 1 3 runs after 2
  19. The “Inquiry Count” with the number is displayed at the

    record page. Apply to the Kintone App