Upgrade to Pro
— share decks privately, control downloads, hide ads and more …
Speaker Deck
Features
Speaker Deck
PRO
Sign in
Sign up for free
Search
Search
Install CentOS on VirtualBox
Search
Sponsored
·
SiteGround - Reliable hosting with speed, security, and support you can count on.
→
Akira Morikawa
August 27, 2018
Technology
240
0
Share
Embed
Copy iframe code
Copy JS code
Copy link
Start on current slide
Install CentOS on VirtualBox
Windows10 上で CentOS 検証環境を作成する手順をまとめました。
Akira Morikawa
August 27, 2018
More Decks by Akira Morikawa
See All by Akira Morikawa
コロナ禍だからこそ考えるオフラインコミュニティの意義 / significance of community
ariaki
0
2.2k
アウトプットの始め方/start output 20230121
ariaki
0
360
web-secure-phpcon2020
ariaki
3
3.7k
オブジェクトライフサイクルとメモリ管理を学ぼう / OOC 2020
ariaki
8
4.1k
エンジニアはアウトプットによって成長できるのか? / Grow with your output
ariaki
24
6.8k
アウトプットを始めよう / How to begin output jawsug-bgnr
ariaki
2
4.1k
参加者の安全を守れていますか? / Protecting community safety
ariaki
1
7.7k
タピオカに学ぶ二段階認証 / tapioca-mfa
ariaki
5
1.4k
古に学ぶ個人開発のススメ / My recommendation of personal development
ariaki
1
1.6k
Other Decks in Technology
See All in Technology
SRENEXT_2026_Chairs__Talks_in_Tamachi.sre.pdf
srenext
1
150
複数プロダクトで進めるAI機能実装 ── 実践から得たリアルな学びとロードマップ実現への挑戦 / AICon2026_yanari
rakus_dev
1
280
インシデント事例と パッケージの全量解析に学ぶ ソフトウェアサプライチェーンの守り方 / supply-chain-attack-defense
flatt_security
0
1k
大量データに対しても、生成AIを用いてリーズナブルにデータ加工をしたい!Databricksのai_queryについて調べてみた
kamoshika
2
290
壊して学ぶAWS CDK: そのcdk deployで消えるもの、残るもの
k_adachi_01
1
490
なぜ、あなたのエージェントは言うことを聞かないのか
segavvy
1
440
伝票作成AIエージェントを支える、LLMOpsとインフラの選択肢 / AICon2026_takeda
rakus_dev
0
270
[Droidcon Orlando '26] The Android Lens: Applying Mobile Forensics to AI Performance
amanda_hinchman
1
110
GoでCコンパイラを作った話
repunit
0
150
AI時代におけるテストの基礎の再定義 / Rethinking the Fundamentals of Testing in the AI Era
mineo_matsuya
14
5.3k
アップデートで何が変わった?デモで学んで使いこなすIBM Bob2.0
muehara
0
250
AIコード生成×サプライチェーン攻撃 — PHPが直面する“二重の信頼問題
shinyasaita
0
470
Featured
See All Featured
HDC tutorial
michielstock
2
750
We Are The Robots
honzajavorek
0
280
Accessibility Awareness
sabderemane
1
160
Jamie Indigo - Trashchat’s Guide to Black Boxes: Technical SEO Tactics for LLMs
techseoconnect
PRO
0
520
Stop Working from a Prison Cell
hatefulcrawdad
274
21k
Neural Spatial Audio Processing for Sound Field Analysis and Control
skoyamalab
0
390
CoffeeScript is Beautiful & I Never Want to Write Plain JavaScript Again
sstephenson
162
16k
We Analyzed 250 Million AI Search Results: Here's What I Found
joshbly
1
1.6k
Public Speaking Without Barfing On Your Shoes - THAT 2023
reverentgeek
1
460
How to optimise 3,500 product descriptions for ecommerce in one day using ChatGPT
katarinadahlin
PRO
1
3.7k
Optimizing for Happiness
mojombo
378
71k
What's in a price? How to price your products and services
michaelherold
247
13k
Transcript
Install CentOS 7 on VirtualBox for Windows 10 ariaki4dev
Virtual Box
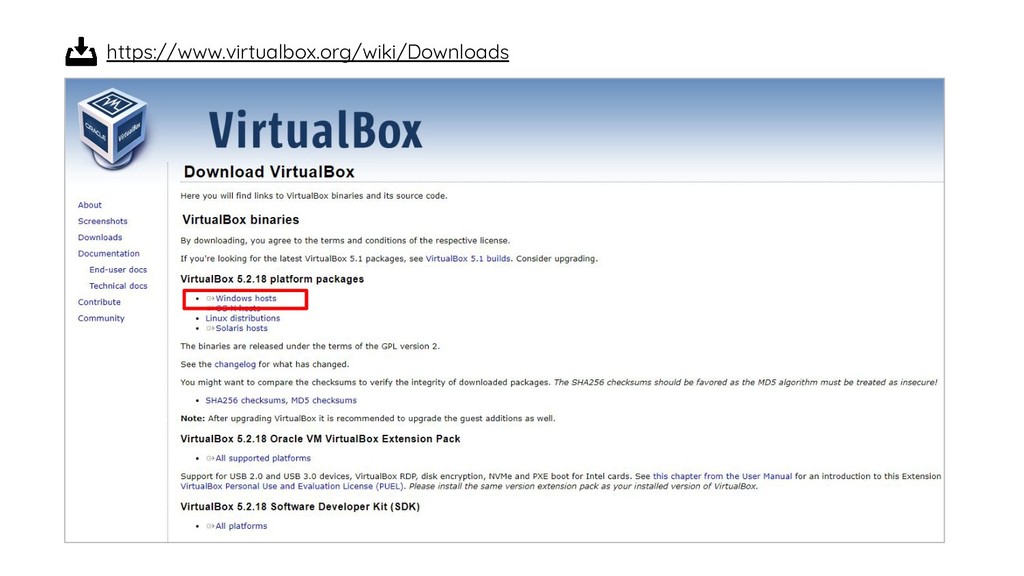
https://www.virtualbox.org/wiki/Downloads
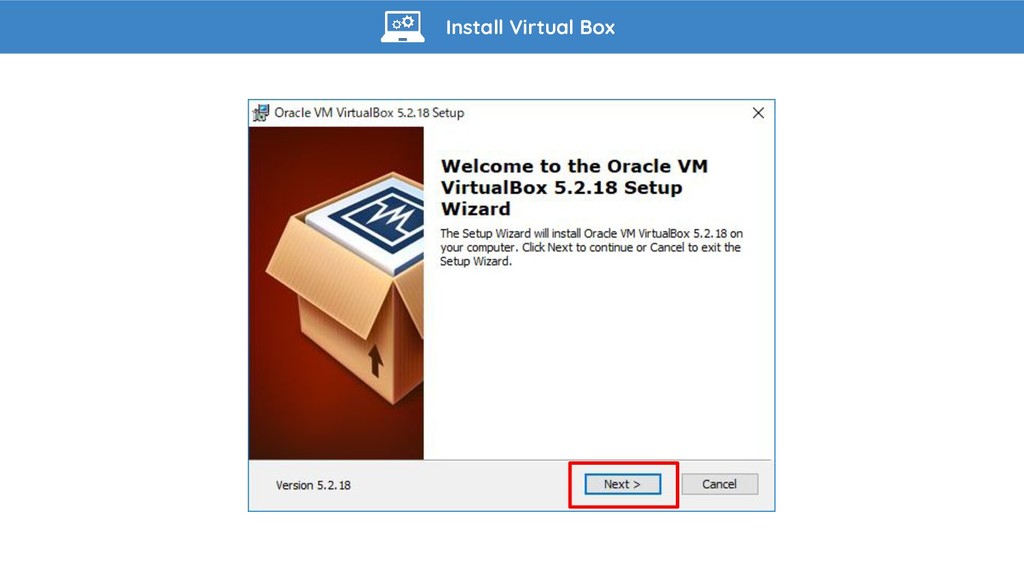
Install Virtual Box
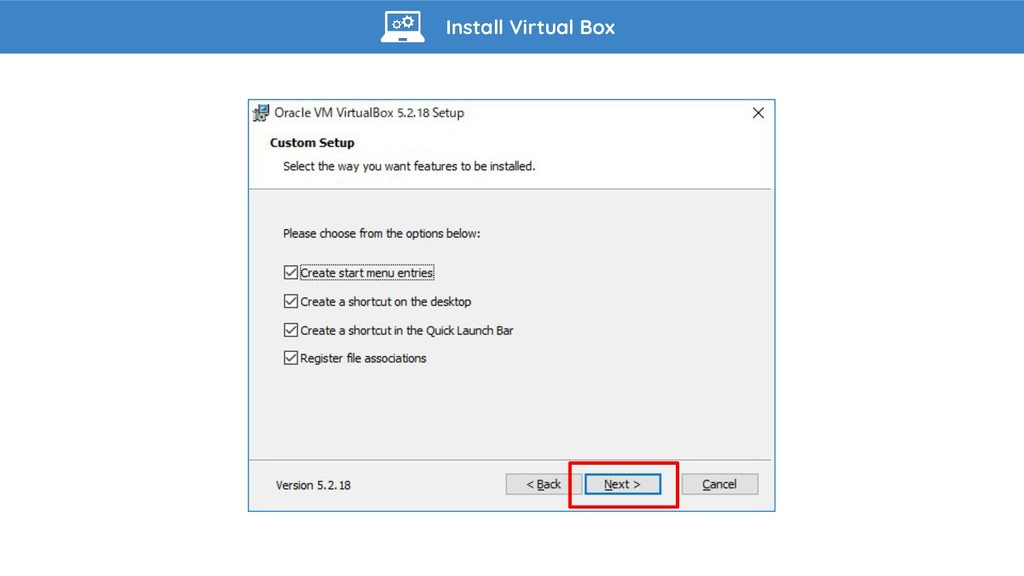
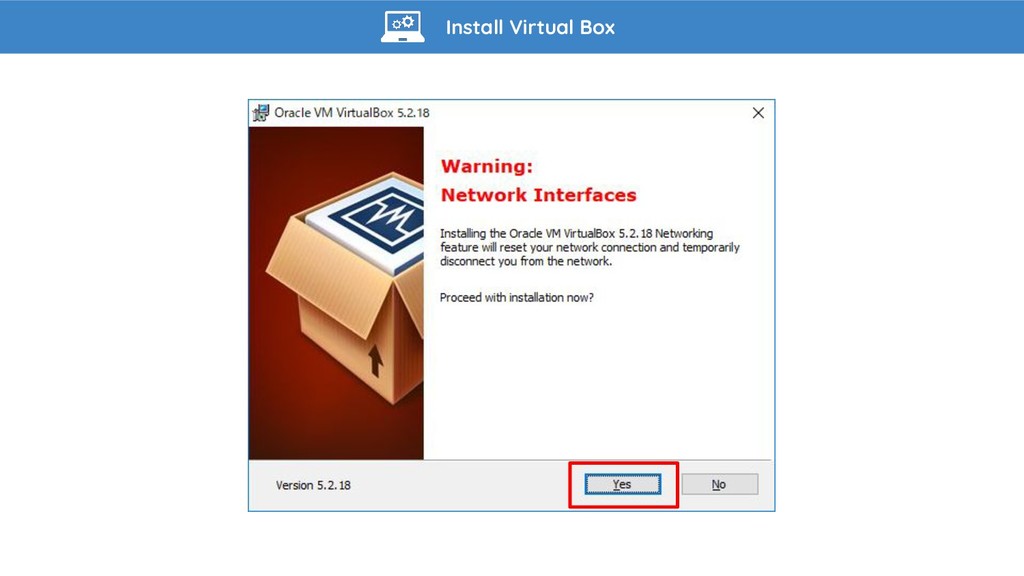
Install Virtual Box
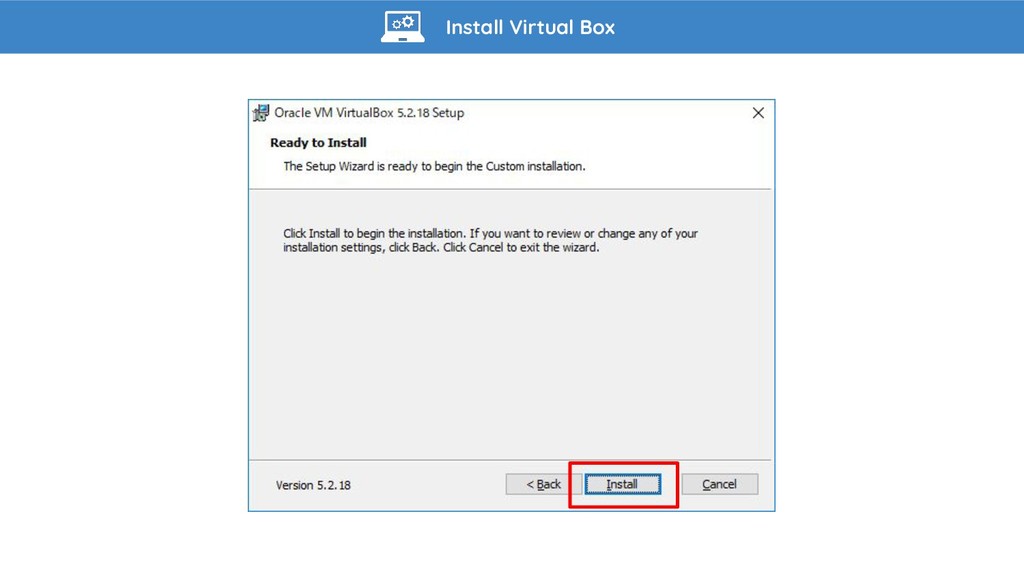
Install Virtual Box
Install Virtual Box
Install Virtual Box
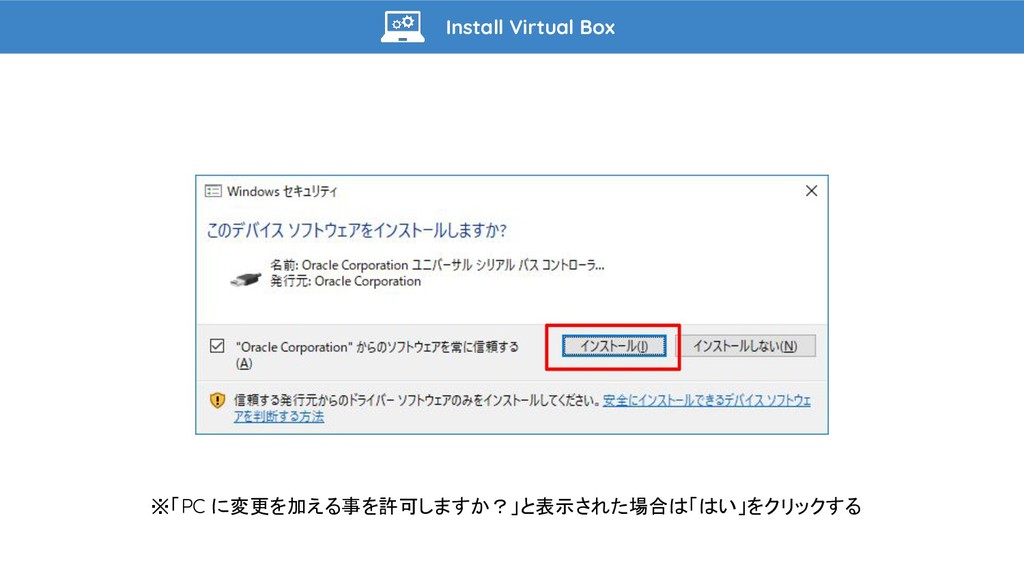
Install Virtual Box ※「PC に変更を加える事を許可しますか?」と表示された場合は「はい」をクリックする
Install Virtual Box
Install CentOS 7
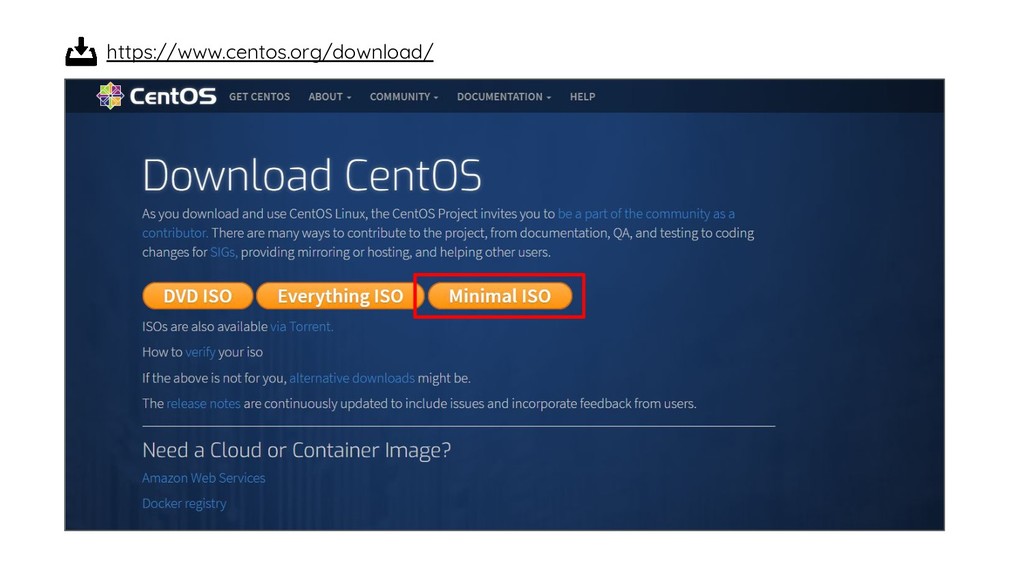
https://www.centos.org/download/
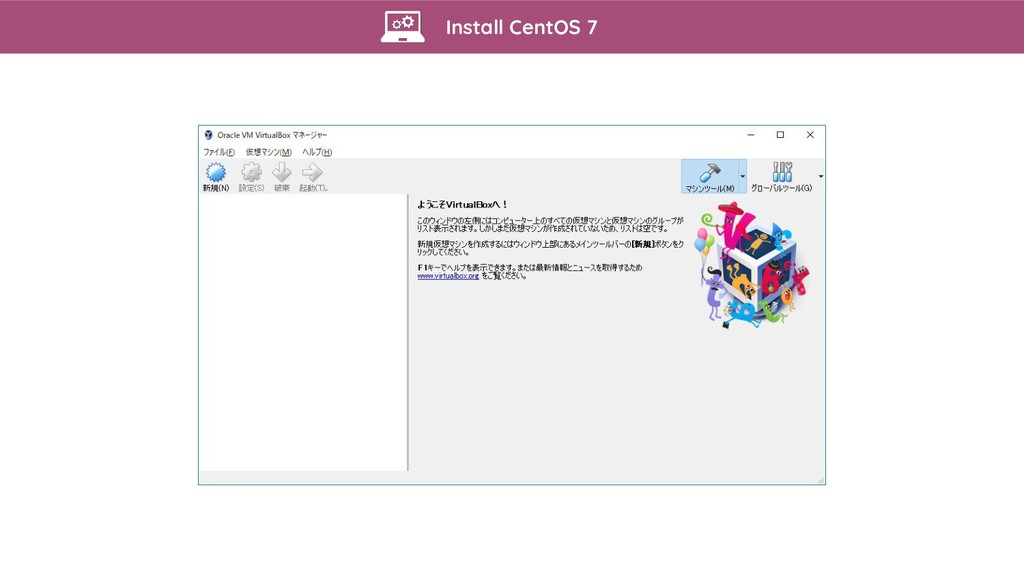
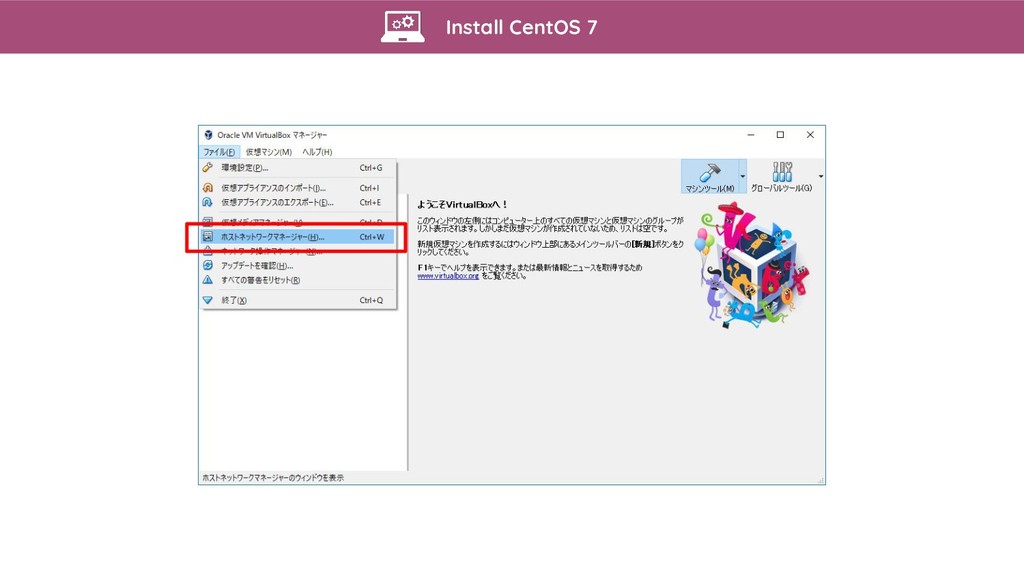
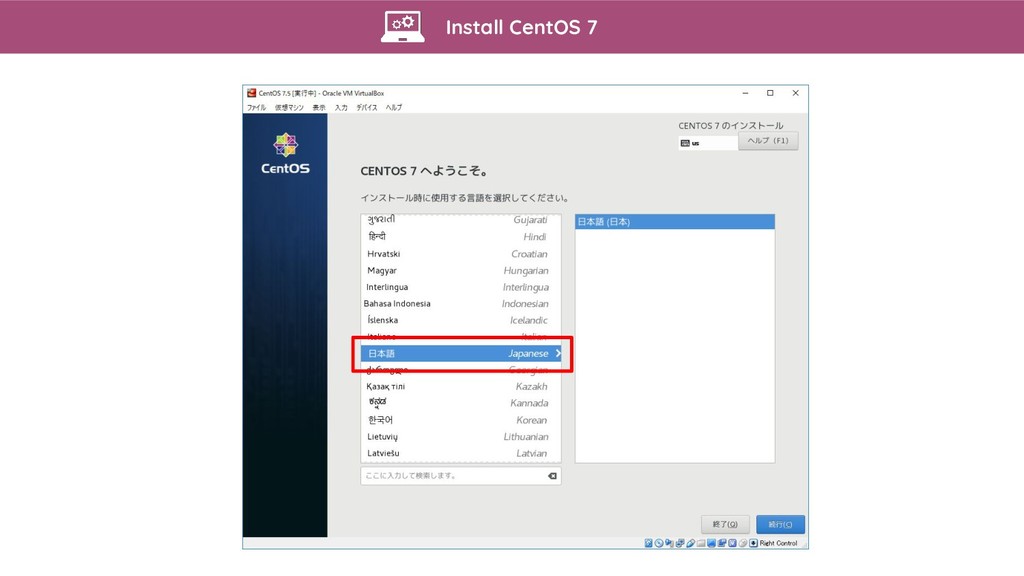
Install CentOS 7
Install CentOS 7
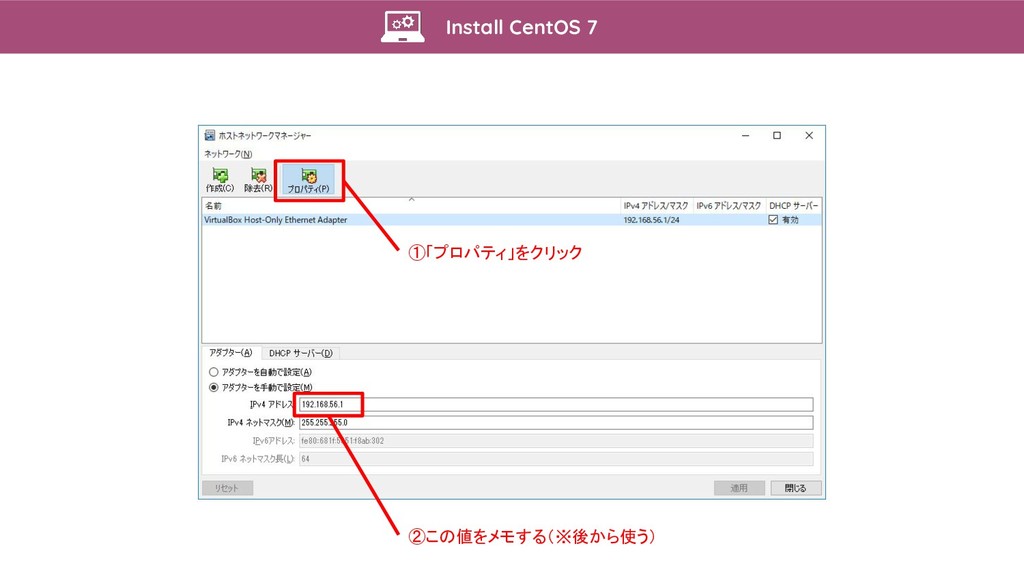
Install CentOS 7 ②この値をメモする(※後から使う) ①「プロパティ」をクリック
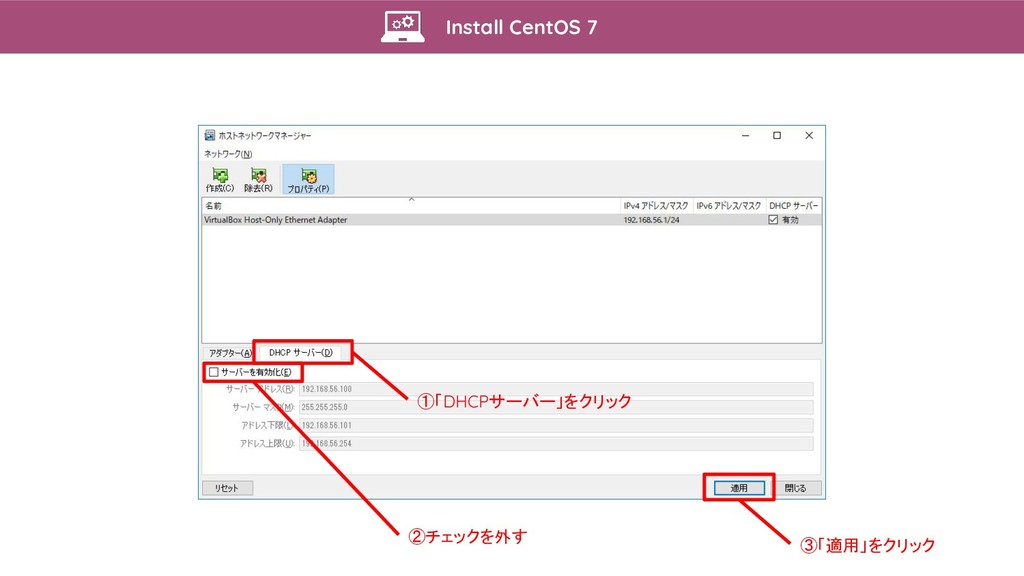
Install CentOS 7 ②チェックを外す ③「適用」をクリック ①「DHCPサーバー」をクリック
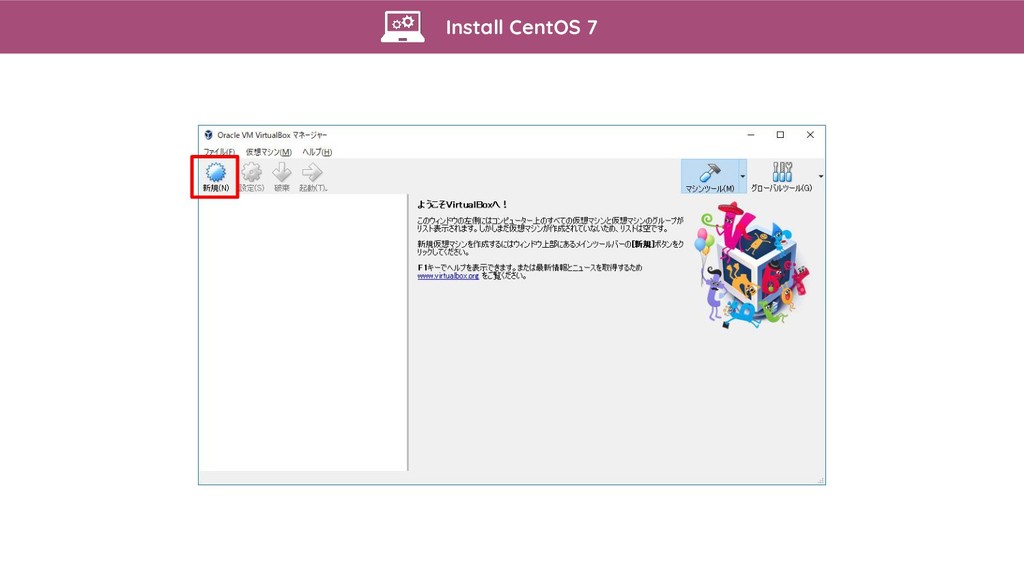
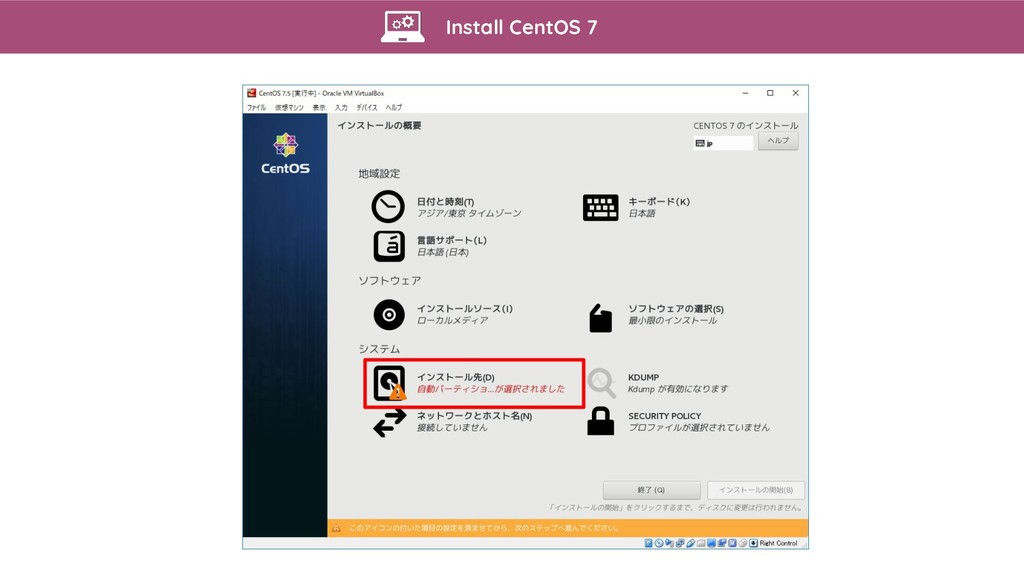
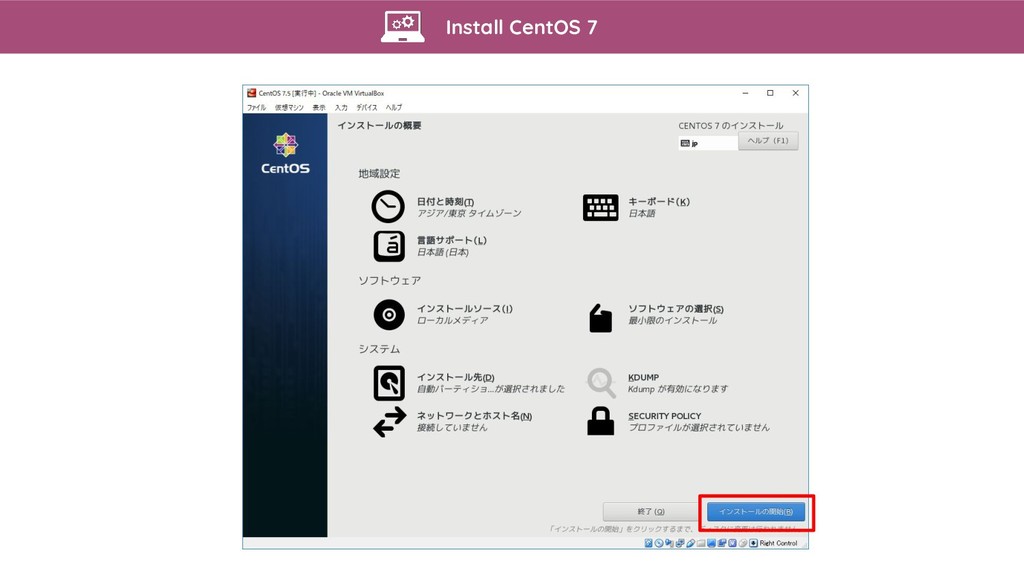
Install CentOS 7
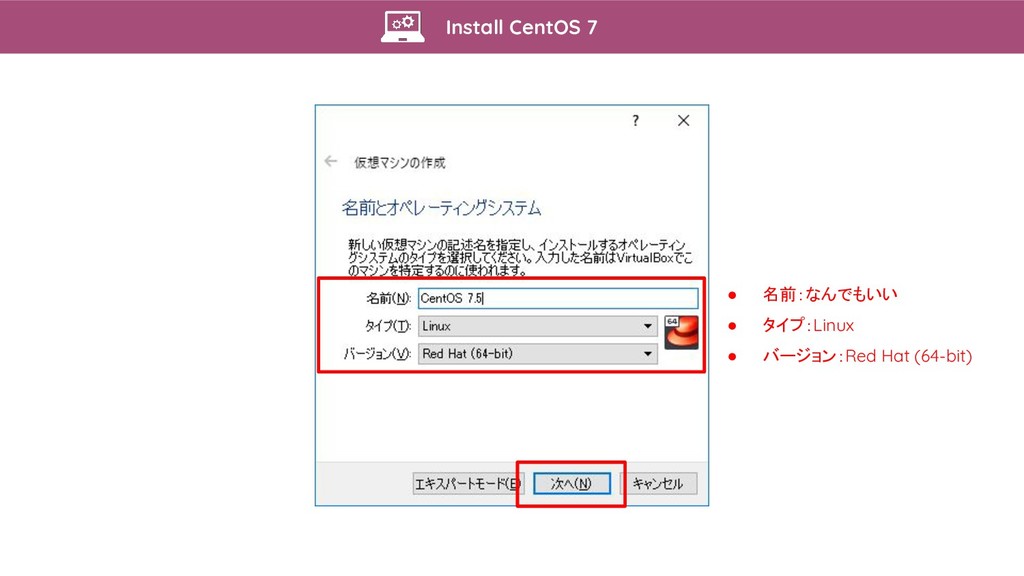
Install CentOS 7 • 名前:なんでもいい • タイプ:Linux • バージョン:Red Hat
(64-bit)
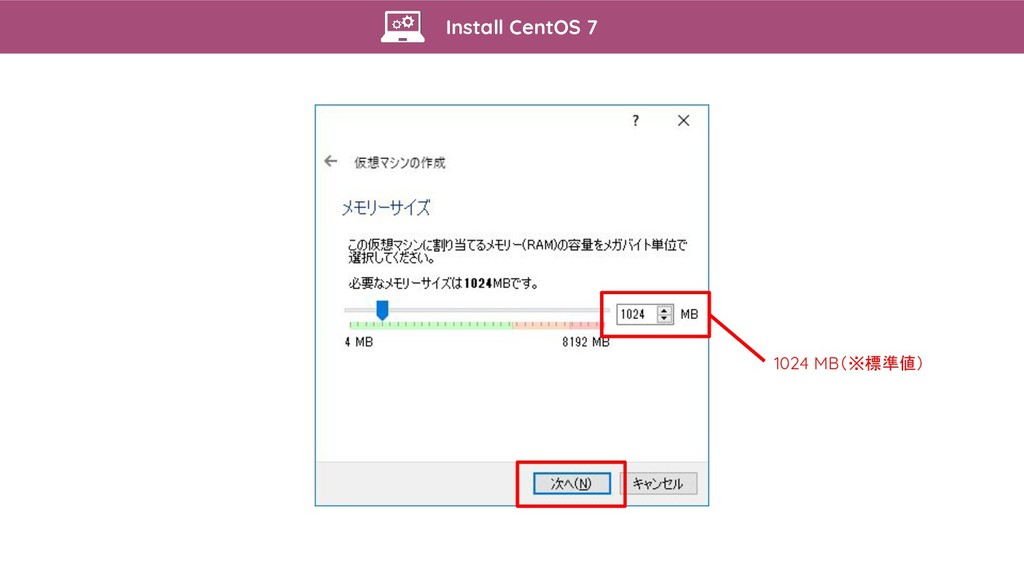
Install CentOS 7 1024 MB(※標準値)
Install CentOS 7
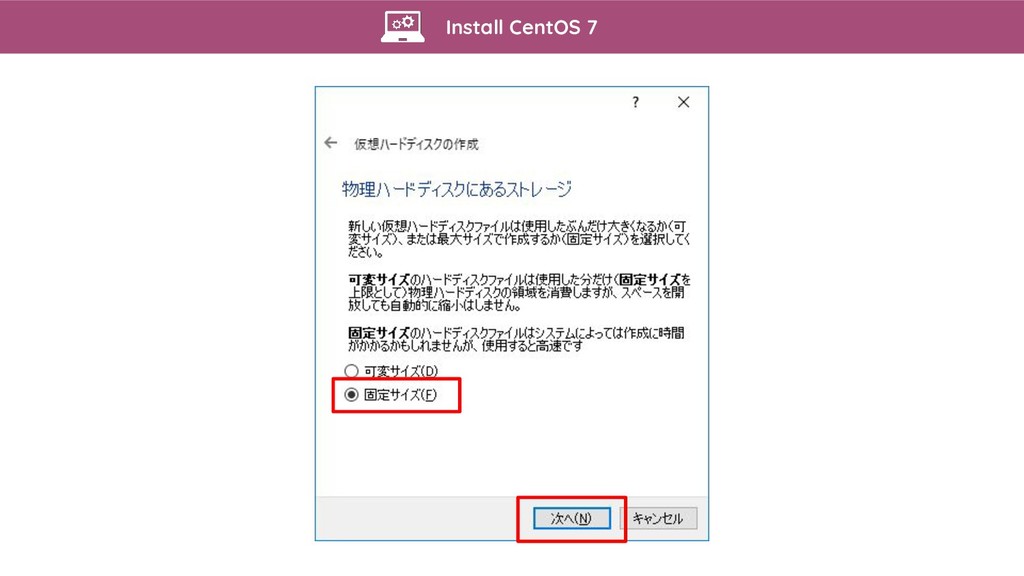
Install CentOS 7
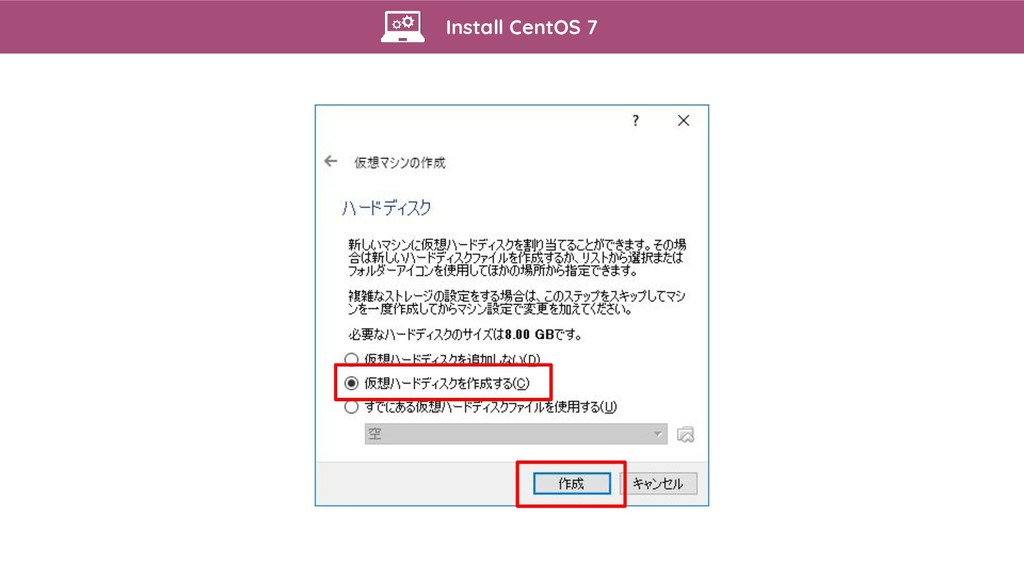
Install CentOS 7 名前は何でもいい 8.00 GB(※標準値)
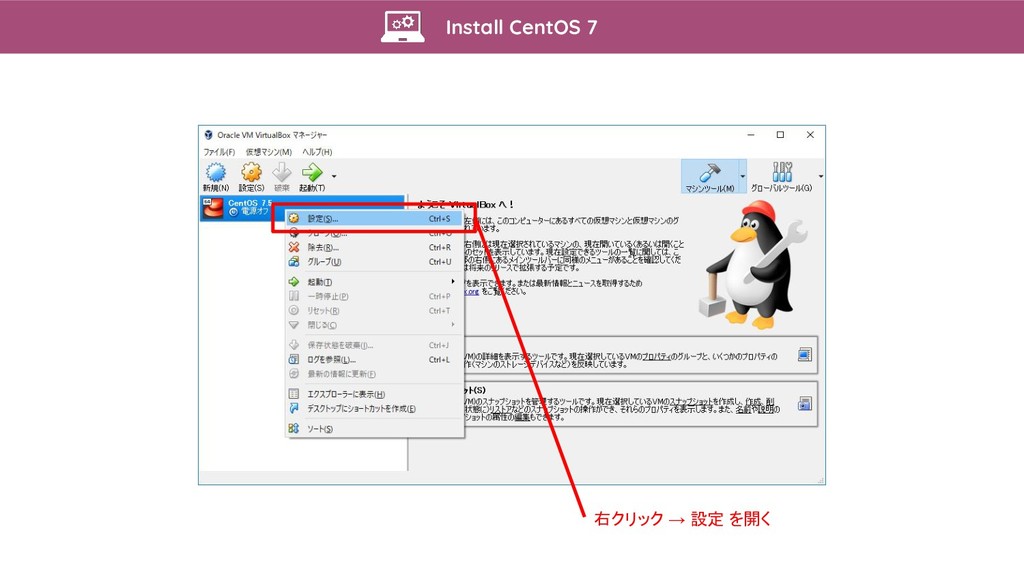
Install CentOS 7 右クリック → 設定 を開く
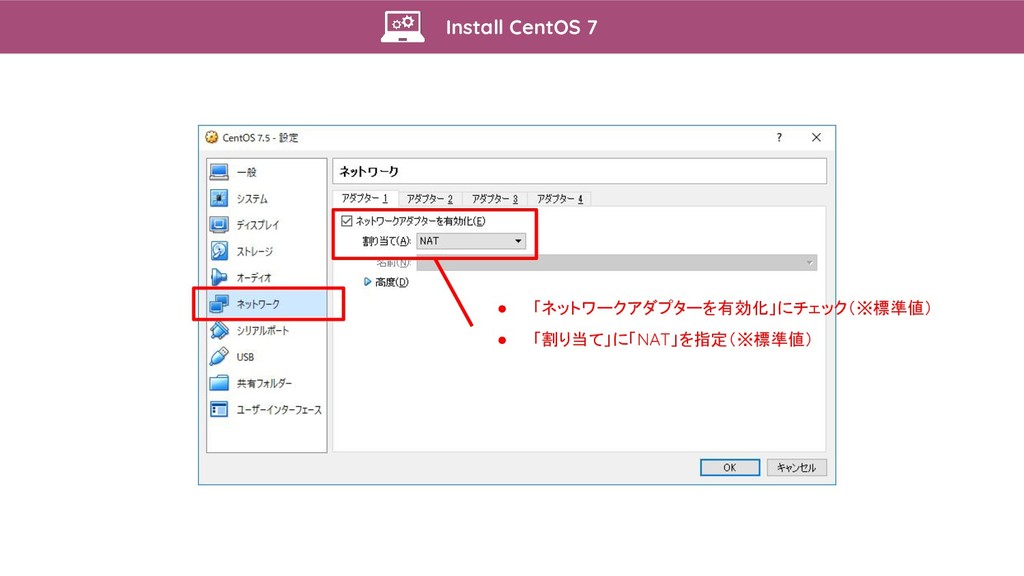
Install CentOS 7 • 「ネットワークアダプターを有効化」にチェック(※標準値) • 「割り当て」に「NAT」を指定(※標準値)
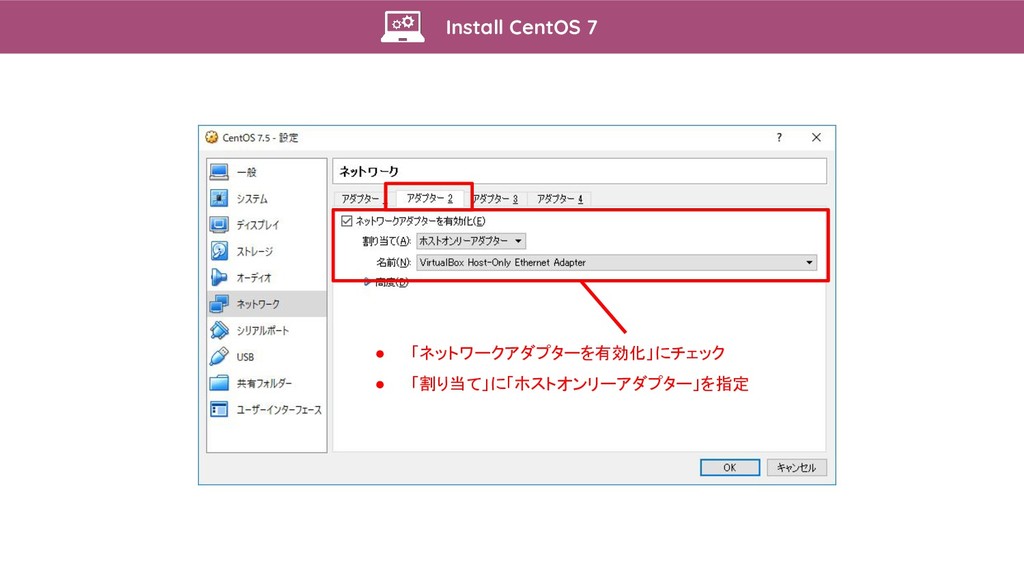
Install CentOS 7 • 「ネットワークアダプターを有効化」にチェック • 「割り当て」に「ホストオンリーアダプター」を指定
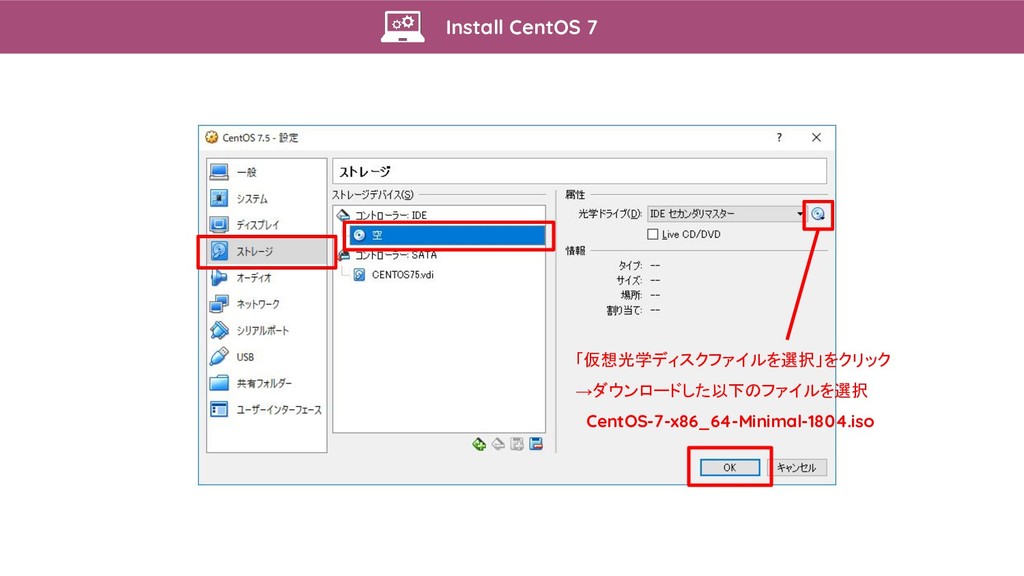
Install CentOS 7 「仮想光学ディスクファイルを選択」をクリック →ダウンロードした以下のファイルを選択 CentOS-7-x86_64-Minimal-1804.iso
Install CentOS 7
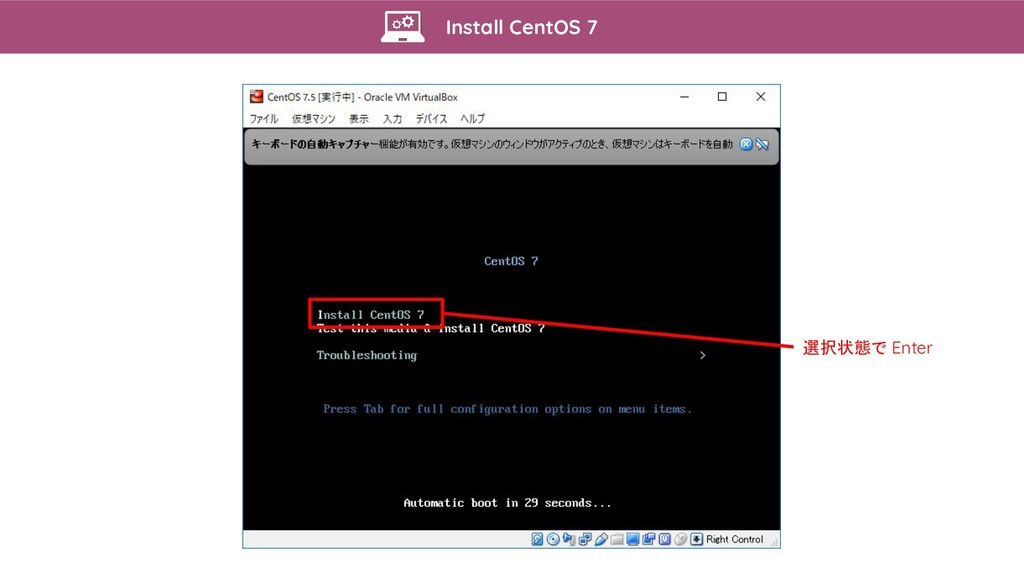
Install CentOS 7 選択状態で Enter
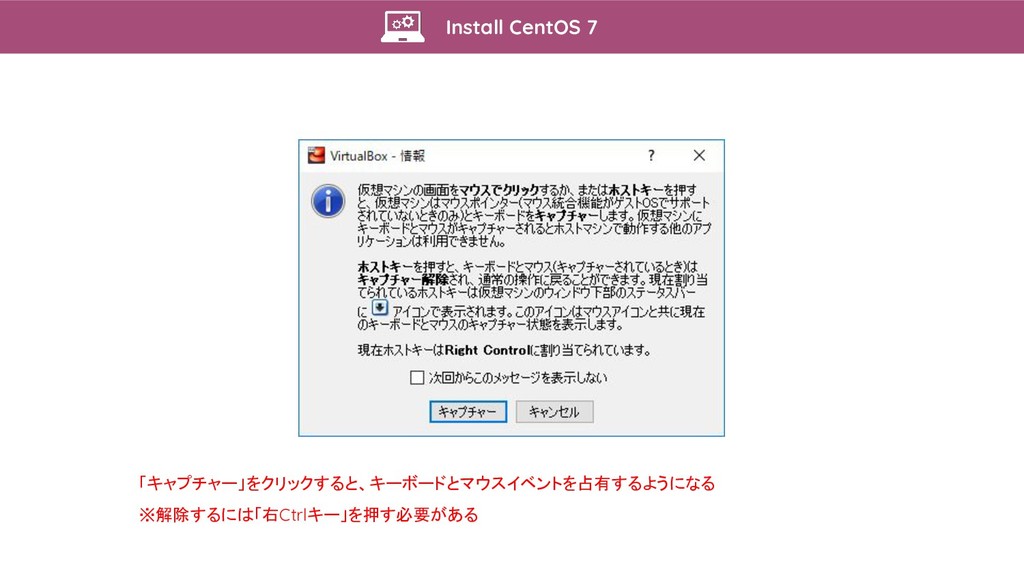
Install CentOS 7 「キャプチャー」をクリックすると、キーボードとマウスイベントを占有するようになる ※解除するには「右Ctrlキー」を押す必要がある
Install CentOS 7
Install CentOS 7
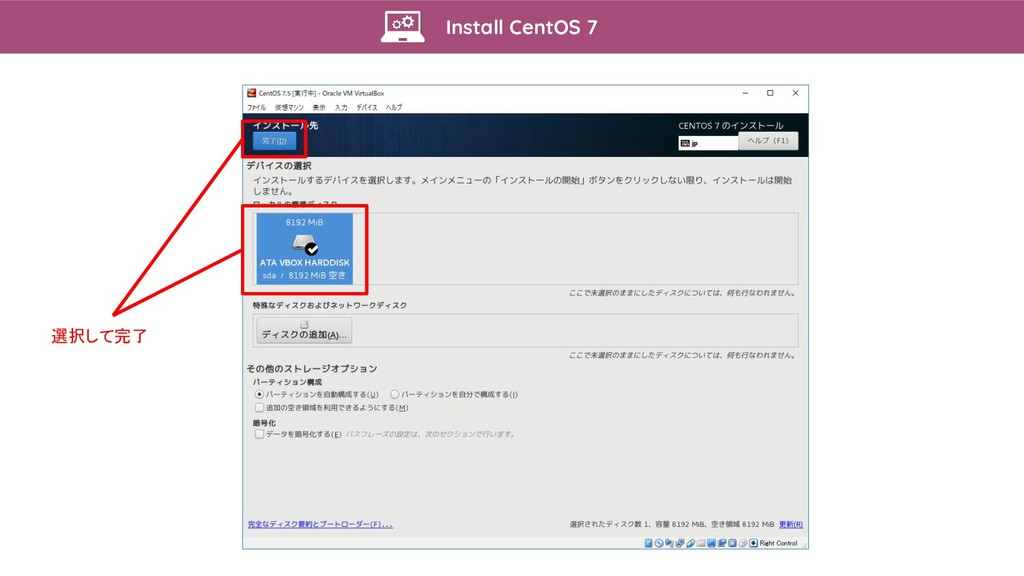
Install CentOS 7 選択して完了
Install CentOS 7
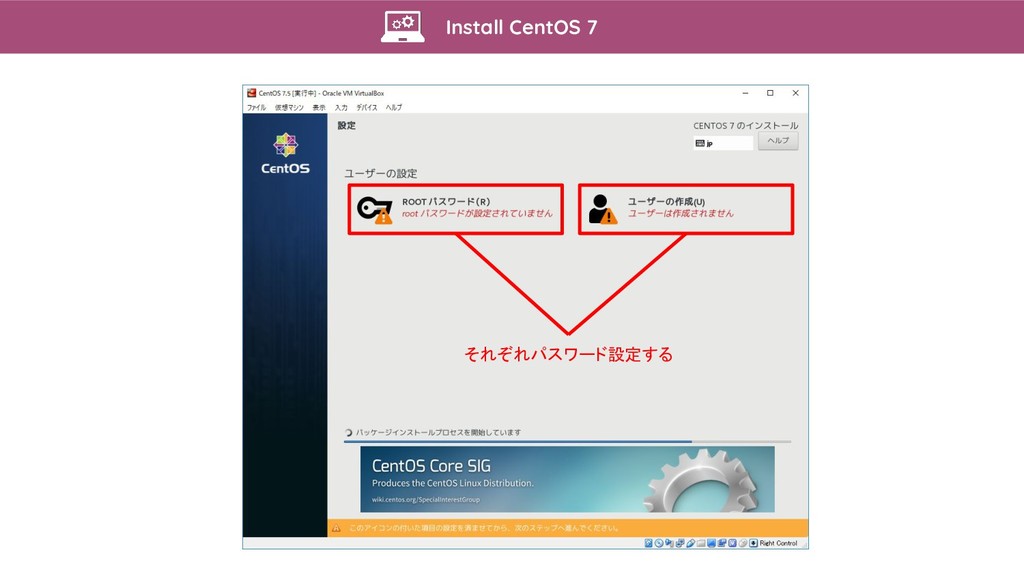
Install CentOS 7 それぞれパスワード設定する
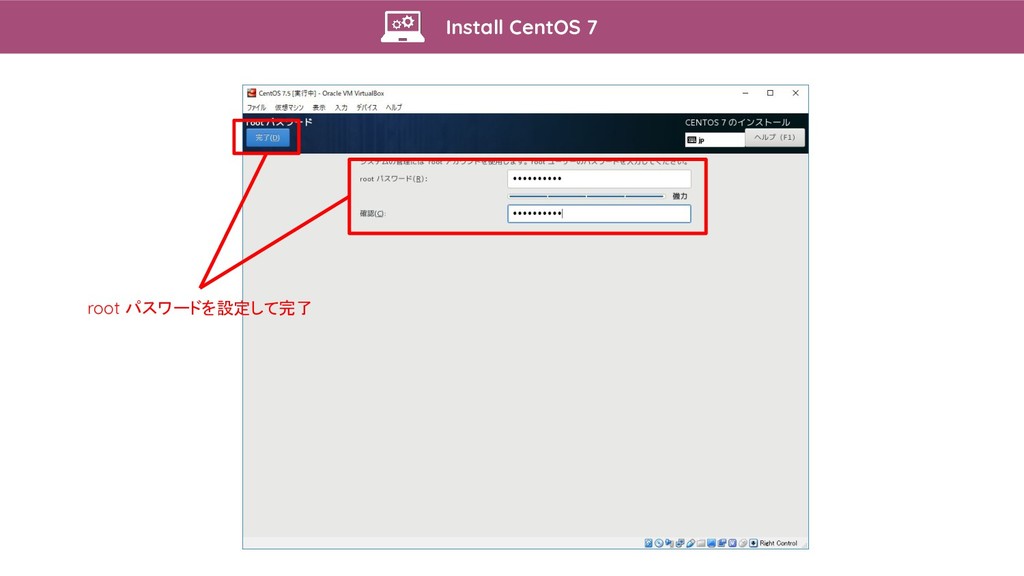
Install CentOS 7 root パスワードを設定して完了
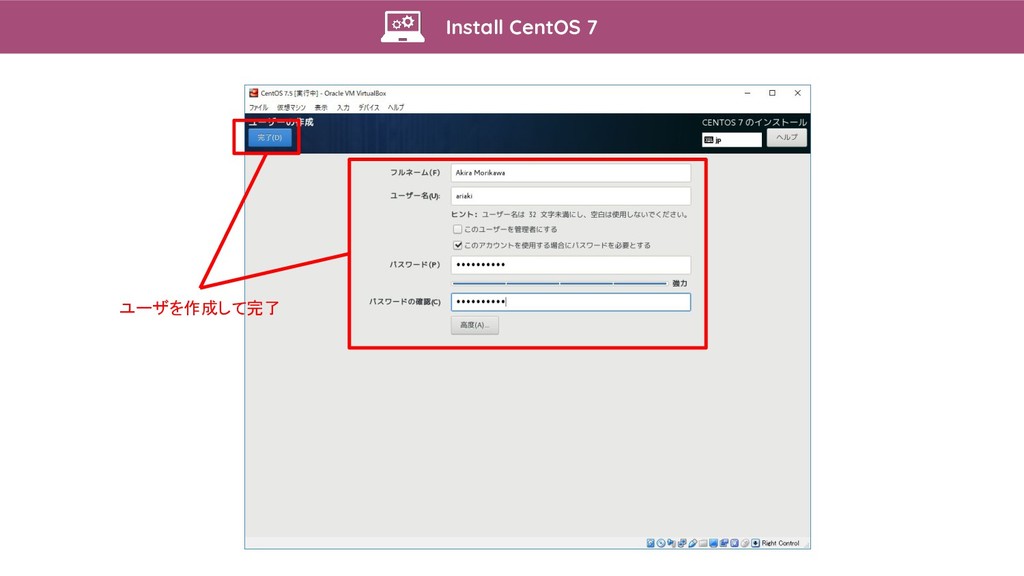
Install CentOS 7 ユーザを作成して完了
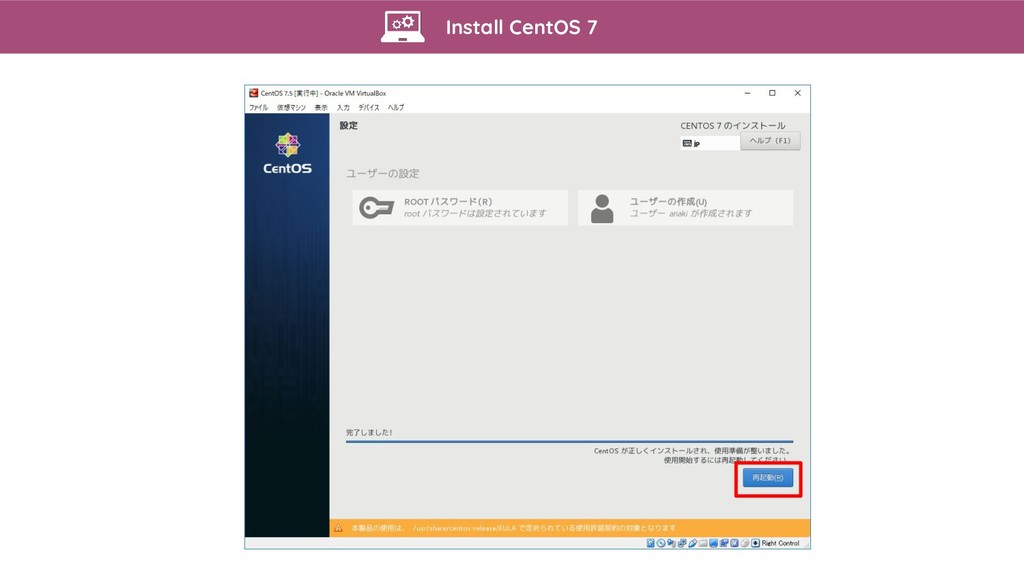
Install CentOS 7
Configure CentOS 7
Configure CentOS 7 以下を入力 • login: root • password: (パスワード)
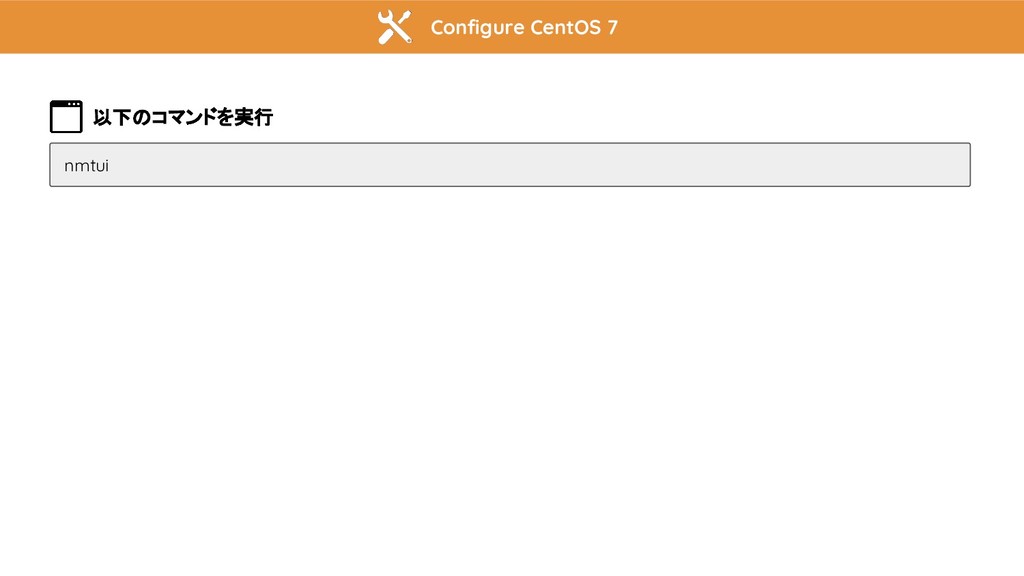
Configure CentOS 7 以下のコマンドを実行 nmtui
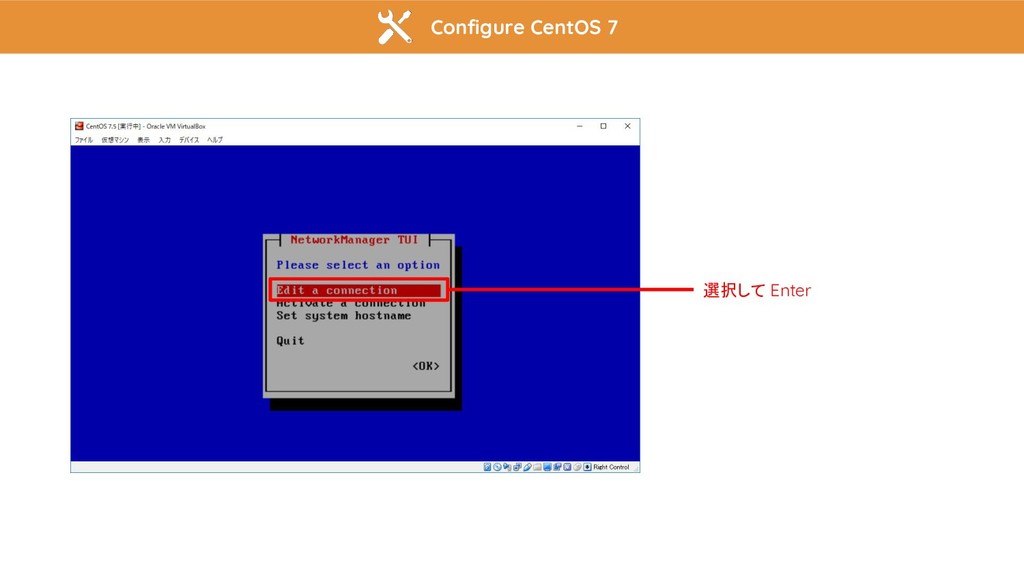
Configure CentOS 7 選択して Enter
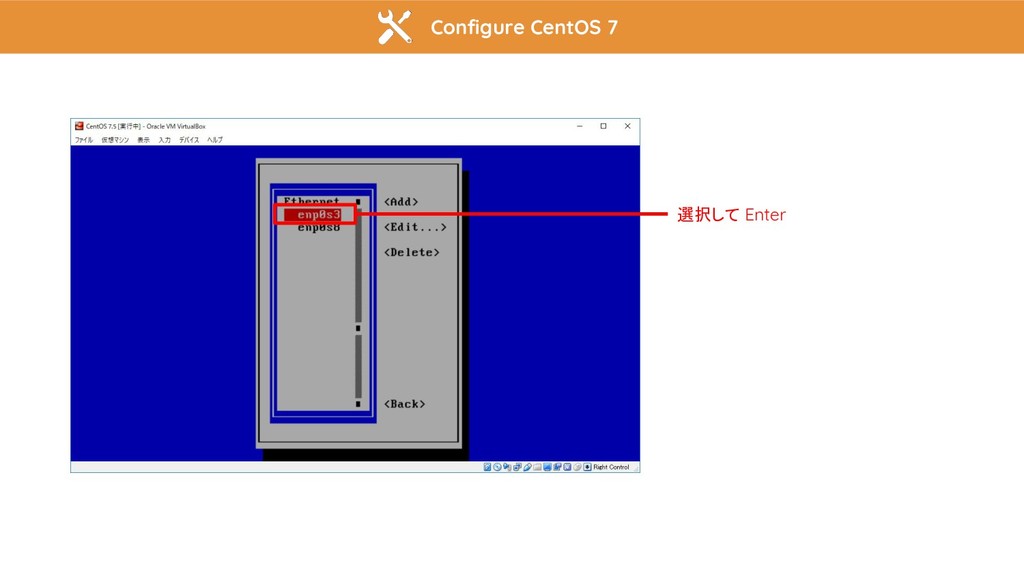
Configure CentOS 7 選択して Enter
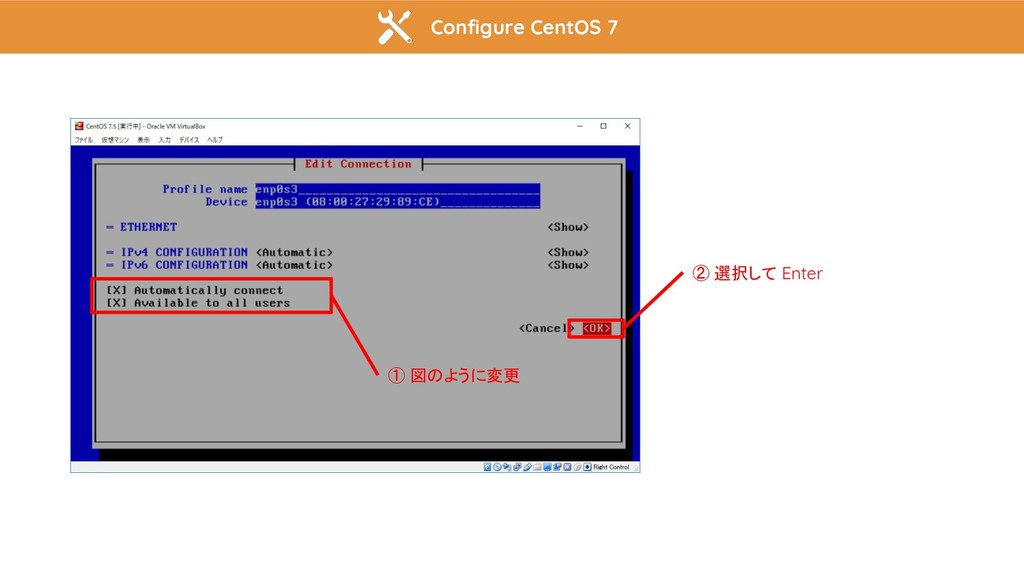
Configure CentOS 7 ① 図のように変更 ② 選択して Enter
Configure CentOS 7 選択して Enter
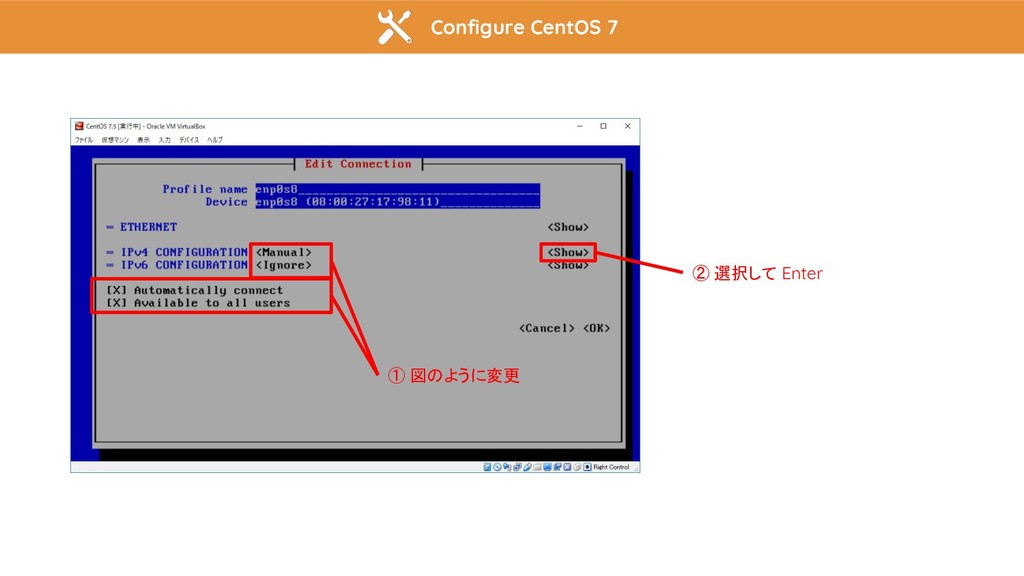
Configure CentOS 7 ① 図のように変更 ② 選択して Enter
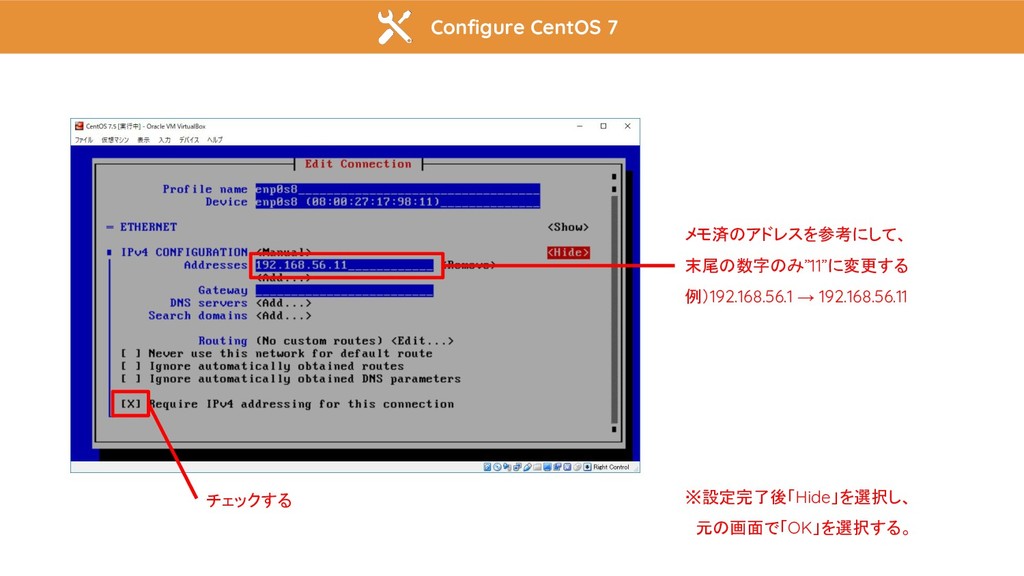
Configure CentOS 7 メモ済のアドレスを参考にして、 末尾の数字のみ”11”に変更する 例)192.168.56.1 → 192.168.56.11 チェックする ※設定完了後「Hide」を選択し、
元の画面で「OK」を選択する。
Configure CentOS 7 選択して Enter
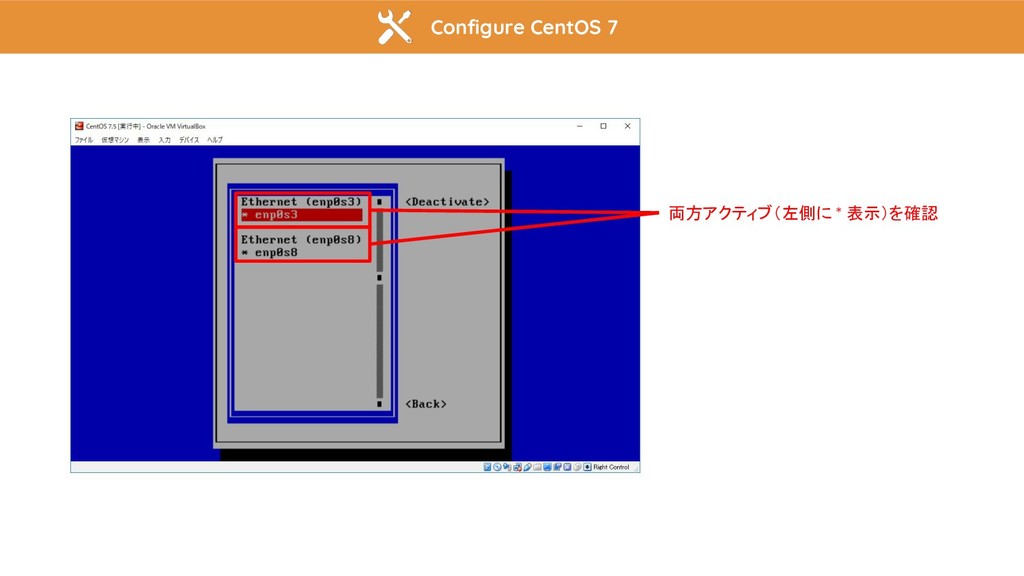
Configure CentOS 7 両方アクティブ(左側に * 表示)を確認
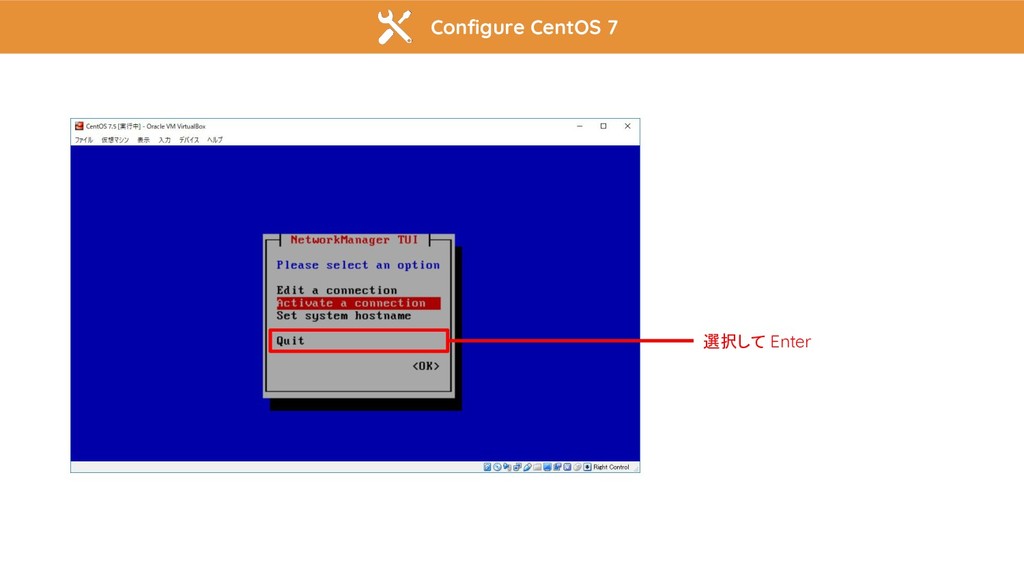
Configure CentOS 7 選択して Enter
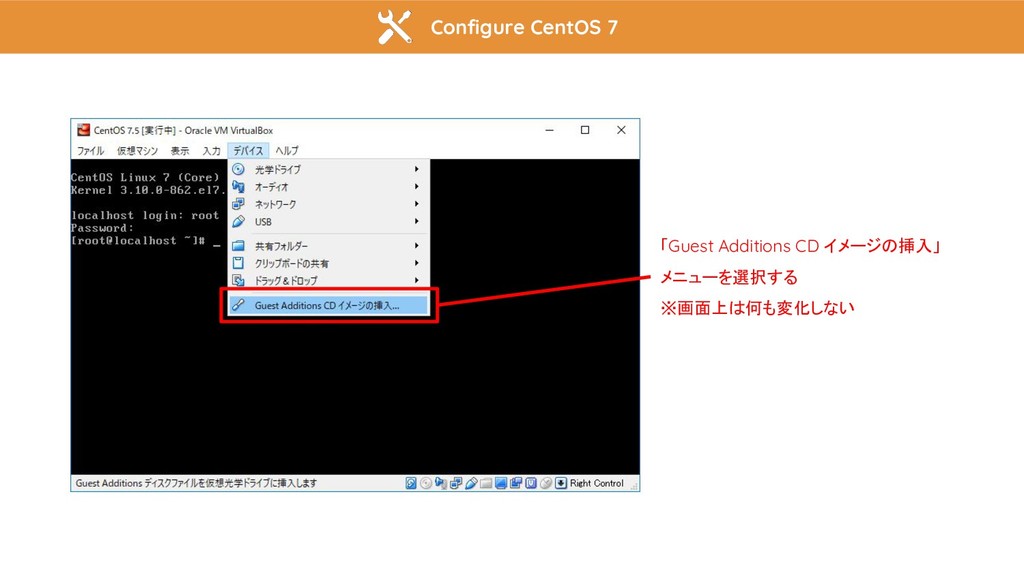
Configure CentOS 7 「Guest Additions CD イメージの挿入」 メニューを選択する ※画面上は何も変化しない
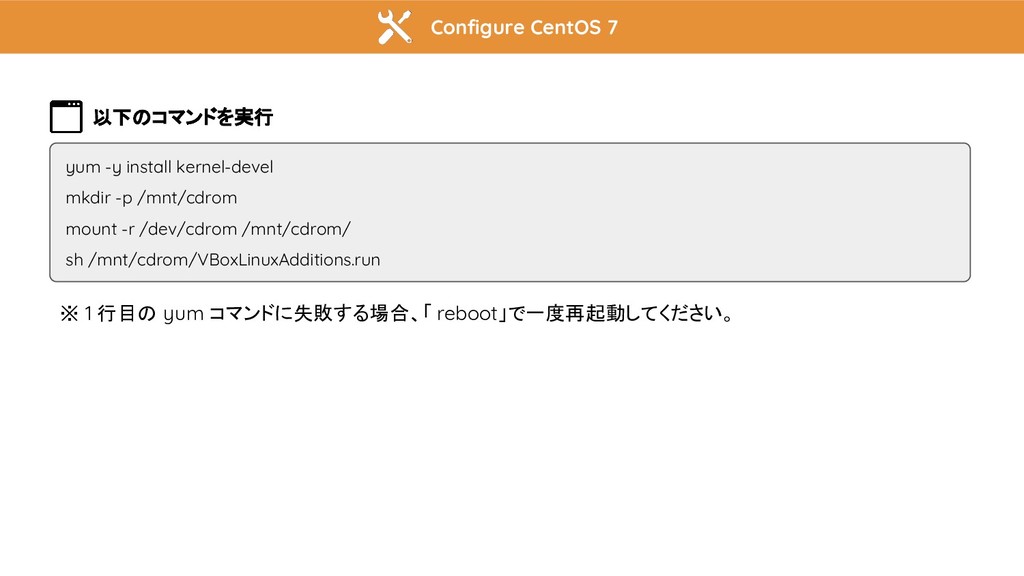
Configure CentOS 7 以下のコマンドを実行 yum -y install kernel-devel mkdir -p
/mnt/cdrom mount -r /dev/cdrom /mnt/cdrom/ sh /mnt/cdrom/VBoxLinuxAdditions.run ※ 1 行目の yum コマンドに失敗する場合、「 reboot」で一度再起動してください。
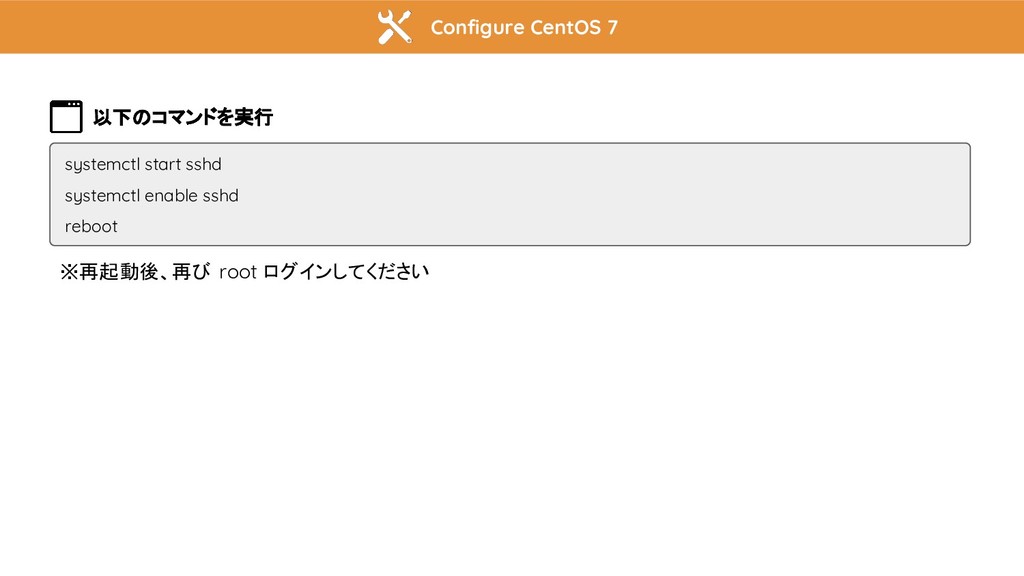
Configure CentOS 7 以下のコマンドを実行 systemctl start sshd systemctl enable sshd
reboot ※再起動後、再び root ログインしてください
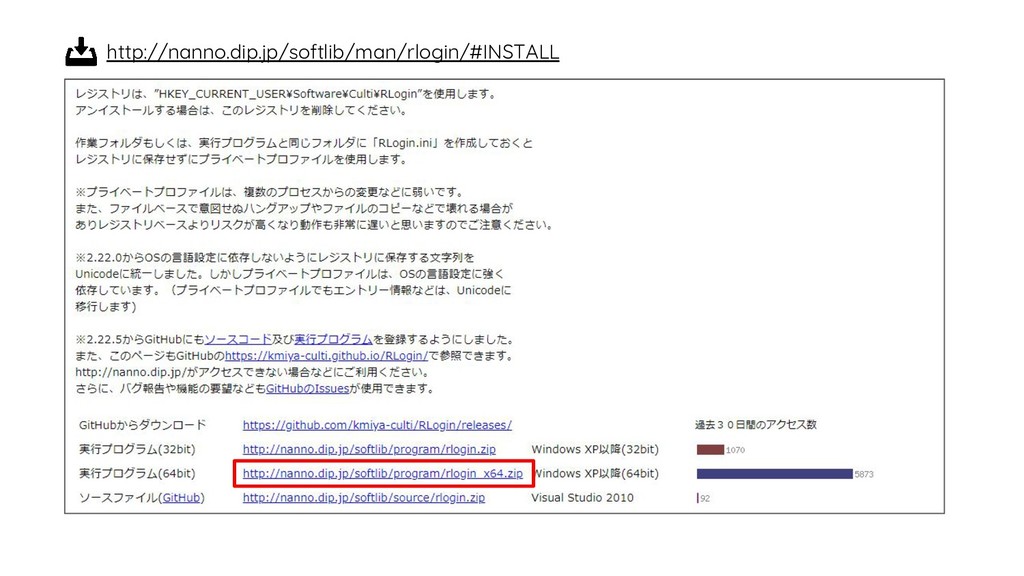
http://nanno.dip.jp/softlib/man/rlogin/#INSTALL
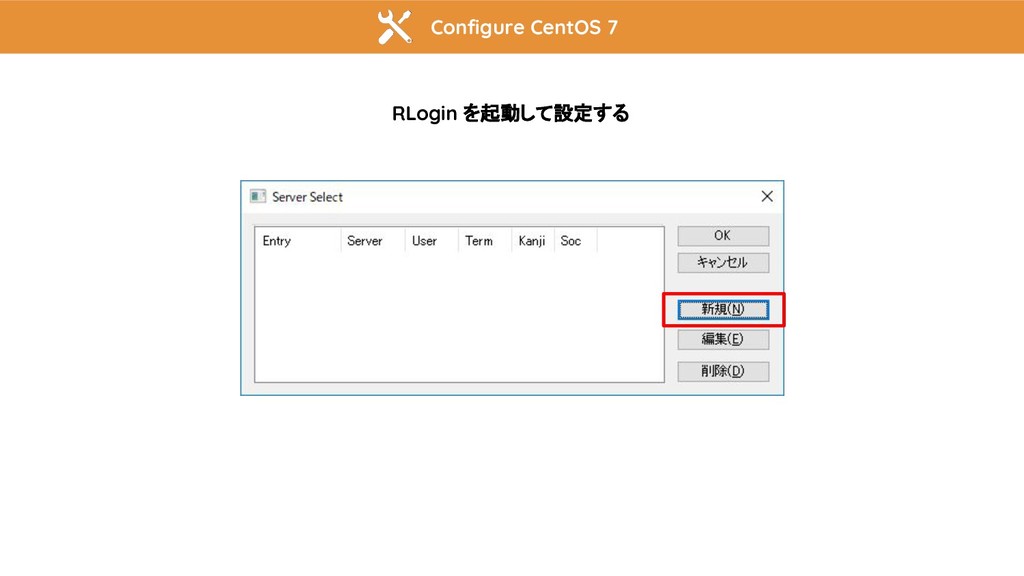
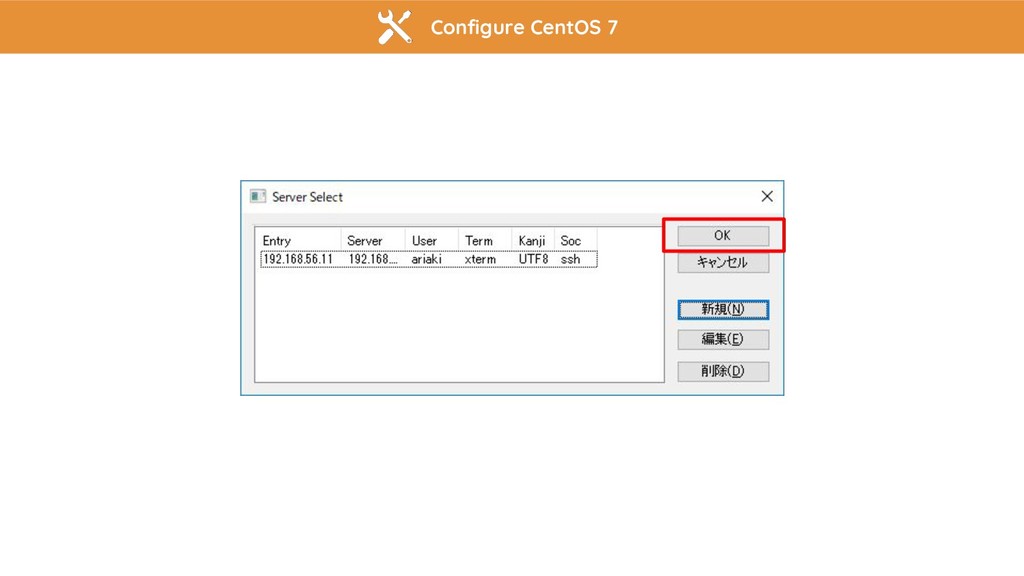
Configure CentOS 7 RLogin を起動して設定する
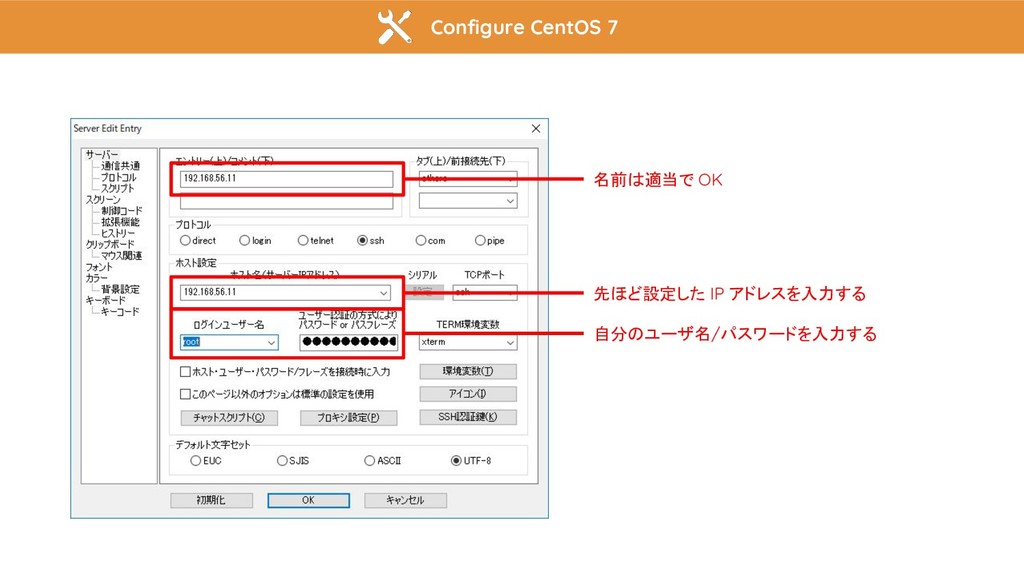
Configure CentOS 7 名前は適当で OK 先ほど設定した IP アドレスを入力する 自分のユーザ名/パスワードを入力する
Configure CentOS 7
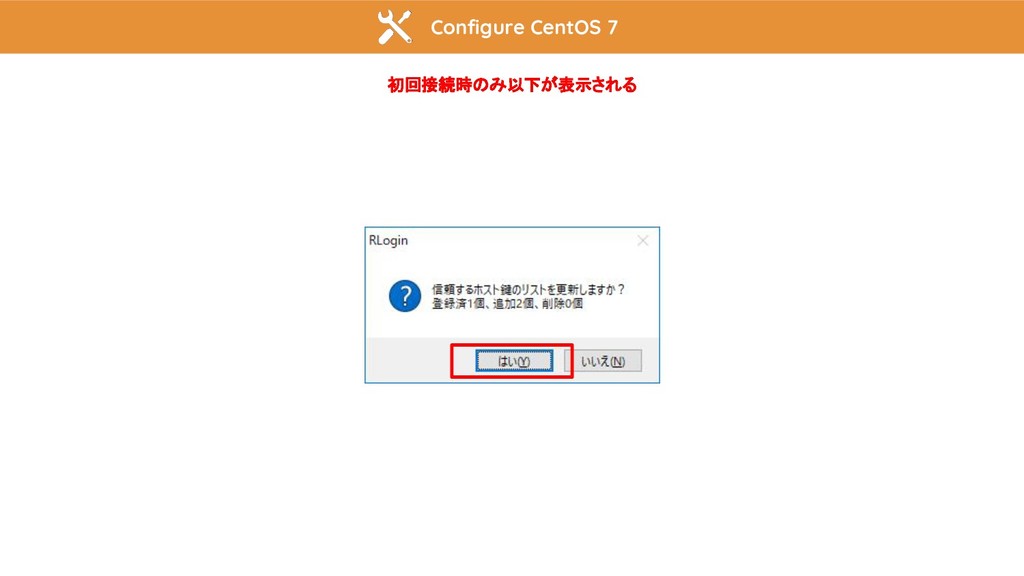
Configure CentOS 7 初回接続時のみ以下が表示される
Configure CentOS 7 初回接続時のみ以下が表示される
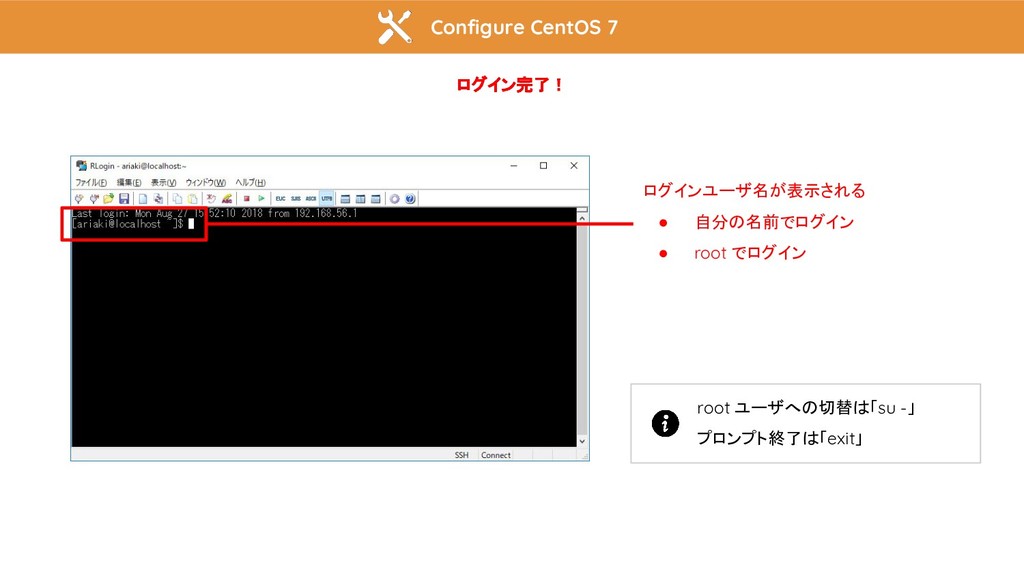
Configure CentOS 7 ログイン完了! ログインユーザ名が表示される • 自分の名前でログイン • root でログイン
root ユーザへの切替は「su -」 プロンプト終了は「exit」
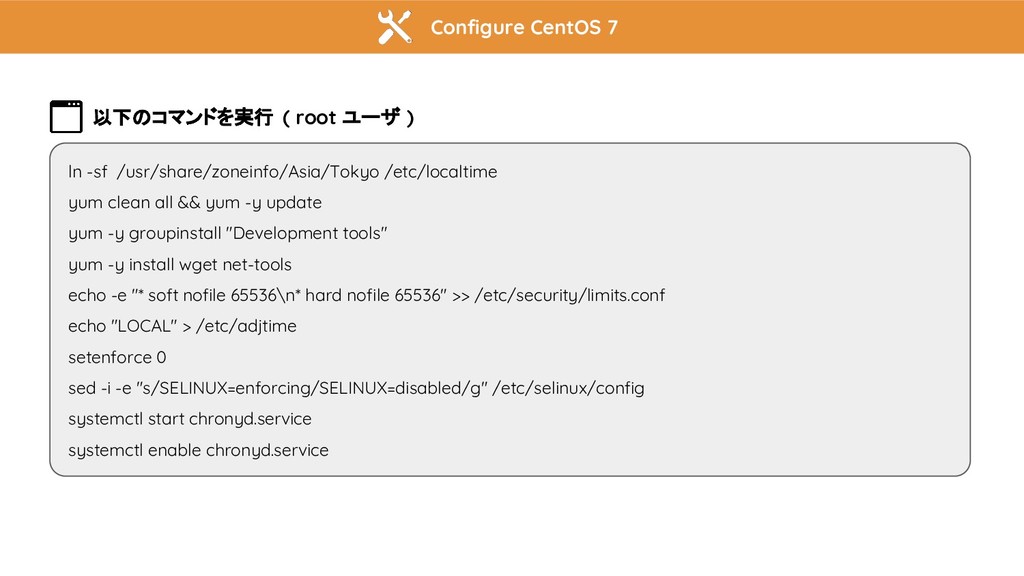
Configure CentOS 7 以下のコマンドを実行 ( root ユーザ ) ln -sf
/usr/share/zoneinfo/Asia/Tokyo /etc/localtime yum clean all && yum -y update yum -y groupinstall "Development tools" yum -y install wget net-tools echo -e "* soft nofile 65536\n* hard nofile 65536" >> /etc/security/limits.conf echo "LOCAL" > /etc/adjtime setenforce 0 sed -i -e "s/SELINUX=enforcing/SELINUX=disabled/g" /etc/selinux/config systemctl start chronyd.service systemctl enable chronyd.service
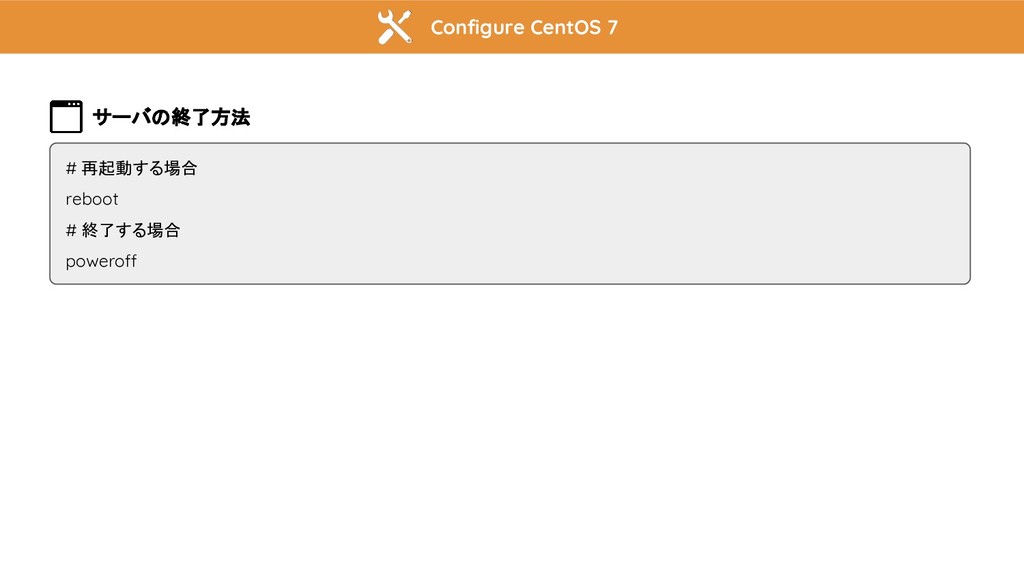
Configure CentOS 7 サーバの終了方法 # 再起動する場合 reboot # 終了する場合 poweroff
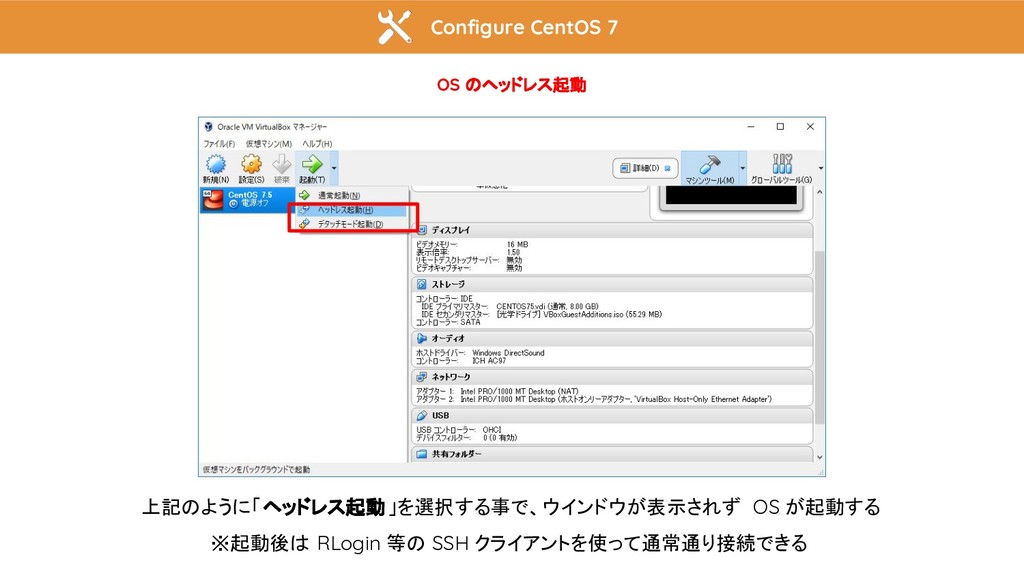
Configure CentOS 7 OS のヘッドレス起動 上記のように「ヘッドレス起動」を選択する事で、ウインドウが表示されず OS が起動する ※起動後は RLogin
等の SSH クライアントを使って通常通り接続できる
ariaki4dev Build Something Amazing written by