Upgrade to Pro
— share decks privately, control downloads, hide ads and more …
Speaker Deck
Features
Speaker Deck
PRO
Sign in
Sign up for free
Search
Search
アプリ開発の新たな選択肢が登場!Google社製Flutterのご紹介
Search
アシアル株式会社
June 24, 2019
Technology
770
0
Share
Embed
Copy iframe code
Copy JS code
Copy link
Start on current slide
アプリ開発の新たな選択肢が登場!Google社製Flutterのご紹介
2019年6月25日(火)開催のアシアル技術セミナーでの発表資料
アシアル株式会社
June 24, 2019
More Decks by アシアル株式会社
See All by アシアル株式会社
大学オリジナルのデジタル学生証アプリ「MyCampus」のご紹介資料
asial_corp
0
220
第2回全国商業高校Webアプリコンテスト説明会(2024年3月版)
asial_corp
0
260
第1回全国商業高校Webアプリコンテスト総括
asial_corp
0
680
6ヶ月間の授業でここまでできた。コンテスト参加に向けての授業内容と生徒の様子を紹介!
asial_corp
0
580
アプリ開発を目指した授業づくりについて
asial_corp
0
590
train20231223_mainslide.pdf
asial_corp
0
720
Monaca Education 活用事例セミナー:「Monacaでゲームプログラミング~作品制作事例~」
asial_corp
0
1.5k
おみくじアプリのスライド_20230719版
asial_corp
0
790
2023年度第二弾無料導入説明会
asial_corp
0
570
Other Decks in Technology
See All in Technology
論語・武士道・産業革命から見る かわるもの、かわらないもの
ichimichi
5
430
仕様駆動開発、導入半年。「本当に速くなってるの?」にデータで答える / AICon2026_hirakawa
rakus_dev
0
330
OPENLOGI Company Profile for engineer
hr01
1
75k
AI時代におけるテストの基礎の再定義 / Rethinking the Fundamentals of Testing in the AI Era
mineo_matsuya
14
5.2k
AI時代のYAGNI:「爆速で無駄になった機能」からの学び / 20260720 Naoki Takahashi
shift_evolve
PRO
3
540
クラウドを使う側から、作る側へ / 大吉祥寺.pm 2026前夜祭
fujiwara3
6
1.3k
kaonavi Tech Night#1
kaonavi
0
160
AI_Dev_Day_製造業領域でのAI活用から見た活用の罠と成功に導く実践知.pdf
kintotechdev
0
180
大 AI 時代におけるC# の事情 ~ぶっちゃけトークを交えながら~
nenonaninu
1
160
Alphaモジュール使っていいのかい!?いけないのかい!?どっちなんだいっ!?
watany
1
320
JAWS_ICEBERG_BASECAMP
iqbocchi
2
110
そのドキュメント、自動化しませんか?
yuksew
1
420
Featured
See All Featured
The Web Performance Landscape in 2024 [PerfNow 2024]
tammyeverts
12
1.2k
技術選定の審美眼(2025年版) / Understanding the Spiral of Technologies 2025 edition
twada
PRO
118
120k
From Legacy to Launchpad: Building Startup-Ready Communities
dugsong
0
270
実際に使うSQLの書き方 徹底解説 / pgcon21j-tutorial
soudai
PRO
201
75k
Build your cross-platform service in a week with App Engine
jlugia
234
18k
GraphQLの誤解/rethinking-graphql
sonatard
75
12k
Data-driven link building: lessons from a $708K investment (BrightonSEO talk)
szymonslowik
1
1.2k
Organizational Design Perspectives: An Ontology of Organizational Design Elements
kimpetersen
PRO
1
770
Marketing Yourself as an Engineer | Alaka | Gurzu
gurzu
0
260
Improving Core Web Vitals using Speculation Rules API
sergeychernyshev
21
1.5k
What's in a price? How to price your products and services
michaelherold
247
13k
The Invisible Side of Design
smashingmag
301
52k
Transcript
アプリ開発の新たな選択肢が登場! Google社製Flutterのご紹介 HIROAKI TSUTSUMI 堤 啓彰 <
[email protected]
> アシアル株式会社
堤 啓彰 Tsutsumi Hiroaki エンジニア(主にフロントエンド) 業務で使ったことのある⾔語:JavaScript PHP C# 多少は書ける⾔語:Java Swift
ここ1年ほどは、Cordovaでのアプリ開発 ※ Flutterを業務で使った経験はなし
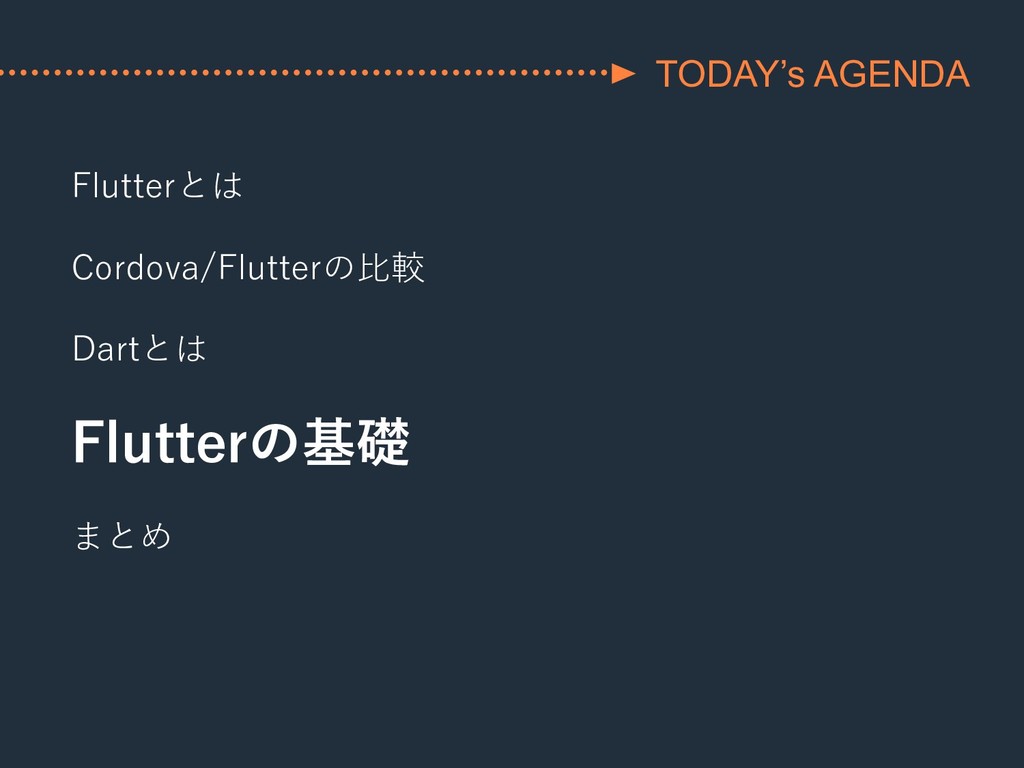
Flutterとは Cordova/Flutterの⽐較 Dartとは Flutterの基礎 まとめ TODAY’s AGENDA
Flutterとは Cordova/Flutterの⽐較 Dartとは Flutterの基礎 まとめ TODAY’s AGENDA
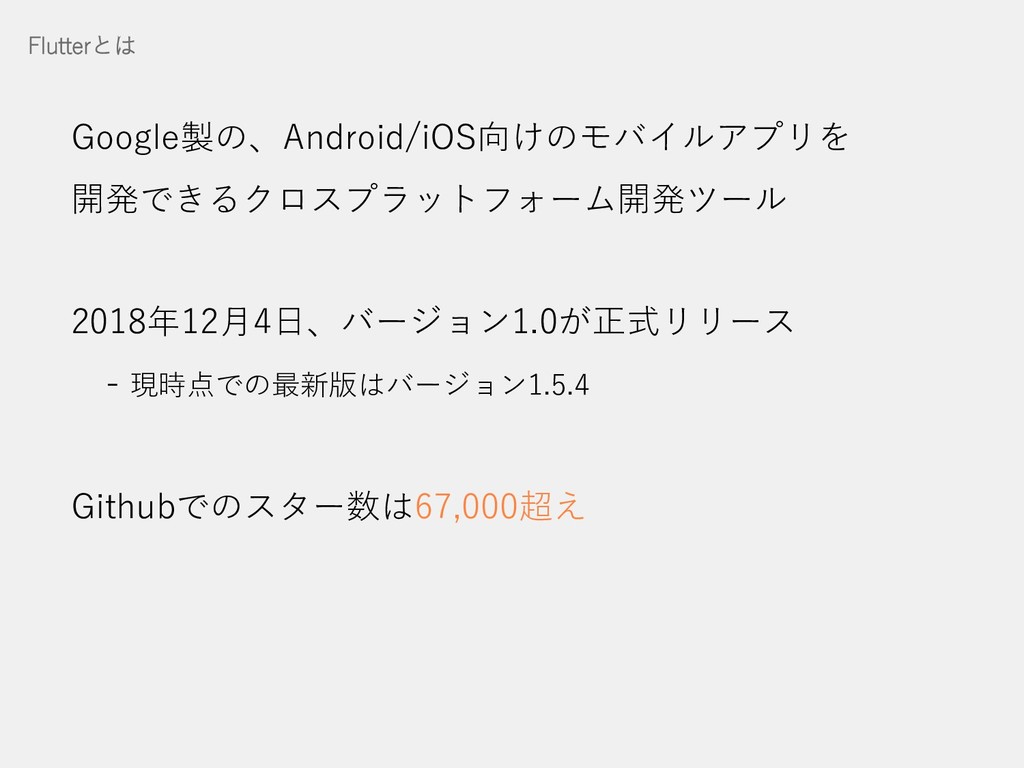
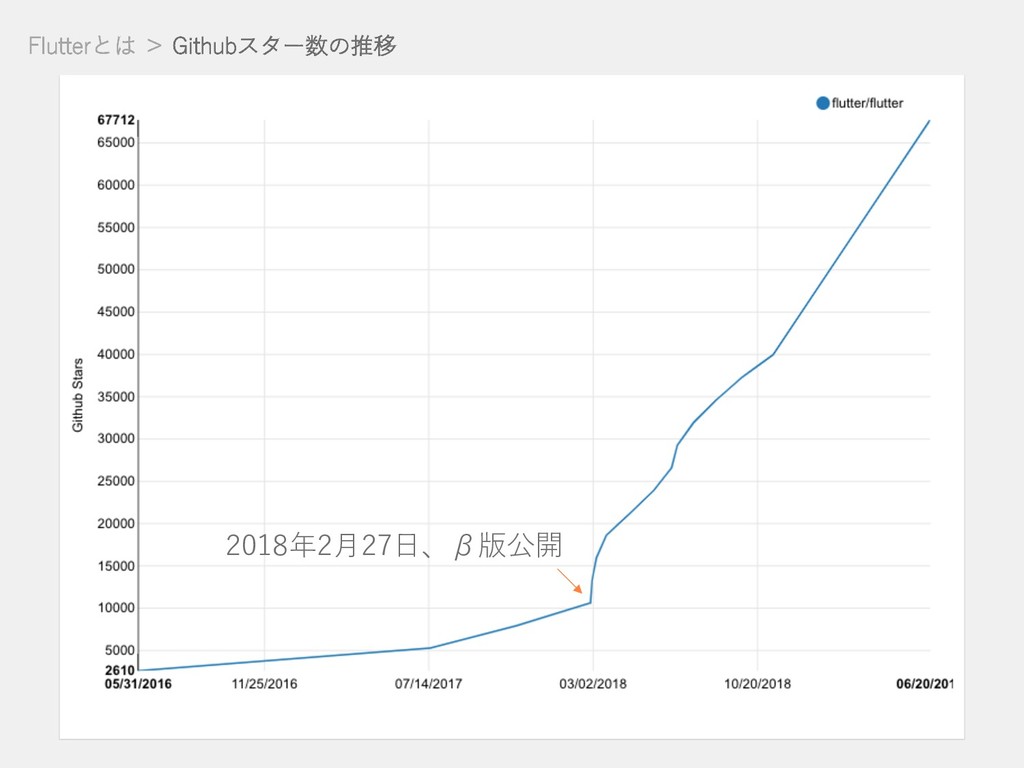
Flutterとは Google製の、Android/iOS向けのモバイルアプリを 開発できるクロスプラットフォーム開発ツール 2018年12⽉4⽇、バージョン1.0が正式リリース - 現時点での最新版はバージョン1.5.4 Githubでのスター数は67,000超え
Flutterとは > Githubスター数の推移 2018年2⽉27⽇、β版公開
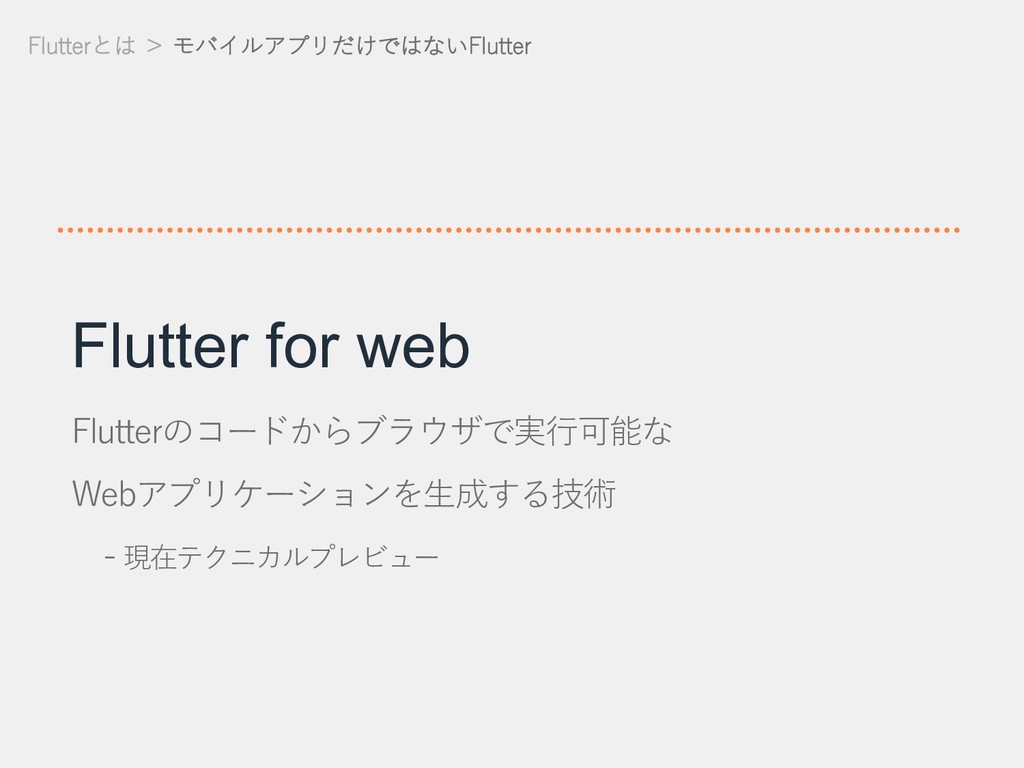
Flutterとは > モバイルアプリだけではないFlutter Flutter for web Flutterのコードからブラウザで実⾏可能な Webアプリケーションを⽣成する技術 - 現在テクニカルプレビュー
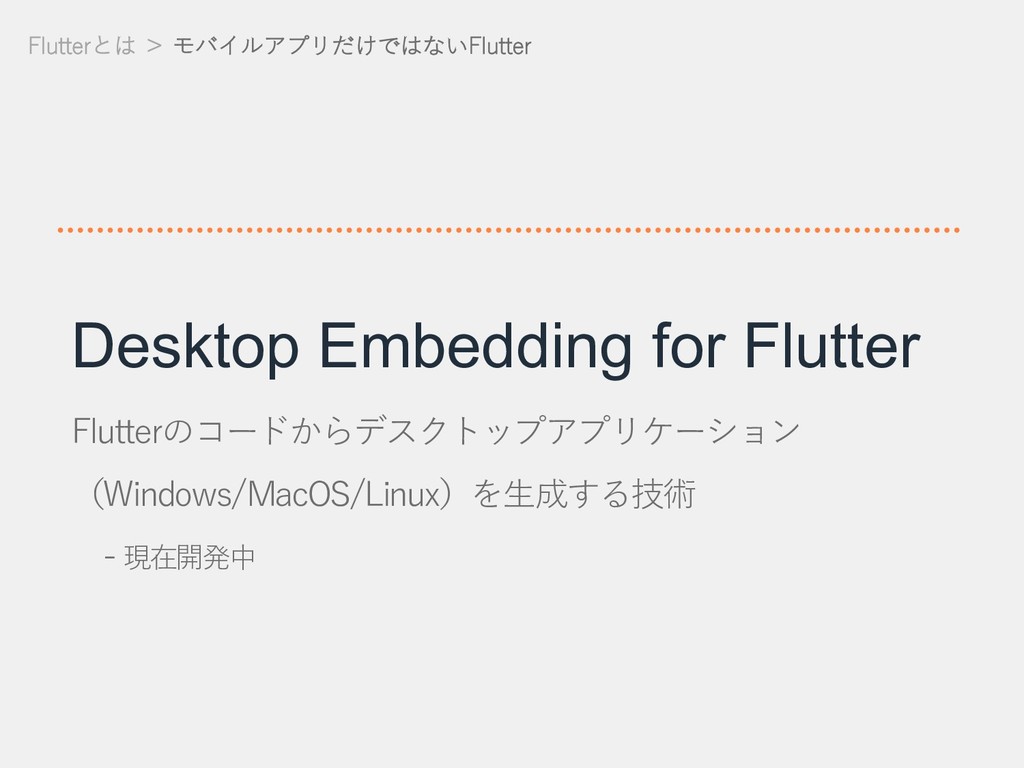
Flutterとは > モバイルアプリだけではないFlutter Desktop Embedding for Flutter Flutterのコードからデスクトップアプリケーション (Windows/MacOS/Linux)を⽣成する技術 -
現在開発中
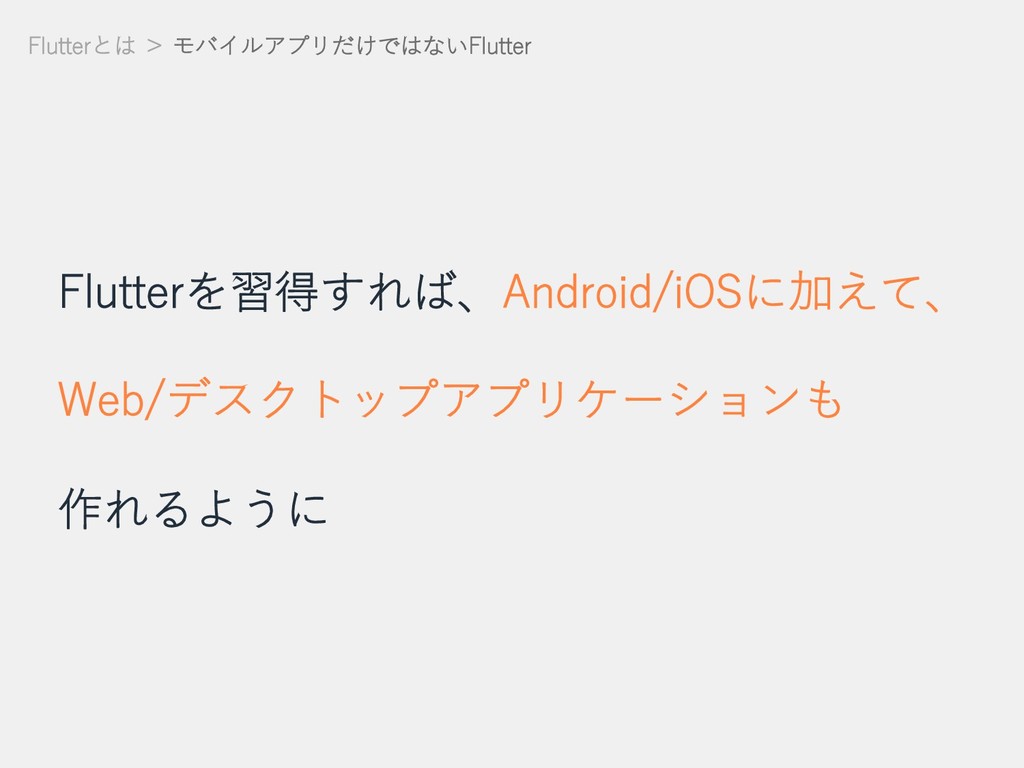
Flutterとは > モバイルアプリだけではないFlutter Flutterを習得すれば、Android/iOSに加えて、 Web/デスクトップアプリケーションも 作れるように
Flutterとは Cordova/Flutterの⽐較 Dartとは Flutterの基礎 まとめ TODAY’s AGENDA
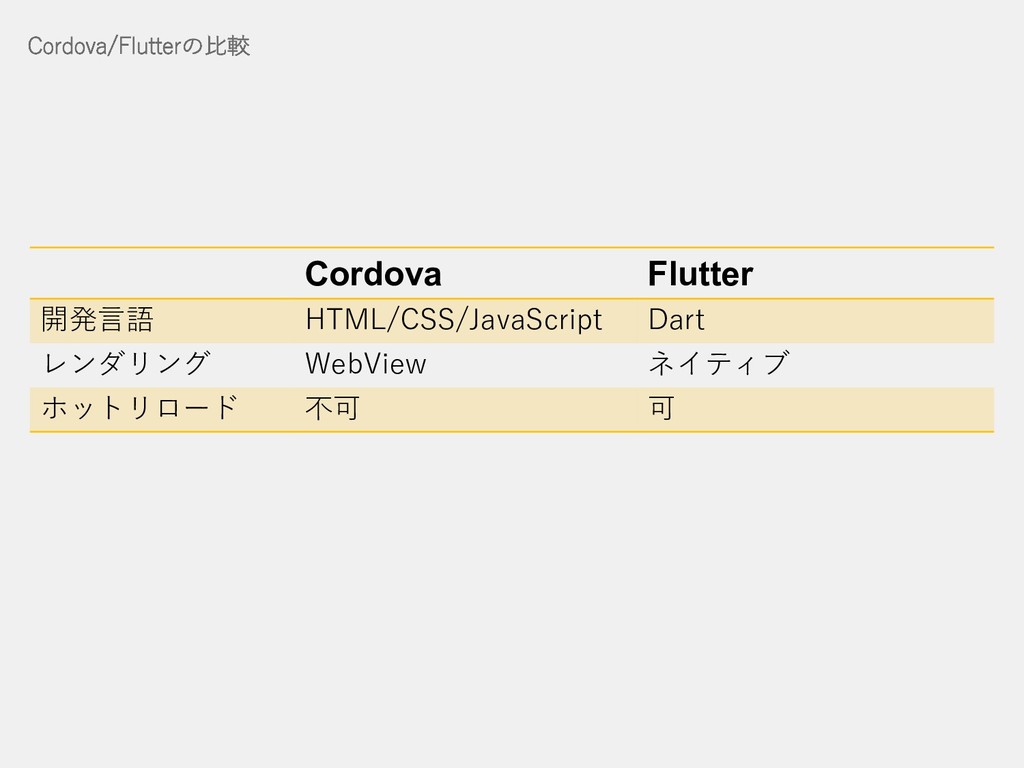
Cordova/Flutterの⽐較 Cordova Flutter 開発⾔語 HTML/CSS/JavaScript Dart レンダリング WebView ネイティブ ホットリロード
不可 可
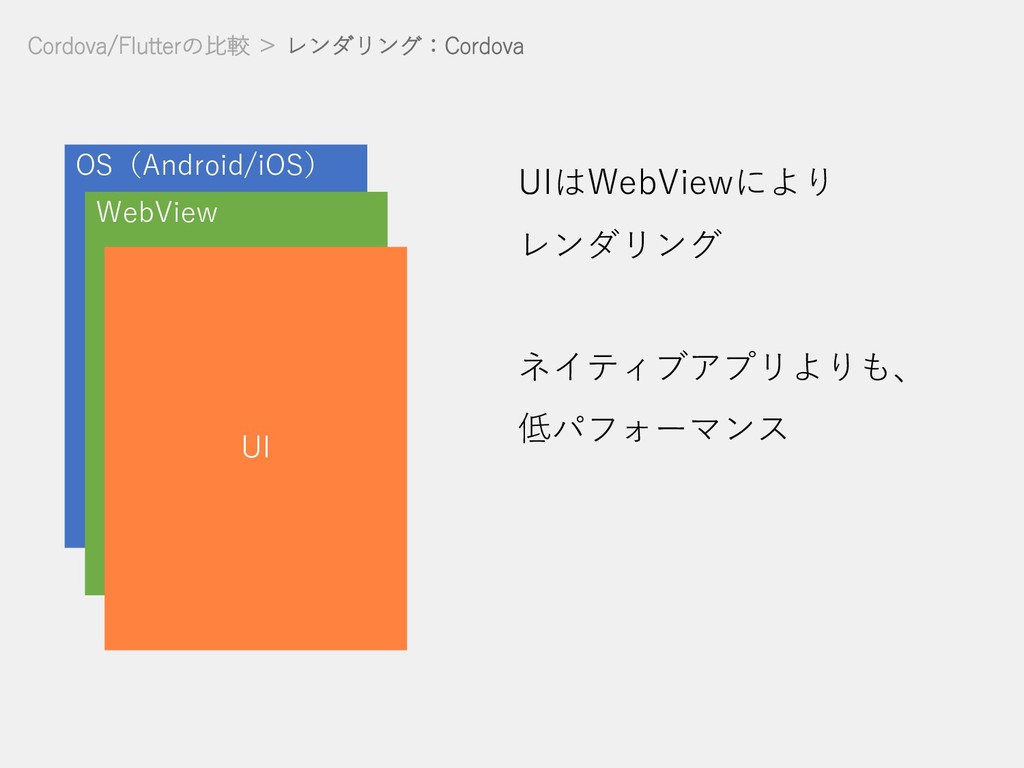
Cordova/Flutterの⽐較 > レンダリング:Cordova OS(Android/iOS) WebView UI UIはWebViewにより レンダリング ネイティブアプリよりも、 低パフォーマンス
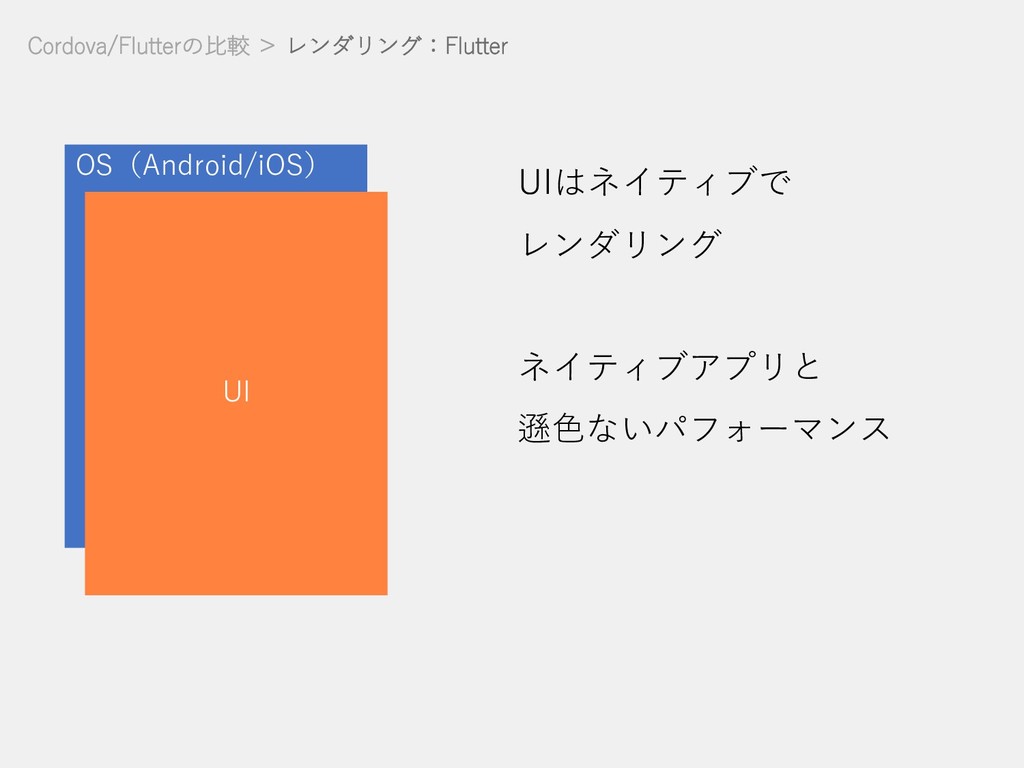
Cordova/Flutterの⽐較 > レンダリング:Flutter OS(Android/iOS) UI UIはネイティブで レンダリング ネイティブアプリと 遜⾊ないパフォーマンス
Cordova/Flutterの⽐較 > ホットリロード ホットリロード ソースコードの変更を、 アプリを再ビルドせず、状態を維持したまま反映 - 修正が(基本的に)1秒未満で反映 - フルリロードしても10秒程度
Cordovaでは現状できない(ブラウザでは可能)
Cordova/Flutterの⽐較 > ホットリロード Demo
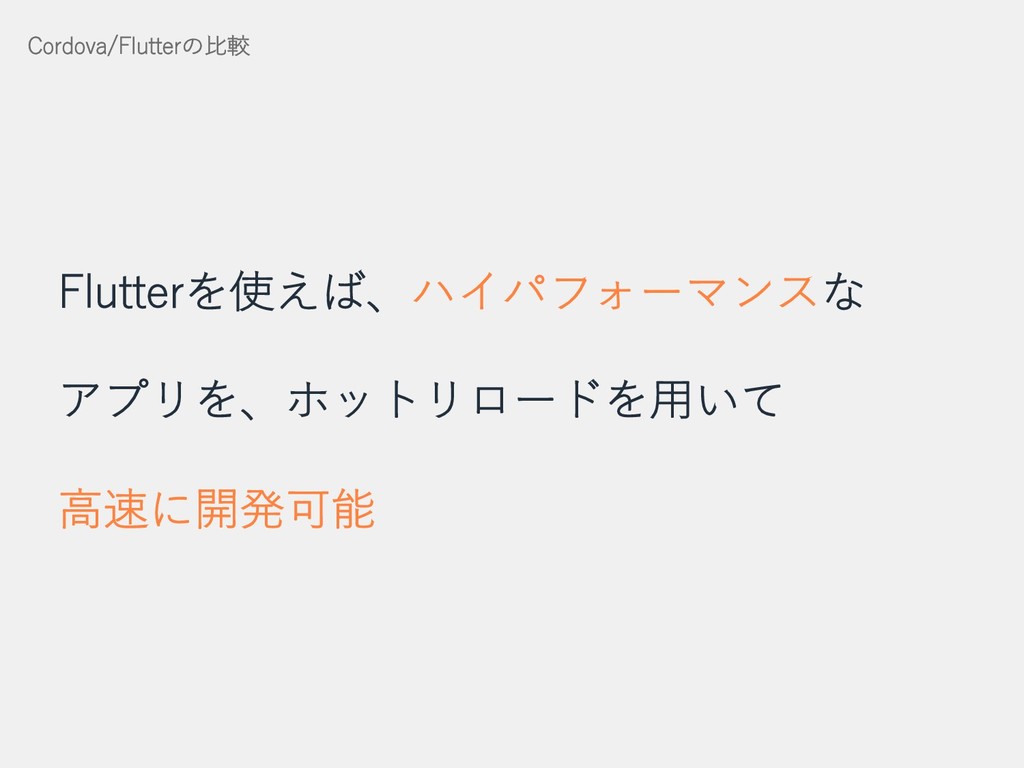
Cordova/Flutterの⽐較 Flutterを使えば、ハイパフォーマンスな アプリを、ホットリロードを⽤いて ⾼速に開発可能
Flutterとは Cordova/Flutterの⽐較 Dartとは Flutterの基礎 まとめ TODAY’s AGENDA
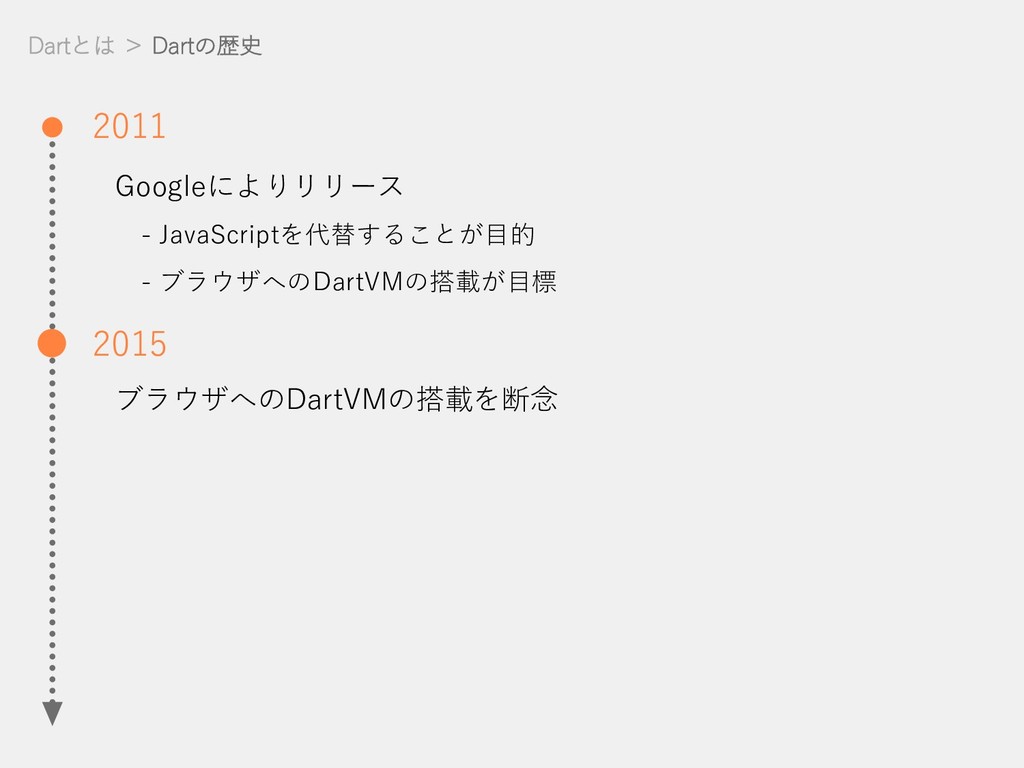
Dartとは > Dartの歴史 Googleによりリリース - JavaScriptを代替することが⽬的 - ブラウザへのDartVMの搭載が⽬標 2011
Dartとは > Dartの歴史 Googleによりリリース - JavaScriptを代替することが⽬的 - ブラウザへのDartVMの搭載が⽬標 ブラウザへのDartVMの搭載を断念 2011
2015
Dartとは > Dartの歴史 Googleによりリリース - JavaScriptを代替することが⽬的 - ブラウザへのDartVMの搭載が⽬標 ブラウザへのDartVMの搭載を断念 Googleのフロントエンド開発の標準⾔語としてTypeScriptが採⽤
2011 2015 2017
Dartとは > Dartの歴史 Googleによりリリース - JavaScriptを代替することが⽬的 - ブラウザへのDartVMの搭載が⽬標 2011 2015
ブラウザへのDartVMの搭載を断念 2017 Googleのフロントエンド開発の標準⾔語としてTypeScriptが採⽤ 現在 Flutterの普及とともに、再び注⽬を集める
Dartとは > Dartの特徴 Dartの特徴 • オブジェクト指向 • 静的型付け
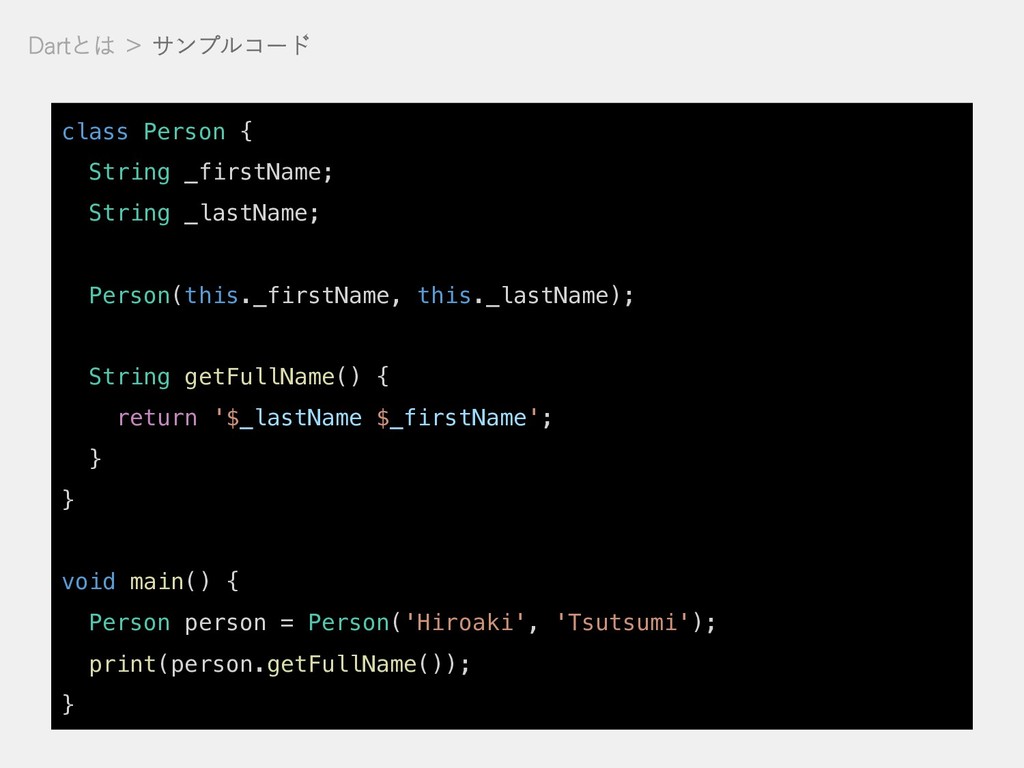
Dartとは > サンプルコード class Person { String _firstName; String _lastName;
Person(this._firstName, this._lastName); String getFullName() { return '$_lastName $_firstName'; } } void main() { Person person = Person('Hiroaki', 'Tsutsumi'); print(person.getFullName()); }
Dartとは > Dartを使ってみた所感 所感 • くせがなく、書きやすい • オブジェクト指向を理解していれば、習得は⽤意 • Javaによく似ており、Javaを触ったことがあれば
すぐ馴染める
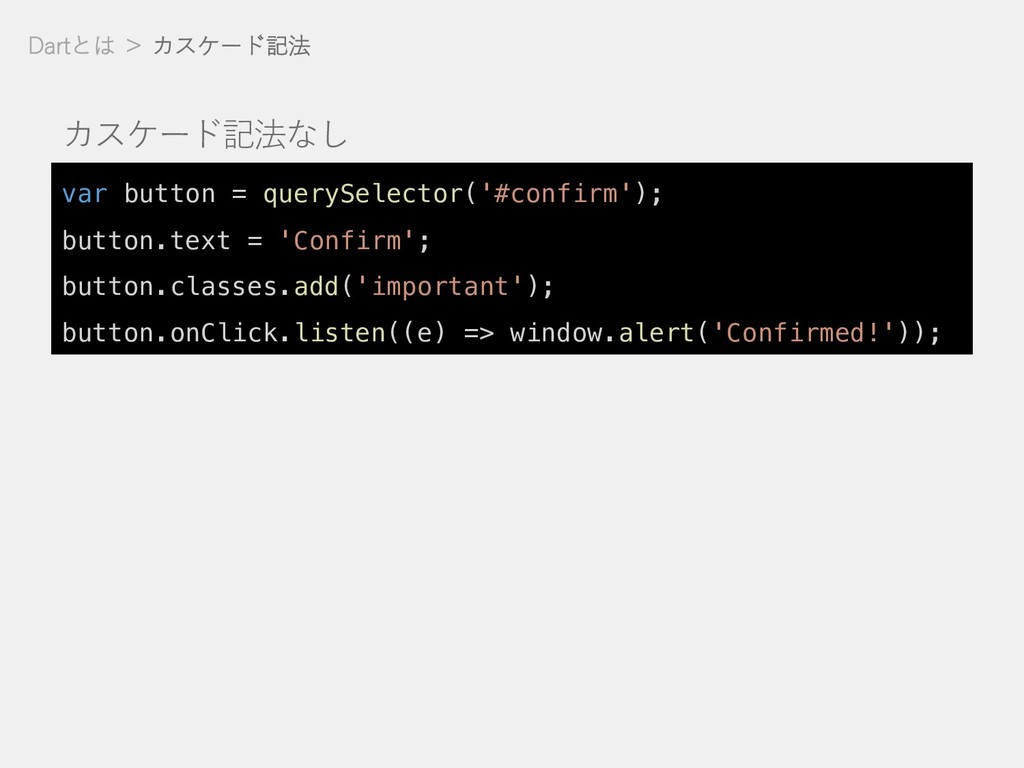
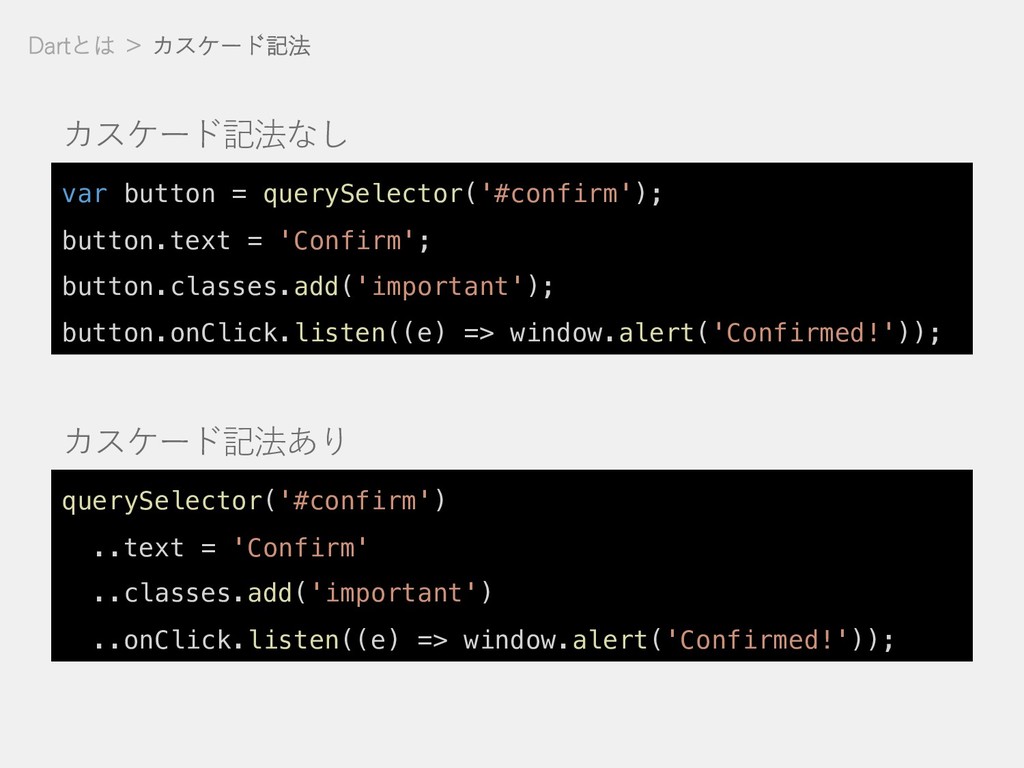
Dartとは > カスケード記法 カスケード記法 • 同⼀オブジェクトに対する操作を、 戻り値がなくても連続して記述できる記法 • 「..」(ドット2つ)で操作を連結して記述
Dartとは > カスケード記法 var button = querySelector('#confirm'); button.text = 'Confirm';
button.classes.add('important'); button.onClick.listen((e) => window.alert('Confirmed!')); カスケード記法なし
Dartとは > カスケード記法 var button = querySelector('#confirm'); button.text = 'Confirm';
button.classes.add('important'); button.onClick.listen((e) => window.alert('Confirmed!')); カスケード記法なし querySelector('#confirm') ..text = 'Confirm' ..classes.add('important') ..onClick.listen((e) => window.alert('Confirmed!')); カスケード記法あり
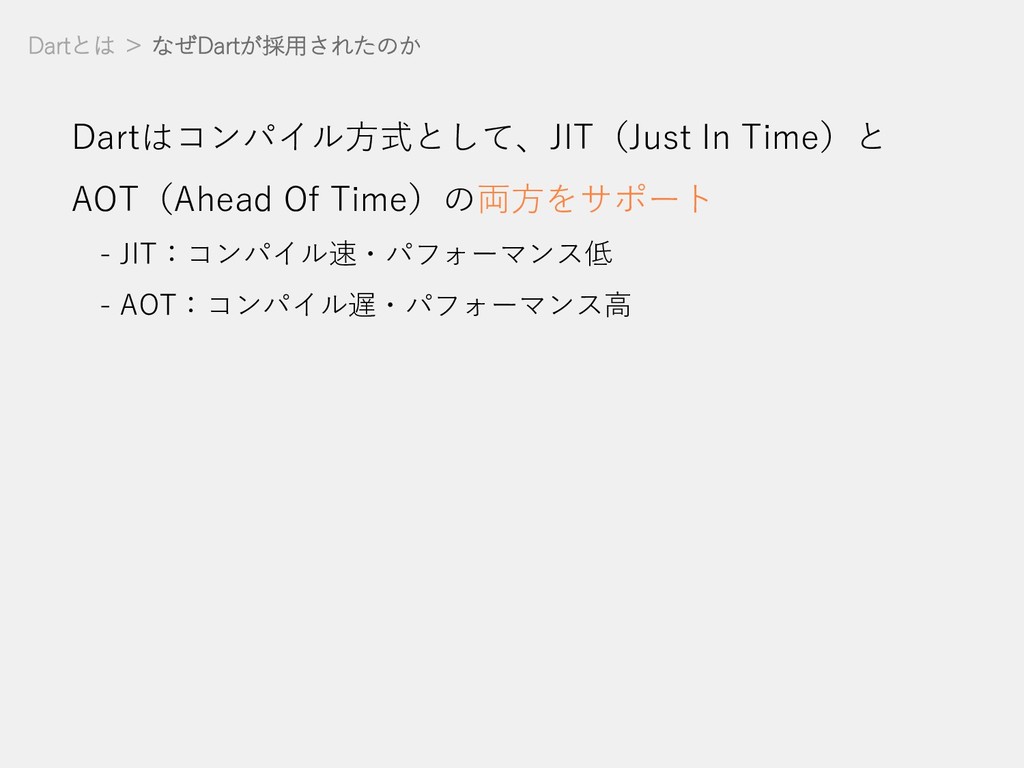
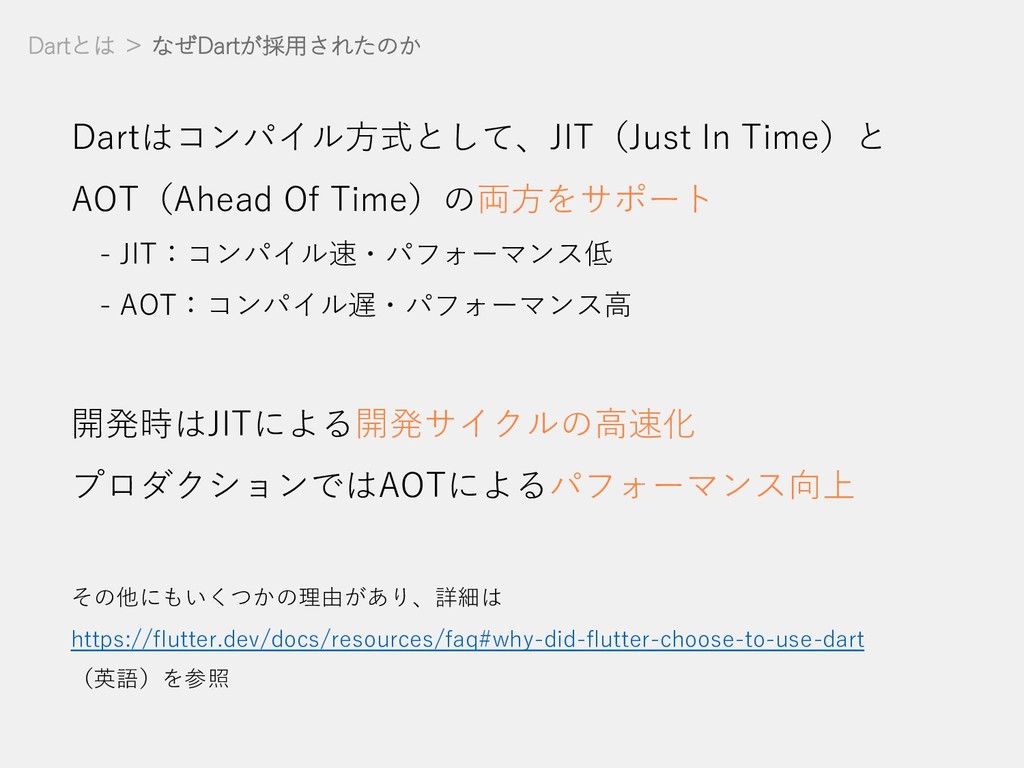
Dartとは > なぜDartが採⽤されたのか Dartはコンパイル⽅式として、JIT(Just In Time)と AOT(Ahead Of Time)の両⽅をサポート -
JIT:コンパイル速・パフォーマンス低 - AOT:コンパイル遅・パフォーマンス⾼
Dartとは > なぜDartが採⽤されたのか Dartはコンパイル⽅式として、JIT(Just In Time)と AOT(Ahead Of Time)の両⽅をサポート -
JIT:コンパイル速・パフォーマンス低 - AOT:コンパイル遅・パフォーマンス⾼ 開発時はJITによる開発サイクルの⾼速化 プロダクションではAOTによるパフォーマンス向上 その他にもいくつかの理由があり、詳細は https://flutter.dev/docs/resources/faq#why-did-flutter-choose-to-use-dart (英語)を参照
Flutterとは Cordova/Flutterの⽐較 Dartとは Flutterの基礎 まとめ TODAY’s AGENDA
Flutterの基礎 すべてがWidget
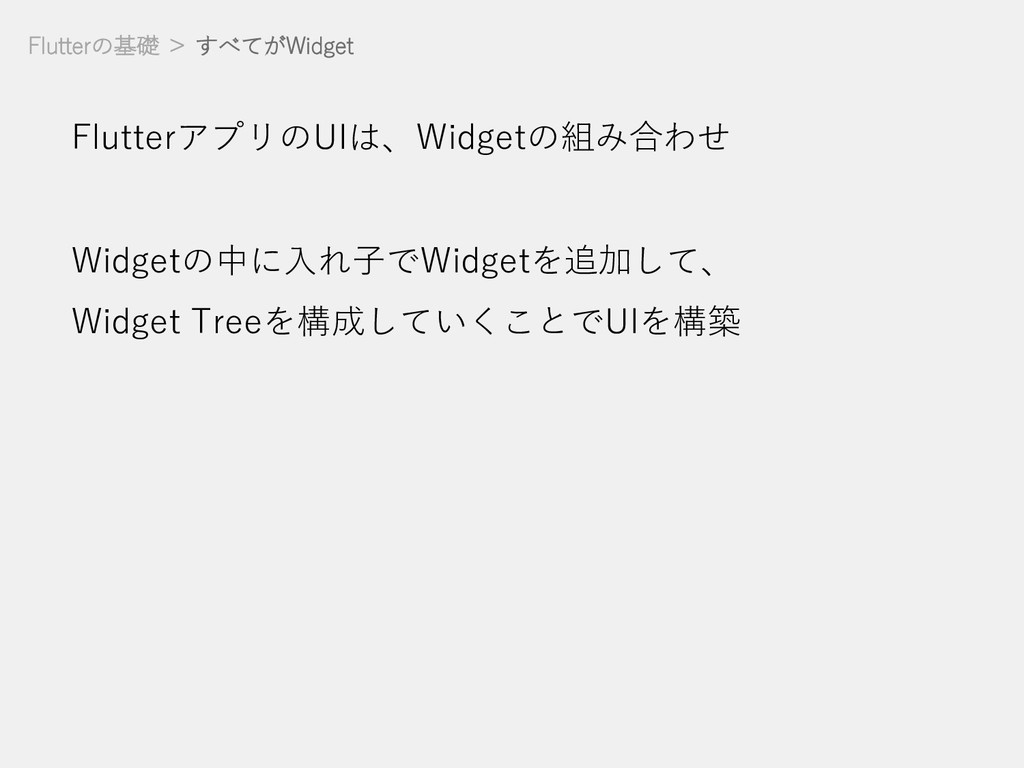
Flutterの基礎 > すべてがWidget FlutterアプリのUIは、Widgetの組み合わせ Widgetの中に⼊れ⼦でWidgetを追加して、 Widget Treeを構成していくことでUIを構築
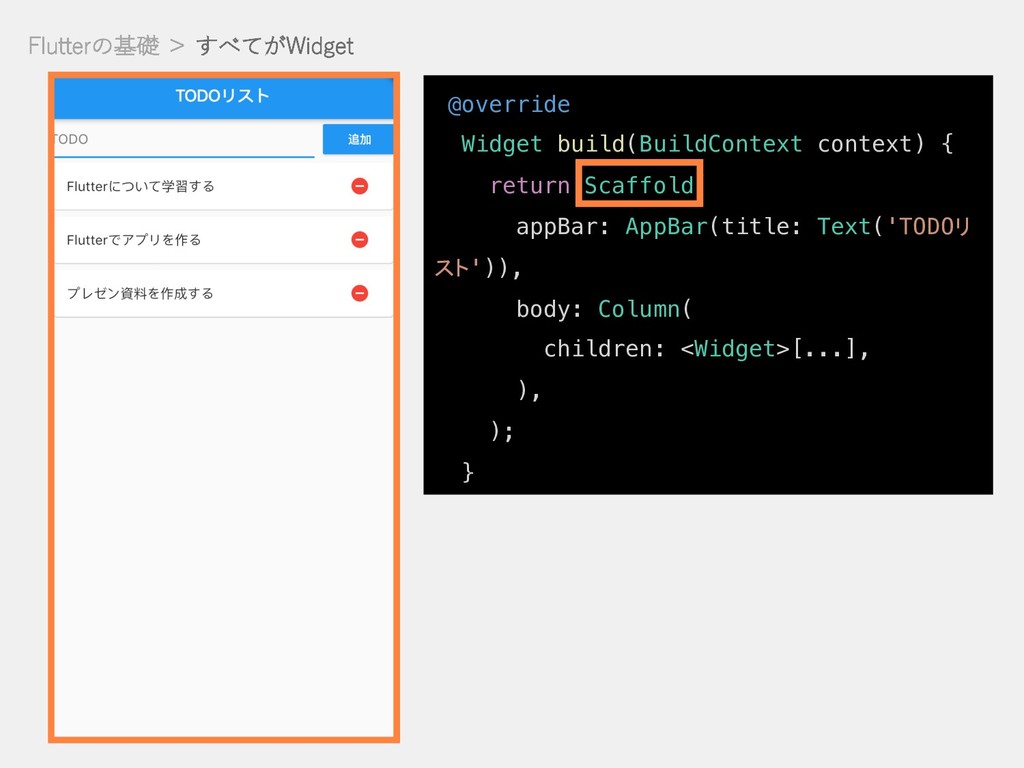
Flutterの基礎 > すべてがWidget @override Widget build(BuildContext context) { return Scaffold(
appBar: AppBar(title: Text('TODOリ スト')), body: Column( children: <Widget>[...], ), ); }
Flutterの基礎 > すべてがWidget @override Widget build(BuildContext context) { return Scaffold(
appBar: AppBar(title: Text('TODOリ スト')), body: Column( children: <Widget>[...], ), ); }
@override Widget build(BuildContext context) { return Scaffold( ..., body: Column(
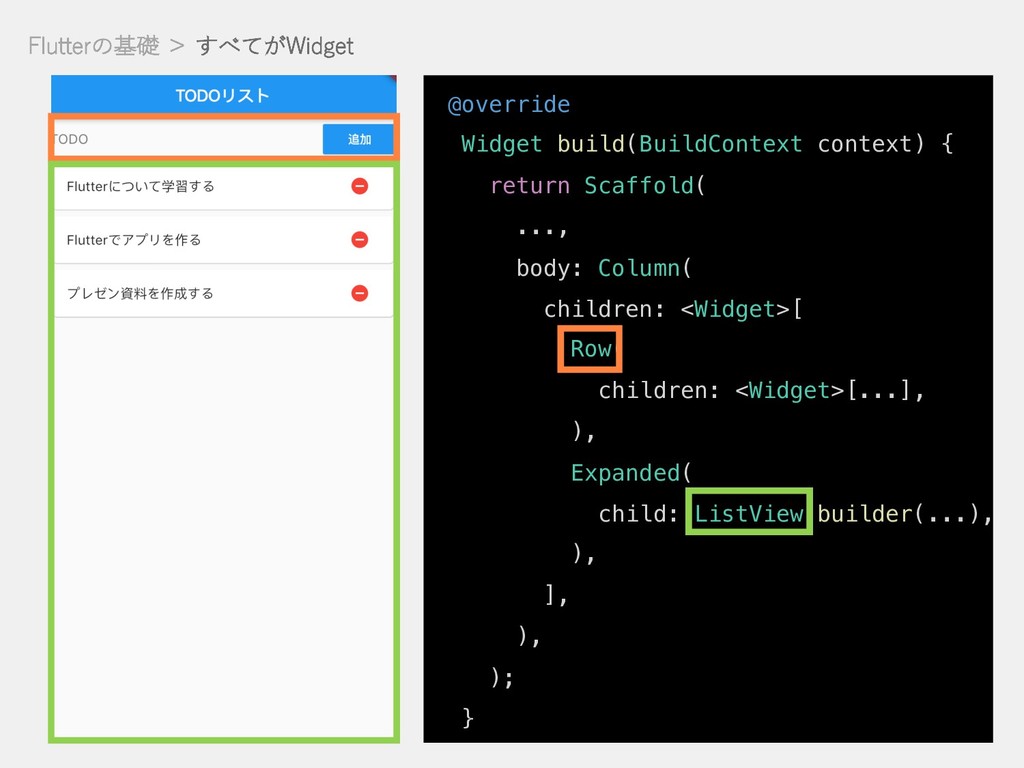
children: <Widget>[ Row( children: <Widget>[...], ), Expanded( child: ListView.builder(...), ), ], ), ); } Flutterの基礎 > すべてがWidget
@override Widget build(BuildContext context) { ..., body: Column( children: <Widget>[
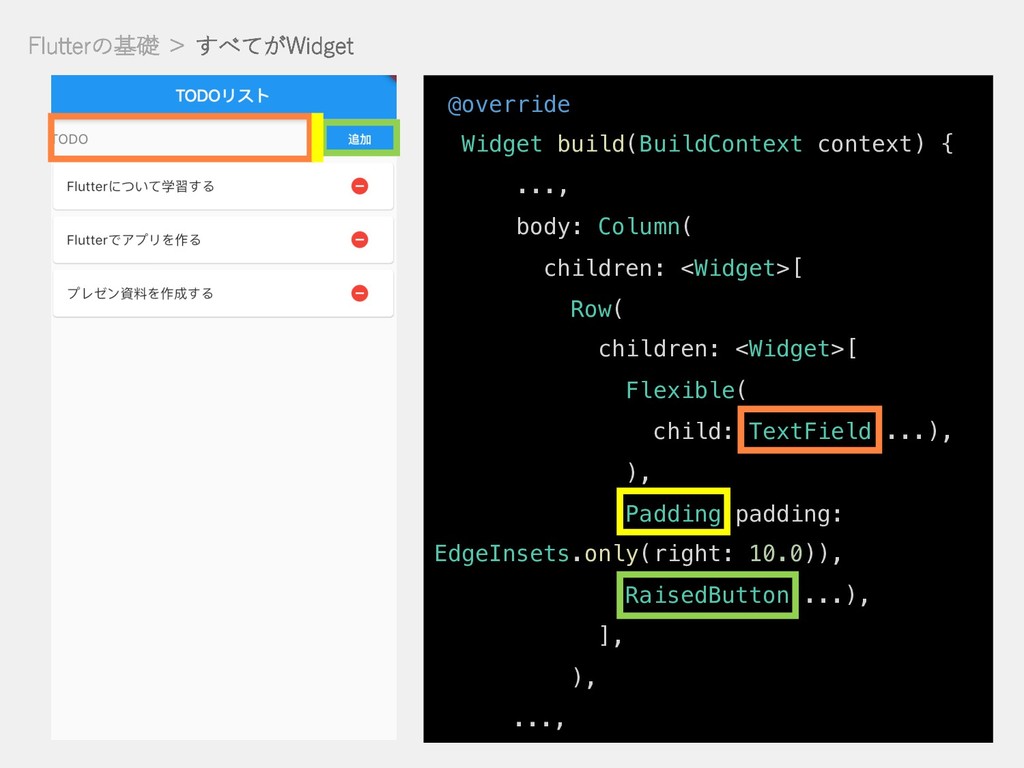
Row( children: <Widget>[ Flexible( child: TextField(...), ), Padding(padding: EdgeInsets.only(right: 10.0)), RaisedButton(...), ], ), ..., Flutterの基礎 > すべてがWidget
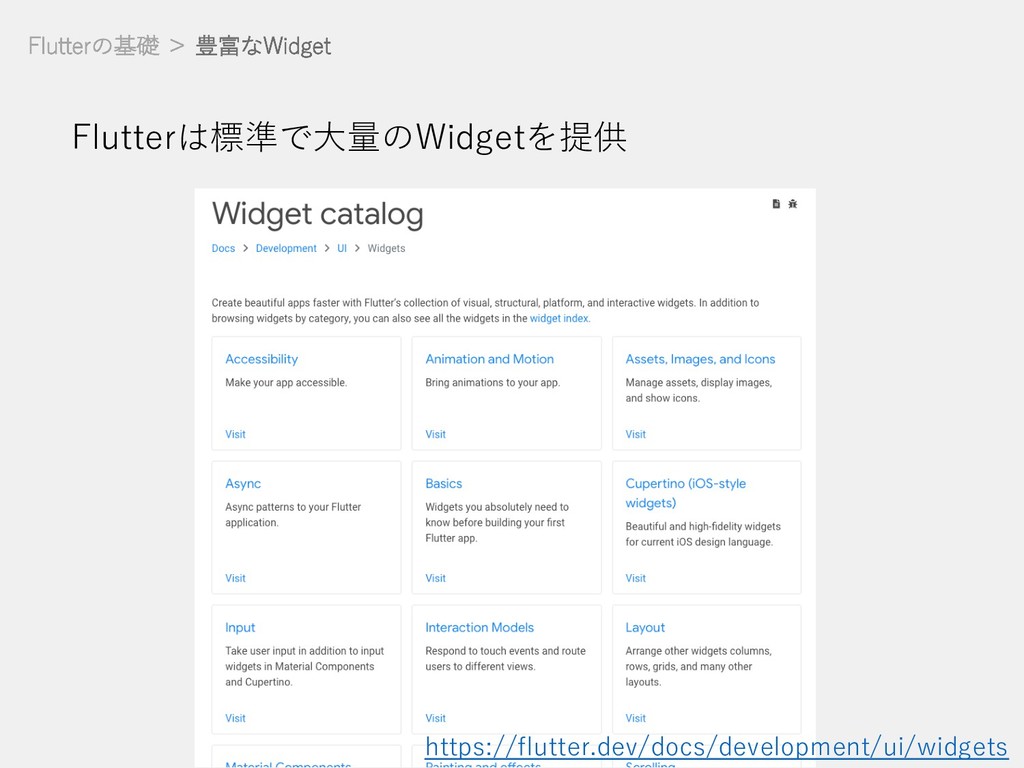
Flutterの基礎 > 豊富なWidget Flutterは標準で⼤量のWidgetを提供 https://flutter.dev/docs/development/ui/widgets
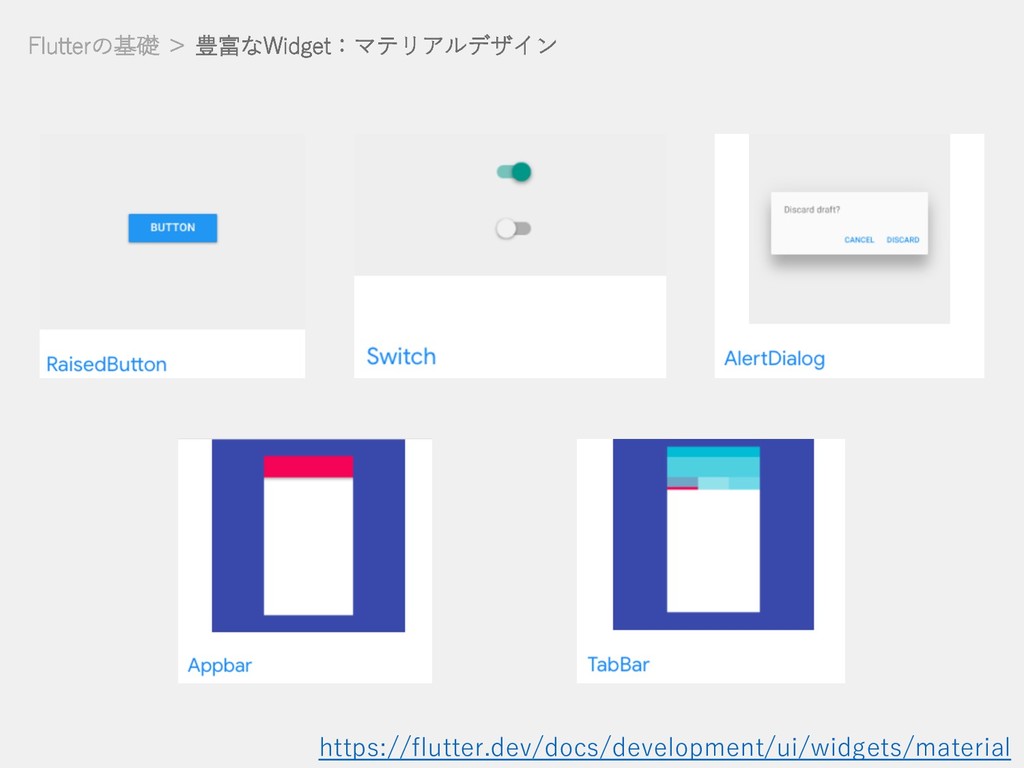
Flutterの基礎 > 豊富なWidget:マテリアルデザイン https://flutter.dev/docs/development/ui/widgets/material
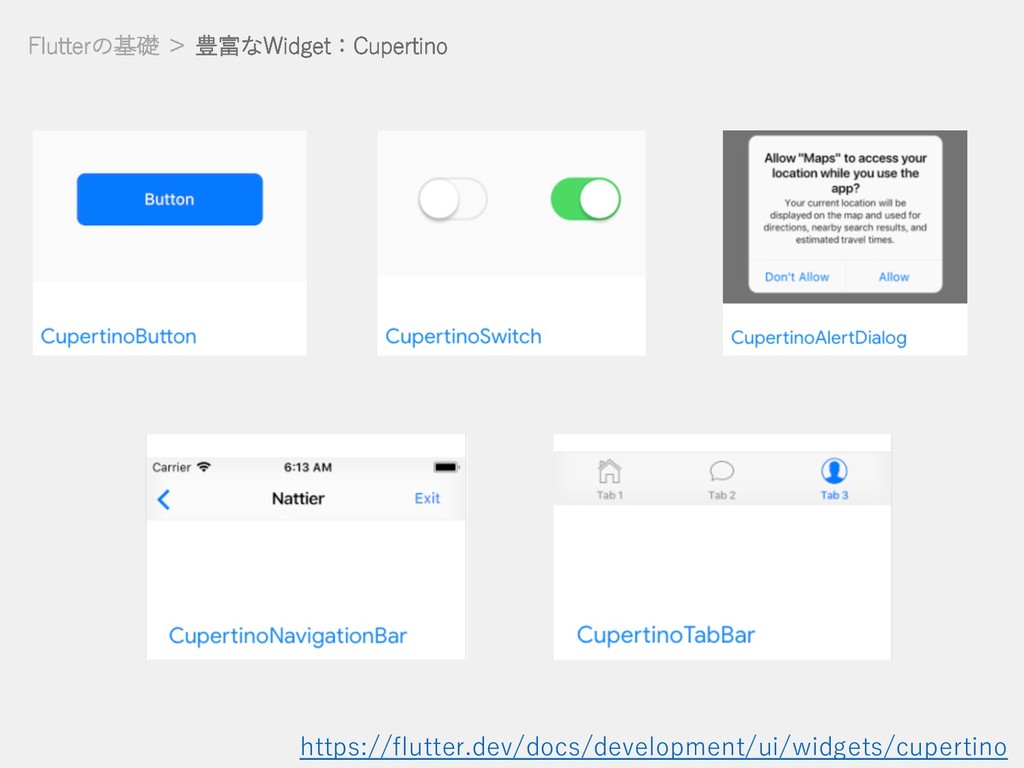
Flutterの基礎 > 豊富なWidget:Cupertino https://flutter.dev/docs/development/ui/widgets/cupertino
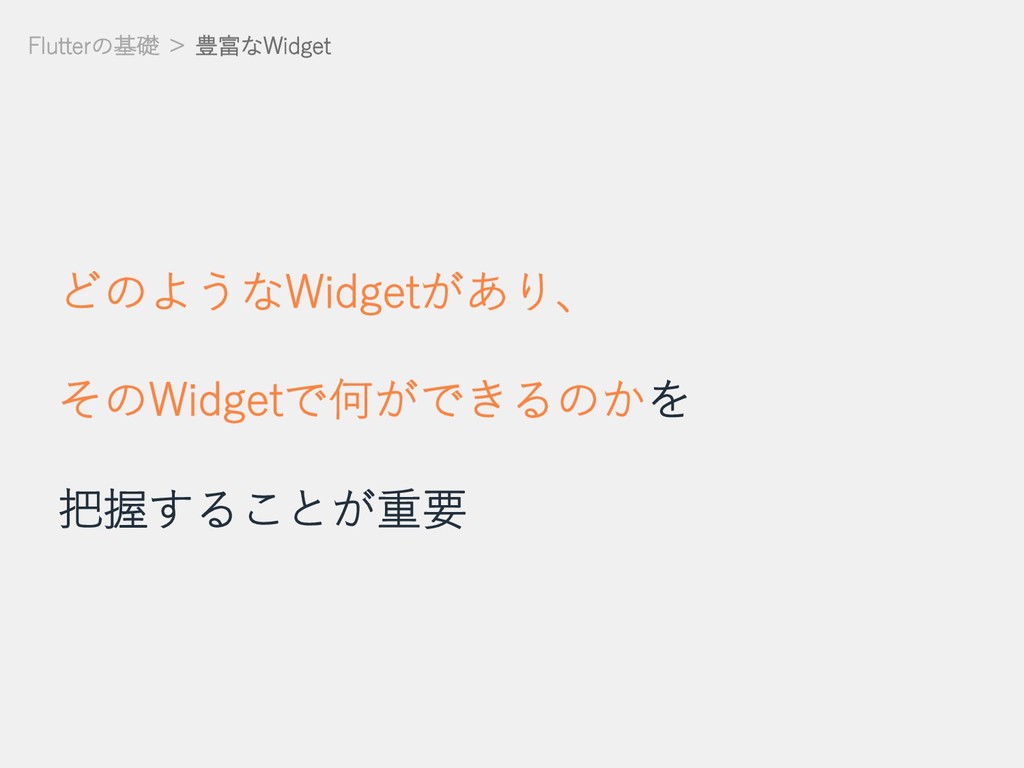
Flutterの基礎 > 豊富なWidget どのようなWidgetがあり、 そのWidgetで何ができるのかを 把握することが重要
Flutterの基礎 StatelessとStateful
Flutterの基礎 > StatelessとStateful Statelessは状態を持たないWidget Statefulは状態を持つWidget 外部との通信やユーザの操作により 状態が変化しないWidgetはStatelessに 状態が変化するWidgetはStatefulに
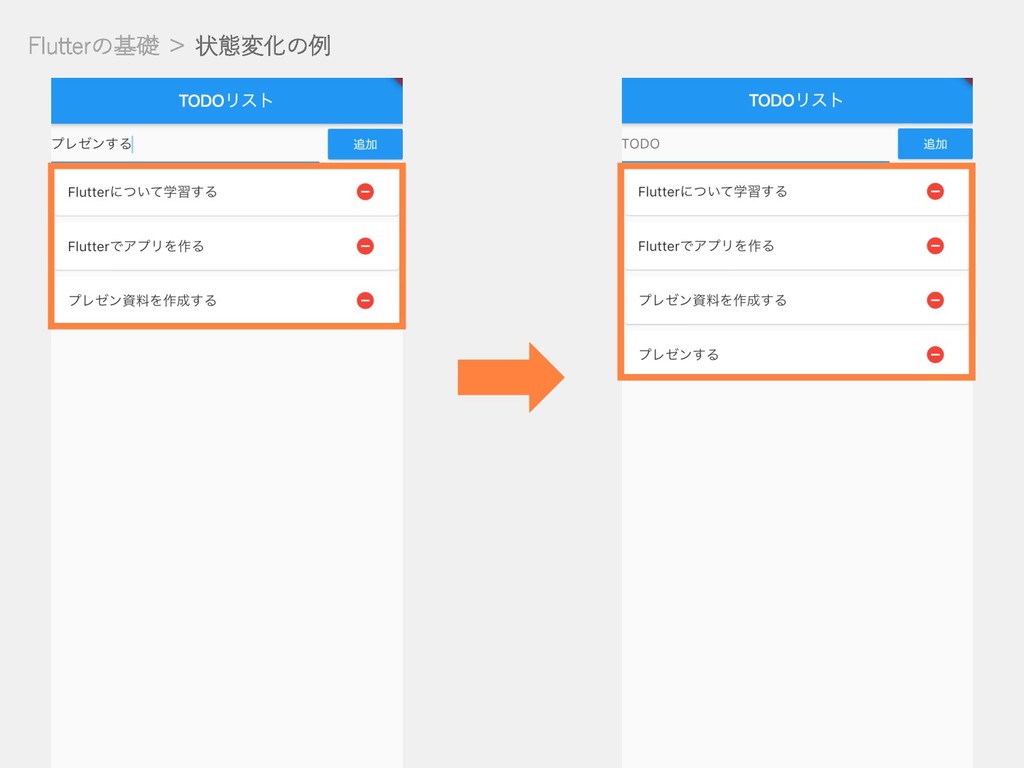
Flutterの基礎 > Statelessの例 各タスクはStateless • 渡された⽂字列を表⽰しているだけ • ユーザの操作により、 保持している情報は変化しないため
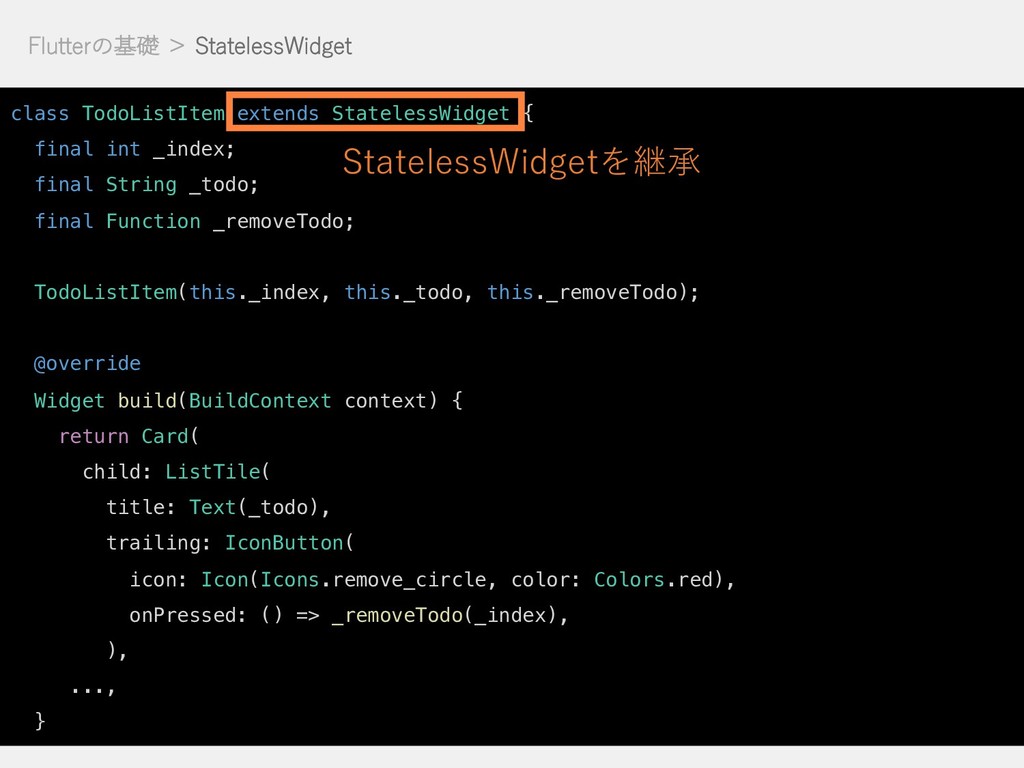
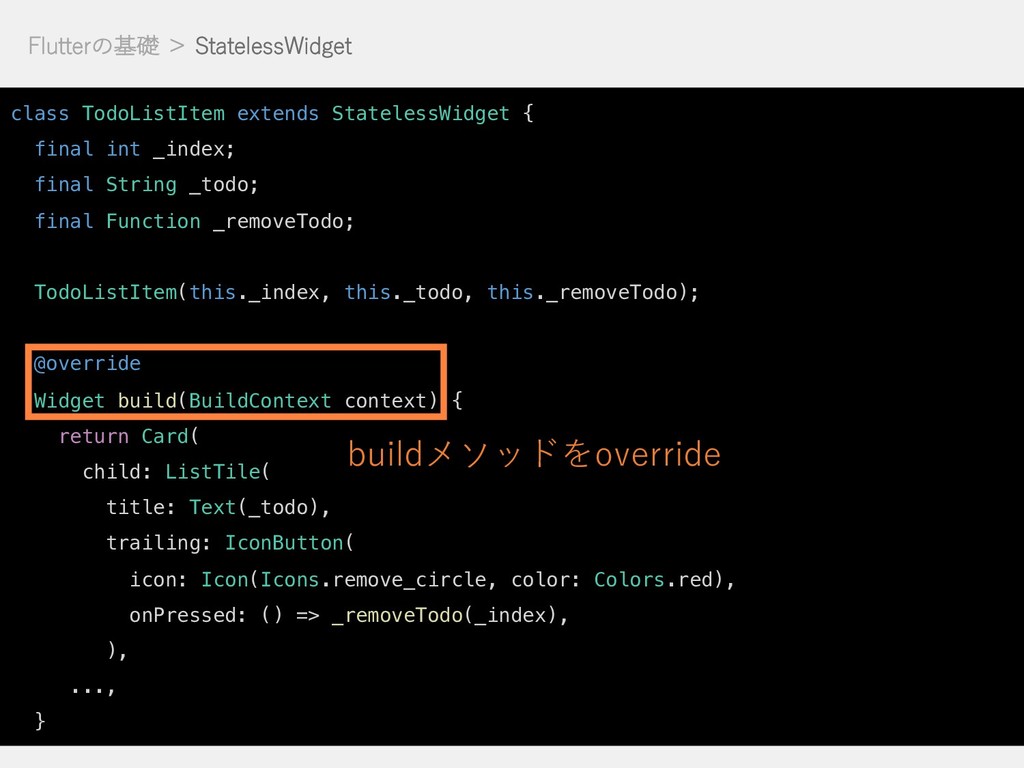
Flutterの基礎 > StatelessWidget class TodoListItem extends StatelessWidget { final int
_index; final String _todo; final Function _removeTodo; TodoListItem(this._index, this._todo, this._removeTodo); @override Widget build(BuildContext context) { return Card( child: ListTile( title: Text(_todo), trailing: IconButton( icon: Icon(Icons.remove_circle, color: Colors.red), onPressed: () => _removeTodo(_index), ), ..., }
Flutterの基礎 > StatelessWidget class TodoListItem extends StatelessWidget { final int
_index; final String _todo; final Function _removeTodo; TodoListItem(this._index, this._todo, this._removeTodo); @override Widget build(BuildContext context) { return Card( child: ListTile( title: Text(_todo), trailing: IconButton( icon: Icon(Icons.remove_circle, color: Colors.red), onPressed: () => _removeTodo(_index), ), ..., } StatelessWidgetを継承
Flutterの基礎 > StatelessWidget class TodoListItem extends StatelessWidget { final int
_index; final String _todo; final Function _removeTodo; TodoListItem(this._index, this._todo, this._removeTodo); @override Widget build(BuildContext context) { return Card( child: ListTile( title: Text(_todo), trailing: IconButton( icon: Icon(Icons.remove_circle, color: Colors.red), onPressed: () => _removeTodo(_index), ), ..., } buildメソッドをoverride
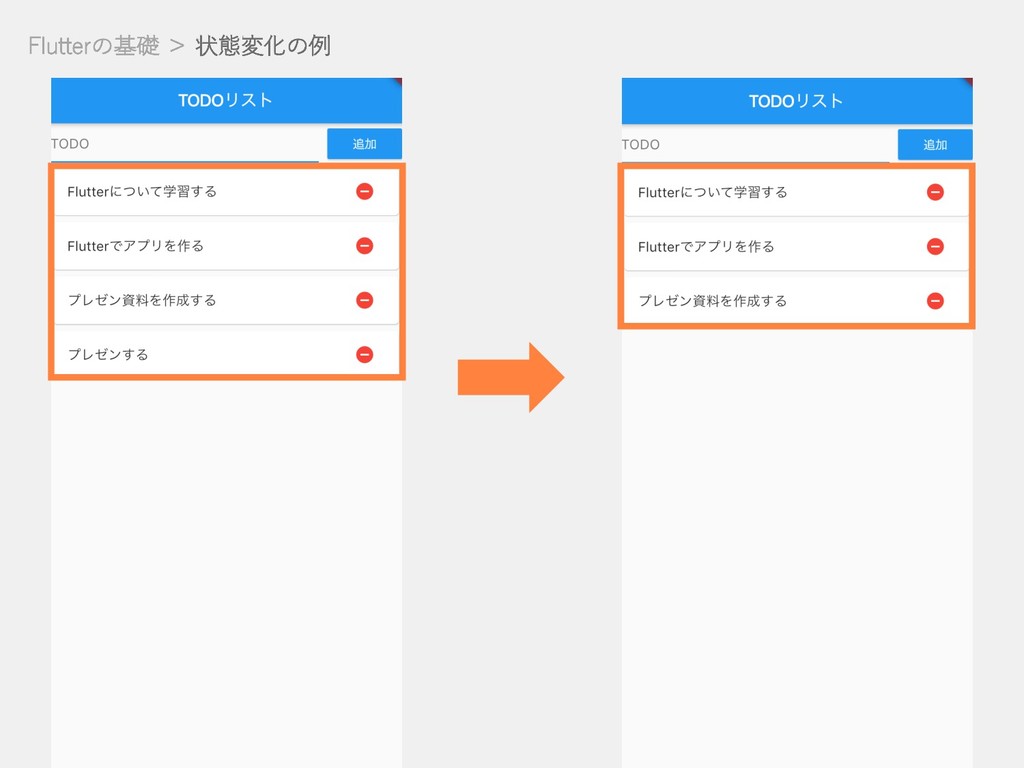
Flutterの基礎 > 状態変化の例
Flutterの基礎 > 状態変化の例
Flutterの基礎 > StatefulWidget final _todos = <String>[]; ... @override Widget
build(BuildContext context) { return Scaffold( ..., RaisedButton( ..., onPressed: () => setState(() => _todos.add(_todo)), ), ], ), ... child: ListView.builder( itemCount: _todos.length, itemBuilder: (BuildContext context, int index) => TodoListItem(index, _todos[index], _removeTodo), ), ...
Flutterの基礎 > StatefulWidget final _todos = <String>[]; ... @override Widget
build(BuildContext context) { return Scaffold( ..., RaisedButton( ..., onPressed: () => setState(() => _todos.add(_todo)), ), ], ), ... child: ListView.builder( itemCount: _todos.length, itemBuilder: (BuildContext context, int index) => TodoListItem(index, _todos[index], _removeTodo), ), ... State(状態)を定義
Flutterの基礎 > StatefulWidget final _todos = <String>[]; ... @override Widget
build(BuildContext context) { return Scaffold( ..., RaisedButton( ..., onPressed: () => setState(() => _todos.add(_todo)), ), ], ), ... child: ListView.builder( itemCount: _todos.length, itemBuilder: (BuildContext context, int index) => TodoListItem(index, _todos[index], _removeTodo), ), ... Stateを更新(タスクを追加)
Flutterの基礎 > StatefulWidget final _todos = <String>[]; ... @override Widget
build(BuildContext context) { return Scaffold( ..., RaisedButton( ..., onPressed: () => setState(() => _todos.add(_todo)), ), ], ), ... child: ListView.builder( itemCount: _todos.length, itemBuilder: (BuildContext context, int index) => TodoListItem(index, _todos[index], _removeTodo), ), ... Stateの更新を検知し、buildが呼ばれる
Flutterの基礎 > StatefulWidget final _todos = <String>[]; ... @override Widget
build(BuildContext context) { return Scaffold( ..., RaisedButton( ..., onPressed: () => setState(() => _todos.add(_todo)), ), ], ), ... child: ListView.builder( itemCount: _todos.length, itemBuilder: (BuildContext context, int index) => TodoListItem(index, _todos[index], _removeTodo), ), ... State(タスク⼀覧)が変化しているため、 ListViewが更新される
Flutterの基礎 Flutterでのアニメーション
Flutterの基礎 > Flutterでのアニメーション Flutterでは、アニメーションもWidget アニメーションに関しても、豊富なWidgetを提供 もちろん、⾃作も可能
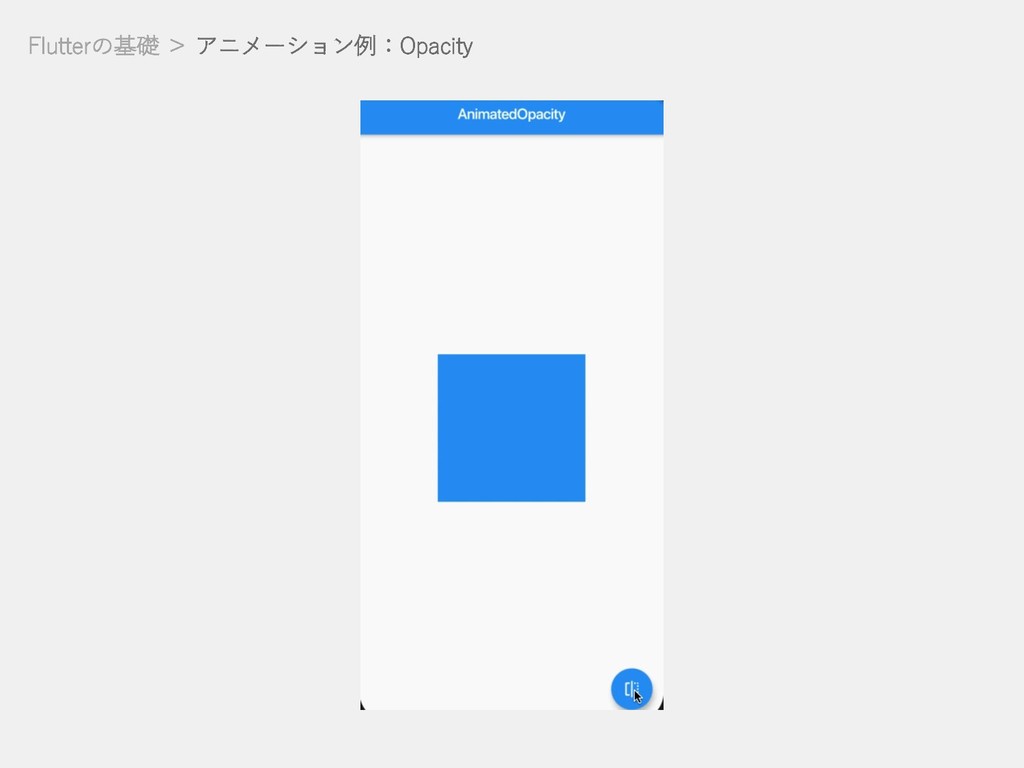
Flutterの基礎 > アニメーション例:Opacity
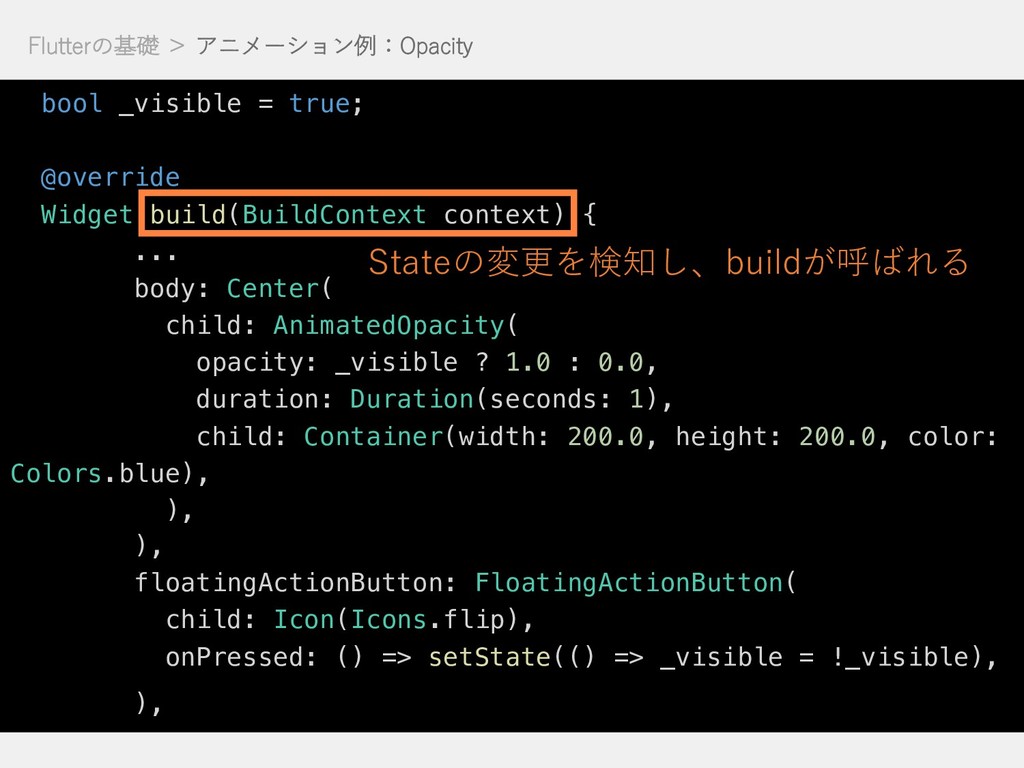
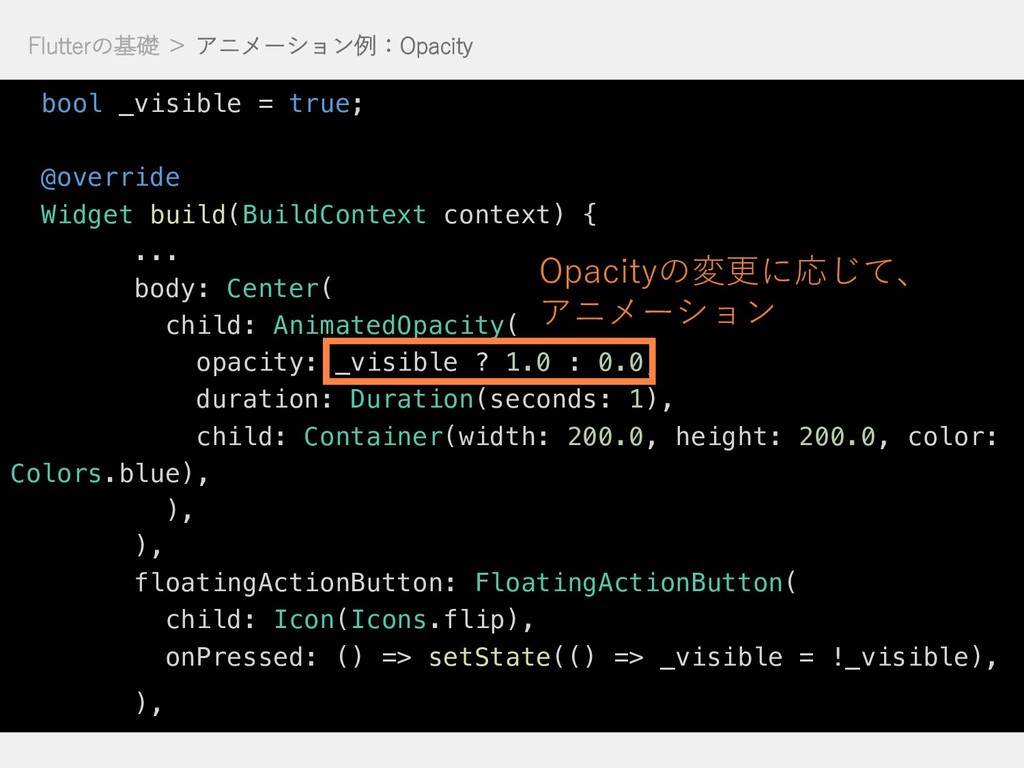
Flutterの基礎 > アニメーション例:Opacity bool _visible = true; @override Widget build(BuildContext
context) { ... body: Center( child: AnimatedOpacity( opacity: _visible ? 1.0 : 0.0, duration: Duration(seconds: 1), child: Container(width: 200.0, height: 200.0, color: Colors.blue), ), ), floatingActionButton: FloatingActionButton( child: Icon(Icons.flip), onPressed: () => setState(() => _visible = !_visible), ),
Flutterの基礎 > アニメーション例:Opacity bool _visible = true; @override Widget build(BuildContext
context) { ... body: Center( child: AnimatedOpacity( opacity: _visible ? 1.0 : 0.0, duration: Duration(seconds: 1), child: Container(width: 200.0, height: 200.0, color: Colors.blue), ), ), floatingActionButton: FloatingActionButton( child: Icon(Icons.flip), onPressed: () => setState(() => _visible = !_visible), ), Stateを定義
Flutterの基礎 > アニメーション例:Opacity bool _visible = true; @override Widget build(BuildContext
context) { ... body: Center( child: AnimatedOpacity( opacity: _visible ? 1.0 : 0.0, duration: Duration(seconds: 1), child: Container(width: 200.0, height: 200.0, color: Colors.blue), ), ), floatingActionButton: FloatingActionButton( child: Icon(Icons.flip), onPressed: () => setState(() => _visible = !_visible), ), Stateを更新
Flutterの基礎 > アニメーション例:Opacity bool _visible = true; @override Widget build(BuildContext
context) { ... body: Center( child: AnimatedOpacity( opacity: _visible ? 1.0 : 0.0, duration: Duration(seconds: 1), child: Container(width: 200.0, height: 200.0, color: Colors.blue), ), ), floatingActionButton: FloatingActionButton( child: Icon(Icons.flip), onPressed: () => setState(() => _visible = !_visible), ), Stateの変更を検知し、buildが呼ばれる
Flutterの基礎 > アニメーション例:Opacity bool _visible = true; @override Widget build(BuildContext
context) { ... body: Center( child: AnimatedOpacity( opacity: _visible ? 1.0 : 0.0, duration: Duration(seconds: 1), child: Container(width: 200.0, height: 200.0, color: Colors.blue), ), ), floatingActionButton: FloatingActionButton( child: Icon(Icons.flip), onPressed: () => setState(() => _visible = !_visible), ), Opacityの変更に応じて、 アニメーション
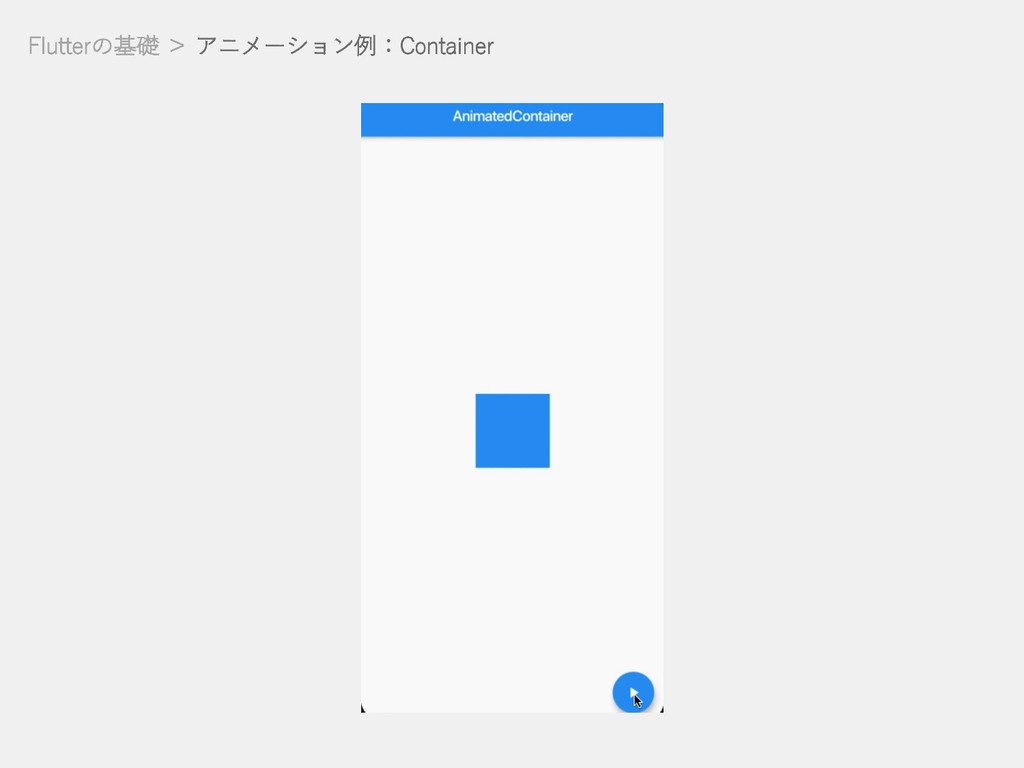
Flutterの基礎 > アニメーション例:Container
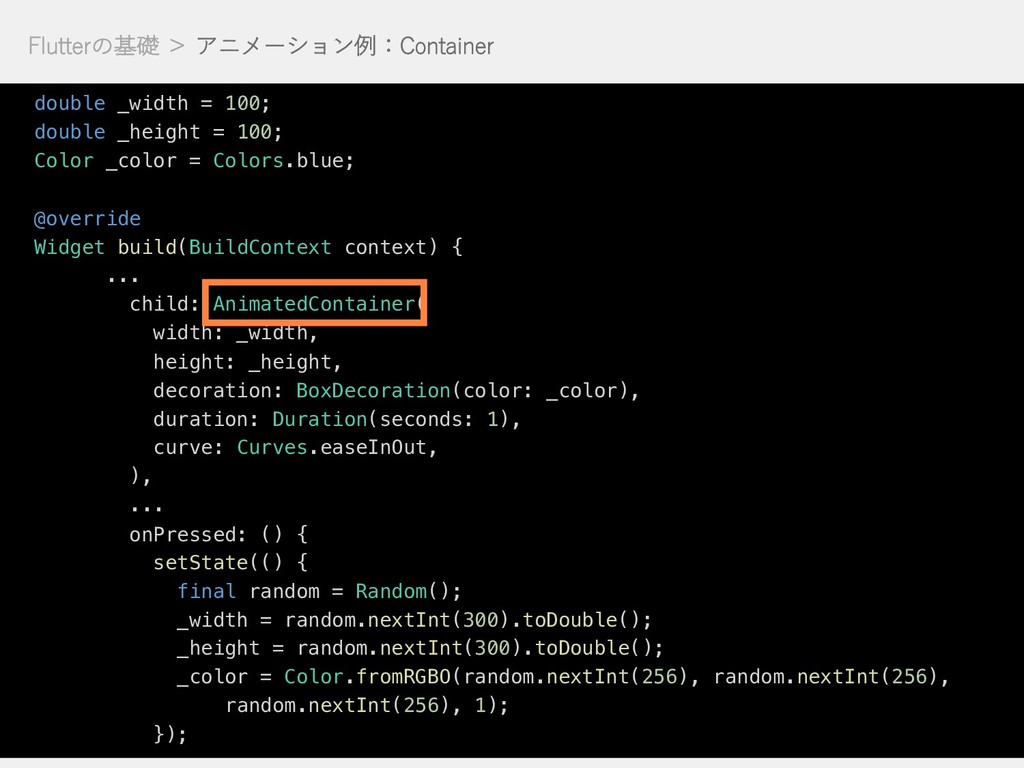
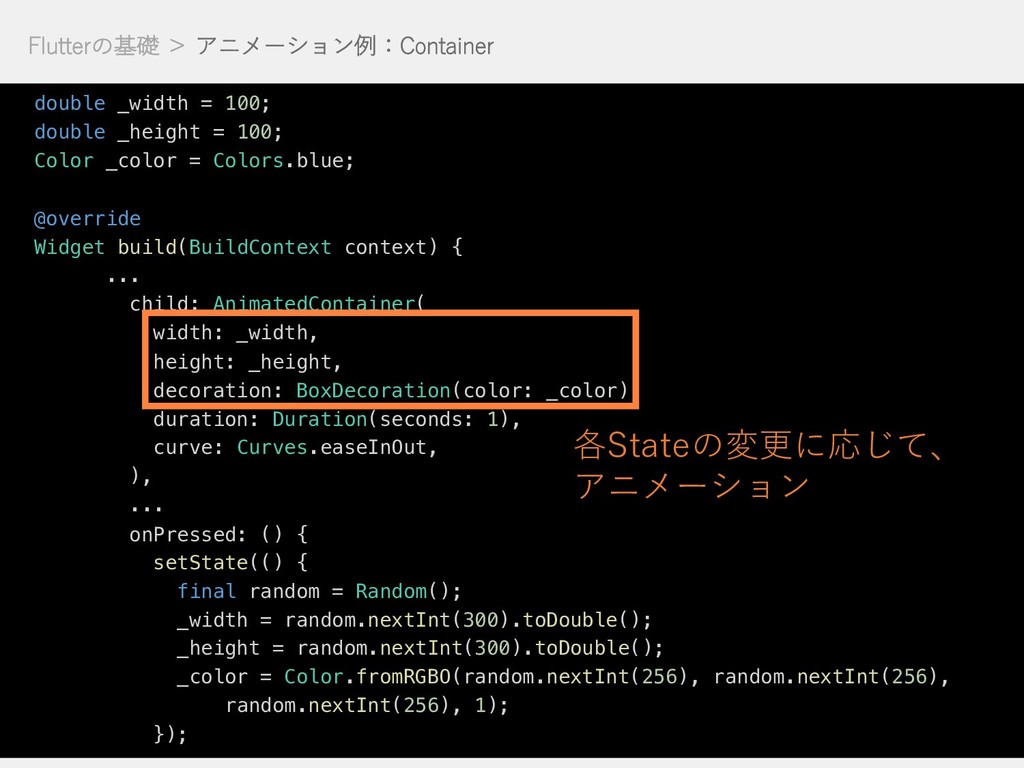
Flutterの基礎 > アニメーション例:Container double _width = 100; double _height =
100; Color _color = Colors.blue; @override Widget build(BuildContext context) { ... child: AnimatedContainer( width: _width, height: _height, decoration: BoxDecoration(color: _color), duration: Duration(seconds: 1), curve: Curves.easeInOut, ), ... onPressed: () { setState(() { final random = Random(); _width = random.nextInt(300).toDouble(); _height = random.nextInt(300).toDouble(); _color = Color.fromRGBO(random.nextInt(256), random.nextInt(256), random.nextInt(256), 1); });
Flutterの基礎 > アニメーション例:Container double _width = 100; double _height =
100; Color _color = Colors.blue; @override Widget build(BuildContext context) { ... child: AnimatedContainer( width: _width, height: _height, decoration: BoxDecoration(color: _color), duration: Duration(seconds: 1), curve: Curves.easeInOut, ), ... onPressed: () { setState(() { final random = Random(); _width = random.nextInt(300).toDouble(); _height = random.nextInt(300).toDouble(); _color = Color.fromRGBO(random.nextInt(256), random.nextInt(256), random.nextInt(256), 1); }); Stateを定義
Flutterの基礎 > アニメーション例:Container double _width = 100; double _height =
100; Color _color = Colors.blue; @override Widget build(BuildContext context) { ... child: AnimatedContainer( width: _width, height: _height, decoration: BoxDecoration(color: _color), duration: Duration(seconds: 1), curve: Curves.easeInOut, ), ... onPressed: () { setState(() { final random = Random(); _width = random.nextInt(300).toDouble(); _height = random.nextInt(300).toDouble(); _color = Color.fromRGBO(random.nextInt(256), random.nextInt(256), random.nextInt(256), 1); }); Stateを更新
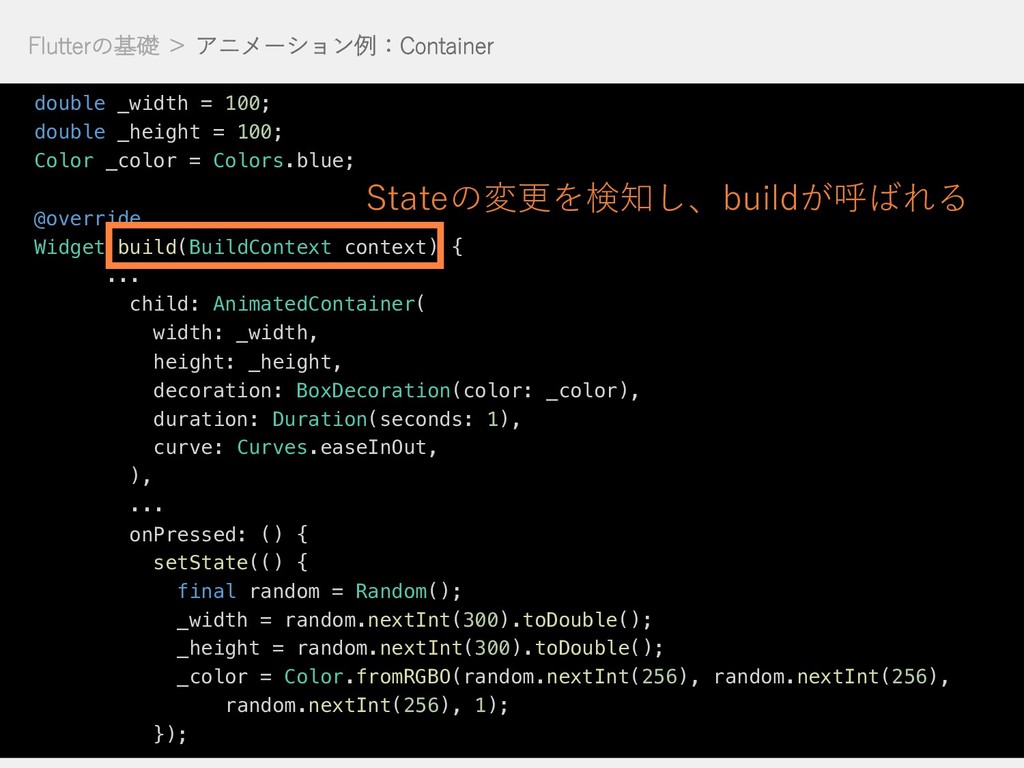
Flutterの基礎 > アニメーション例:Container double _width = 100; double _height =
100; Color _color = Colors.blue; @override Widget build(BuildContext context) { ... child: AnimatedContainer( width: _width, height: _height, decoration: BoxDecoration(color: _color), duration: Duration(seconds: 1), curve: Curves.easeInOut, ), ... onPressed: () { setState(() { final random = Random(); _width = random.nextInt(300).toDouble(); _height = random.nextInt(300).toDouble(); _color = Color.fromRGBO(random.nextInt(256), random.nextInt(256), random.nextInt(256), 1); }); Stateの変更を検知し、buildが呼ばれる
Flutterの基礎 > アニメーション例:Container double _width = 100; double _height =
100; Color _color = Colors.blue; @override Widget build(BuildContext context) { ... child: AnimatedContainer( width: _width, height: _height, decoration: BoxDecoration(color: _color), duration: Duration(seconds: 1), curve: Curves.easeInOut, ), ... onPressed: () { setState(() { final random = Random(); _width = random.nextInt(300).toDouble(); _height = random.nextInt(300).toDouble(); _color = Color.fromRGBO(random.nextInt(256), random.nextInt(256), random.nextInt(256), 1); }); 各Stateの変更に応じて、 アニメーション
Flutterとは Cordova/Flutterの⽐較 Dartとは Flutterの基礎 まとめ TODAY’s AGENDA
まとめ メリット・デメリット l 学習コストは低くはない l Dart⾃体は馴染みやすい l Widgetを使いこなすのが⼤変 l ⽇本語の情報はまだ少ない
l ネイティブアプリに近い パフォーマンス l ホットリロードによる ⾼速な開発サイクル
None
![アプリ開発の新たな選択肢が登場! Google社製Flutterのご紹介 HIROAKI TSUTSUMI 堤 啓彰 <[email protected]> アシアル株式会社](https://files.speakerdeck.com/presentations/6dc04f3769834e8ea43da766e152d0cf/slide_0.jpg)
![Flutterの基礎 > StatefulWidget final _todos = <String>[]; ... @override Widget](https://files.speakerdeck.com/presentations/6dc04f3769834e8ea43da766e152d0cf/slide_48.jpg)
![Flutterの基礎 > StatefulWidget final _todos = <String>[]; ... @override Widget](https://files.speakerdeck.com/presentations/6dc04f3769834e8ea43da766e152d0cf/slide_49.jpg)
![Flutterの基礎 > StatefulWidget final _todos = <String>[]; ... @override Widget](https://files.speakerdeck.com/presentations/6dc04f3769834e8ea43da766e152d0cf/slide_50.jpg)
![Flutterの基礎 > StatefulWidget final _todos = <String>[]; ... @override Widget](https://files.speakerdeck.com/presentations/6dc04f3769834e8ea43da766e152d0cf/slide_51.jpg)
![Flutterの基礎 > StatefulWidget final _todos = <String>[]; ... @override Widget](https://files.speakerdeck.com/presentations/6dc04f3769834e8ea43da766e152d0cf/slide_52.jpg)