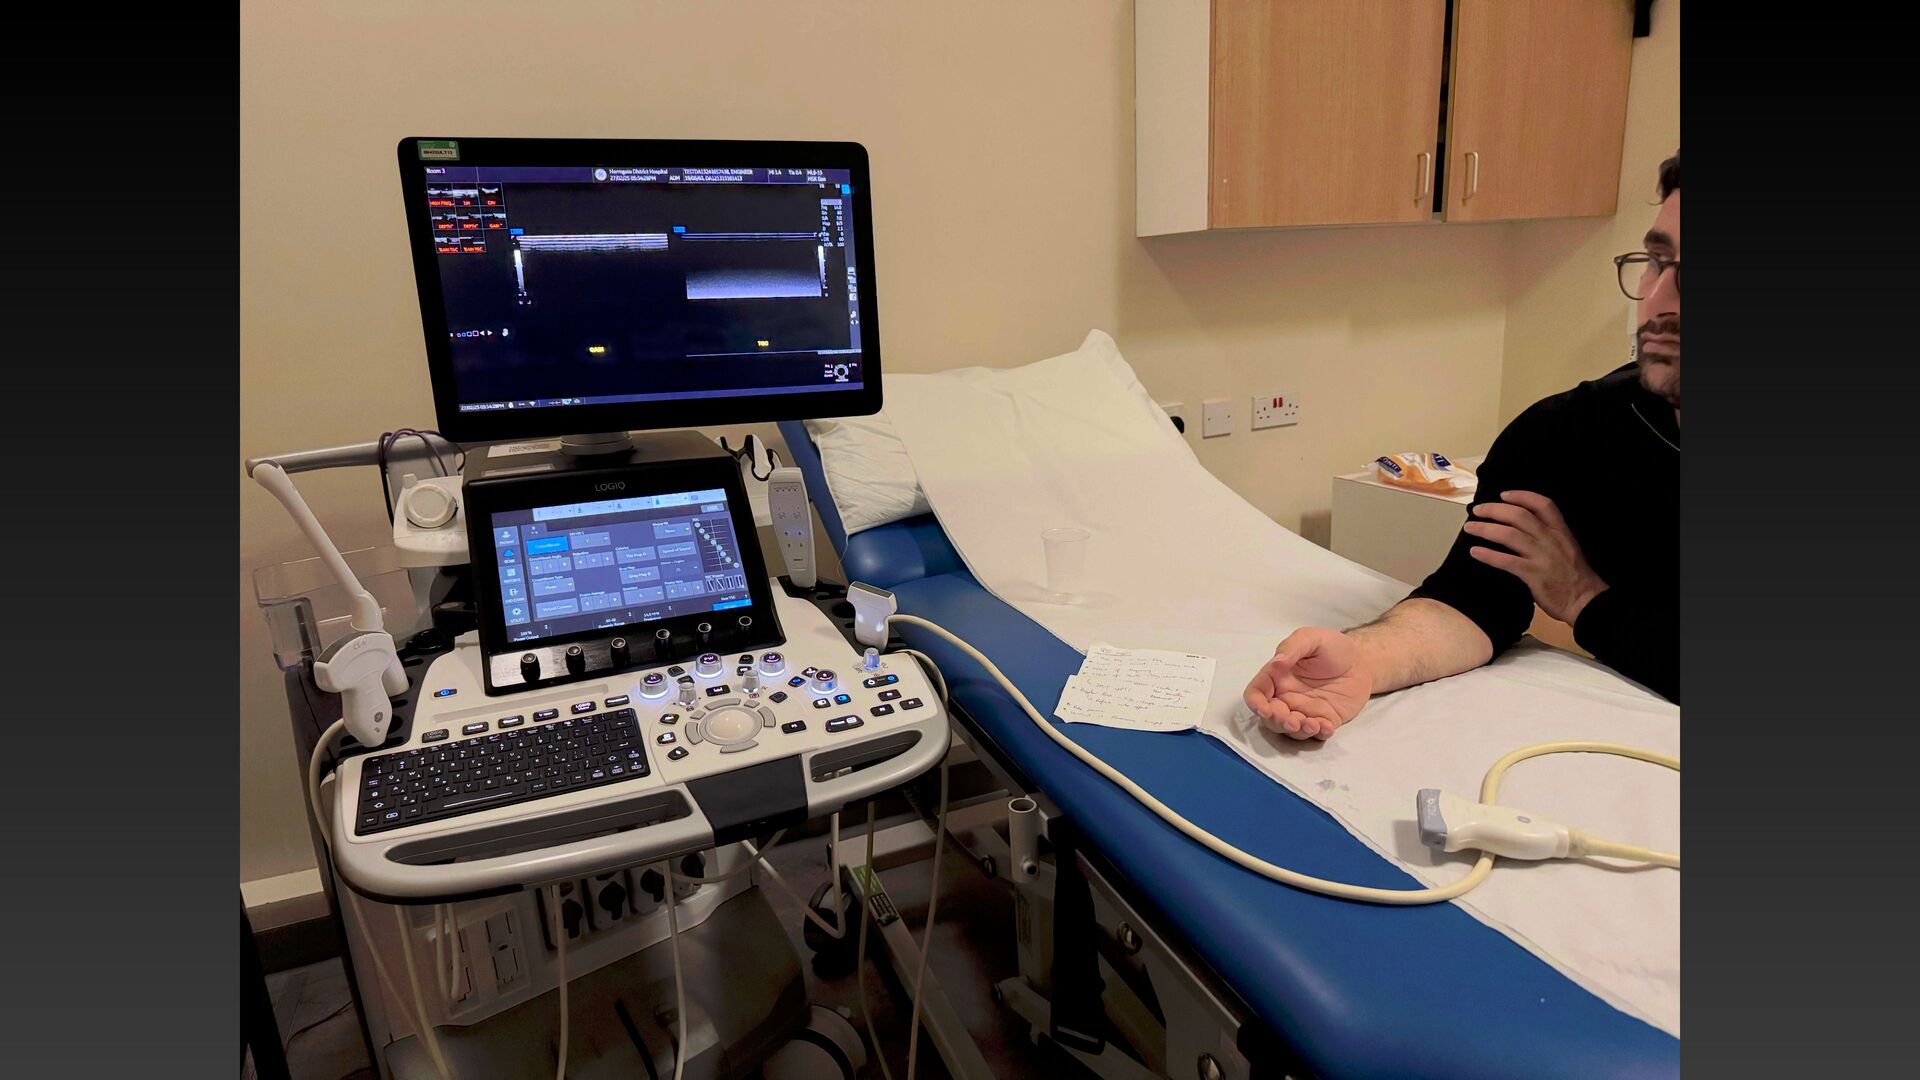
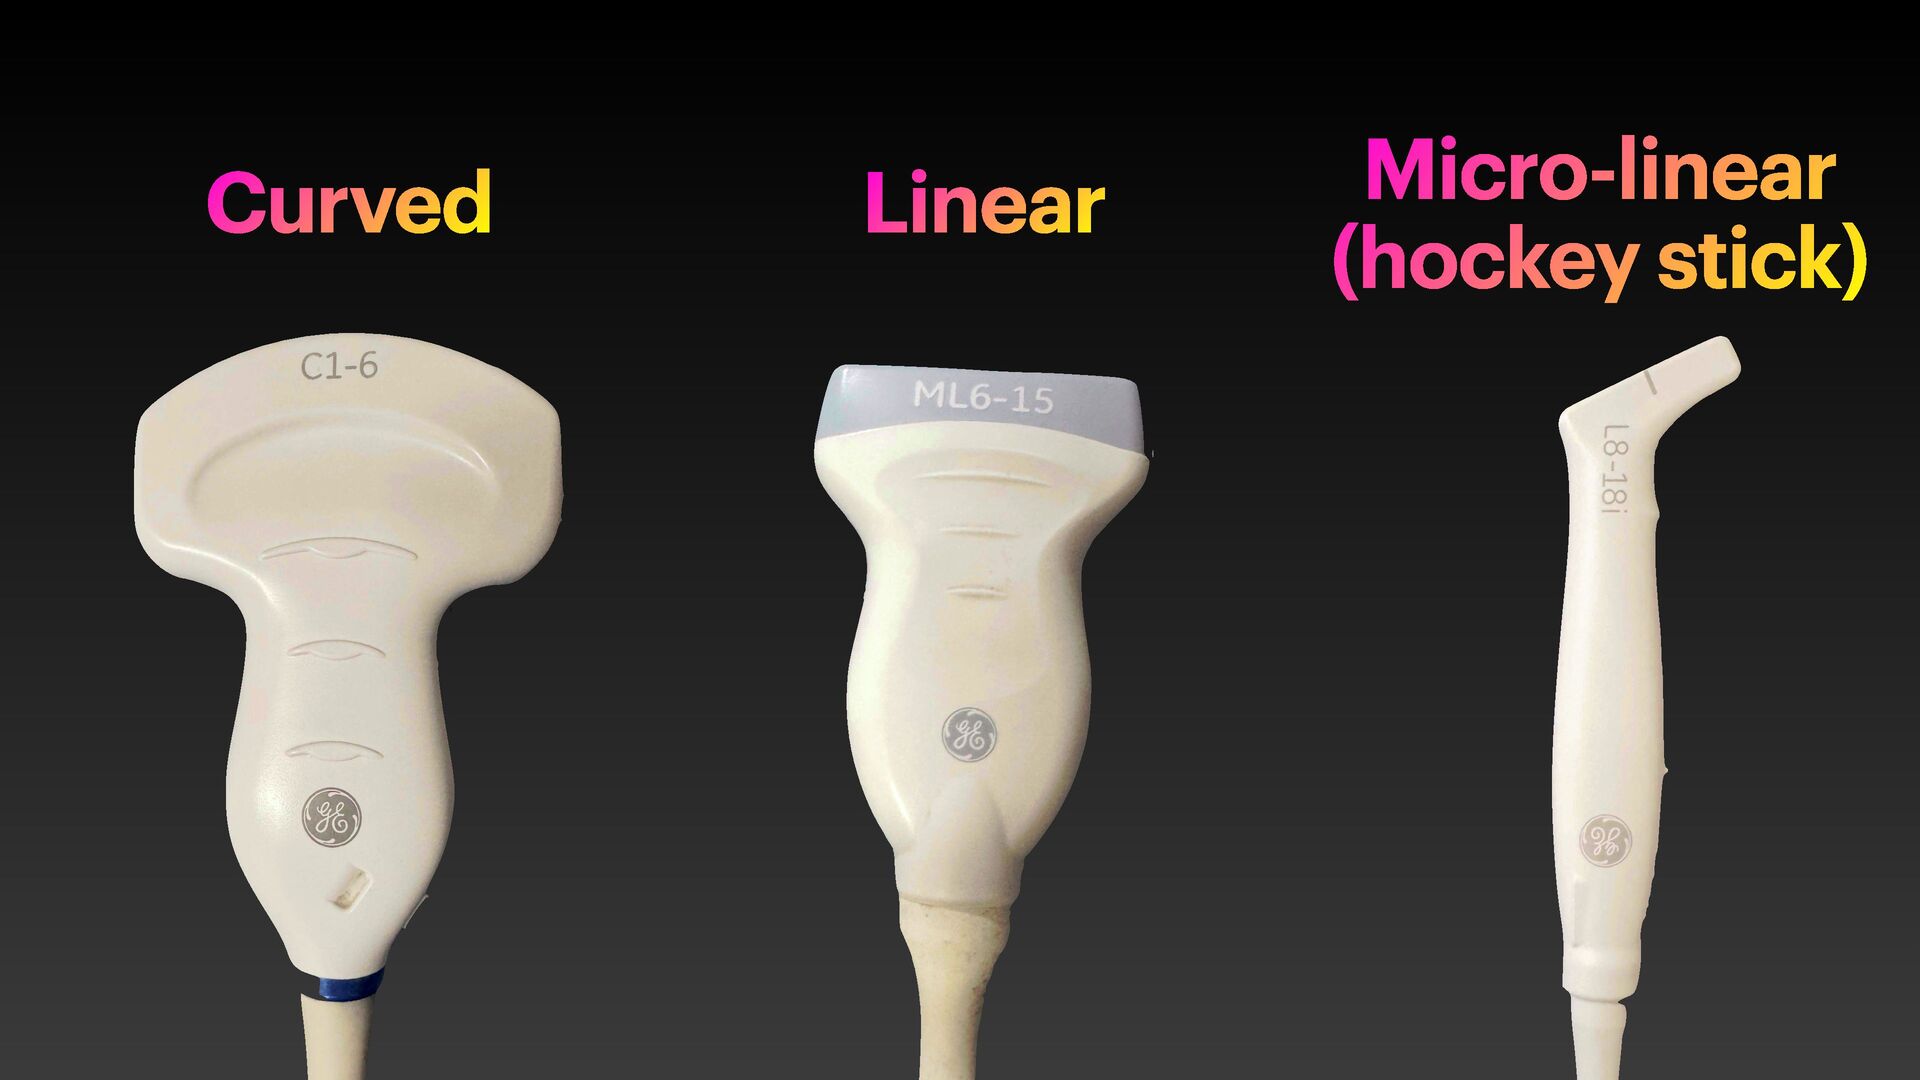
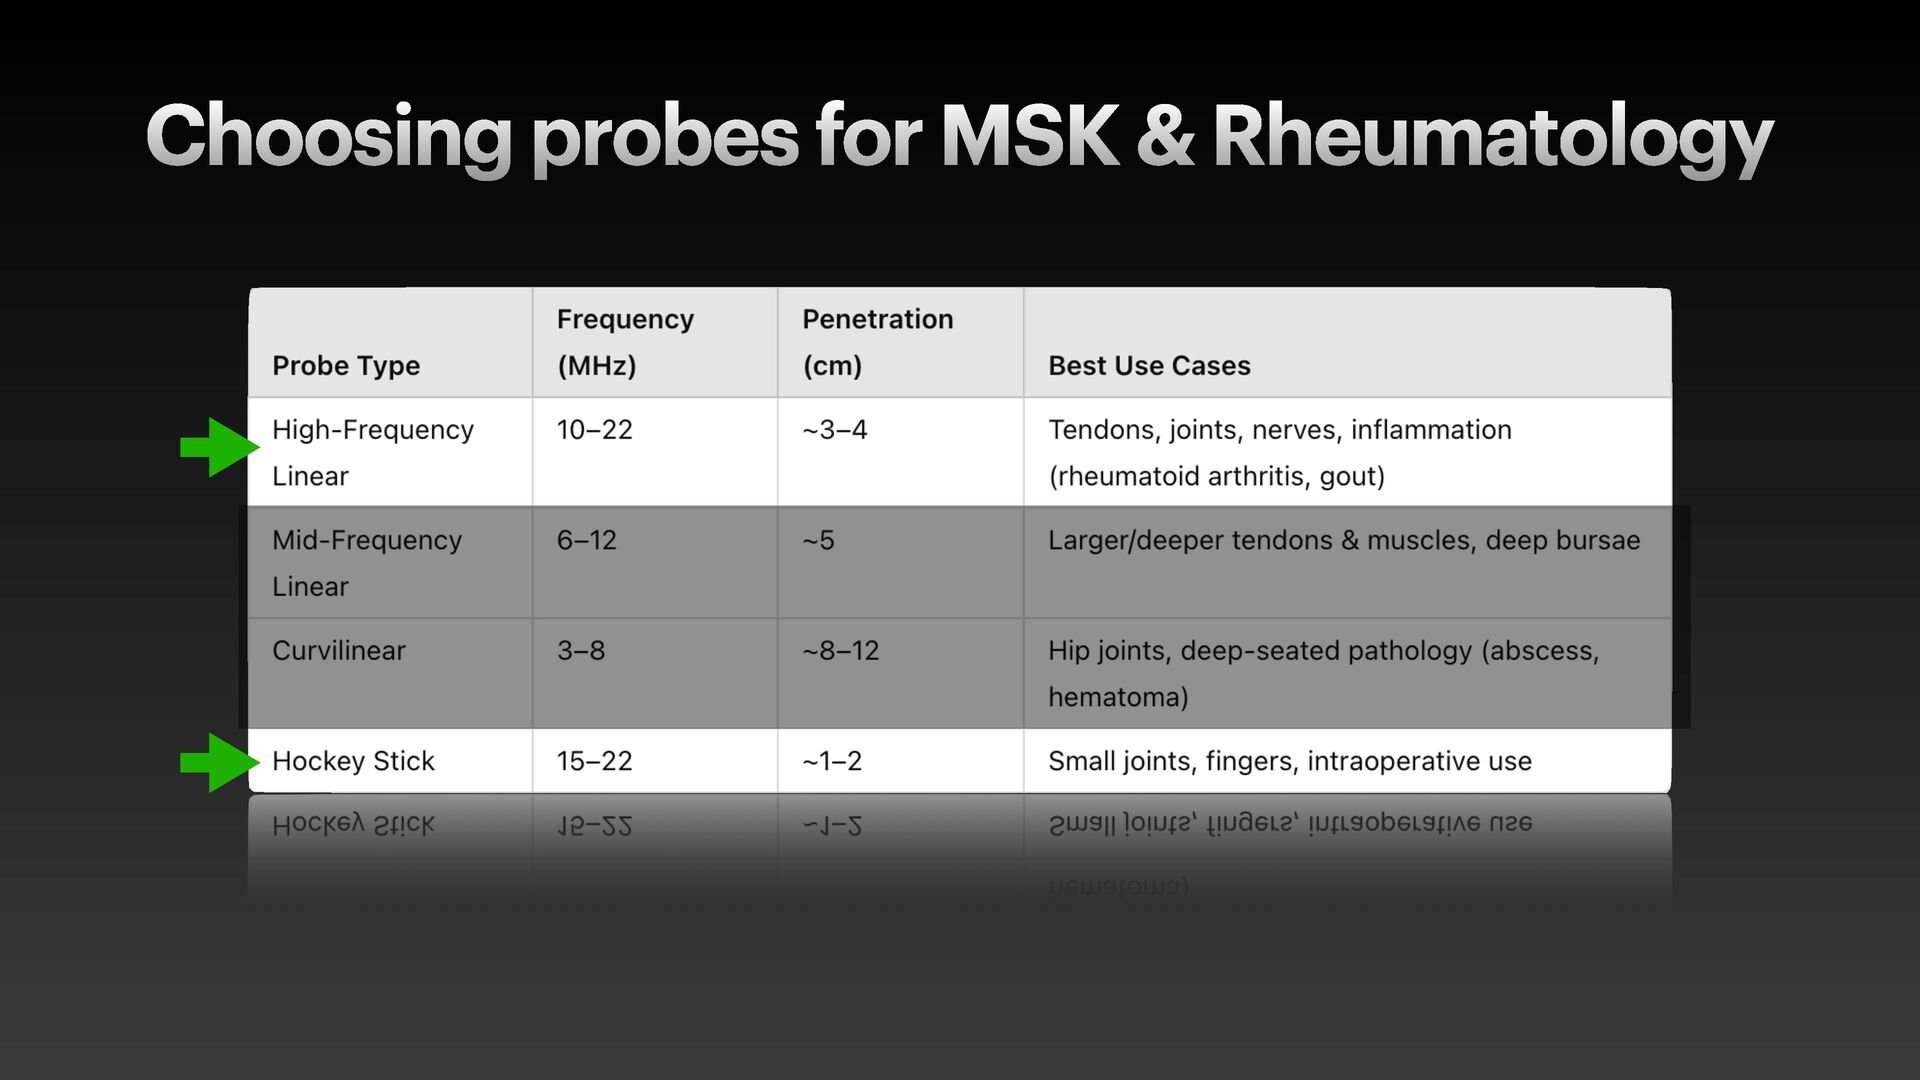
tour • Probes - when to use • Parameters for scanning • What it means • What it does • Effective use • Live Demonstration of parameters (with Dr Rahoz Aziz)
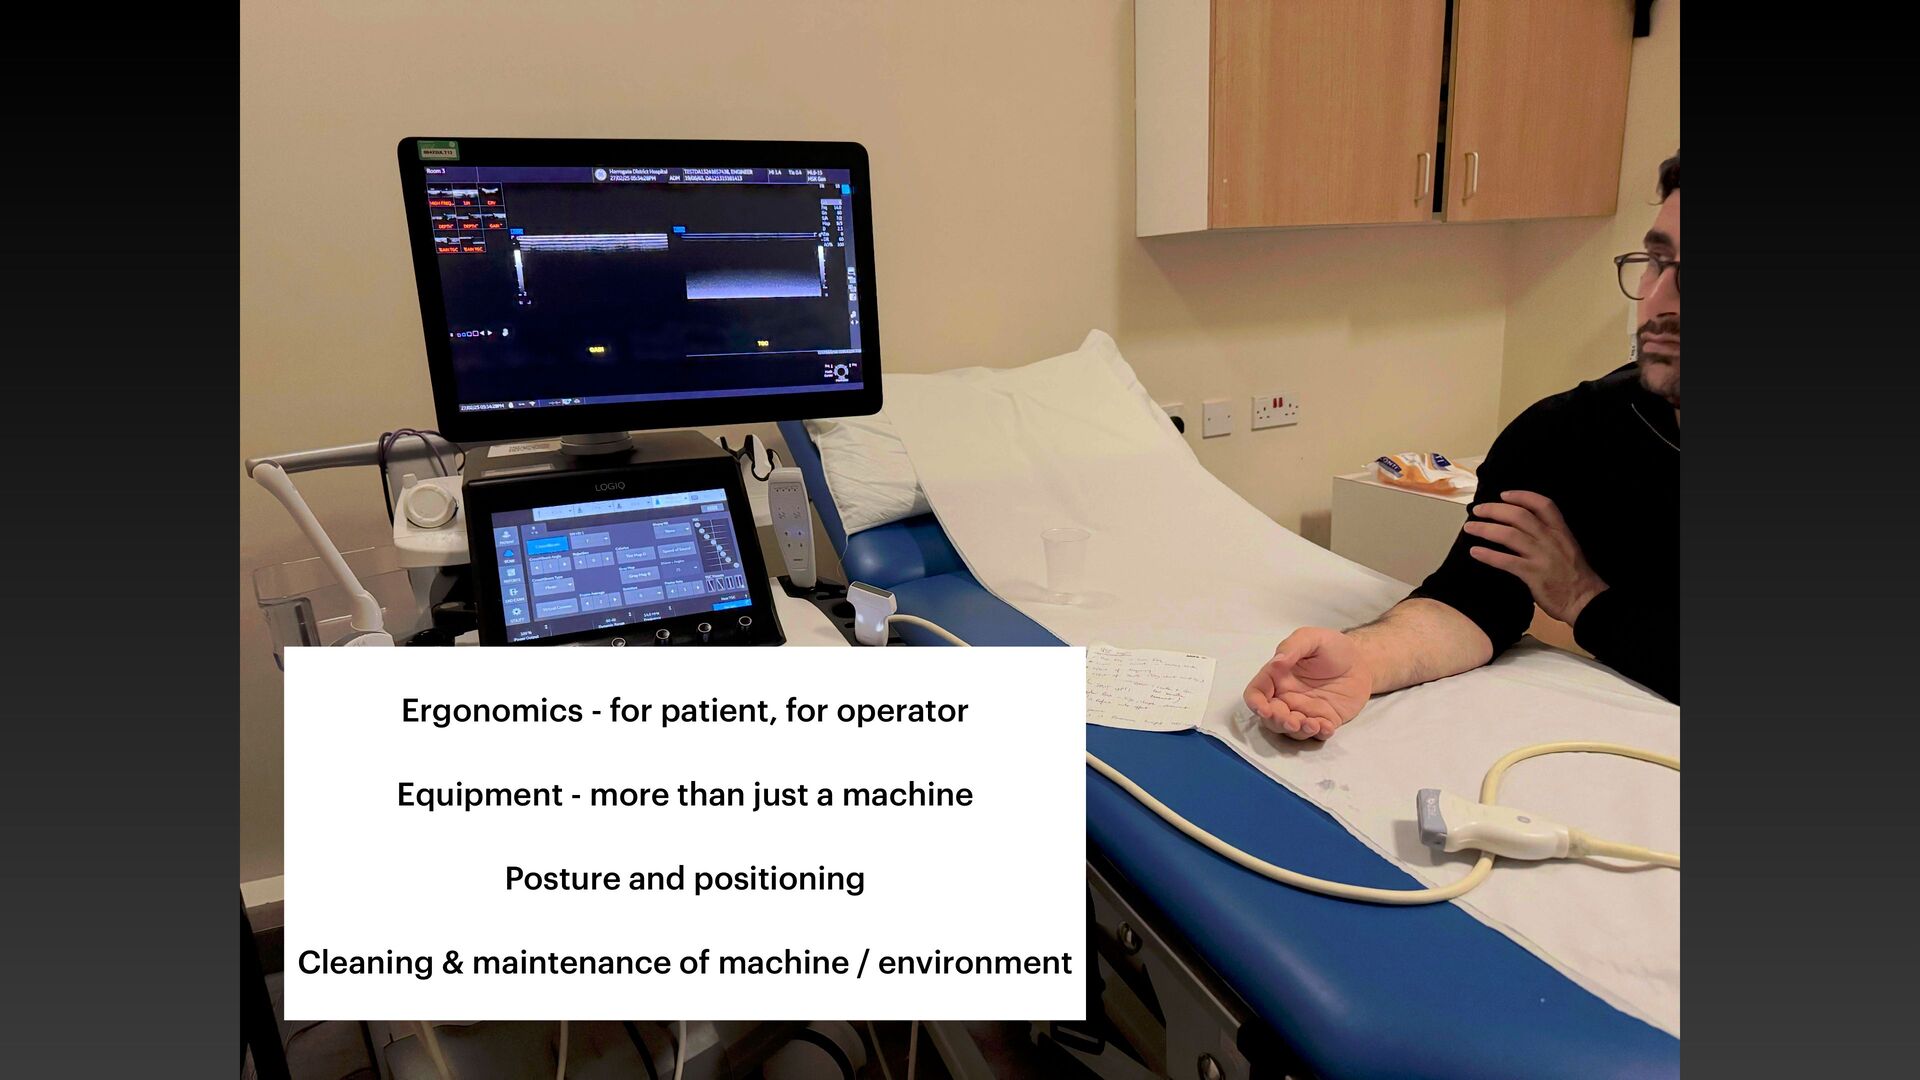
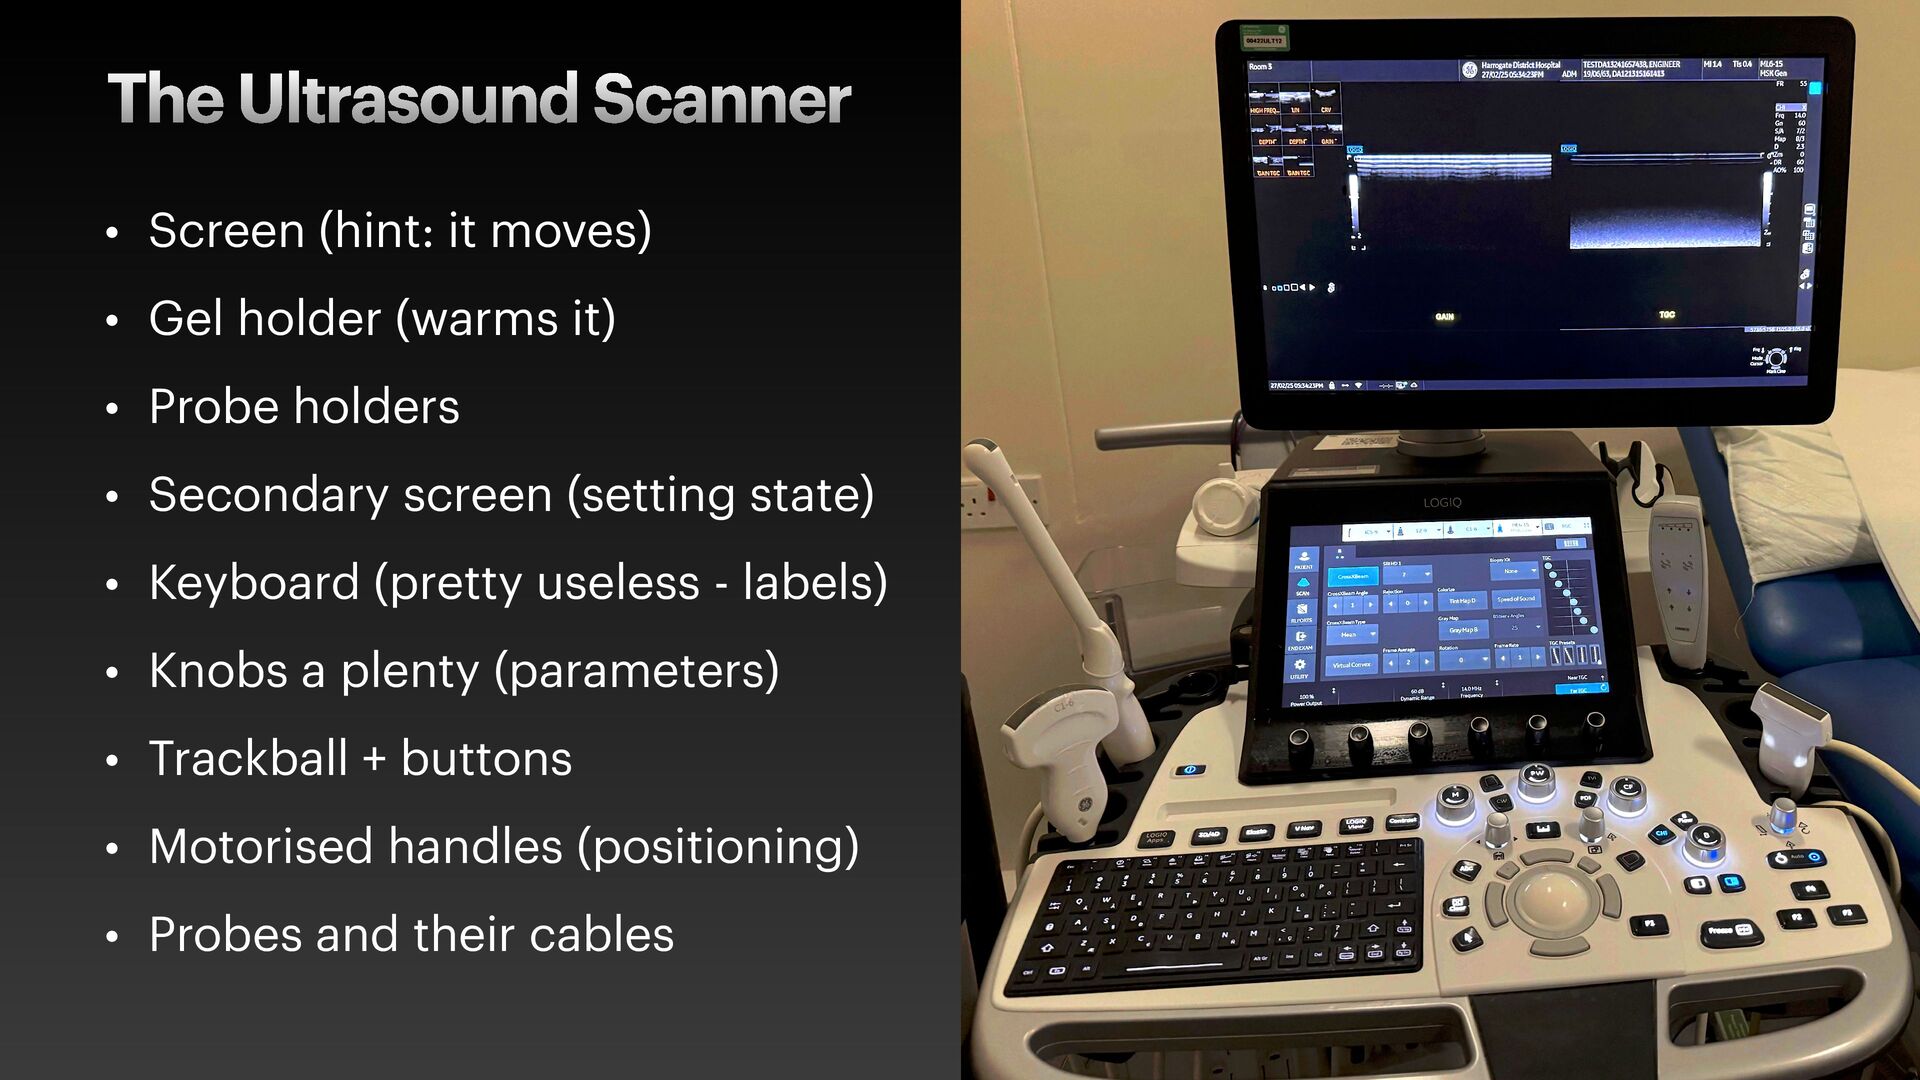
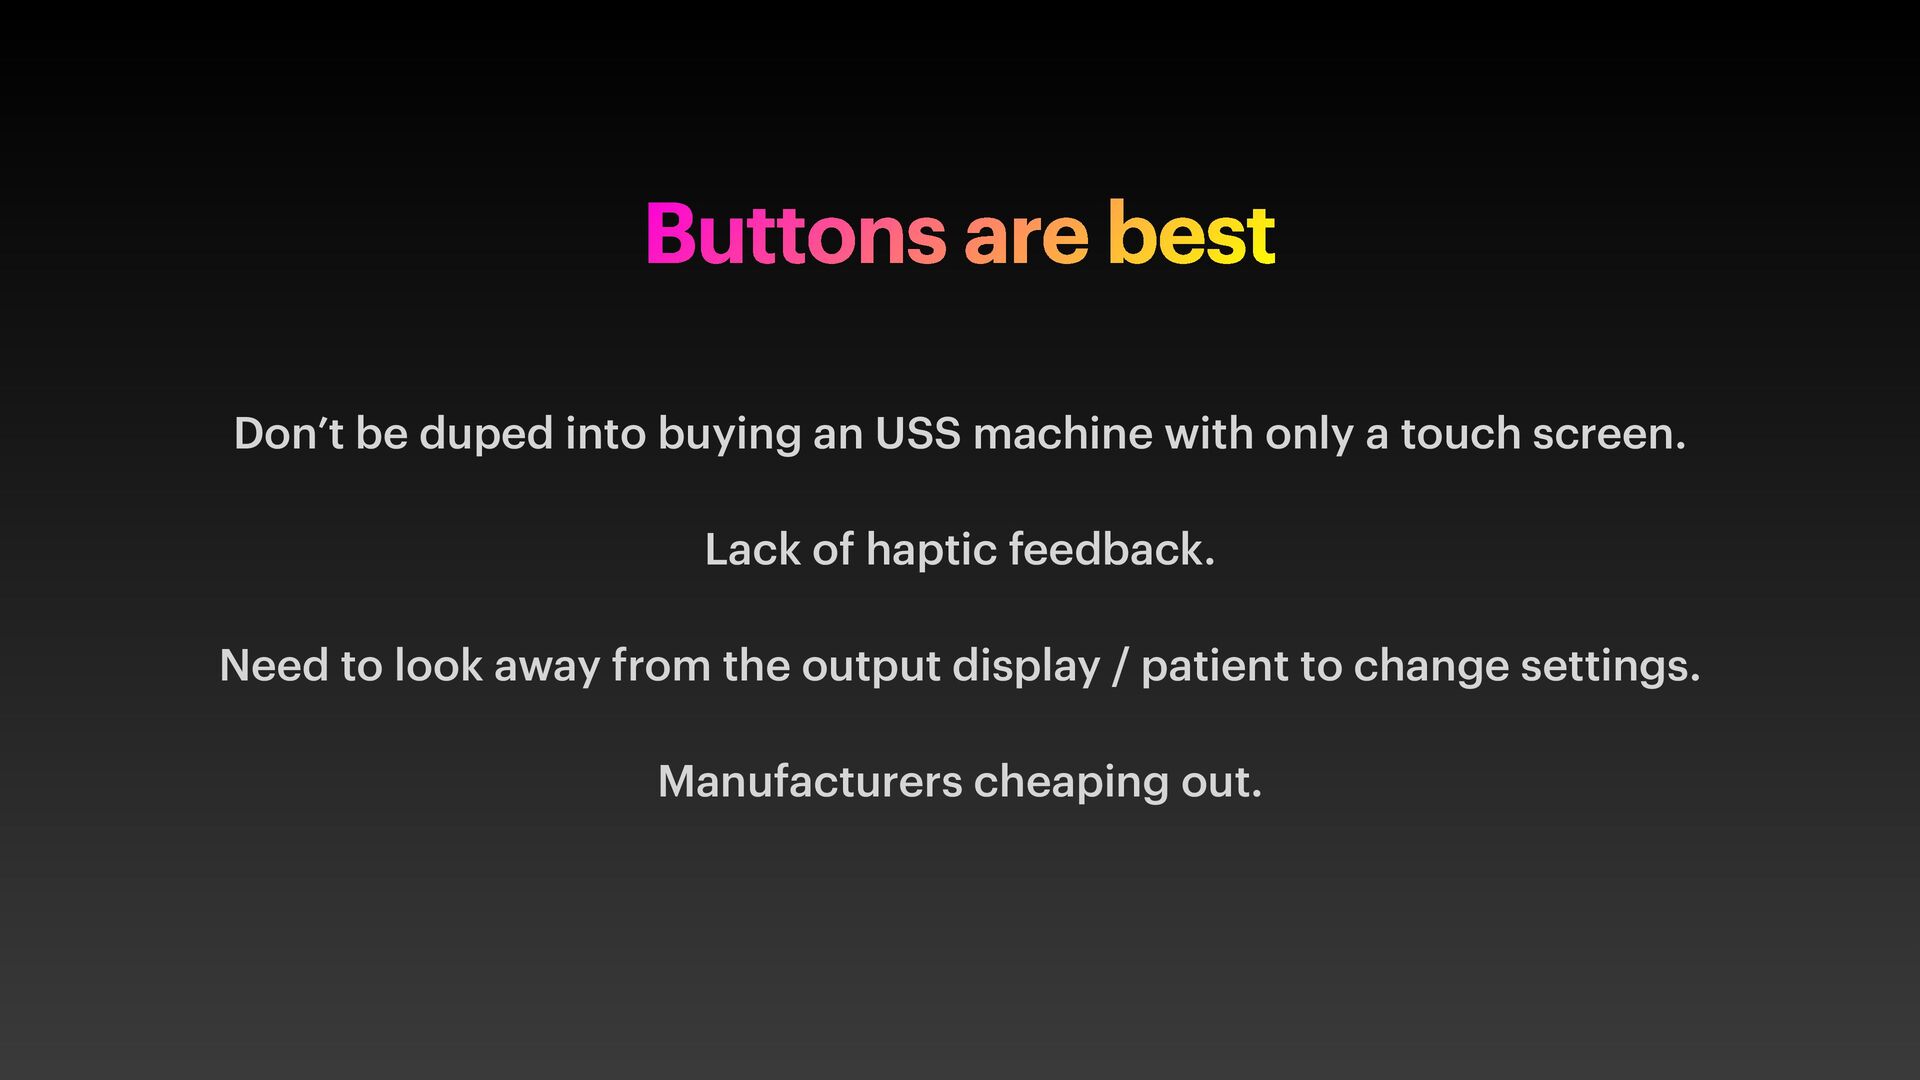
a touch screen. Lack of haptic feedback. Need to look away from the output display / patient to change settings. Manufacturers cheaping out. Buttons are best
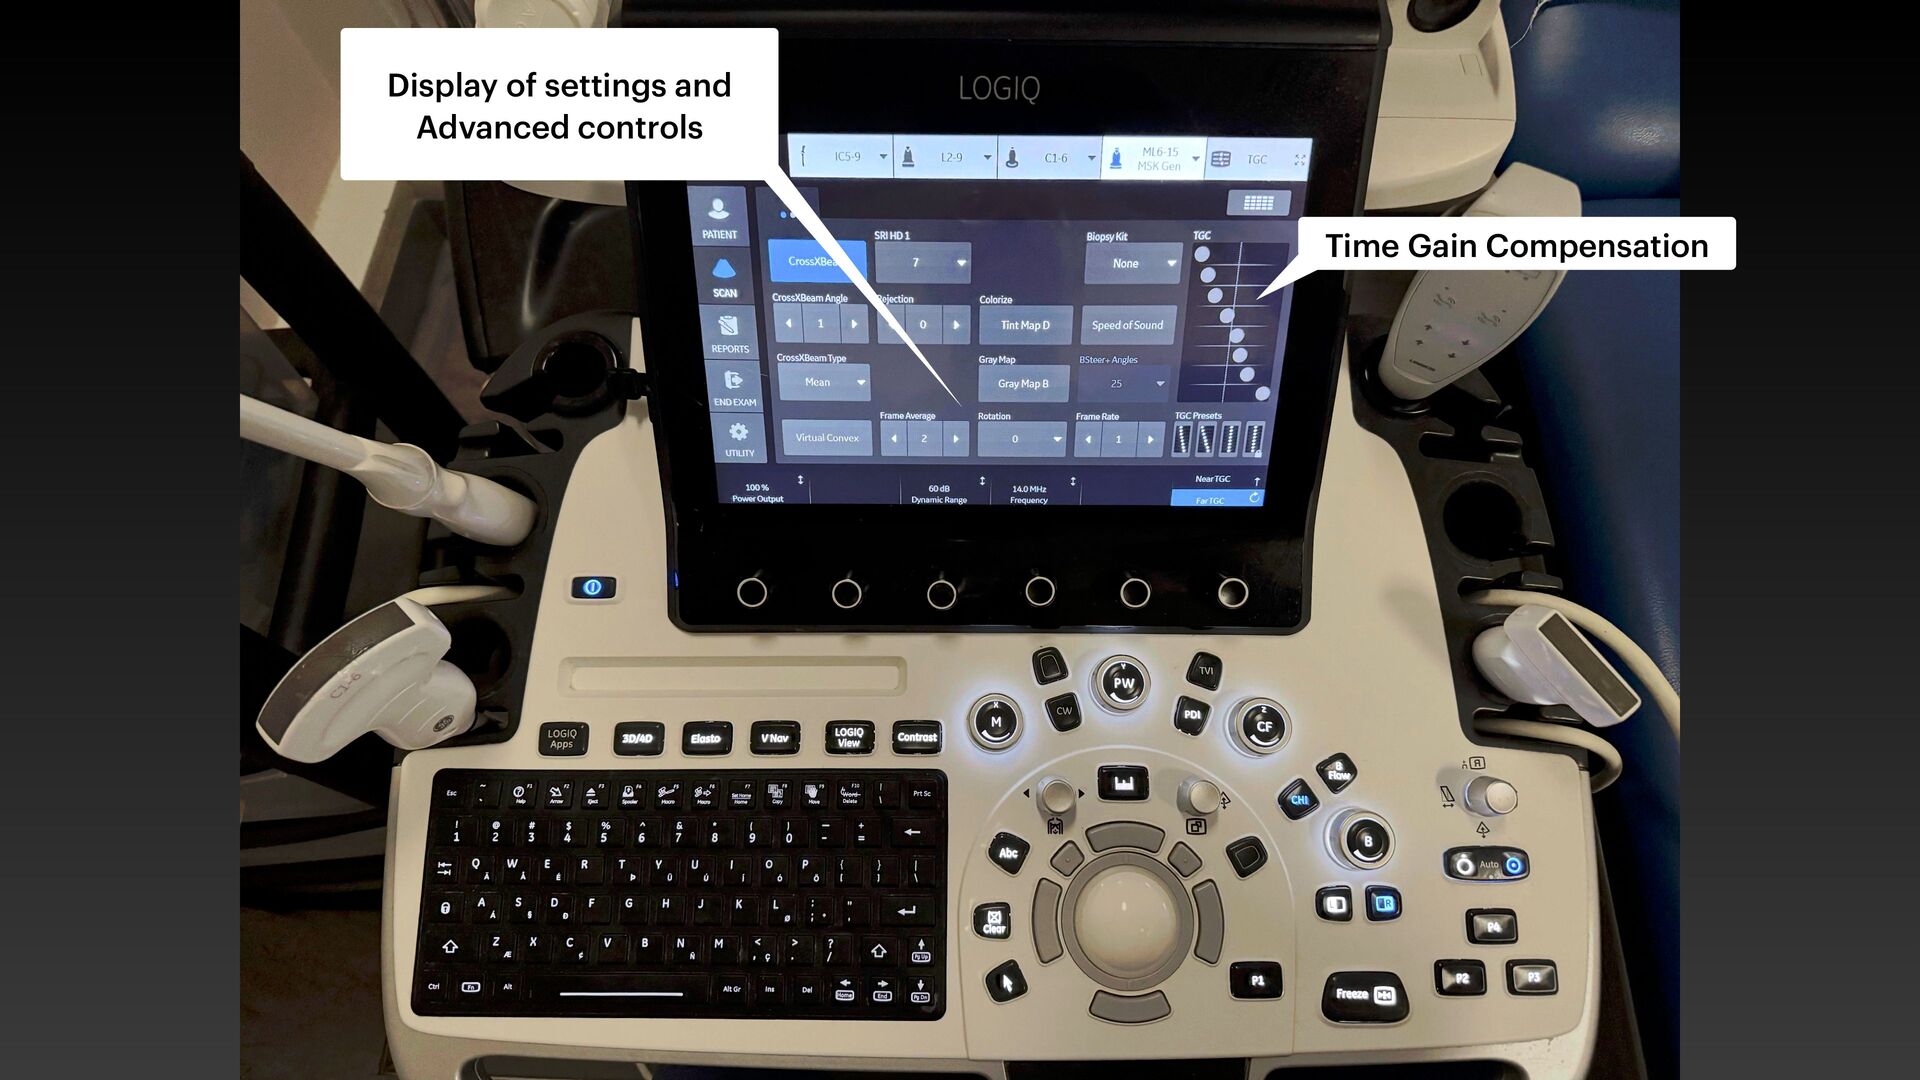
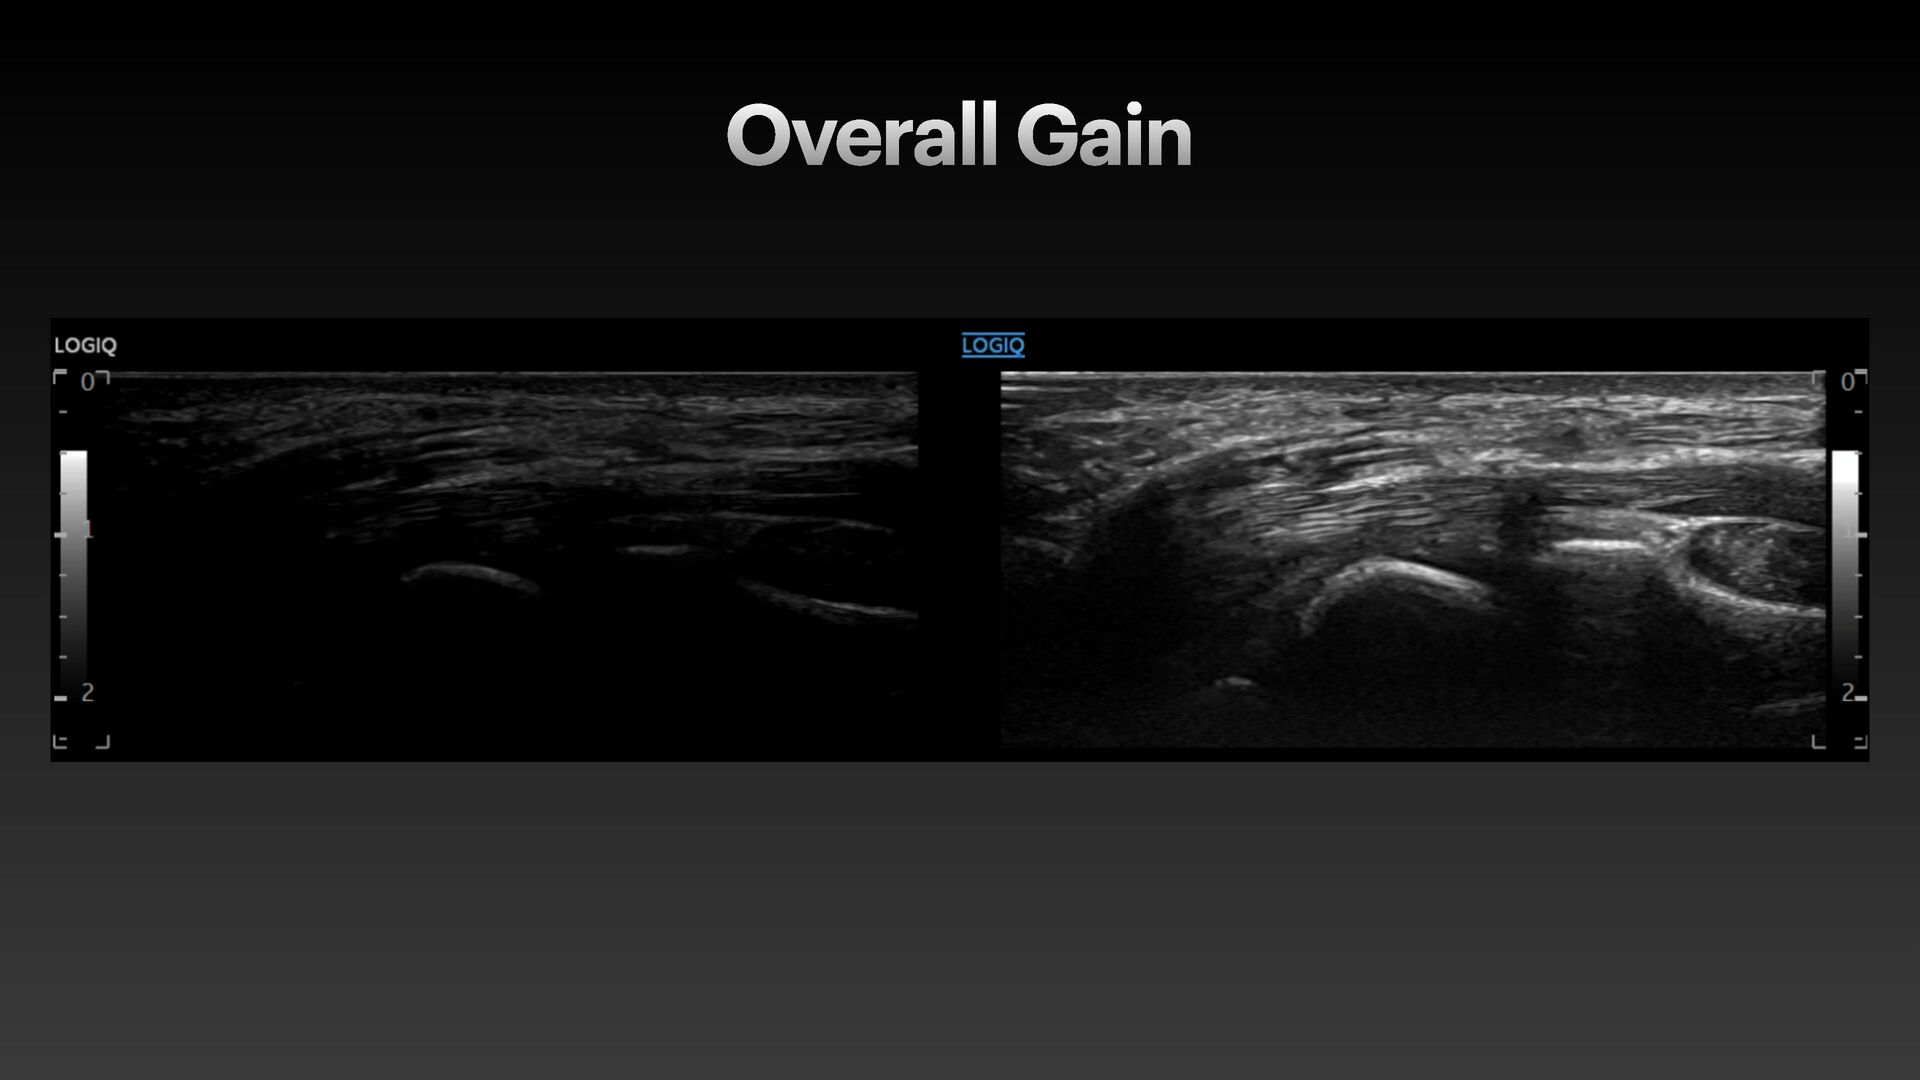
returning sound waves • Uniform brightness increase • Increase: reduces contrast • Decrease: increases contrast • Too high: washed out image • Too low: dark, nothing to see • Degree of personal preference!
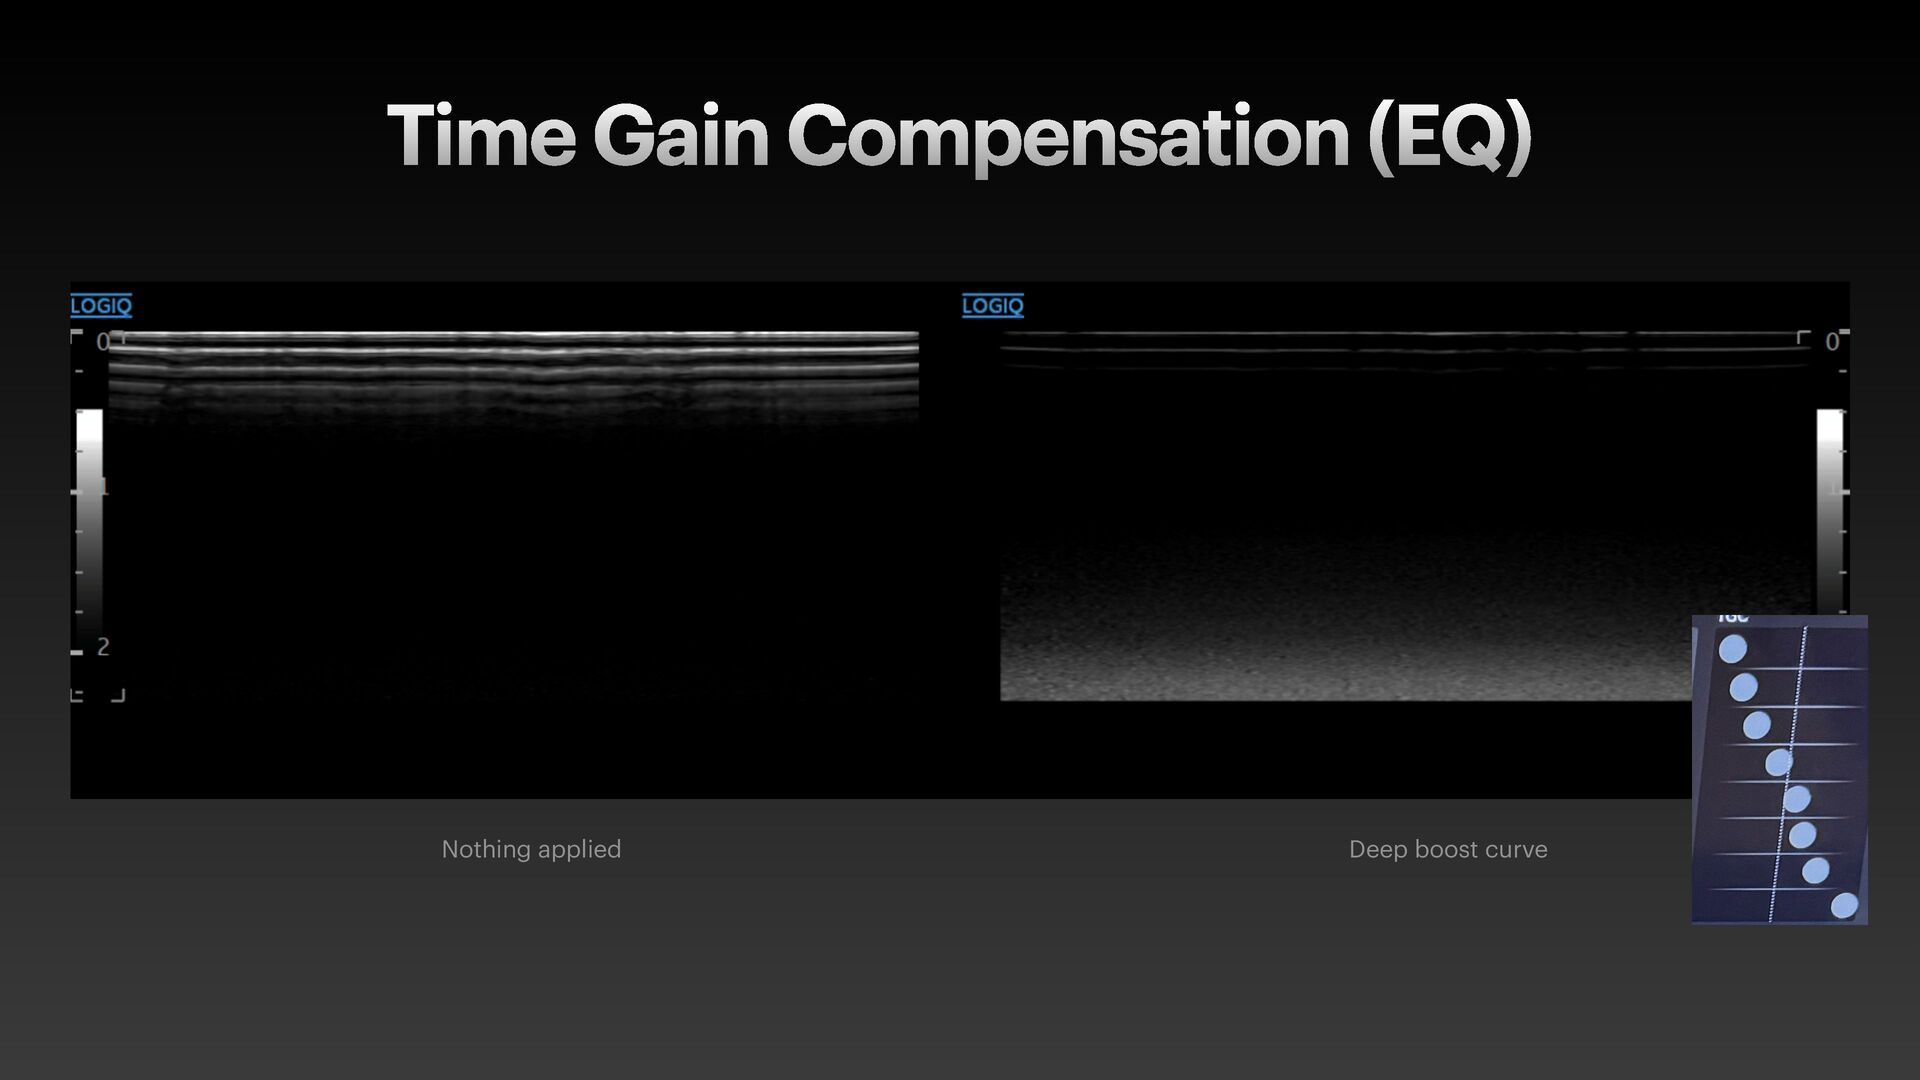
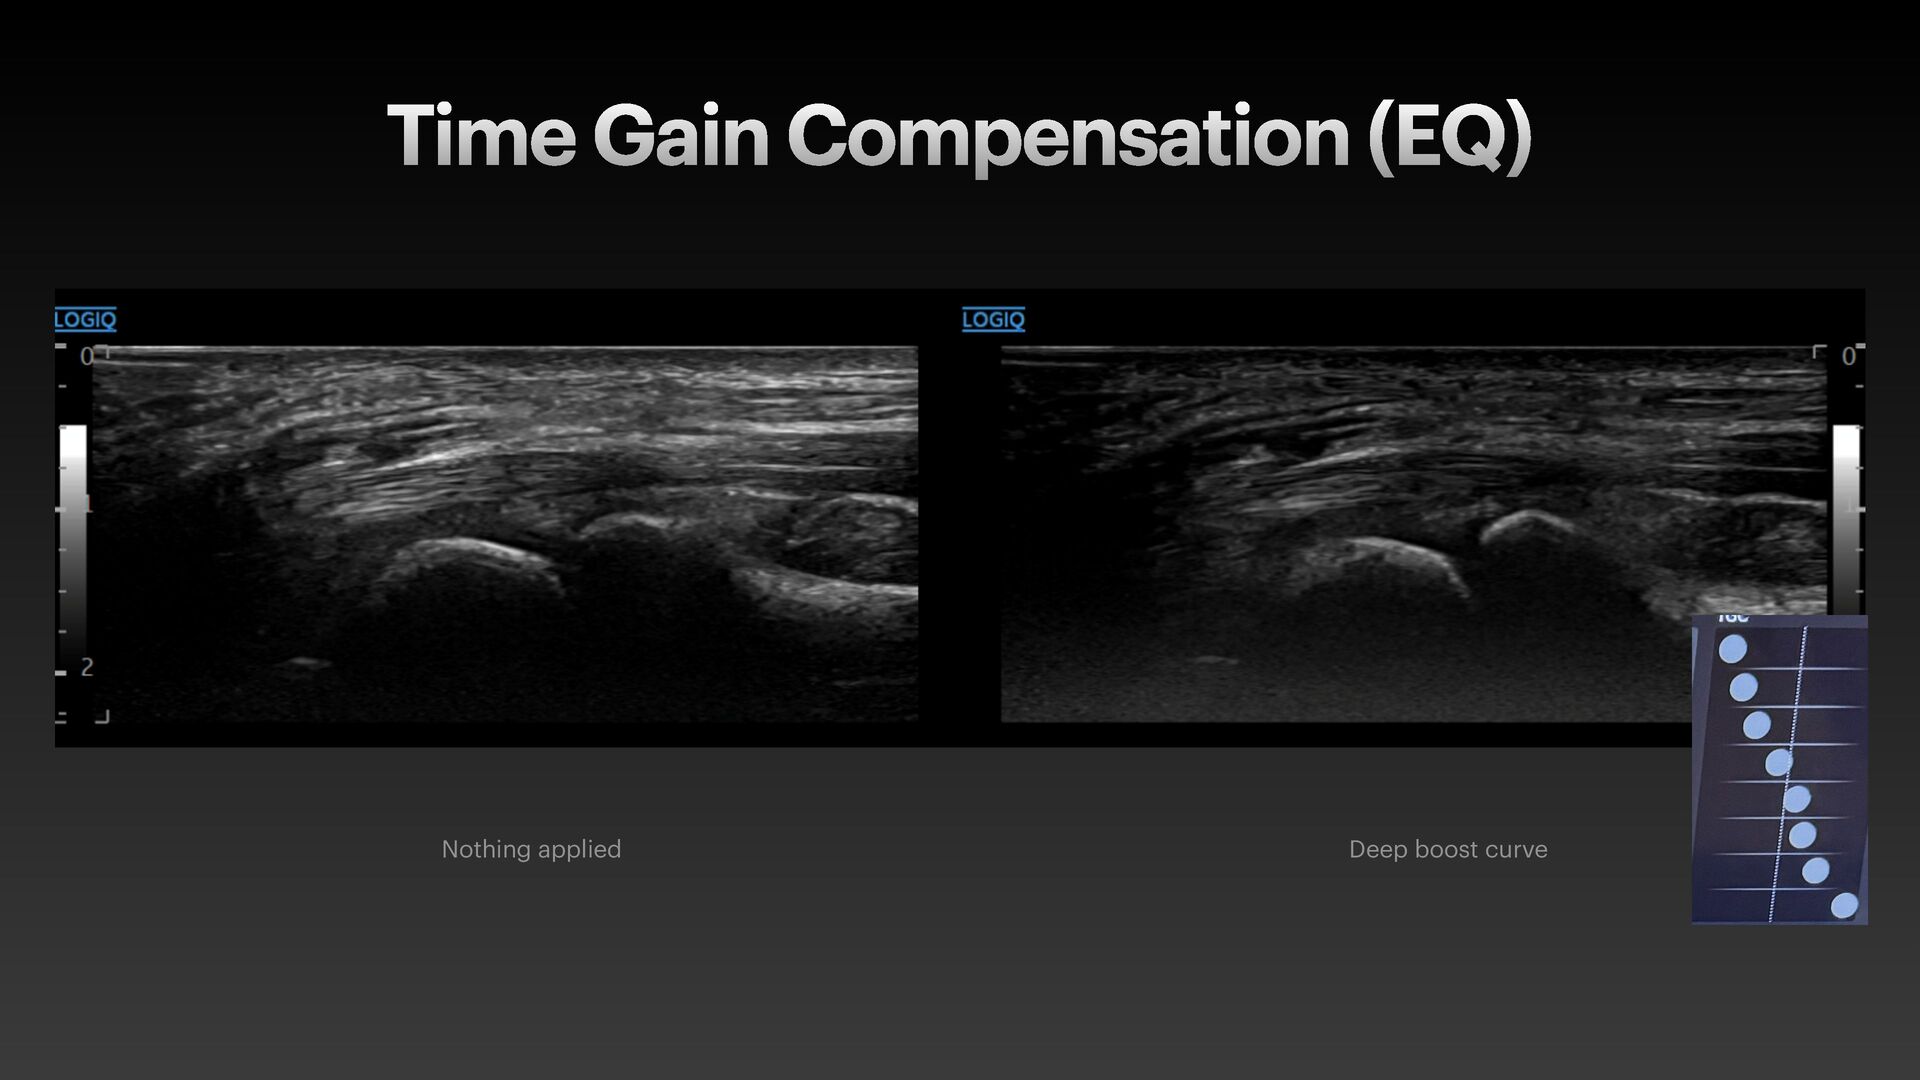
adjustment of brightness at different depths • Corresponds to different sound wave frequencies • Basically: make the deep bits brighter (in reality…) • Consider if that frequency is the issue in reality
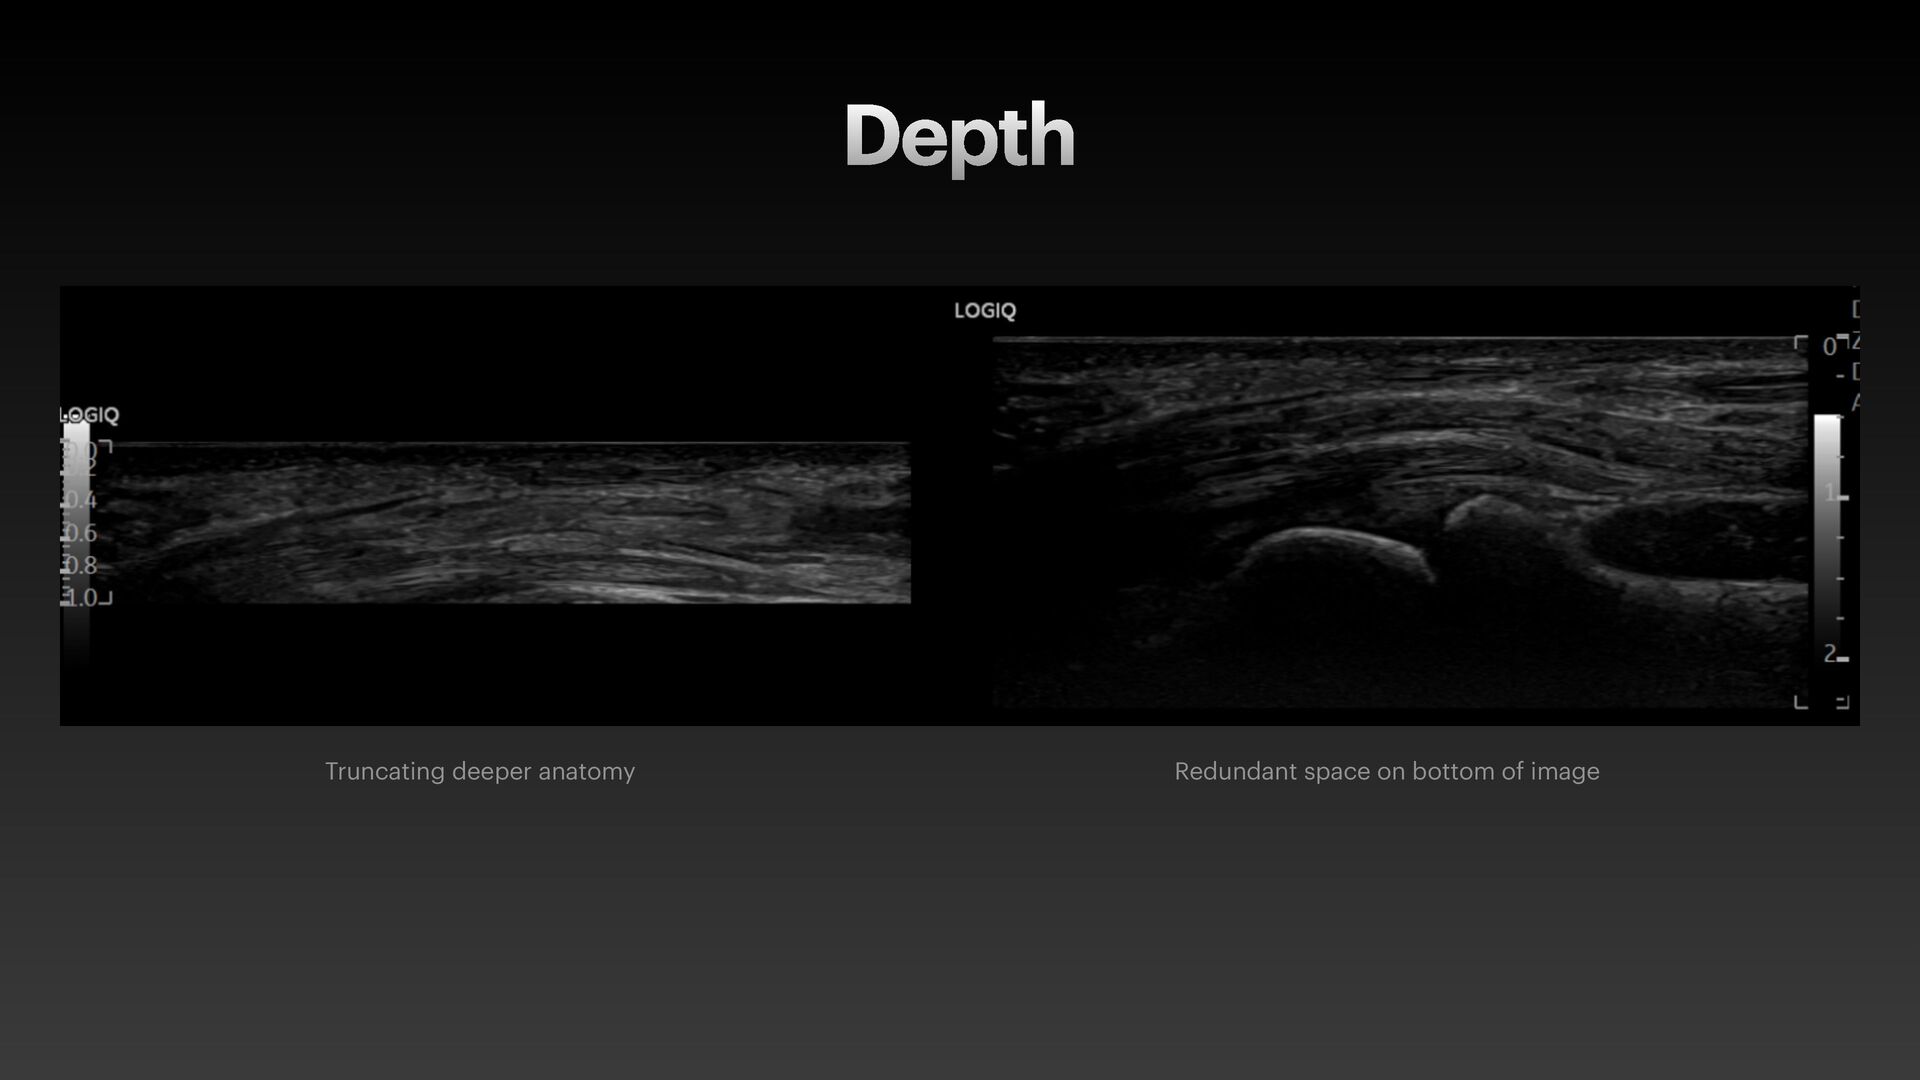
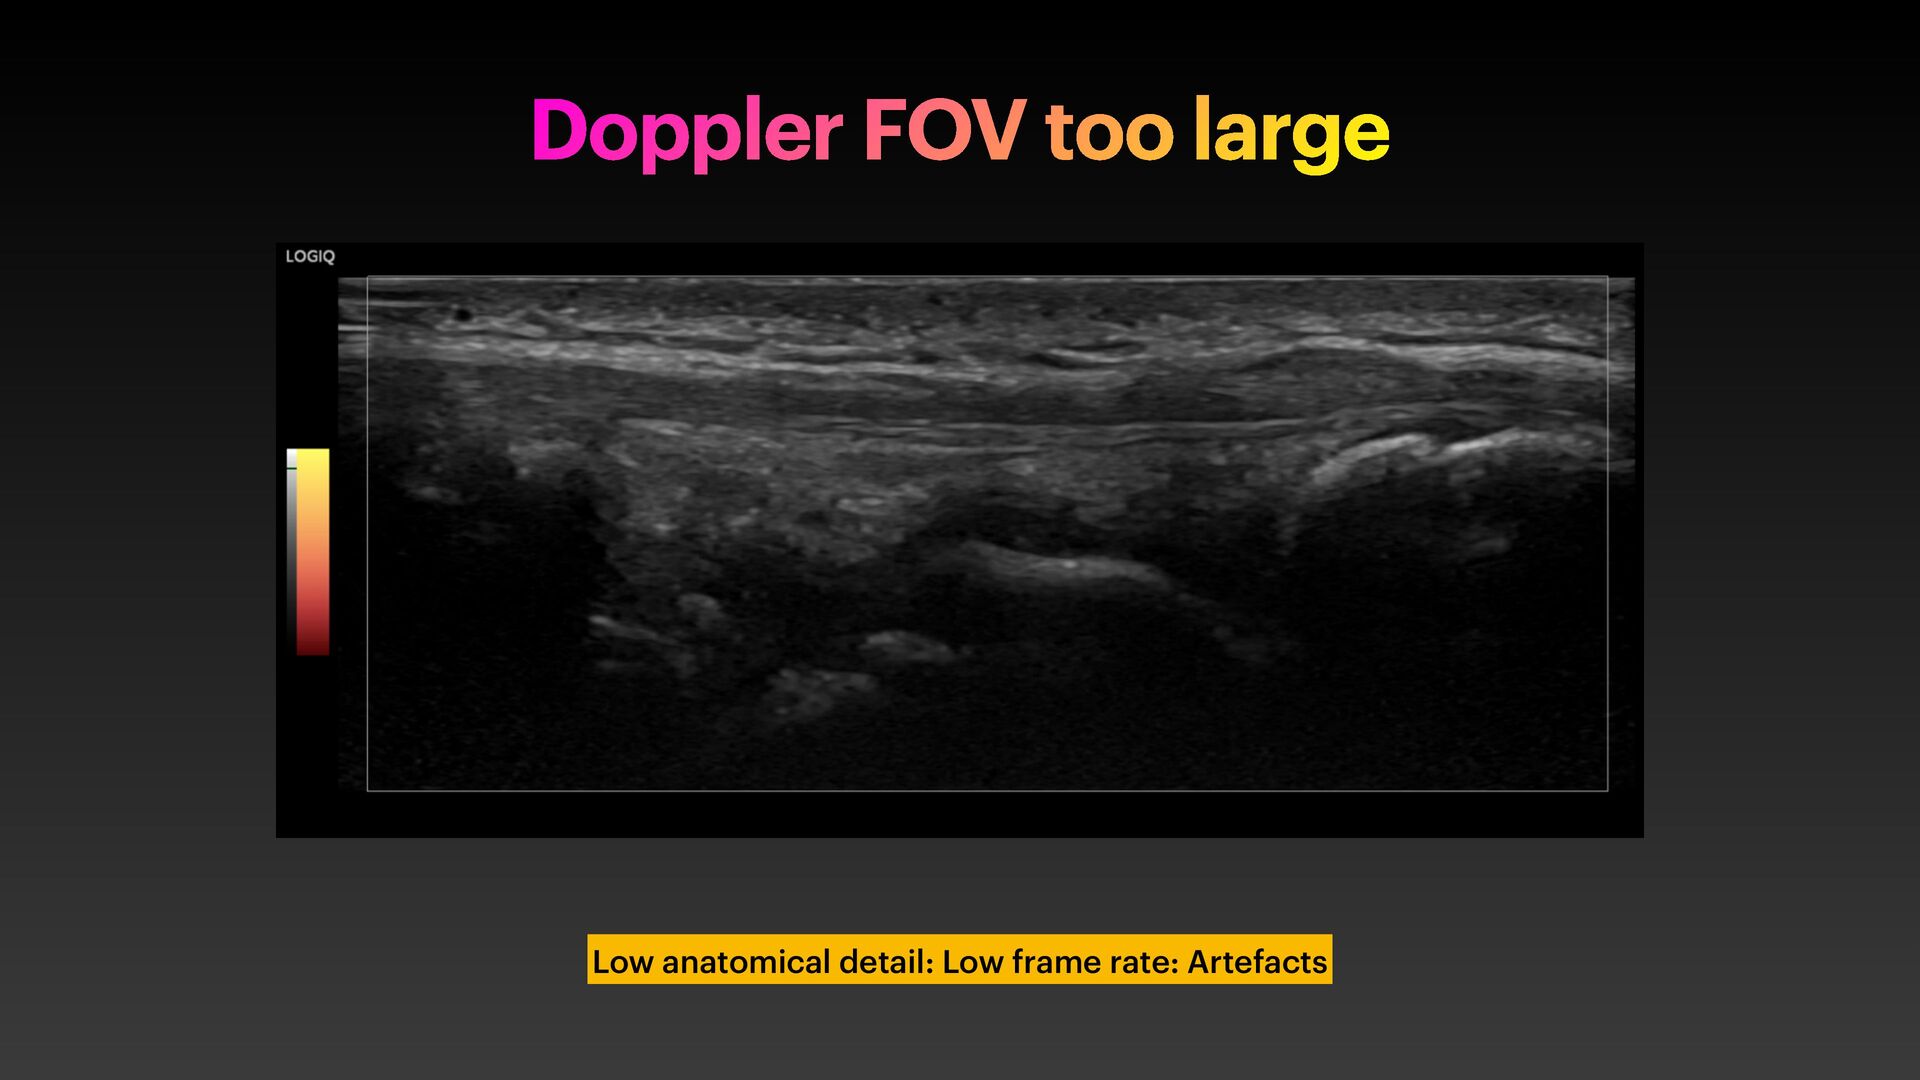
the ultrasound scans by changing the range of echoes displayed. • More depth: Lower frame rate + larger f ield of view. • Too shallow: missing anatomy • Too deep: reduced spatial resolution, tiny structures. Wasted space.
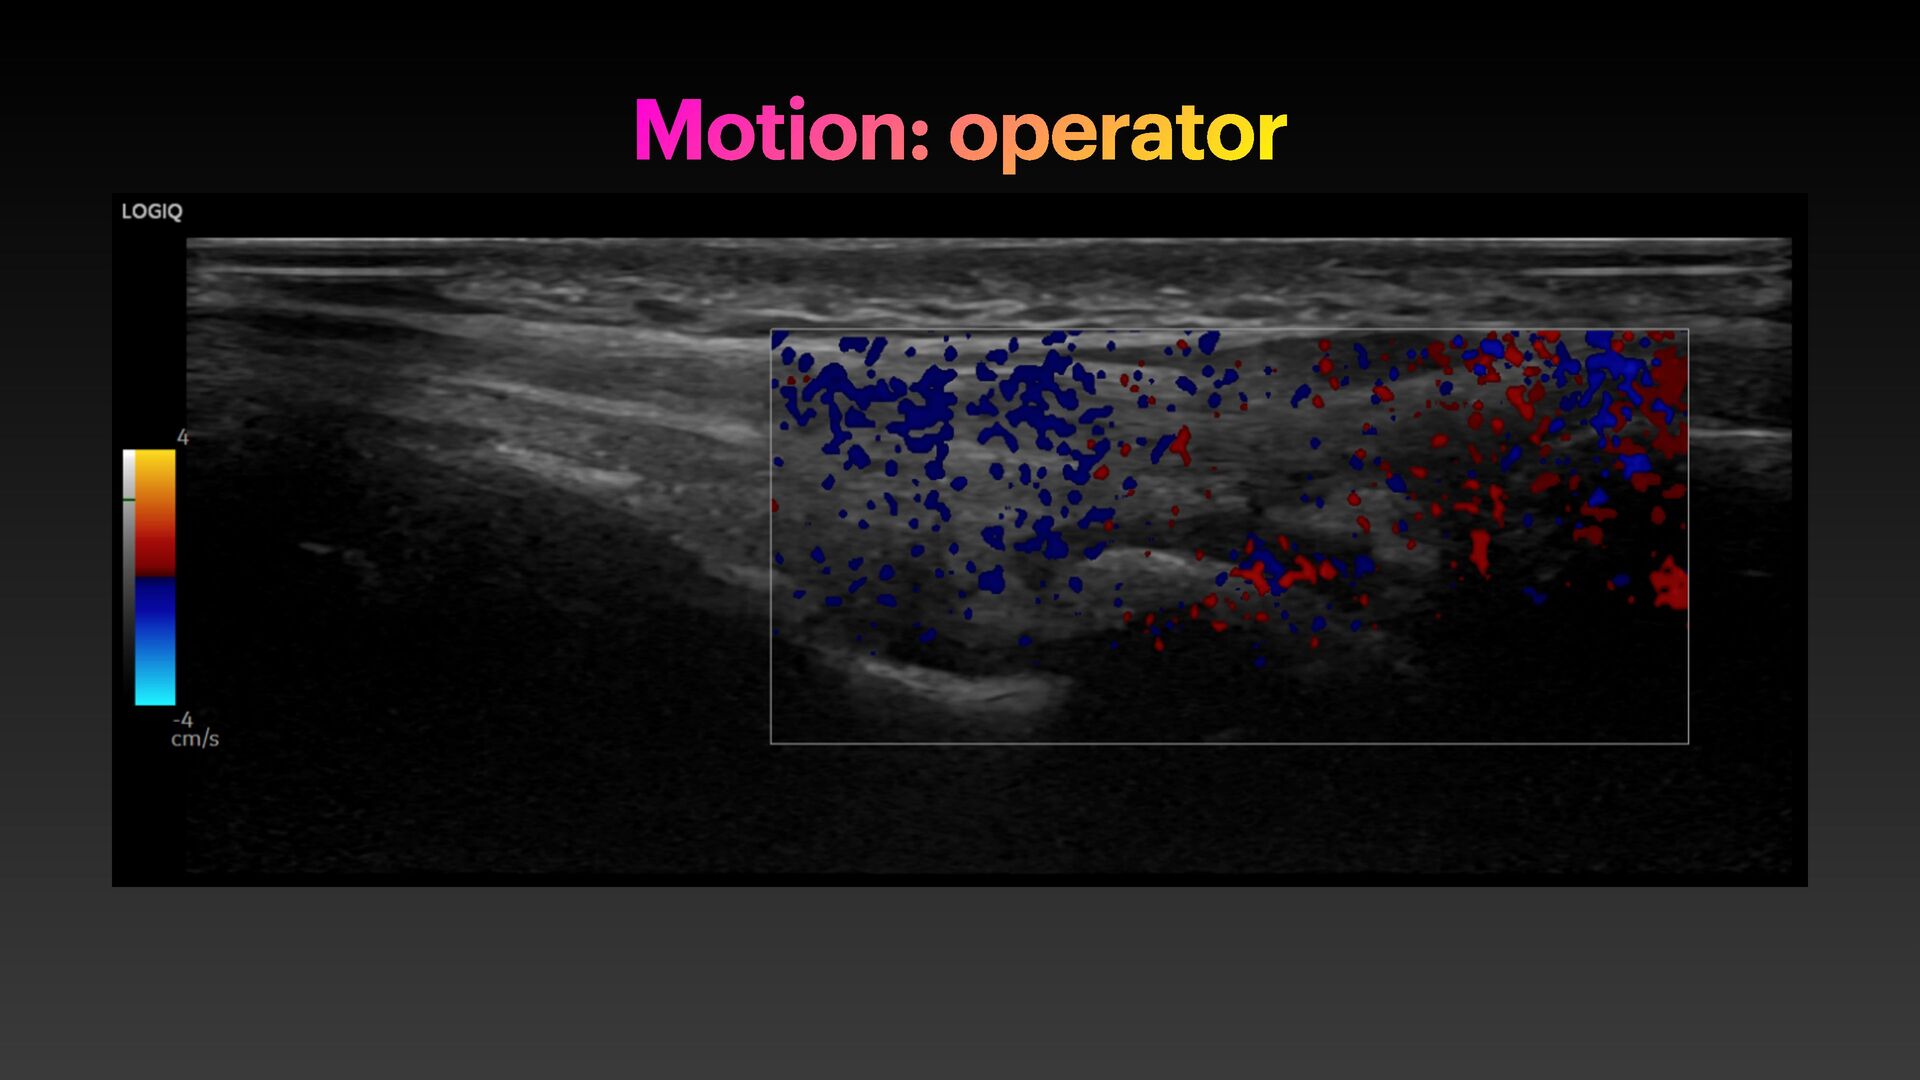
2. If you see synovial thickening, tenosynovitis, effusion, erosion 3. Stabilise image + invoke Doppler 4. Colour Doppler vs Power Doppler: It doesn’t matter* 5. Summative Assessment: History, examination, biochemistry, anatomical scan + functional overlay (Doppler) * Dr Fascia thinks Power Doppler is a scam
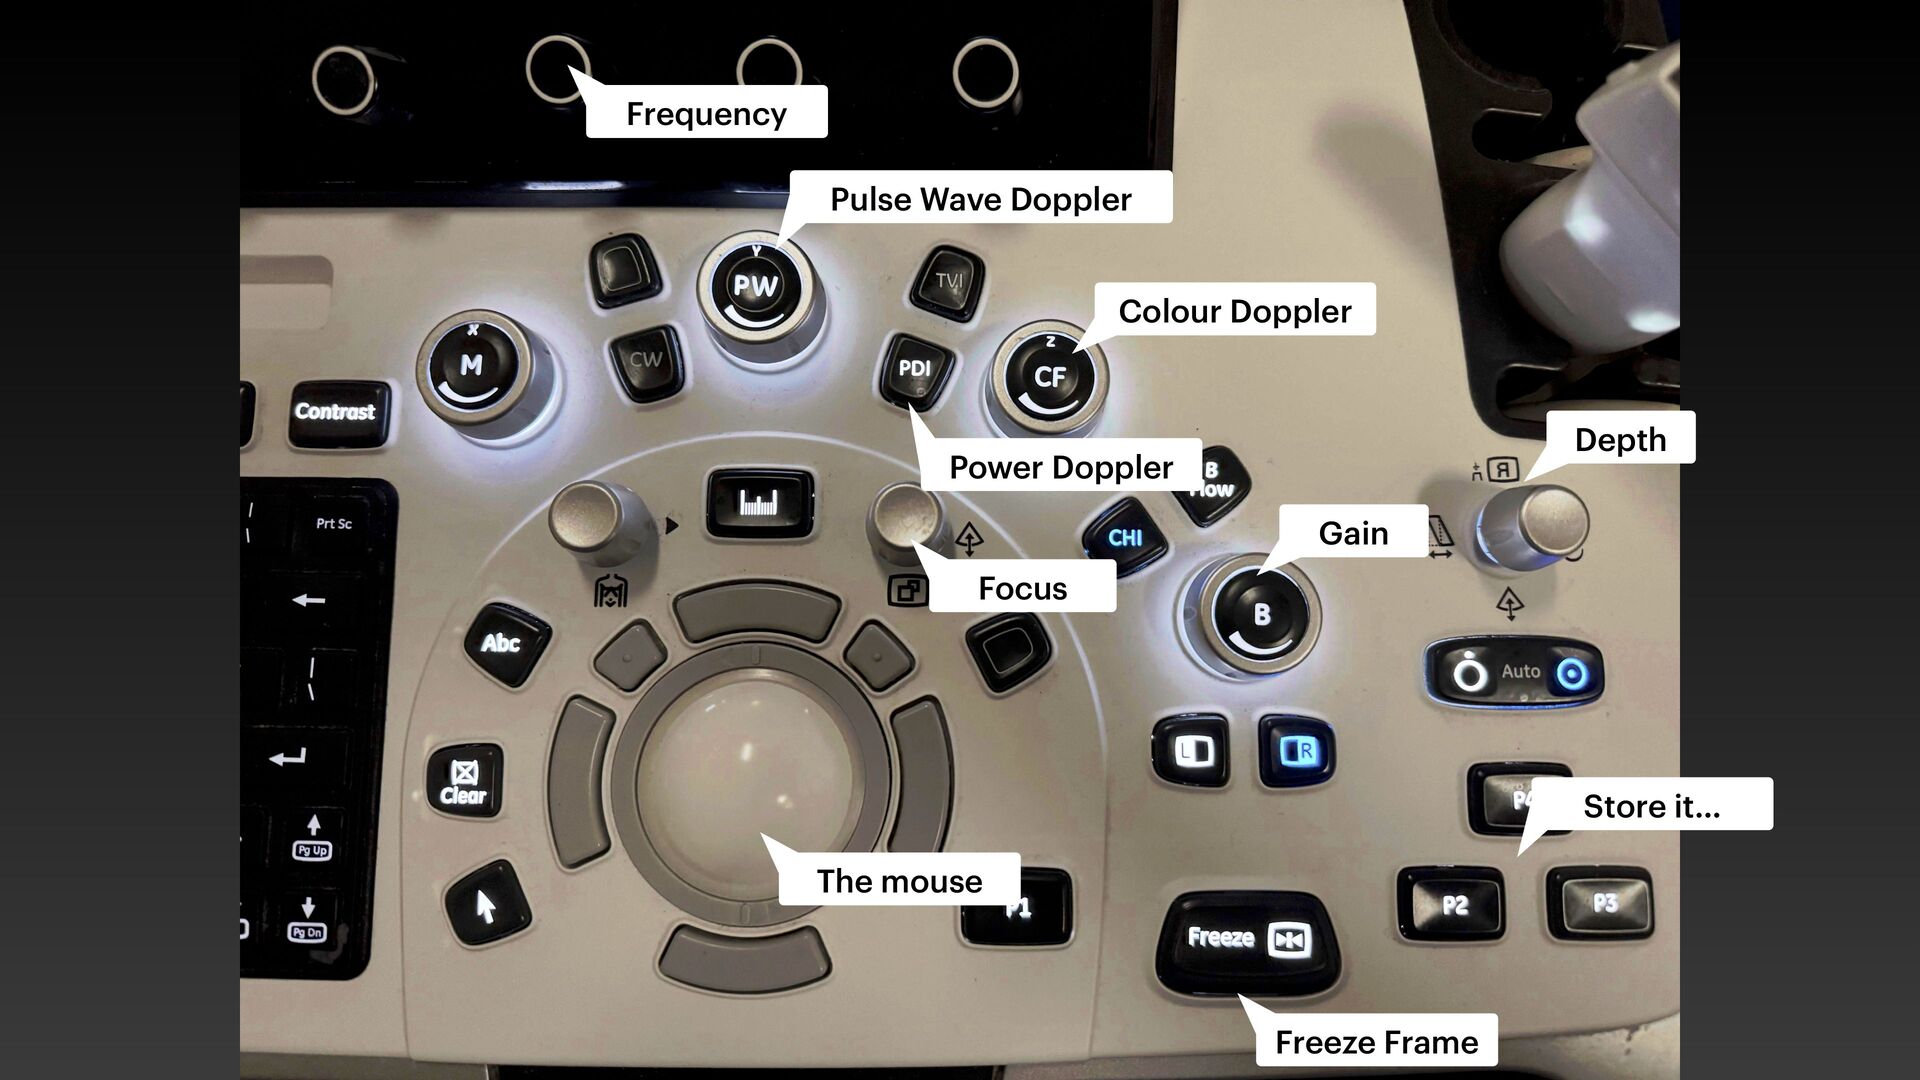
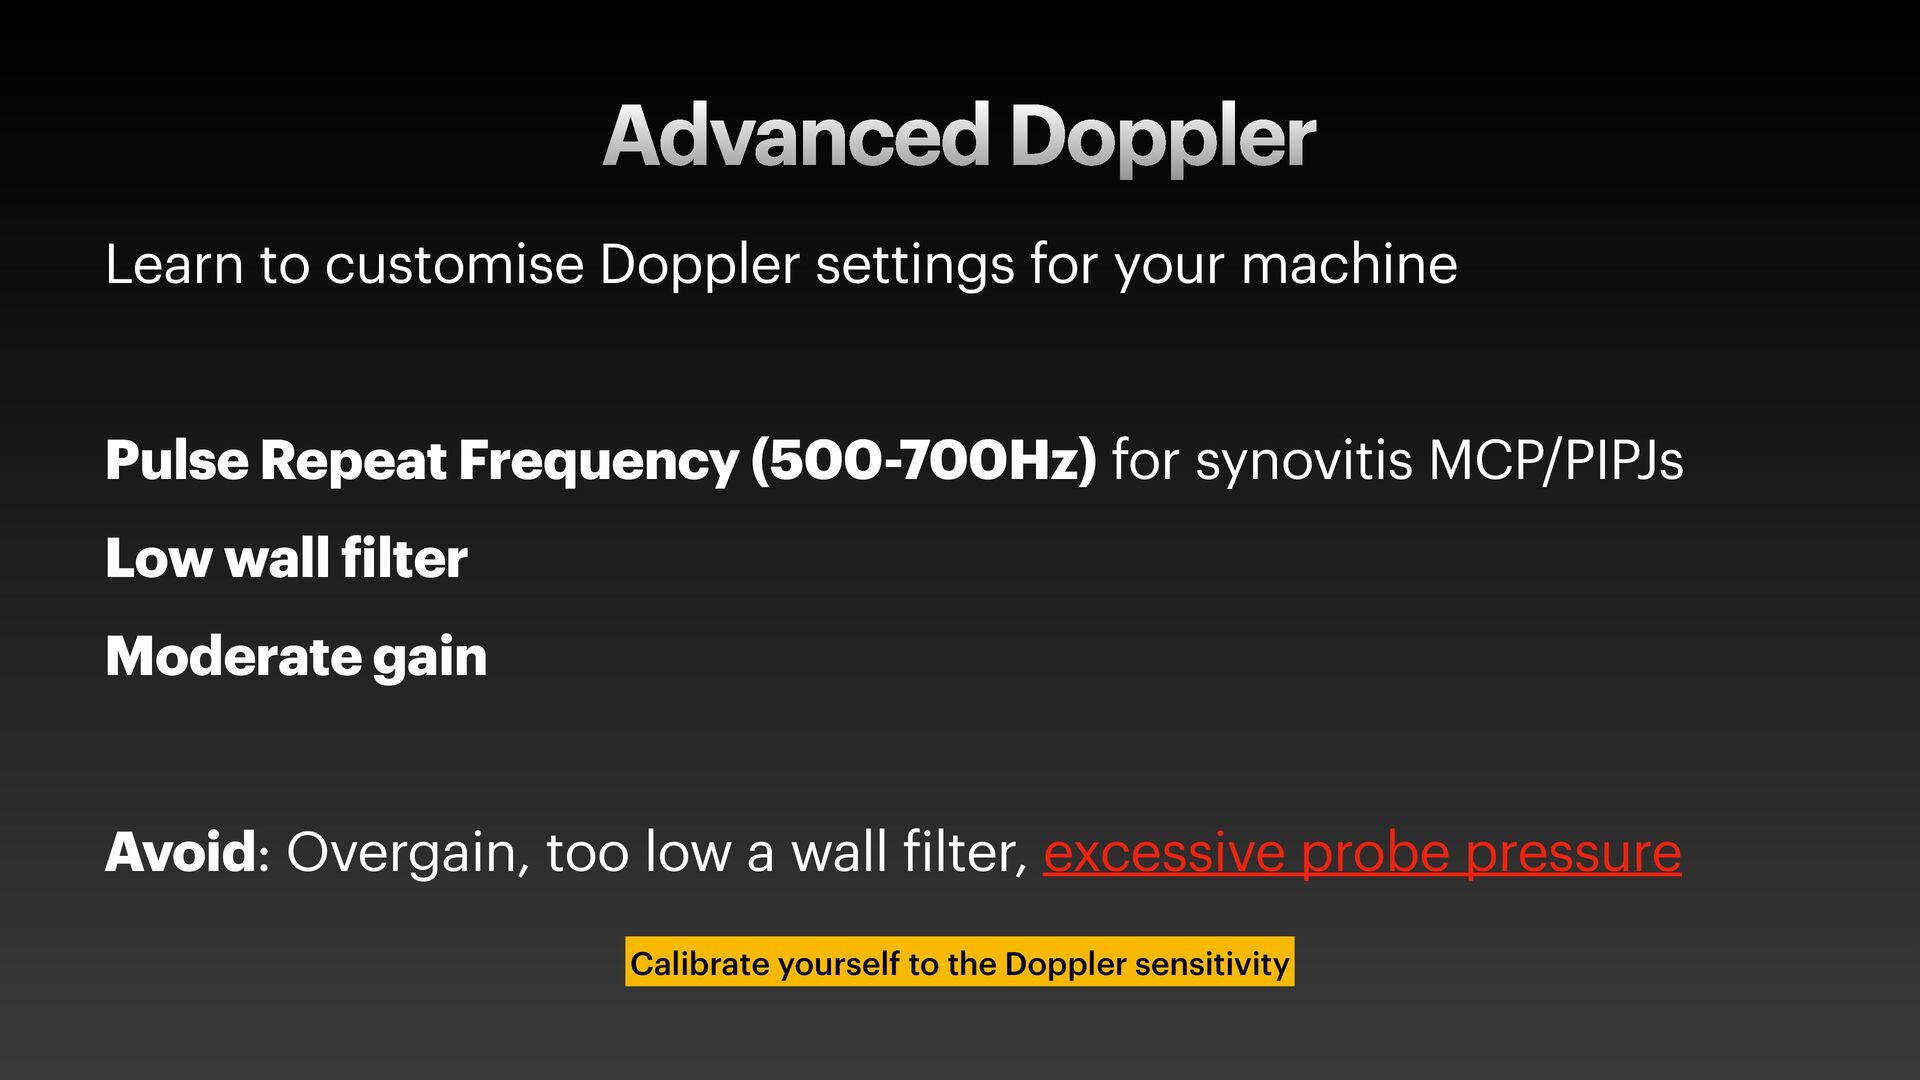
Pulse Repeat Frequency (500-700Hz) for synovitis MCP/PIPJs Low wall f ilter Moderate gain Avoid: Overgain, too low a wall f ilter, excessive probe pressure Calibrate yourself to the Doppler sensitivity
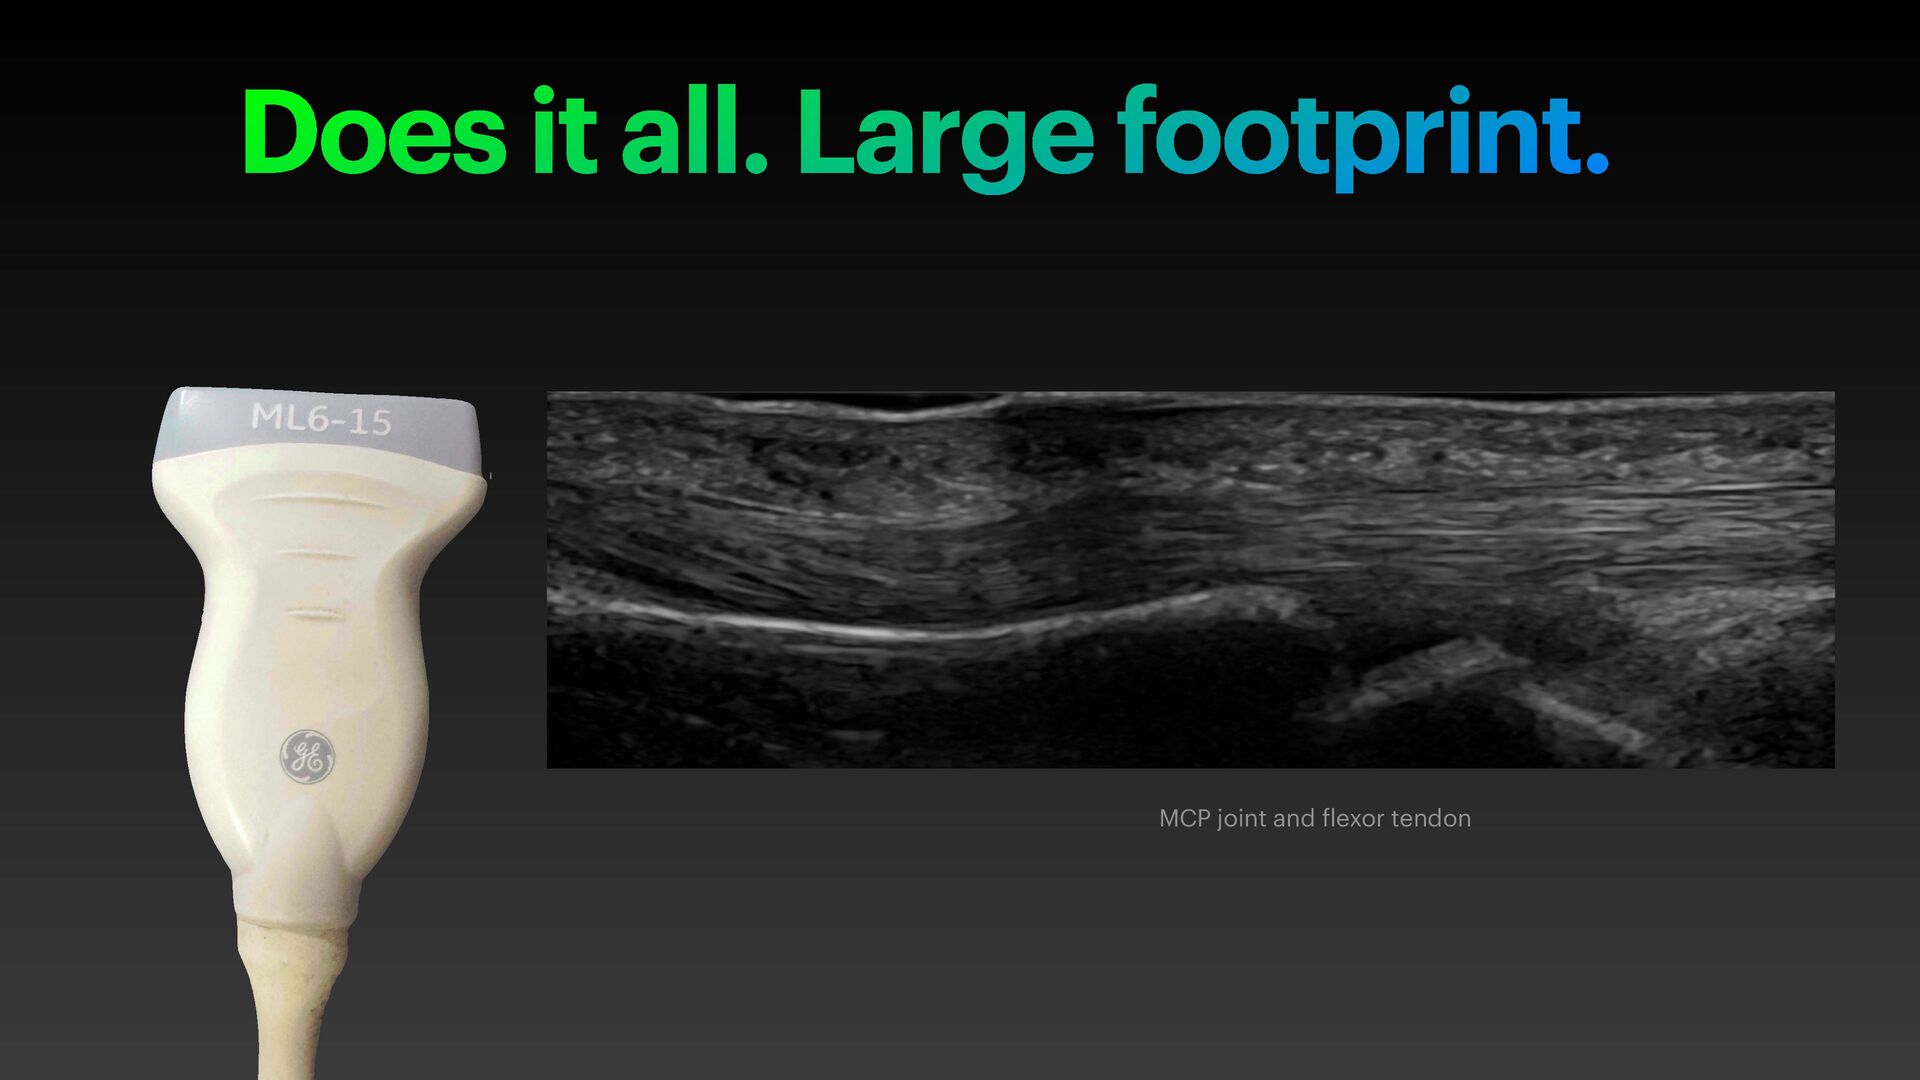
Operator technical skill to pull it off Higher end machines Panorama image of whole f inger palmar surface, f lexor tendon, sheath and all joints DP IP PP MC