Upgrade to Pro — share decks privately, control downloads, hide ads and more …

Building a Smart Home Device with MicroPython

Building a Smart Home Device with MicroPython

Your smart home is a wireless network of connected devices which all talk to each other by sending messages into a central hub. If you control the hub's messaging queue, you can control and monitor the network and even create your own custom devices that end up visible in services like Apple or Google Home.

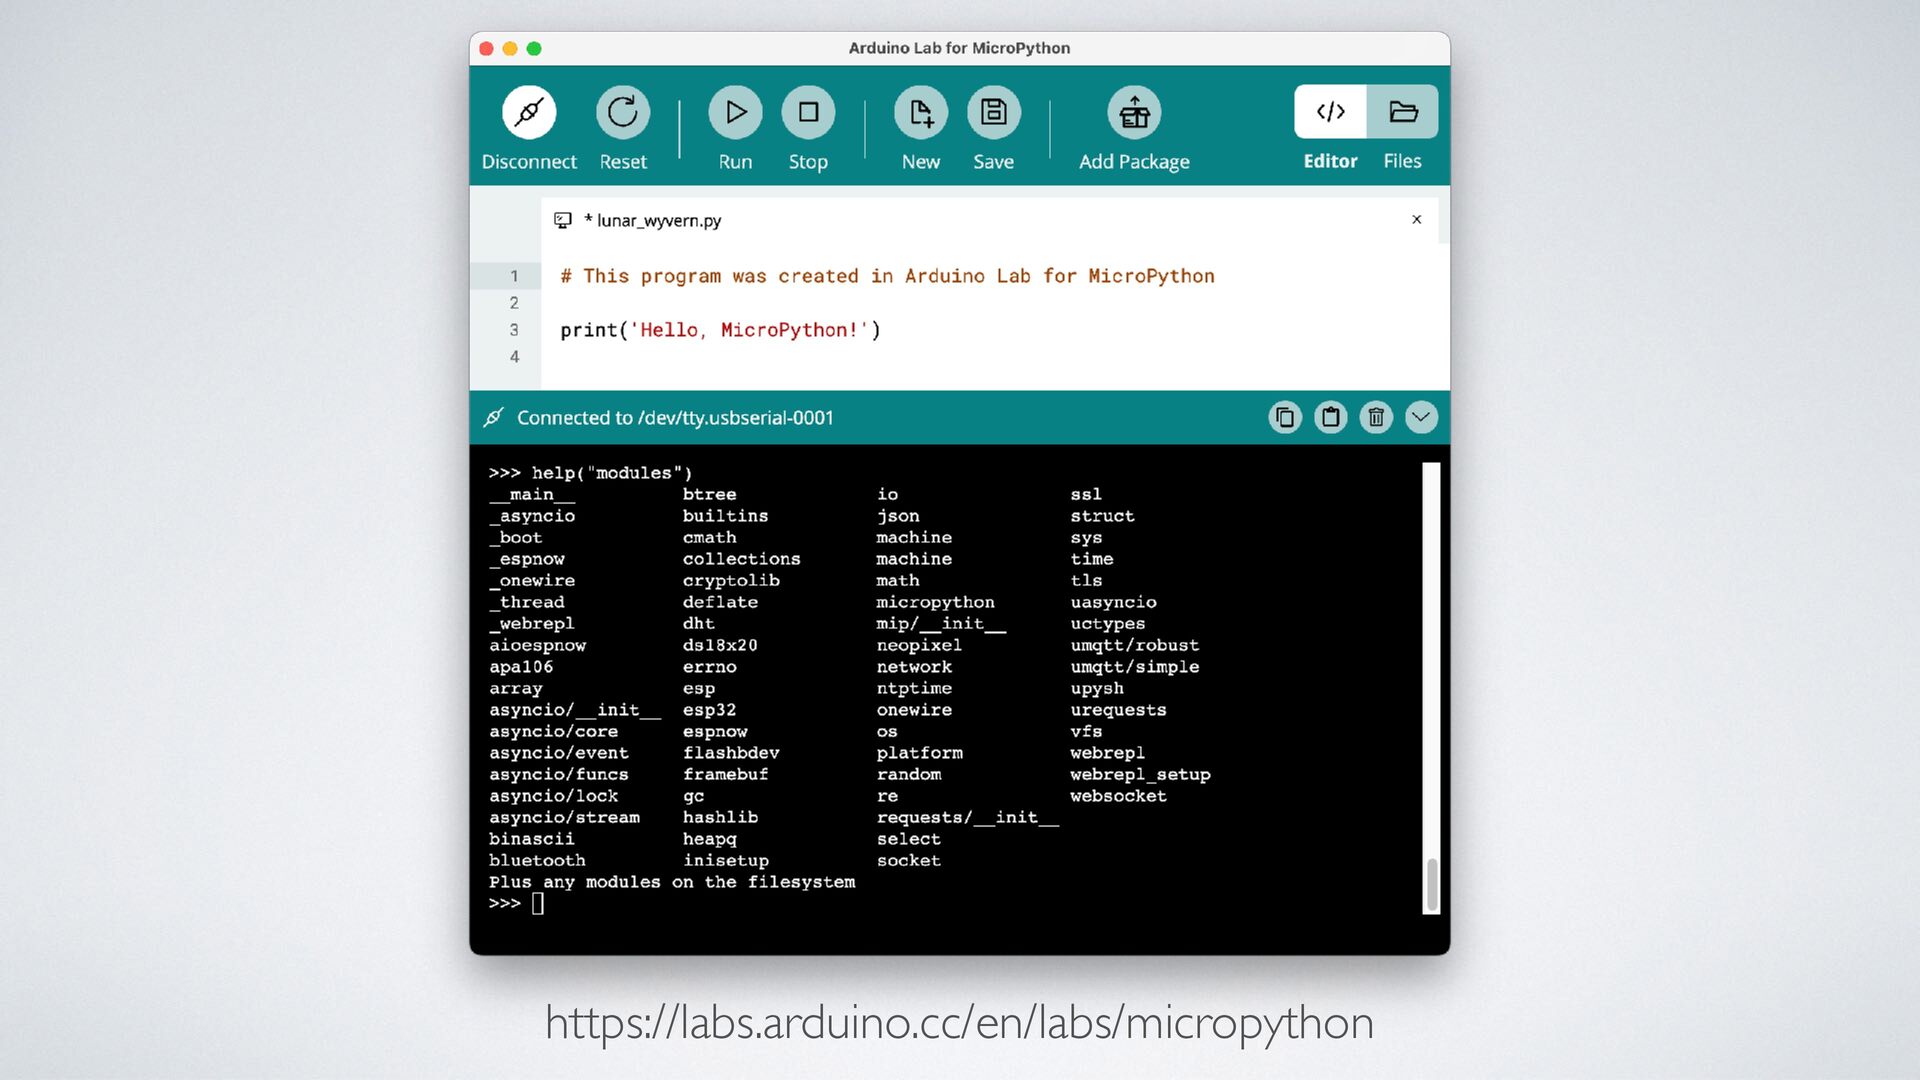
In this talk I will show you what it takes to create such a custom device using an affordable ESP32 microcontroller running MicroPython. We'll briefly look at the capabilities of the ESP32 family and why it is a good choice for WiFi-enabled projects. We'll talk about the tooling that makes development a pleasure, from flashing firmware to interacting with the board using WebREPL, installing lightweight dependencies with mip, testing, logging, and more.

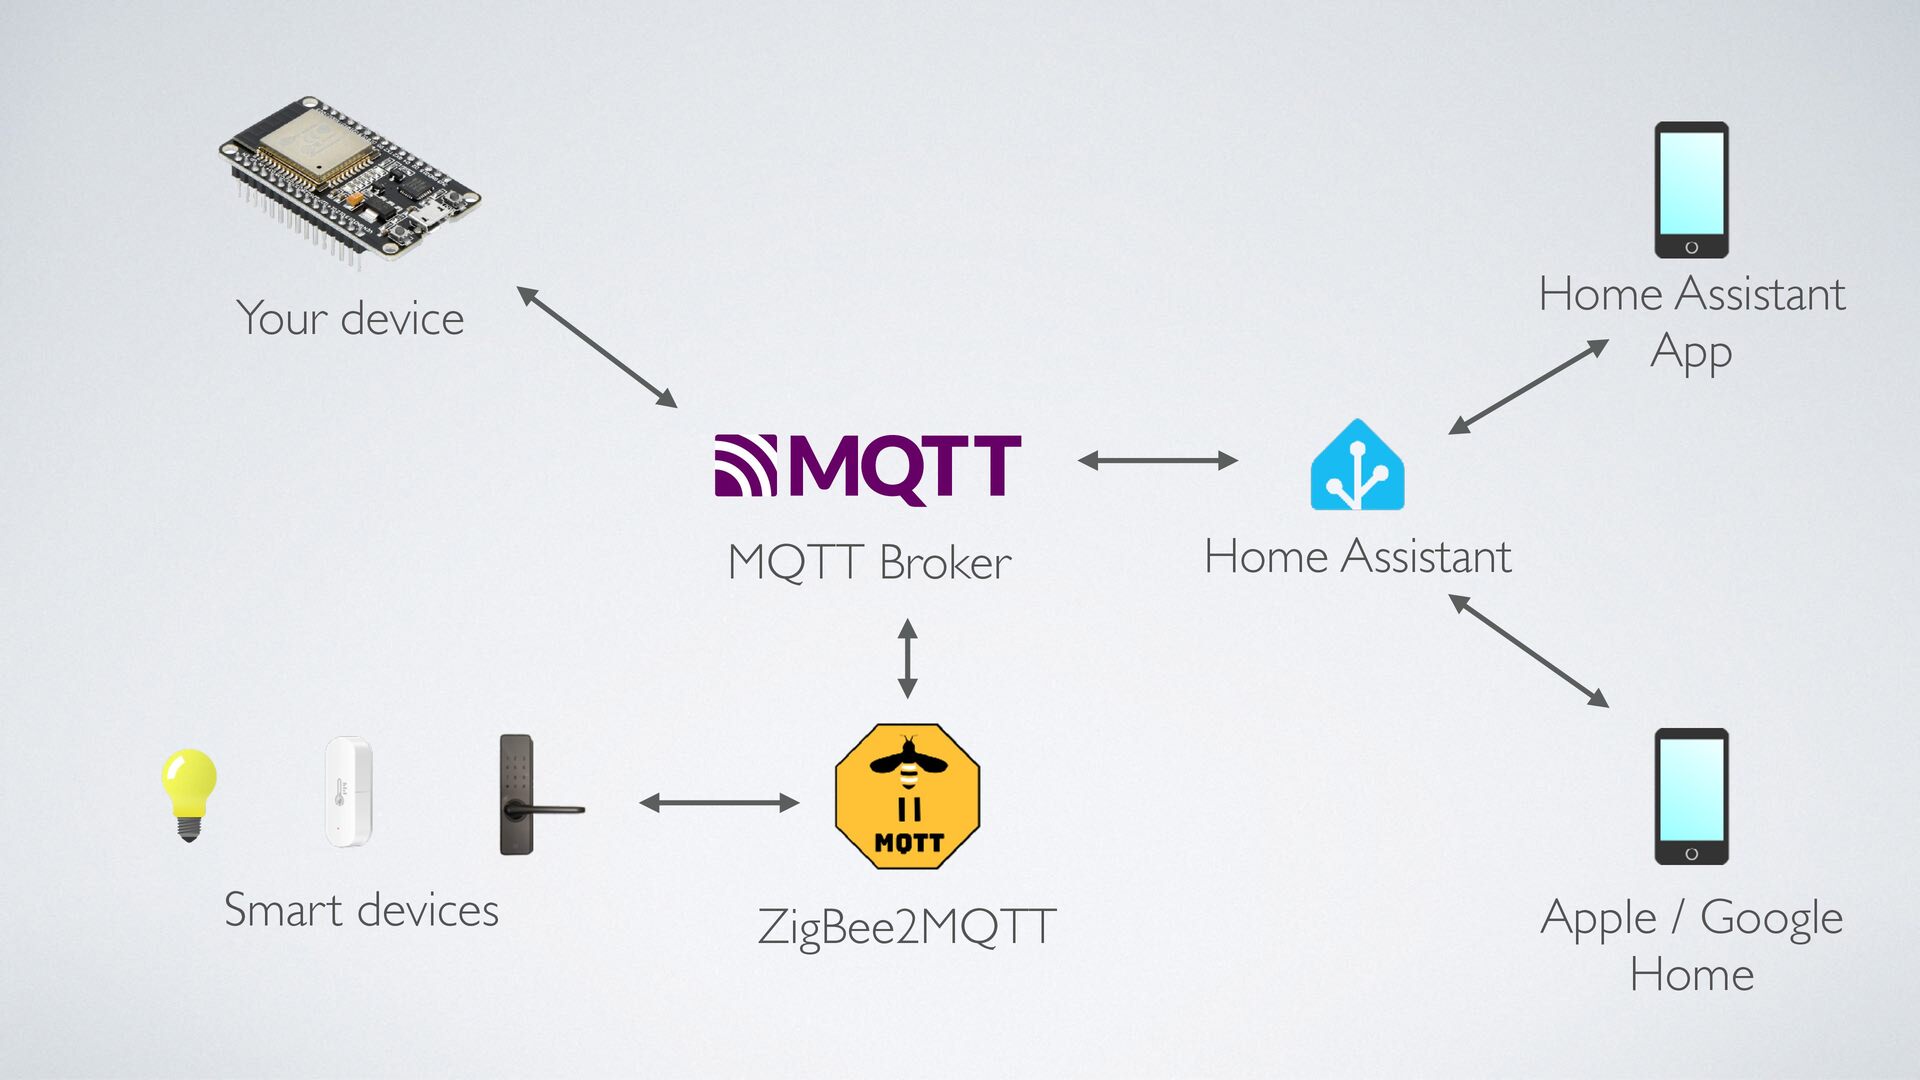
We will also discuss the MQTT protocol, how our custom devices can send and receive messages, how to integrate third-party Zigbee devices, and how to use Home Assistant as a bridge between our MQTT server and Apple or Google Home. We'll see how to use the Mosquitto broker and client tools such as paho.mqtt and how Zigbee2MQTT allows remote sensors to join the same messaging layer.

My goal is to give a practical overview of the hardware and software pieces involved: ESP32, MicroPython tooling, MQTT infrastructure, Zigbee integration, and Home Assistant bridging. If you are comfortable with Python and curious about embedded systems, this talk is for you.

Avatar for Michał Karzyński

Michał Karzyński

July 25, 2026

More Decks by Michał Karzyński

Other Decks in Education

Transcript

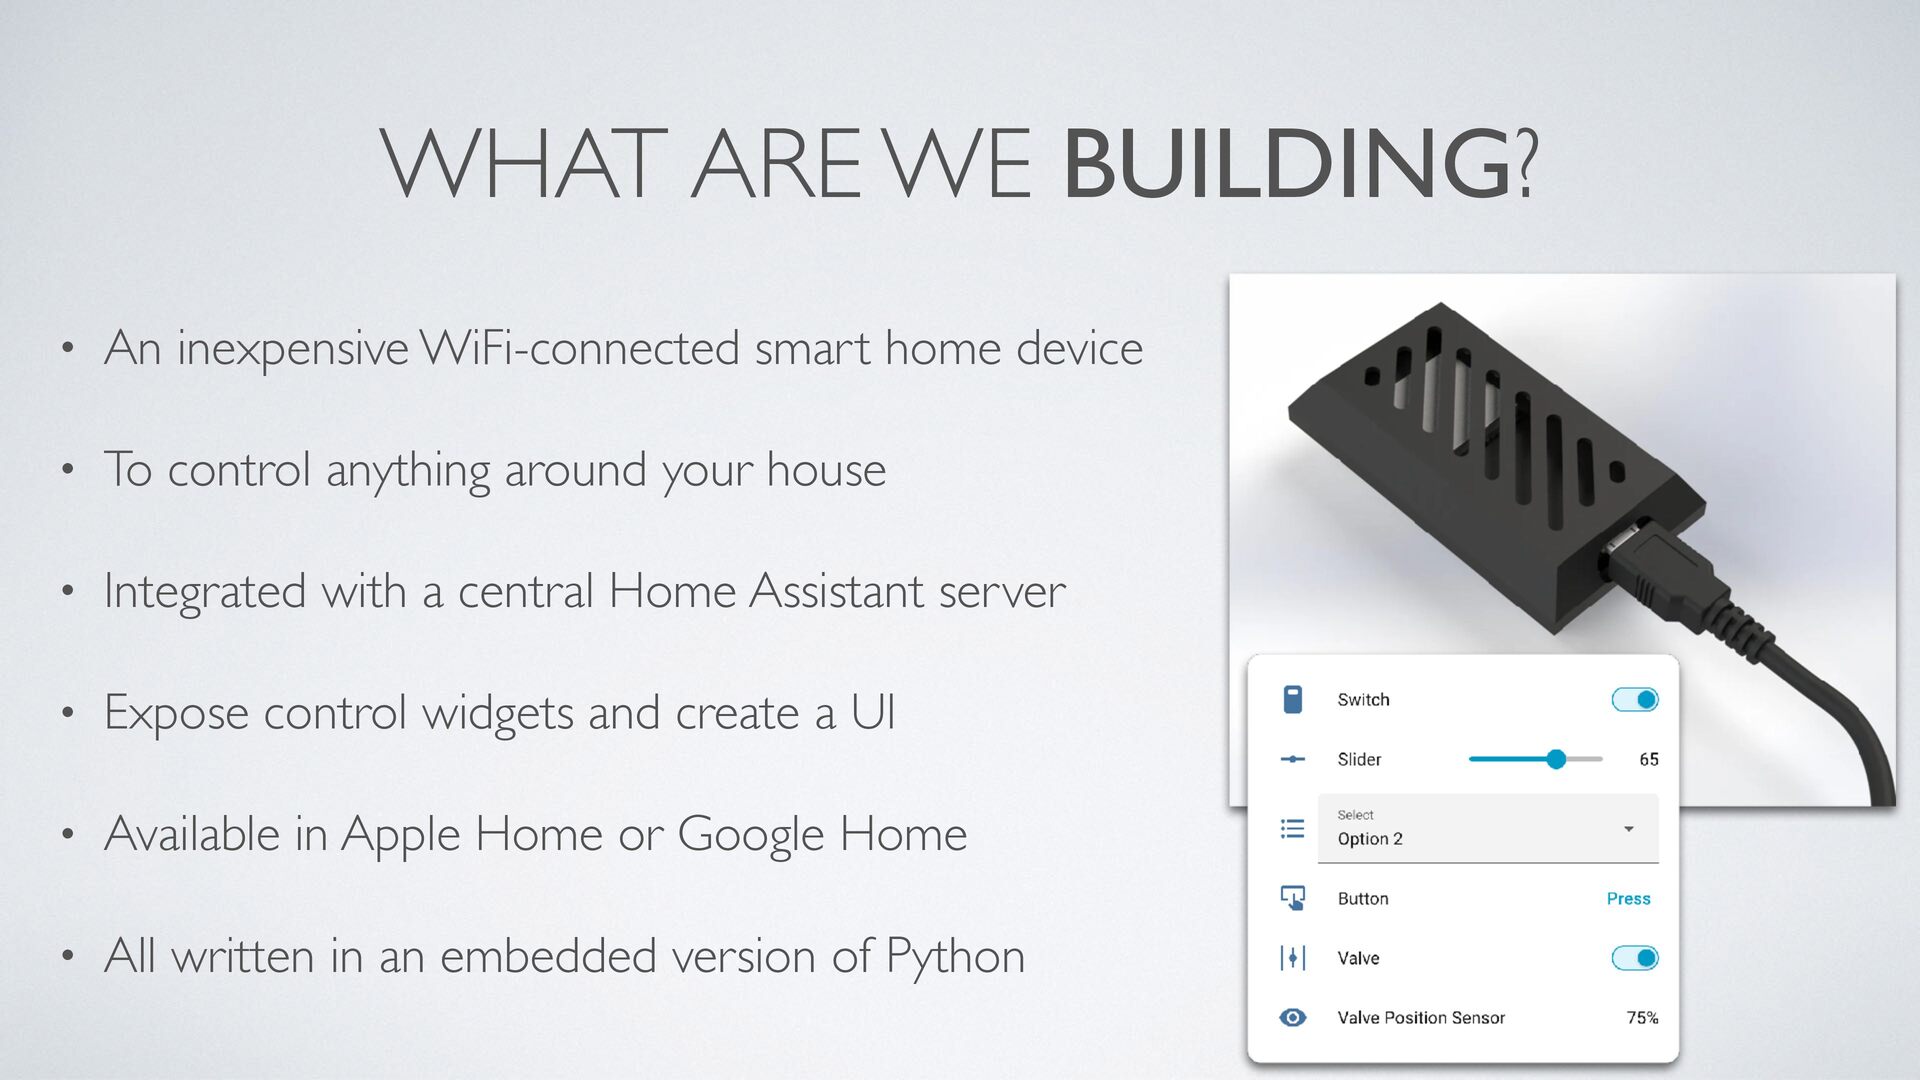
  1. WHAT ARE WE BUILDING? • An inexpensive WiFi-connected smart home

    device • To control anything around your house • Integrated with a central Home Assistant server • Expose control widgets and create a UI • Available in Apple Home or Google Home • All written in an embedded version of Python
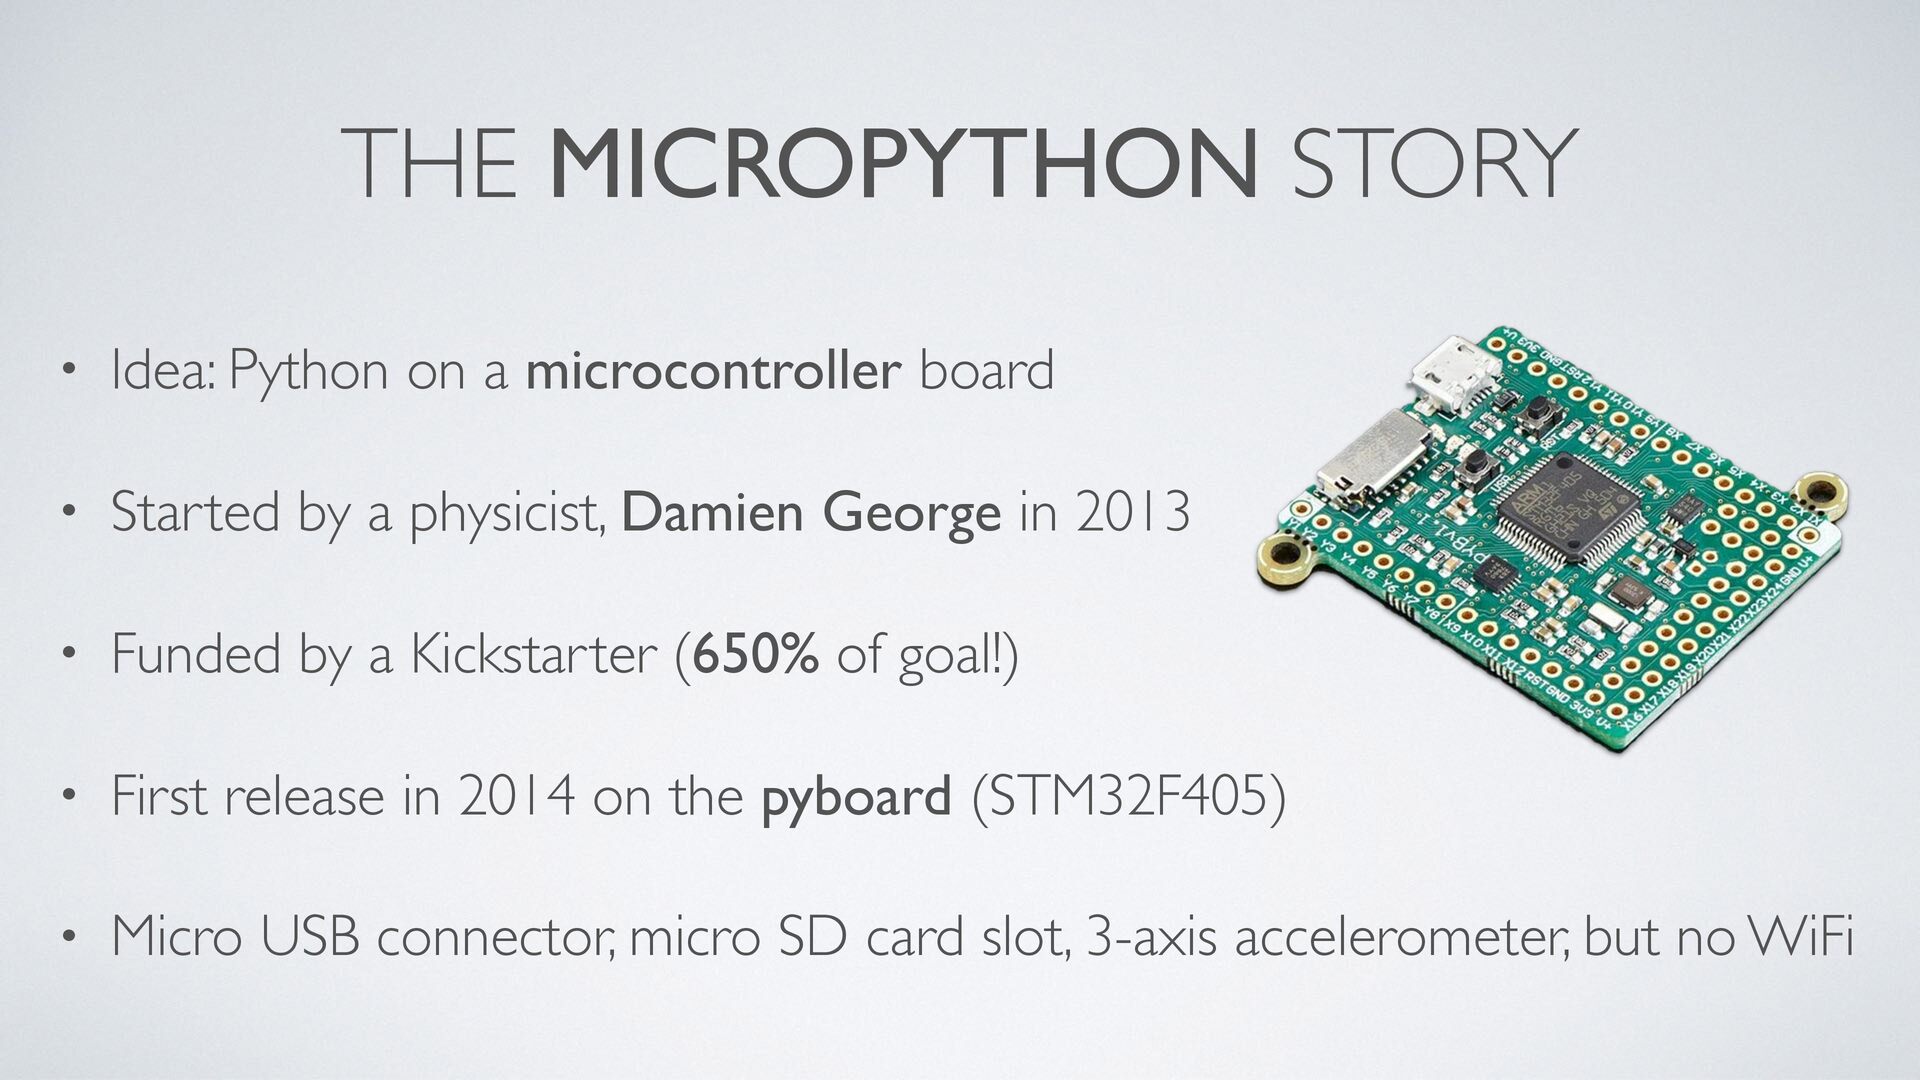
  2. THE MICROPYTHON STORY • Idea: Python on a microcontroller board

    • Started by a physicist, Damien George in 2013 • Funded by a Kickstarter (650% of goal!) • First release in 2014 on the pyboard (STM32F405) • Micro USB connector, micro SD card slot, 3-axis accelerometer, but no WiFi
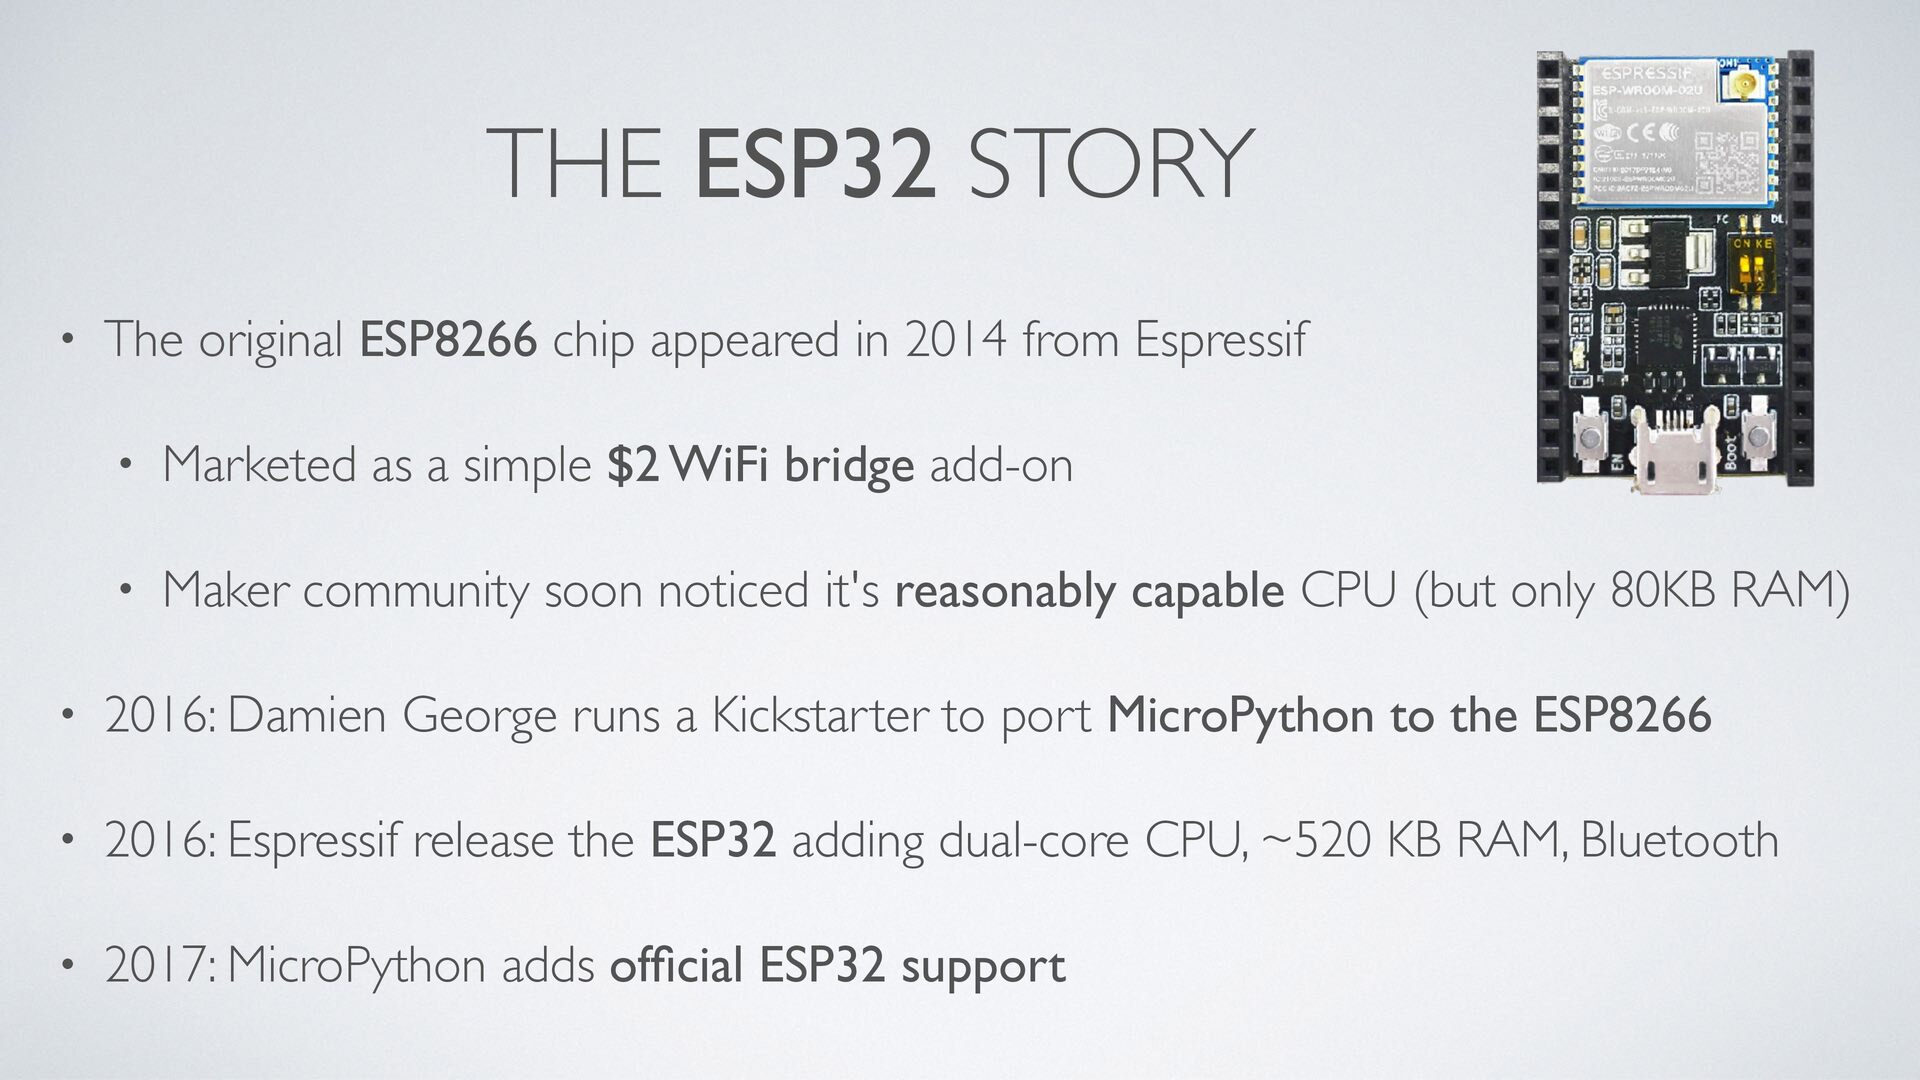
  3. THE ESP32 STORY • The original ESP8266 chip appeared in

    2014 from Espressif • Marketed as a simple $2 WiFi bridge add-on • Maker community soon noticed it's reasonably capable CPU (but only 80KB RAM) • 2016: Damien George runs a Kickstarter to port MicroPython to the ESP8266 • 2016: Espressif release the ESP32 adding dual-core CPU, ~520 KB RAM, Bluetooth • 2017: MicroPython adds official ESP32 support
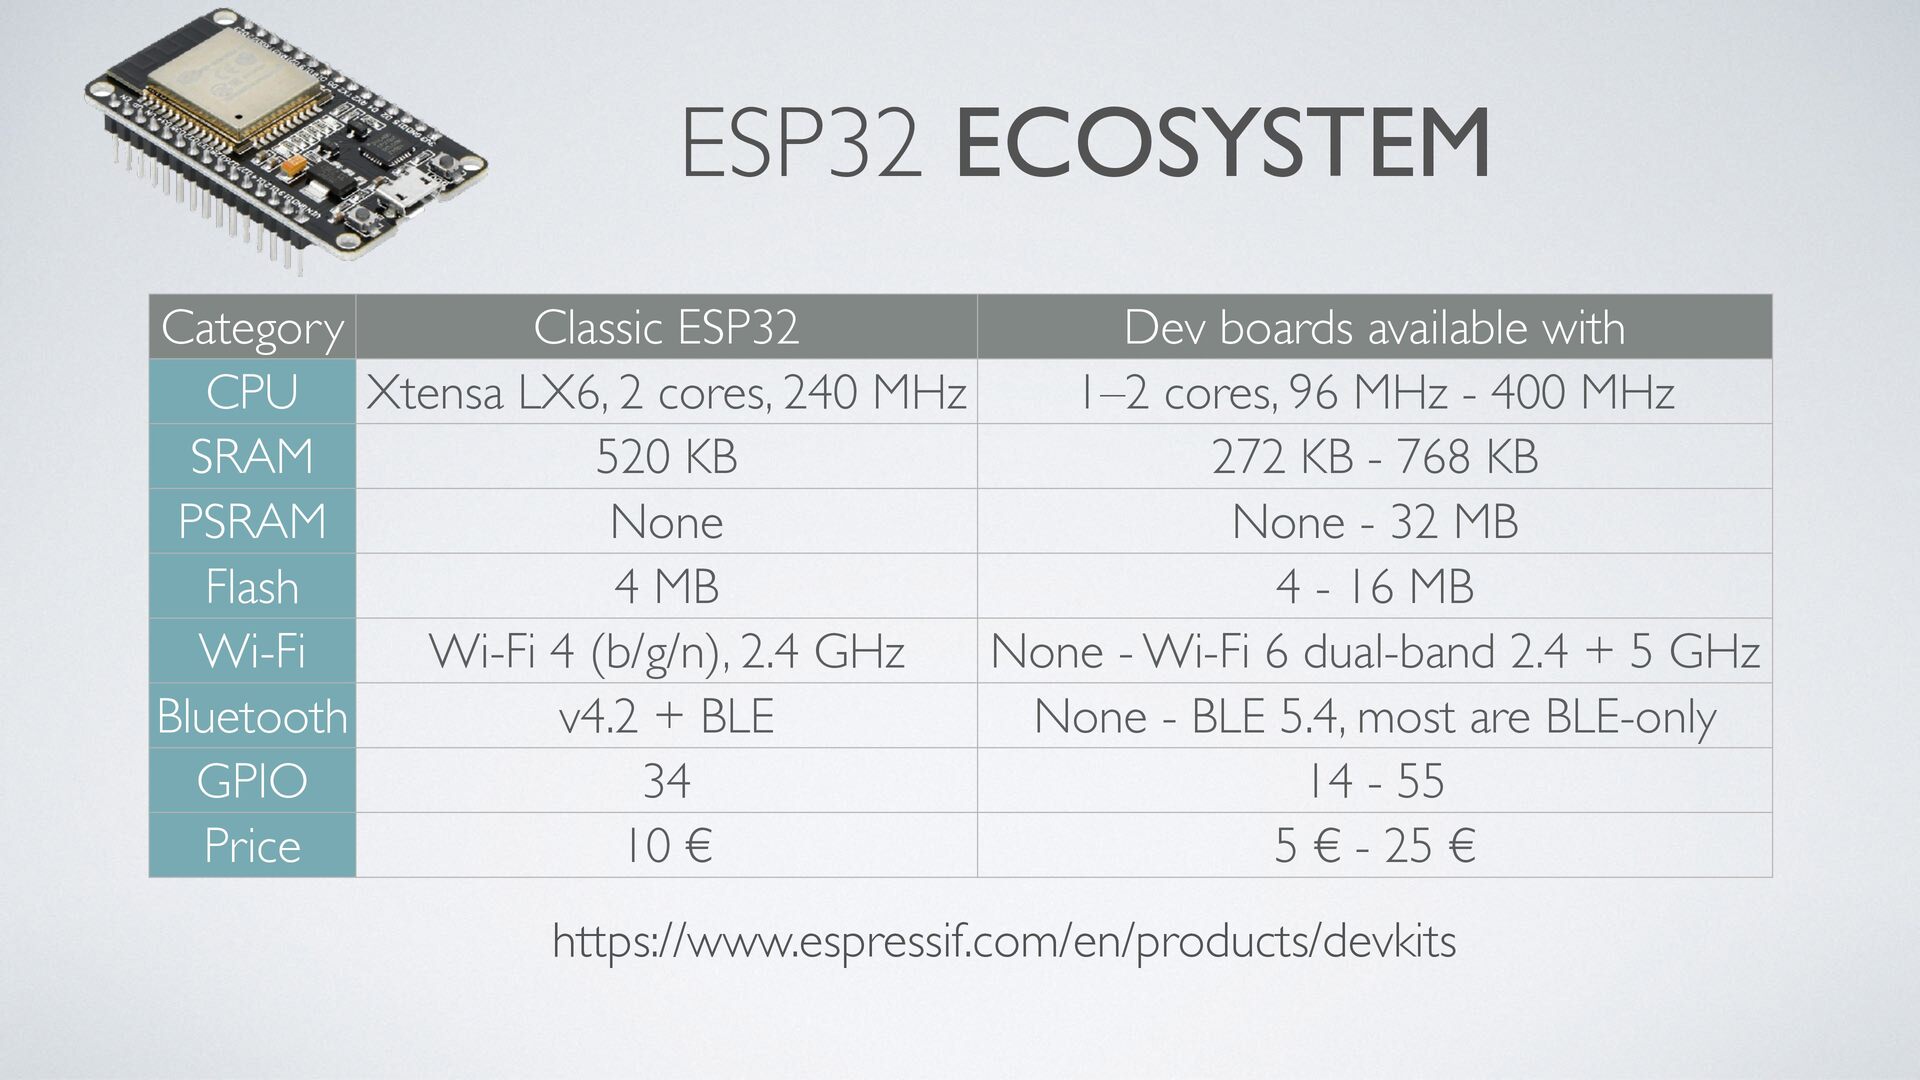
  4. ESP32 ECOSYSTEM Category Classic ESP32 Dev boards available with CPU

    Xtensa LX6, 2 cores, 240 MHz 1–2 cores, 96 MHz - 400 MHz SRAM 520 KB 272 KB - 768 KB PSRAM None None - 32 MB Flash 4 MB 4 - 16 MB Wi-Fi Wi-Fi 4 (b/g/n), 2.4 GHz None - Wi-Fi 6 dual-band 2.4 + 5 GHz Bluetooth v4.2 + BLE None - BLE 5.4, most are BLE-only GPIO 34 14 - 55 Price 10 € 5 € - 25 € https://www.espressif.com/en/products/devkits
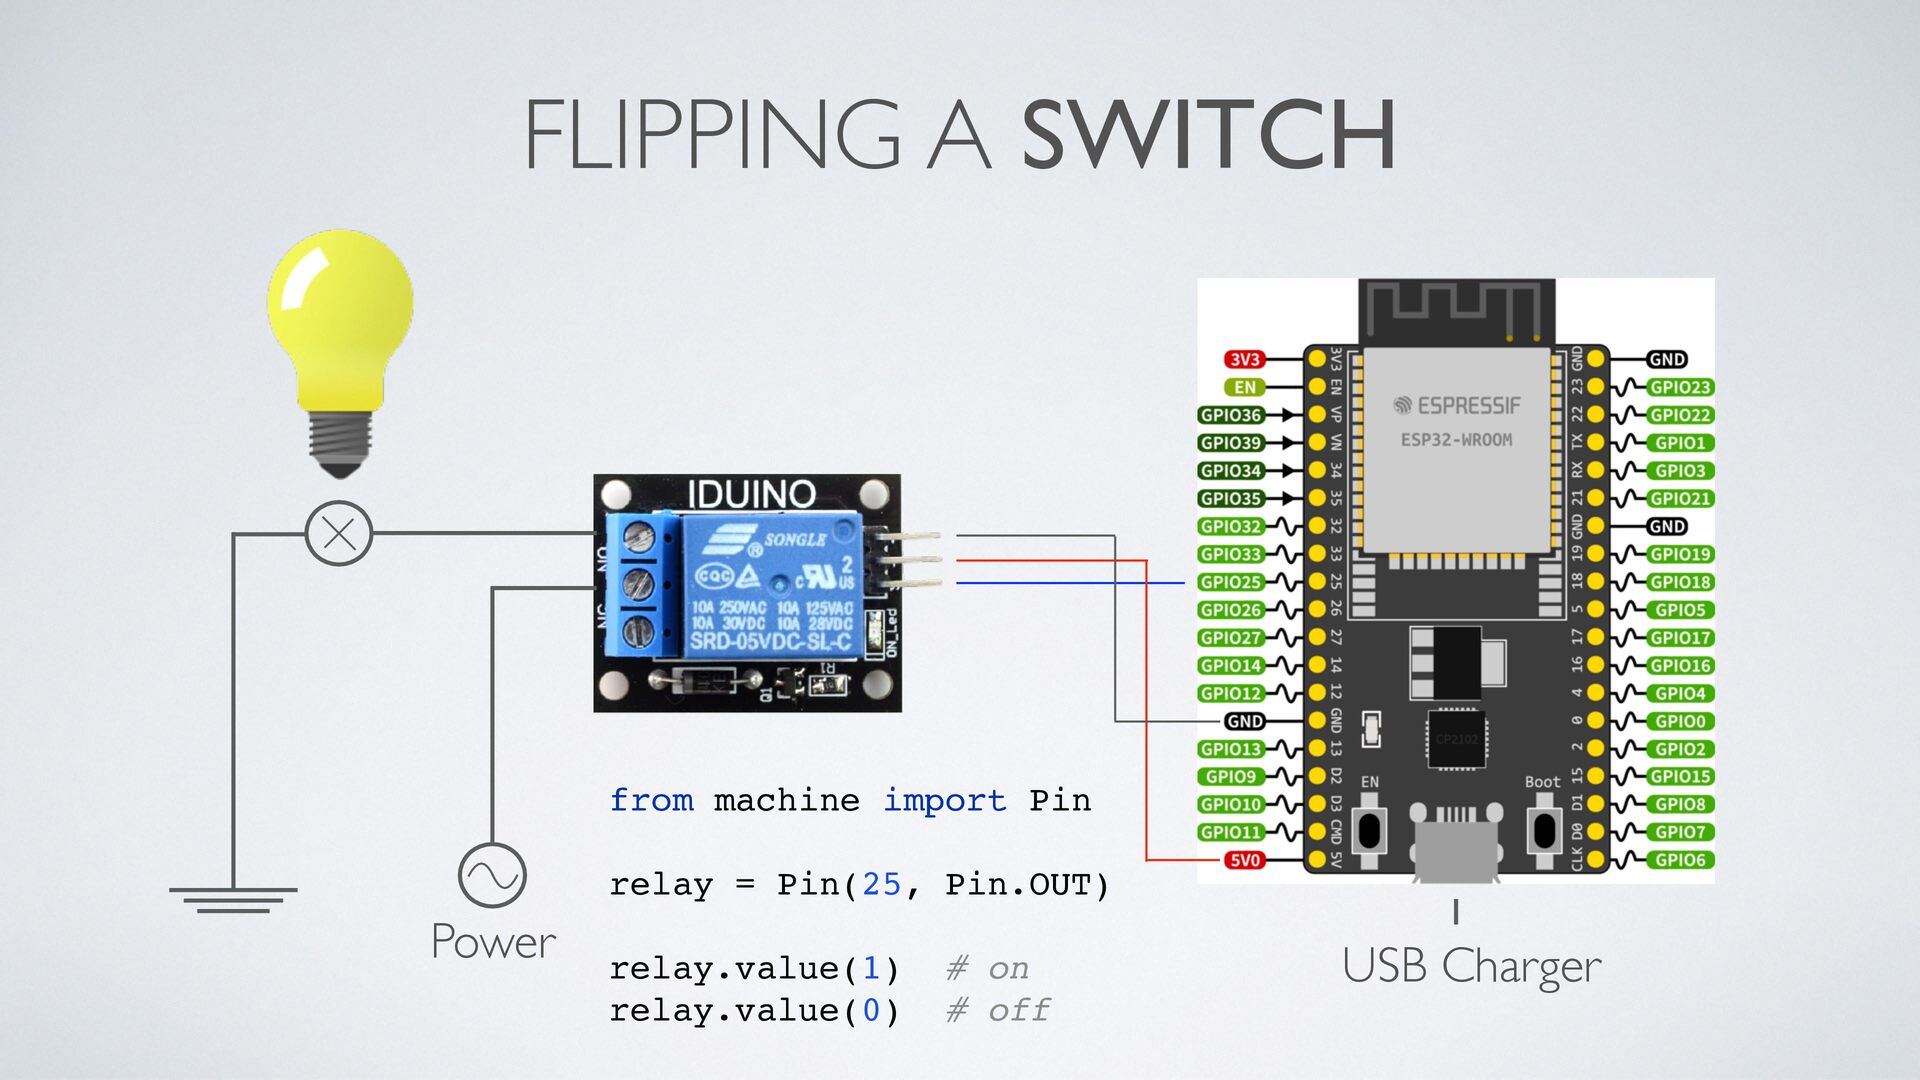
  5. FLIPPING A SWITCH from machine import Pin relay = Pin(25,

    Pin.OUT) Power relay.value(1) relay.value(0) # on # off USB Charger
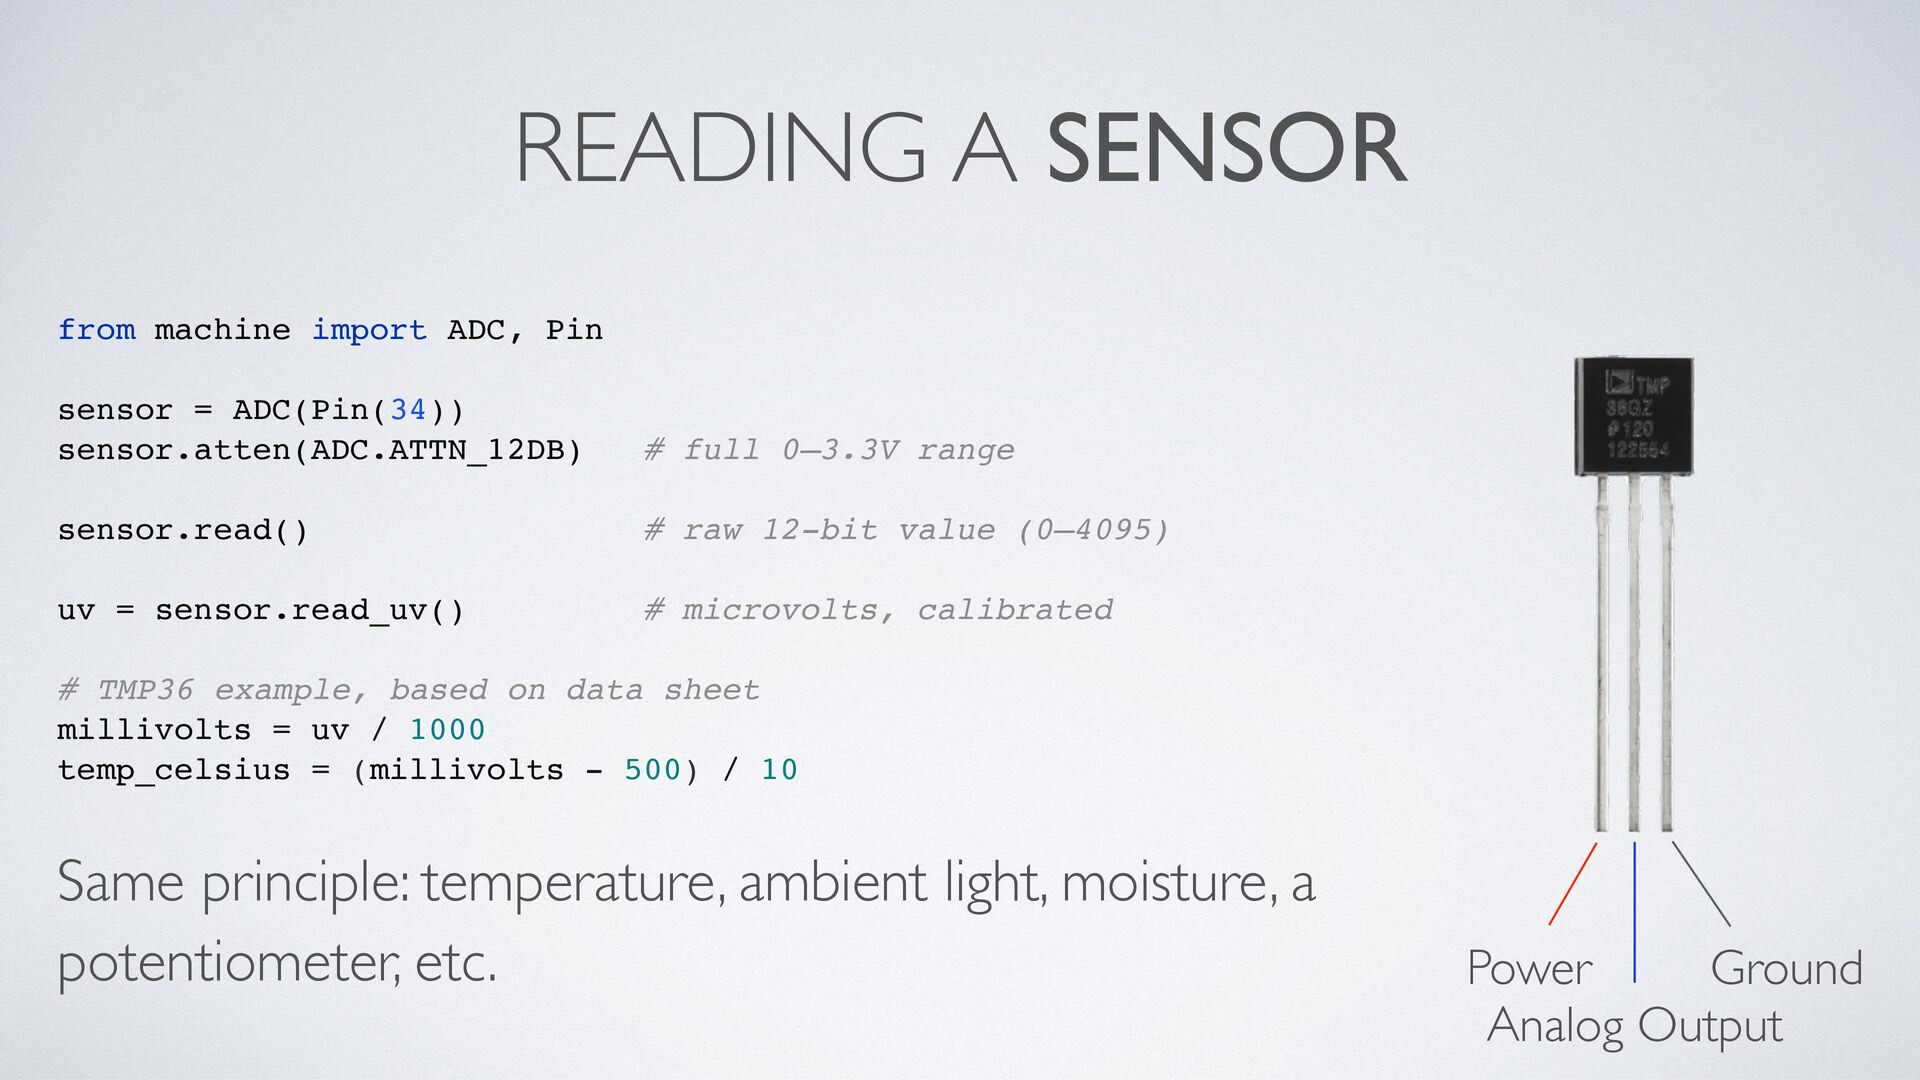
  6. READING A SENSOR from machine import ADC, Pin sensor =

    ADC(Pin(34)) sensor.atten(ADC.ATTN_12DB) # full 0–3.3V range sensor.read() # raw 12-bit value (0–4095) uv = sensor.read_uv() # microvolts, calibrated # TMP36 example, based on data sheet millivolts = uv / 1000 temp_celsius = (millivolts - 500) / 10 Same principle: temperature, ambient light, moisture, a potentiometer, etc. Power Ground Analog Output
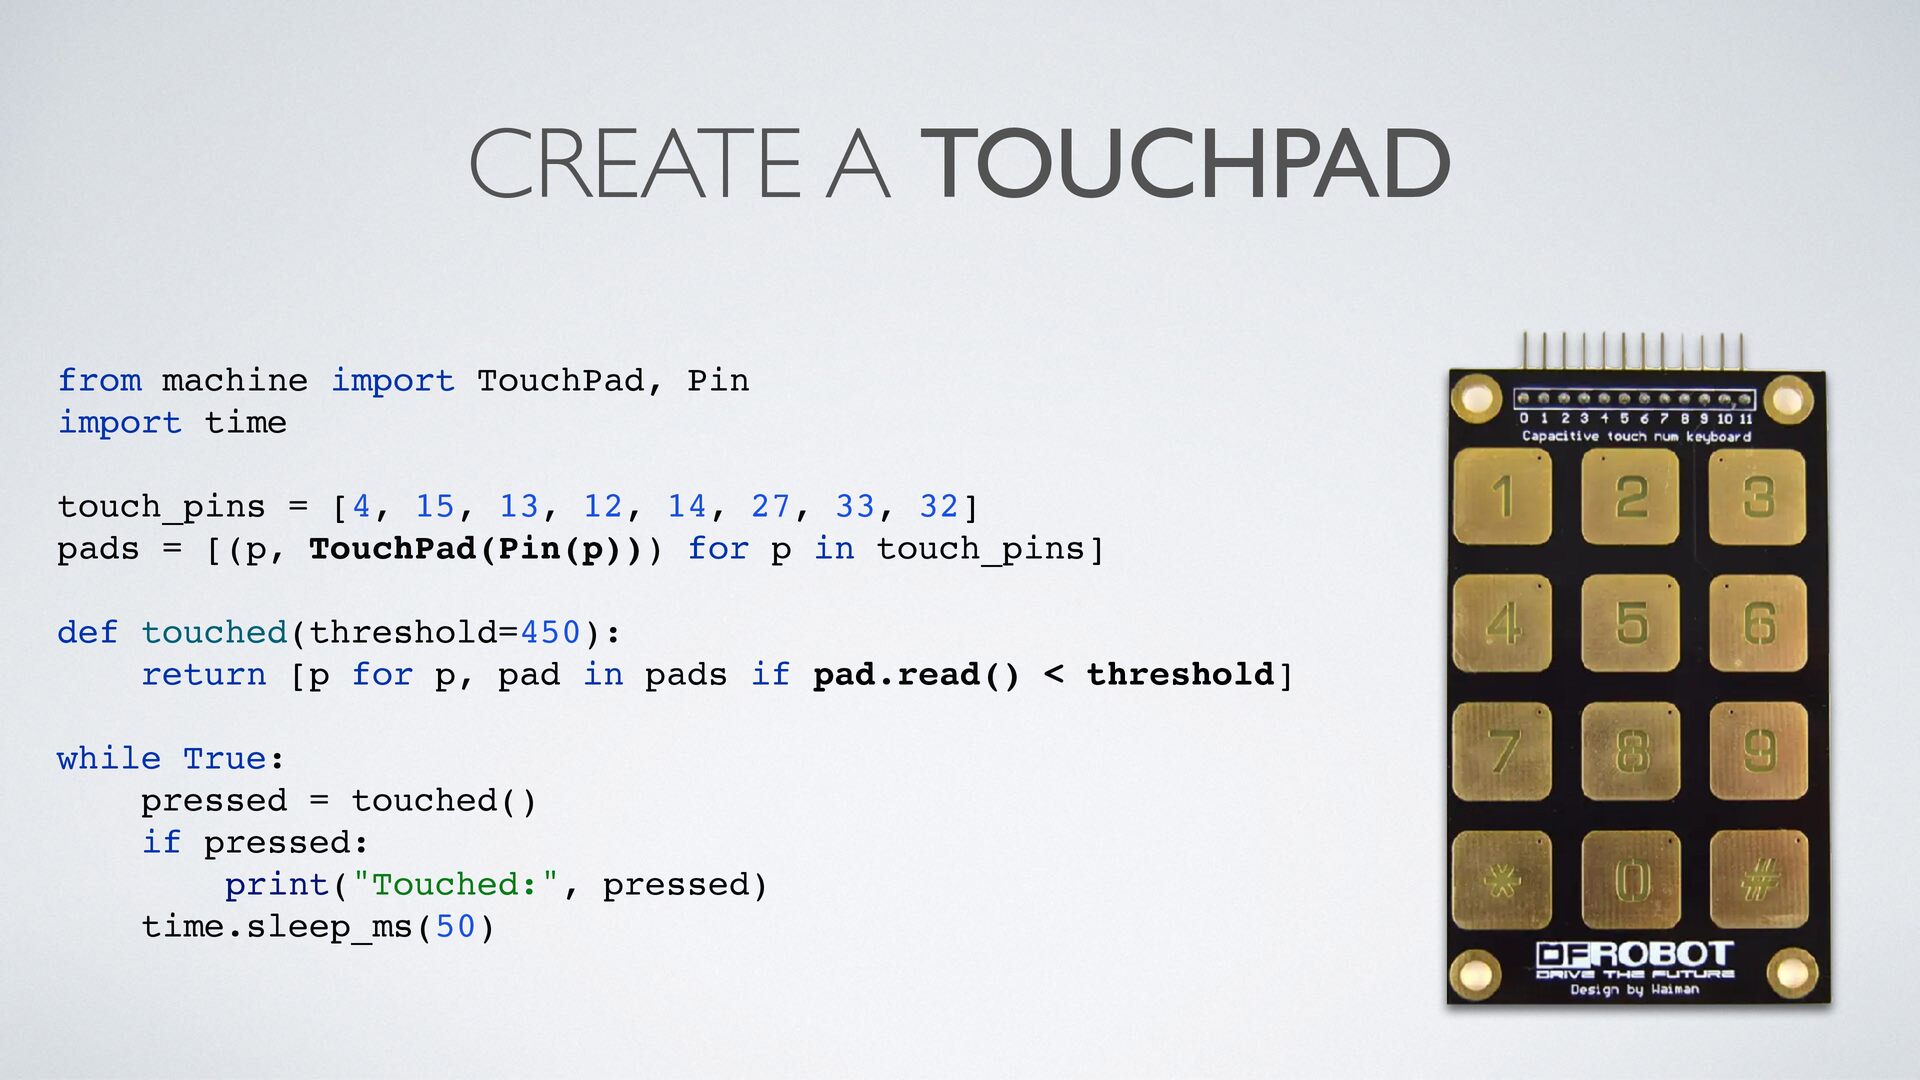
  7. CREATE A TOUCHPAD from machine import TouchPad, Pin import time

    touch_pins = [4, 15, 13, 12, 14, 27, 33, 32] pads = [(p, TouchPad(Pin(p))) for p in touch_pins] def touched(threshold=450): return [p for p, pad in pads if pad.read() < threshold] while True: pressed = touched() if pressed: print("Touched:", pressed) time.sleep_ms(50)
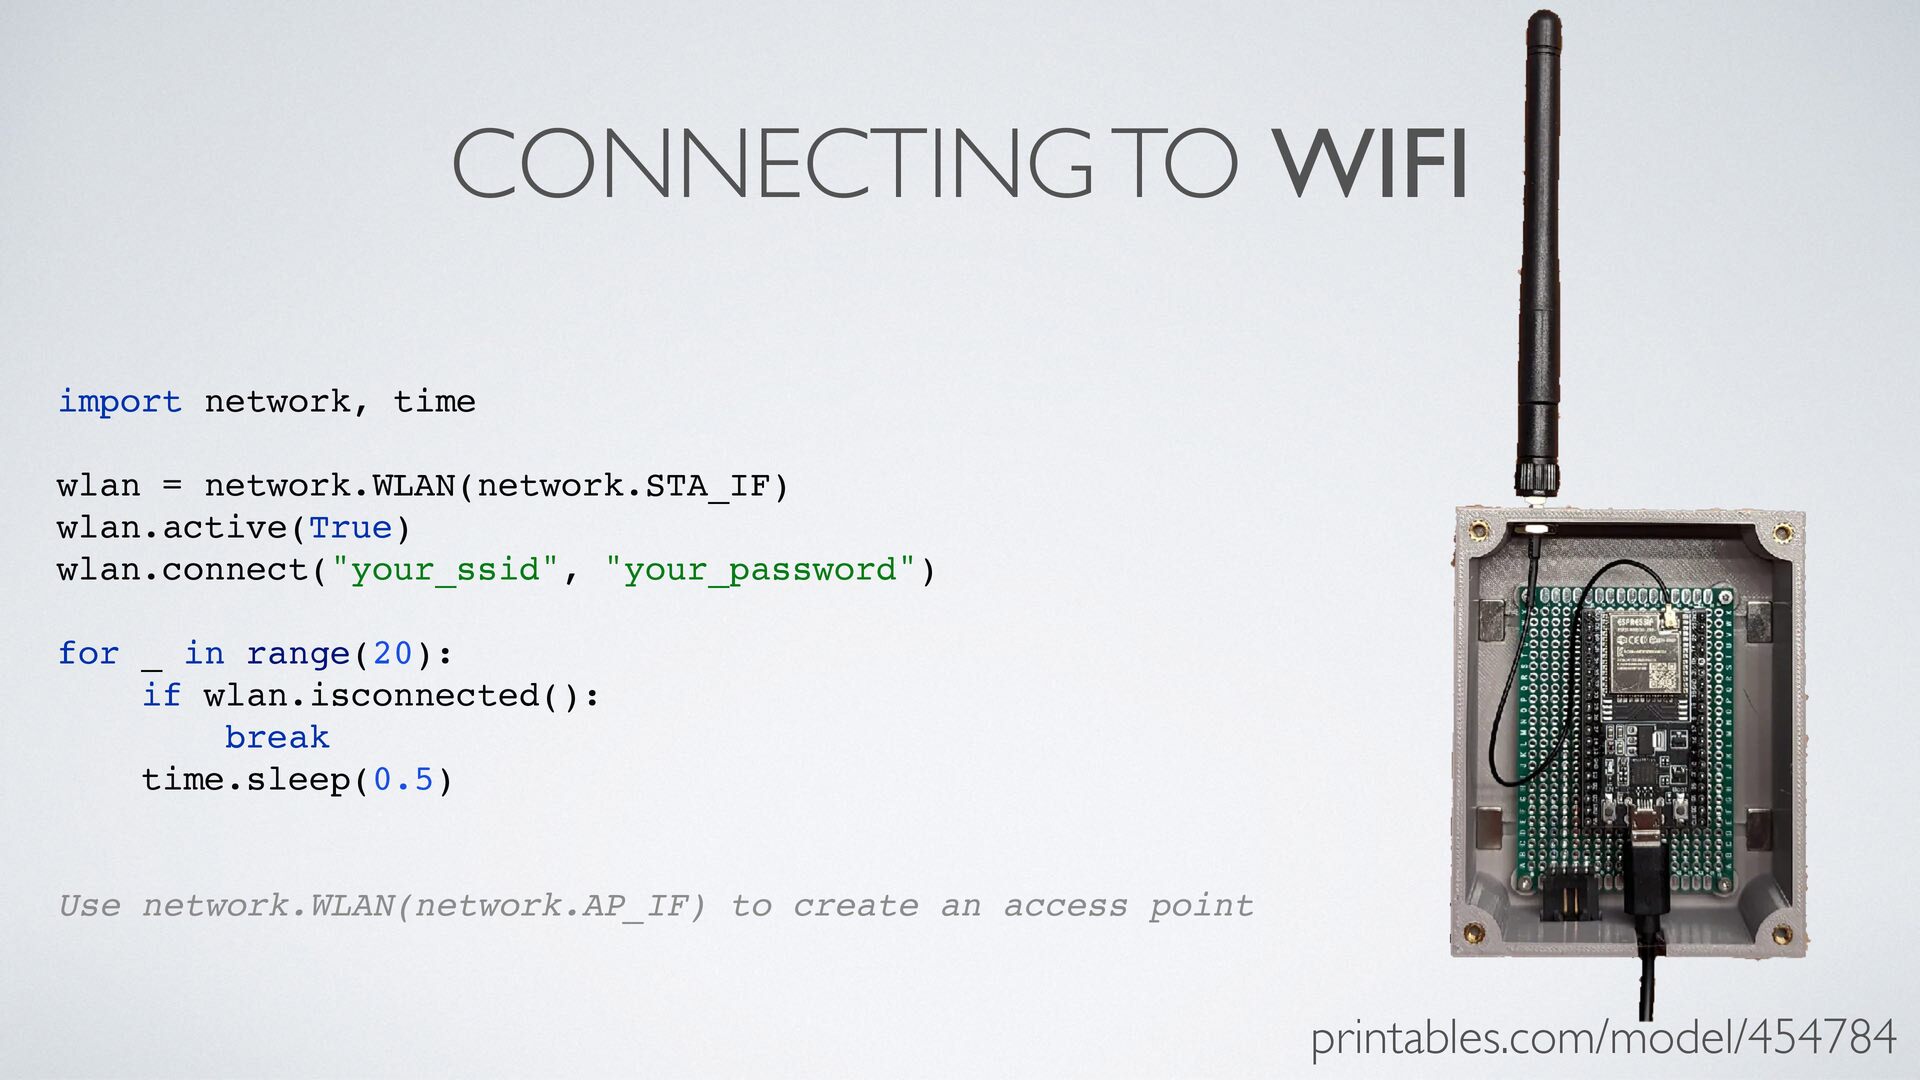
  8. CONNECTING TO WIFI import network, time wlan = network.WLAN(network.STA_IF) wlan.active(True)

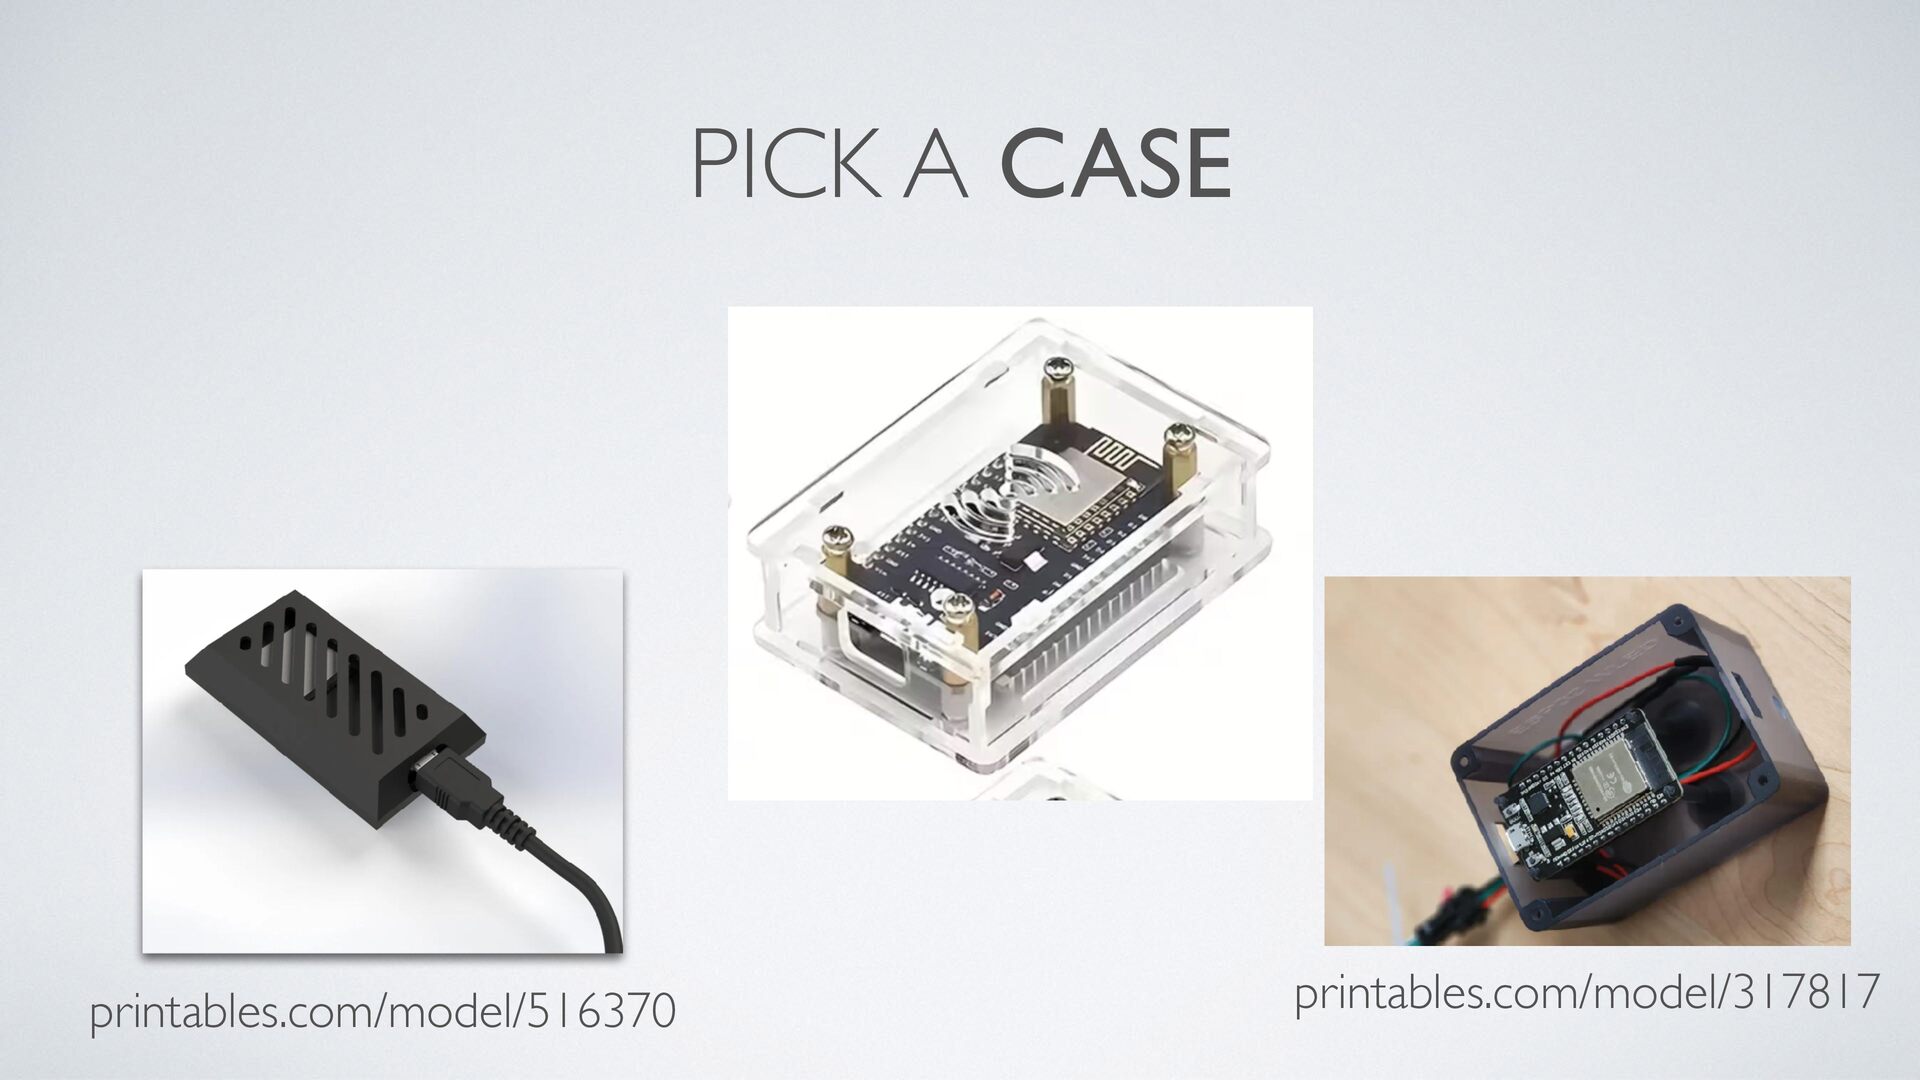
    wlan.connect("your_ssid", "your_password") for _ in range(20): if wlan.isconnected(): break time.sleep(0.5) Use network.WLAN(network.AP_IF) to create an access point printables.com/model/454784
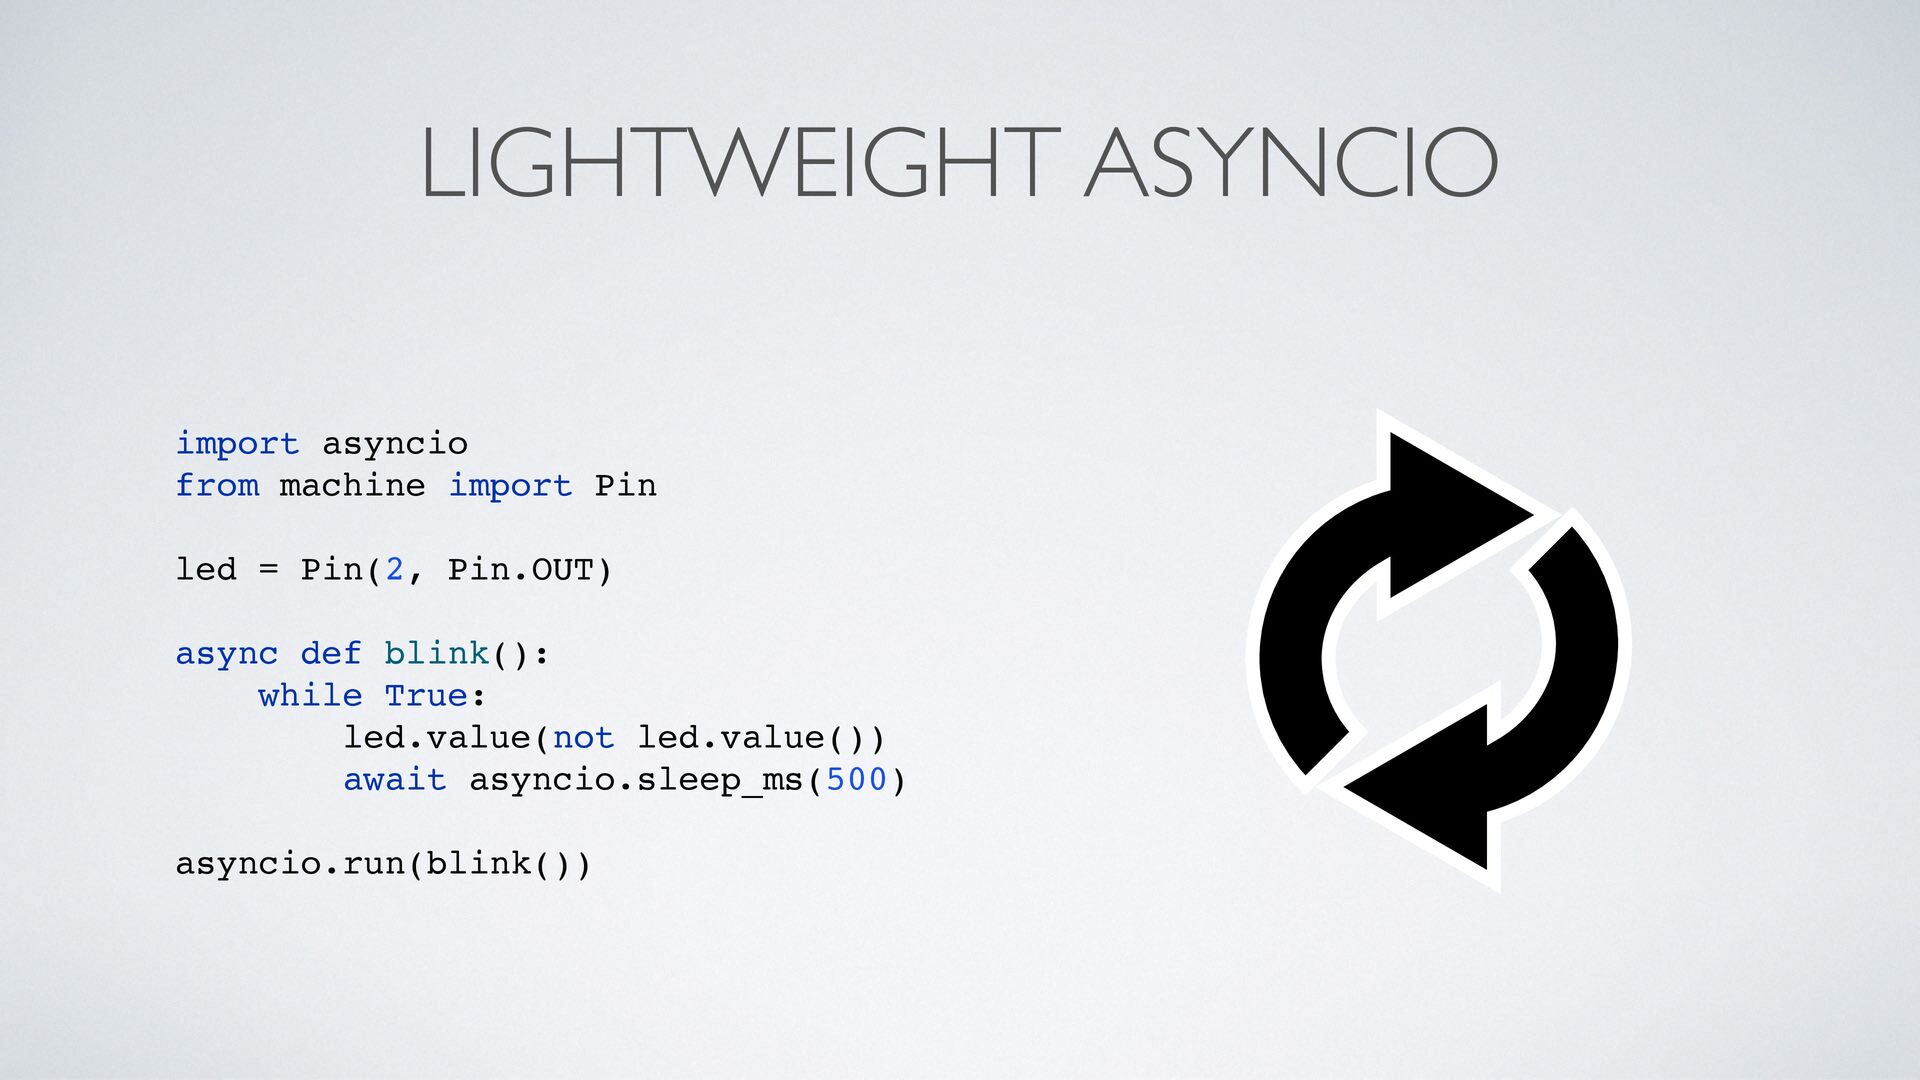
  9. LIGHTWEIGHT ASYNCIO import asyncio from machine import Pin led =

    Pin(2, Pin.OUT) async def blink(): while True: led.value(not led.value()) await asyncio.sleep_ms(500) asyncio.run(blink())
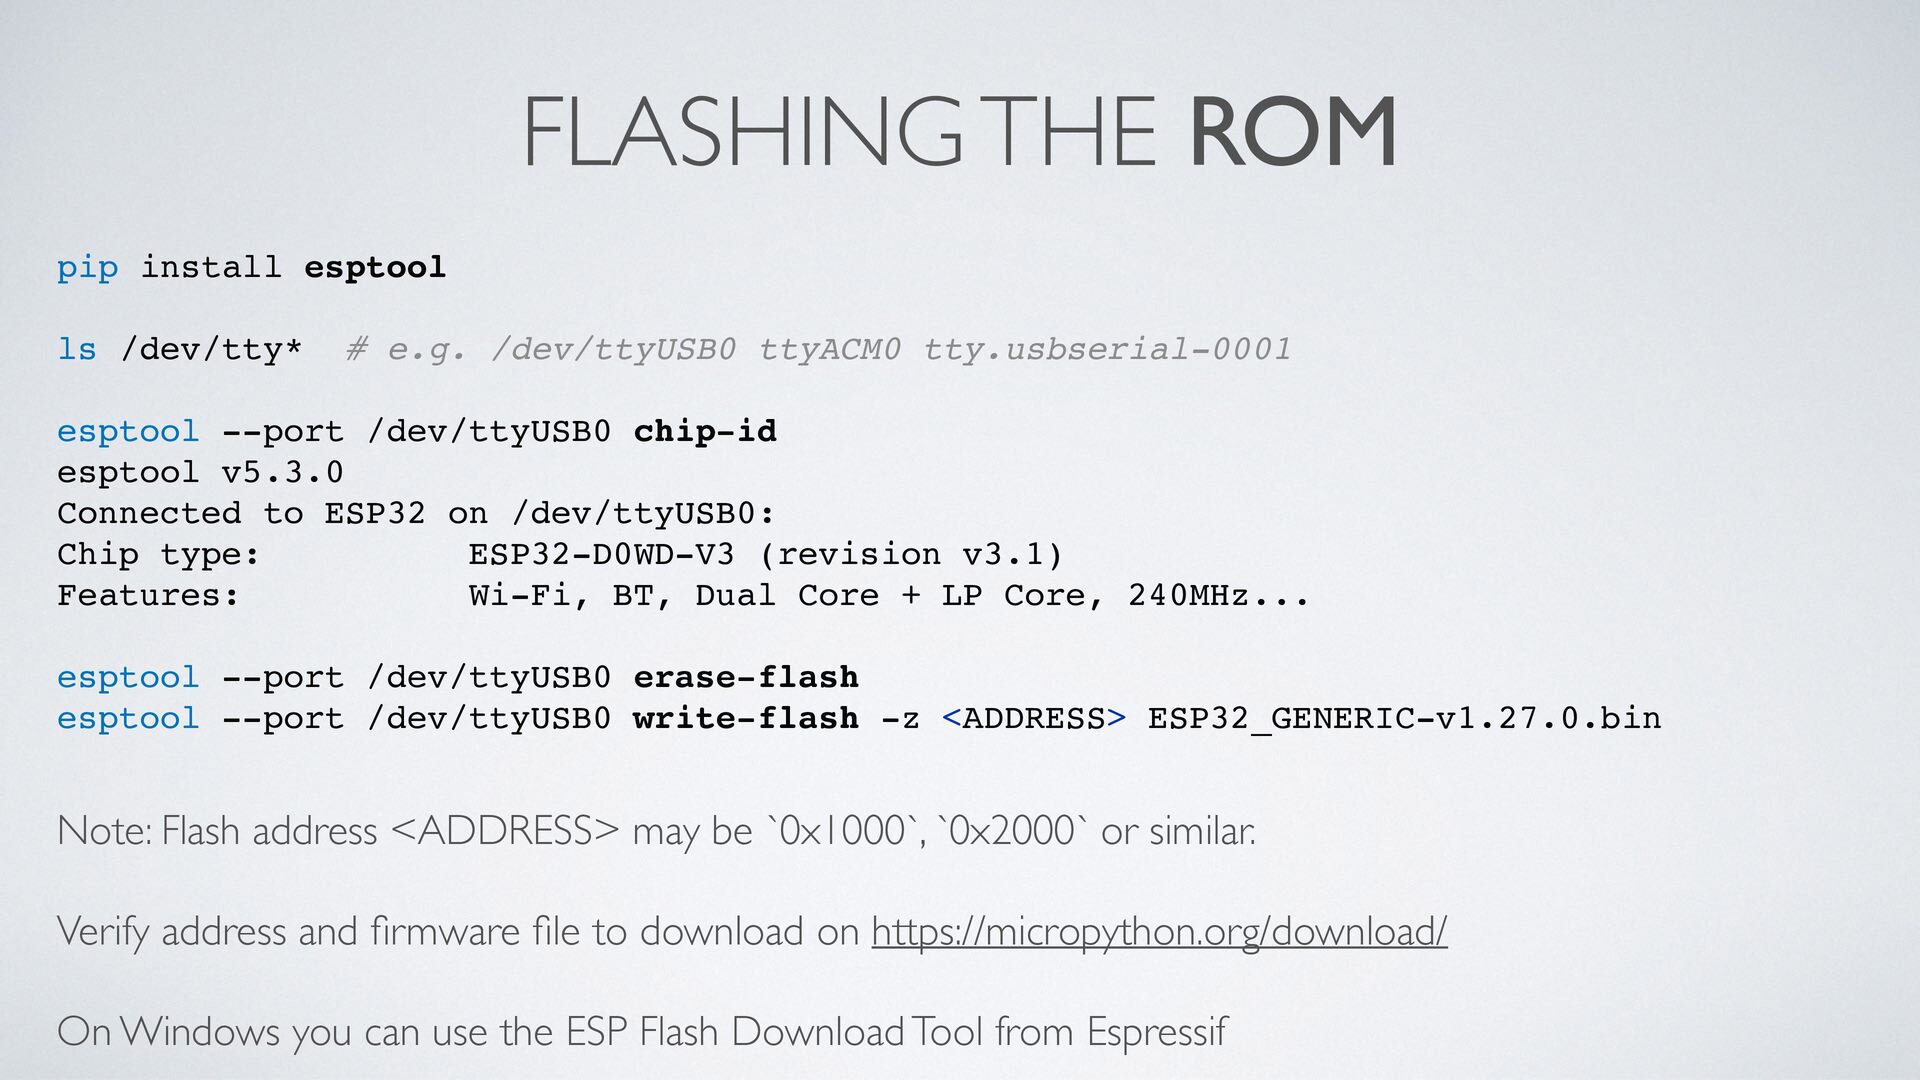
  10. FLASHING THE ROM pip install esptool ls /dev/tty* # e.g.

    /dev/ttyUSB0 ttyACM0 tty.usbserial-0001 esptool --port /dev/ttyUSB0 chip-id esptool v5.3.0 Connected to ESP32 on /dev/ttyUSB0: Chip type: ESP32-D0WD-V3 (revision v3.1) Features: Wi-Fi, BT, Dual Core + LP Core, 240MHz... esptool --port /dev/ttyUSB0 erase-flash esptool --port /dev/ttyUSB0 write-flash -z <ADDRESS> ESP32_GENERIC-v1.27.0.bin Note: Flash address <ADDRESS> may be `0x1000`, `0x2000` or similar. Verify address and firmware file to download on https://micropython.org/download/ On Windows you can use the ESP Flash Download Tool from Espressif
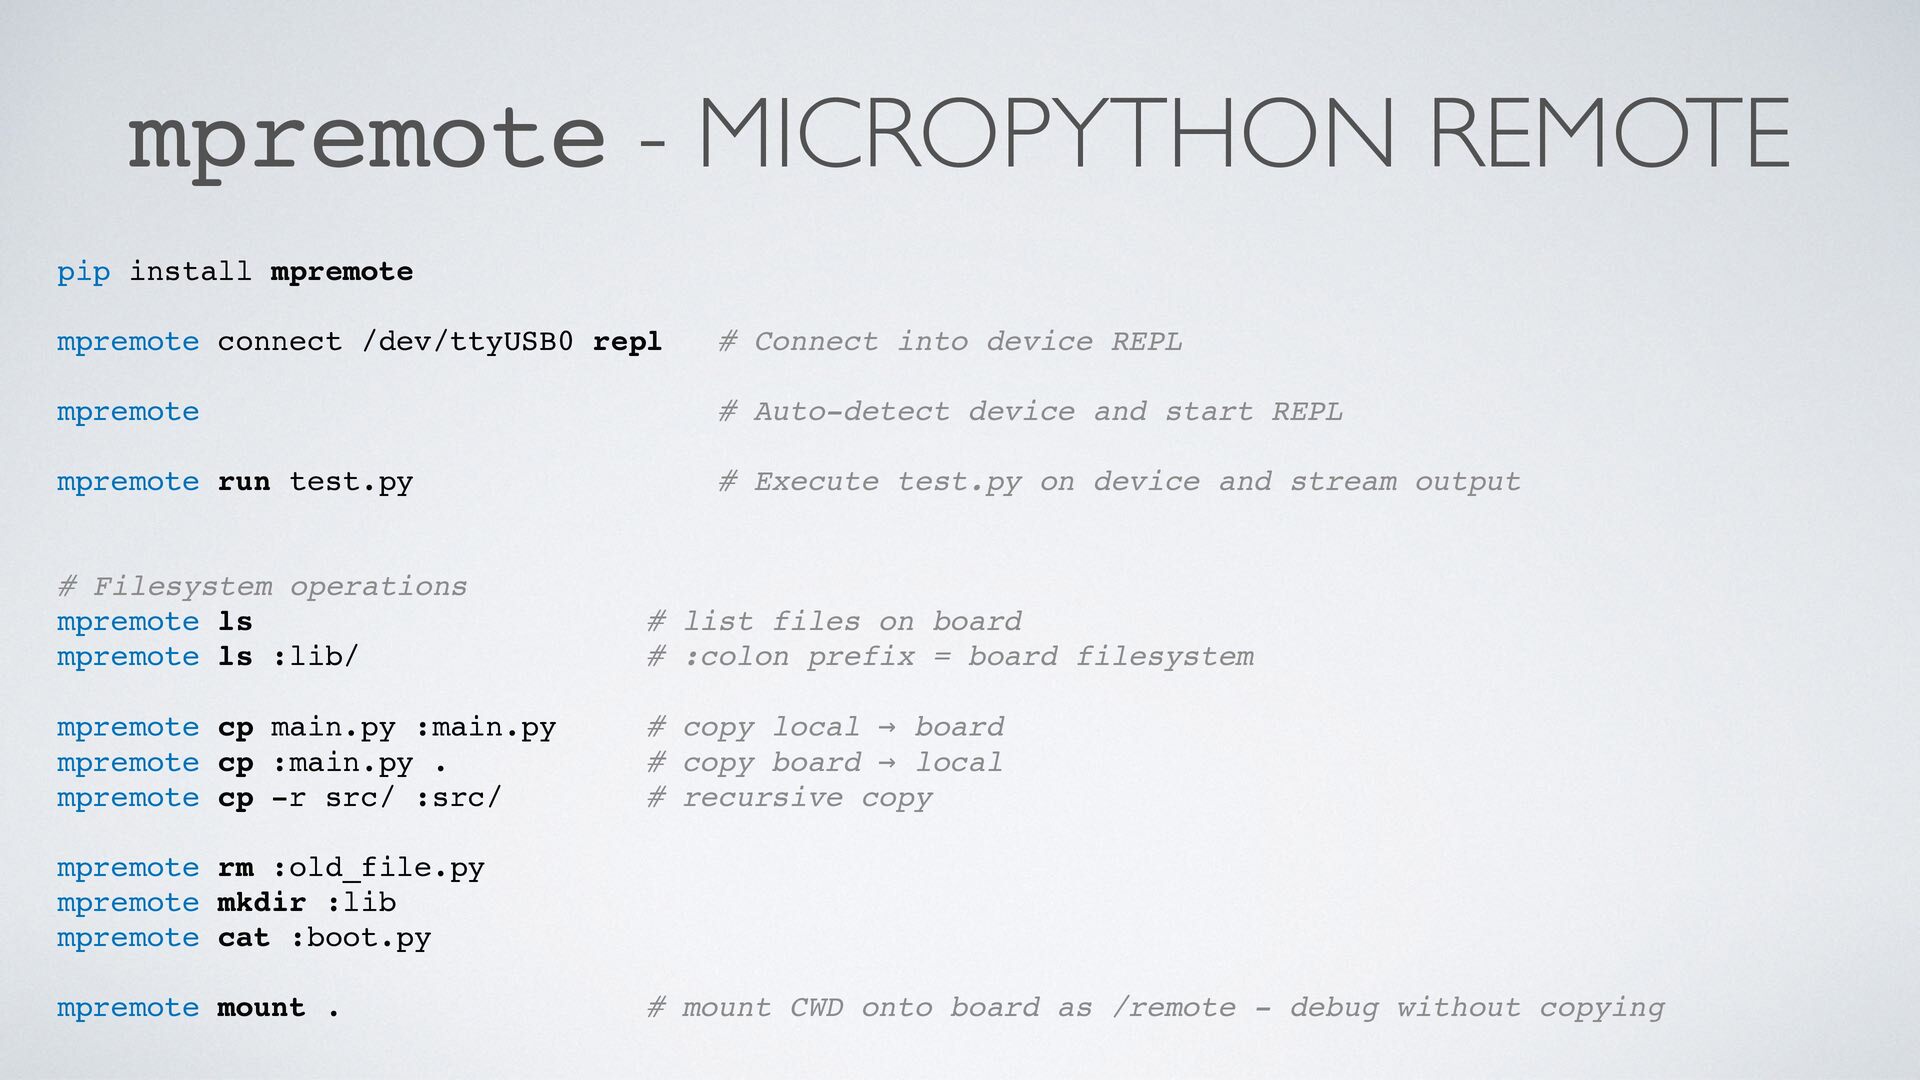
  11. mpremote - MICROPYTHON REMOTE pip install mpremote mpremote connect /dev/ttyUSB0

    repl # Connect into device REPL mpremote # Auto-detect device and start REPL mpremote run test.py # Execute test.py on device and stream output # Filesystem operations mpremote ls mpremote ls :lib/ # list files on board # :colon prefix = board filesystem mpremote cp main.py :main.py mpremote cp :main.py . mpremote cp -r src/ :src/ # copy local → board # copy board → local # recursive copy mpremote rm :old_file.py mpremote mkdir :lib mpremote cat :boot.py mpremote mount . # mount CWD onto board as /remote - debug without copying
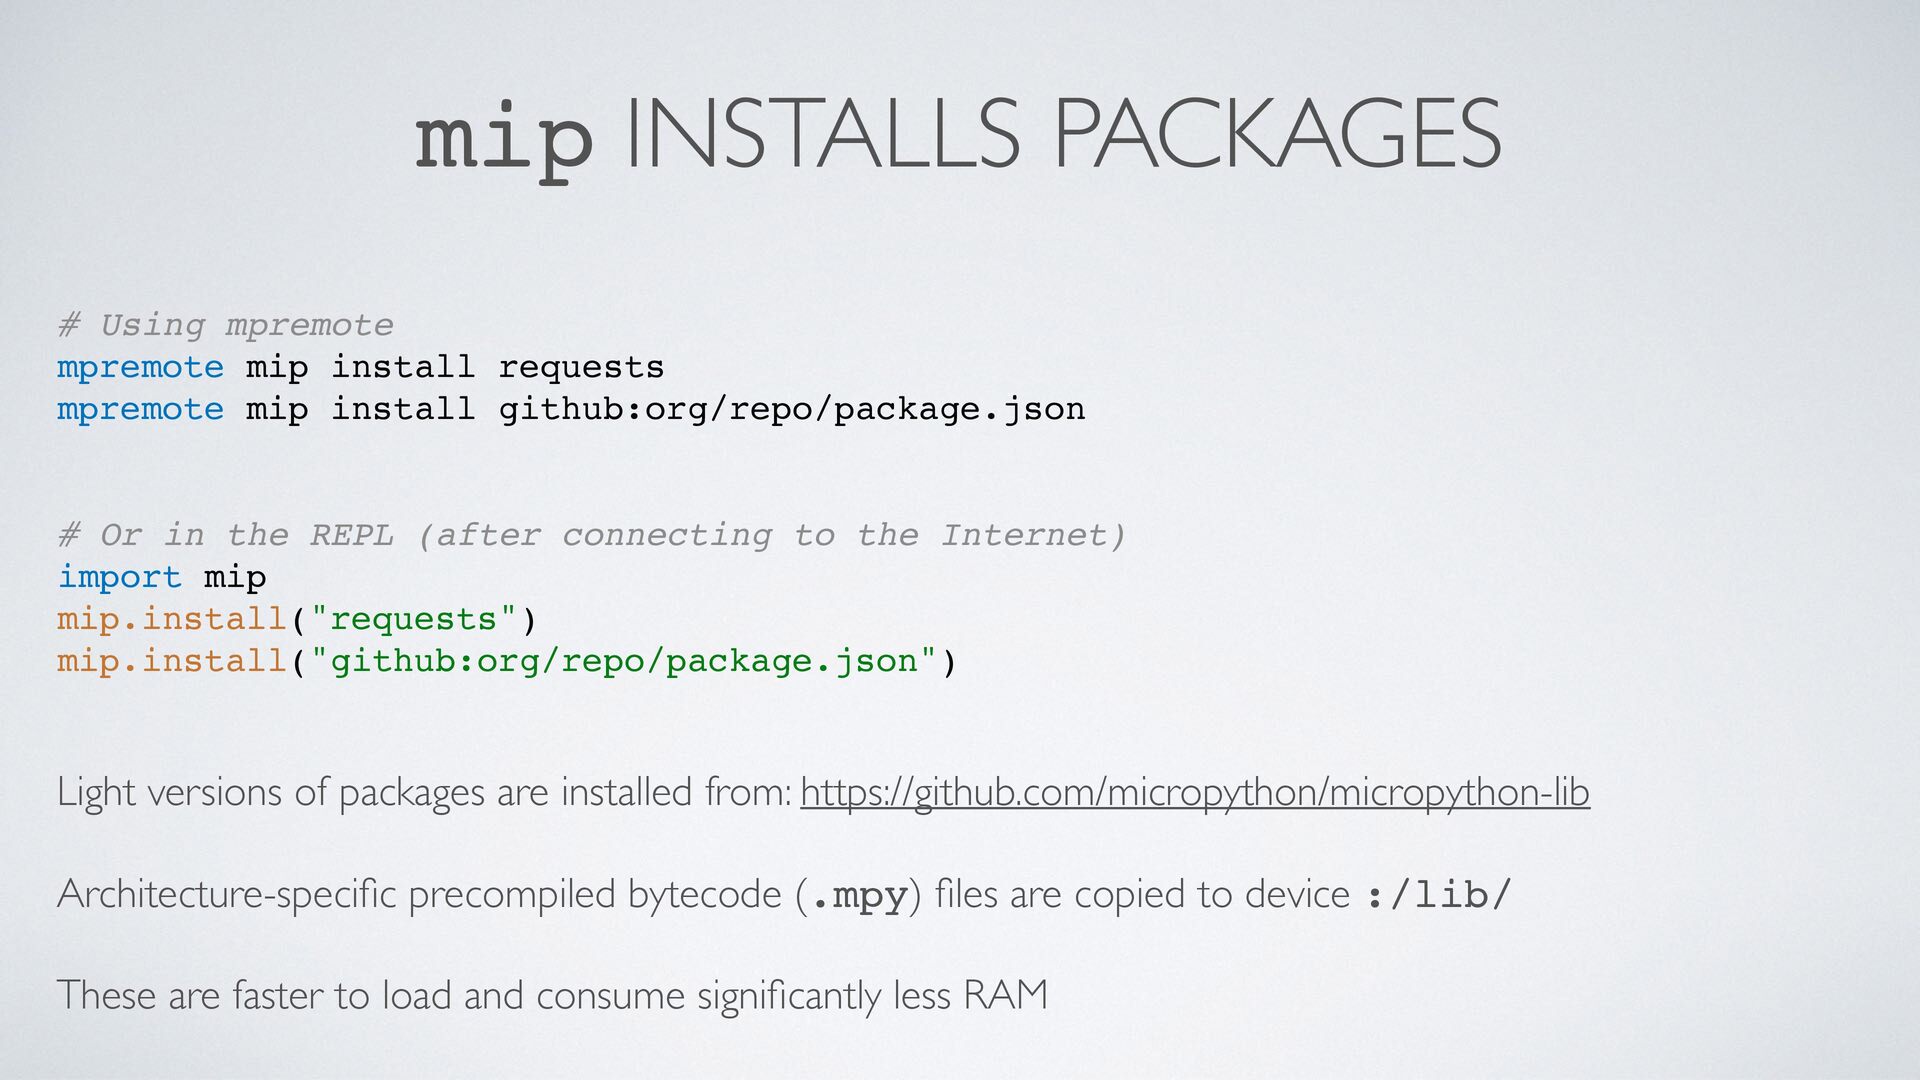
  12. mip INSTALLS PACKAGES # Using mpremote mpremote mip install requests

    mpremote mip install github:org/repo/package.json # Or in the REPL (after connecting to the Internet) import mip mip.install("requests") mip.install("github:org/repo/package.json") Light versions of packages are installed from: https://github.com/micropython/micropython-lib Architecture-specific precompiled bytecode (.mpy) files are copied to device :/lib/ These are faster to load and consume significantly less RAM
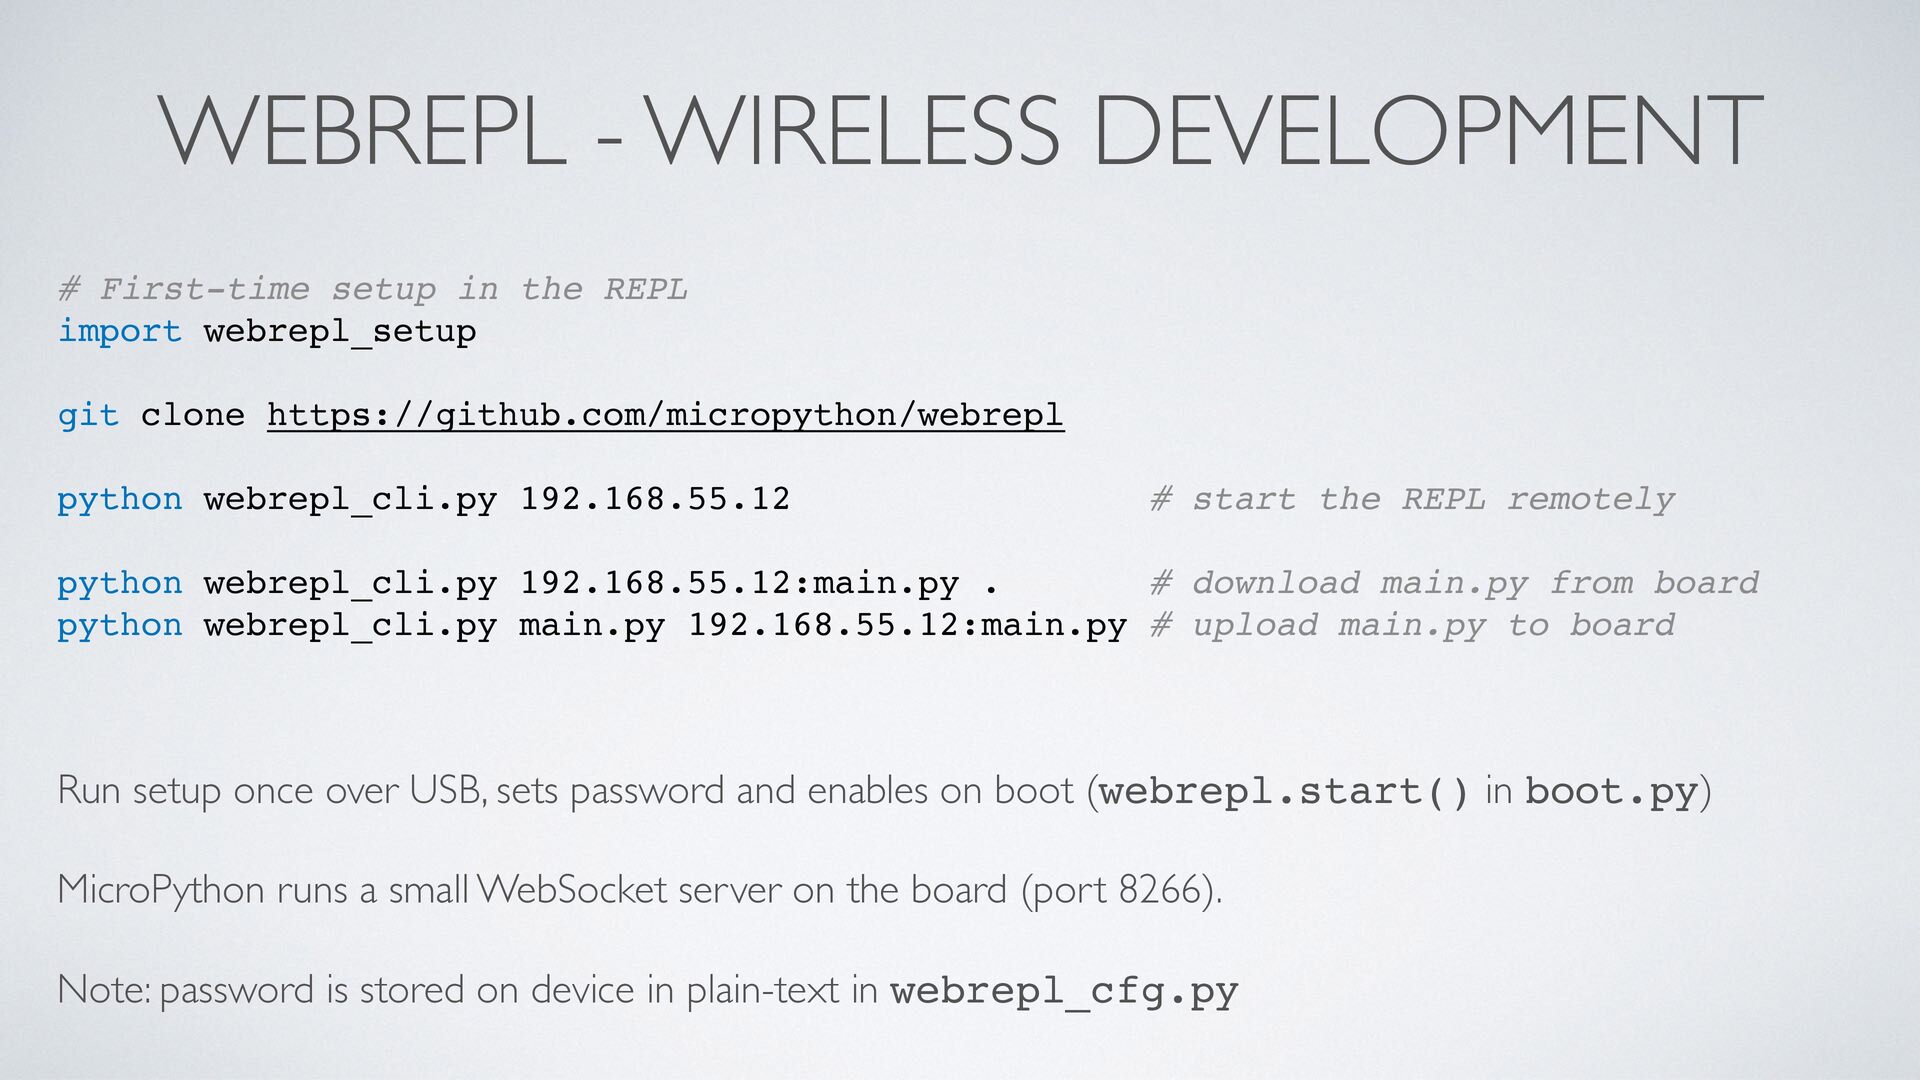
  13. WEBREPL - WIRELESS DEVELOPMENT # First-time setup in the REPL

    import webrepl_setup git clone https://github.com/micropython/webrepl python webrepl_cli.py 192.168.55.12 # start the REPL remotely python webrepl_cli.py 192.168.55.12:main.py . # download main.py from board python webrepl_cli.py main.py 192.168.55.12:main.py # upload main.py to board Run setup once over USB, sets password and enables on boot (webrepl.start() in boot.py) MicroPython runs a small WebSocket server on the board (port 8266). Note: password is stored on device in plain-text in webrepl_cfg.py
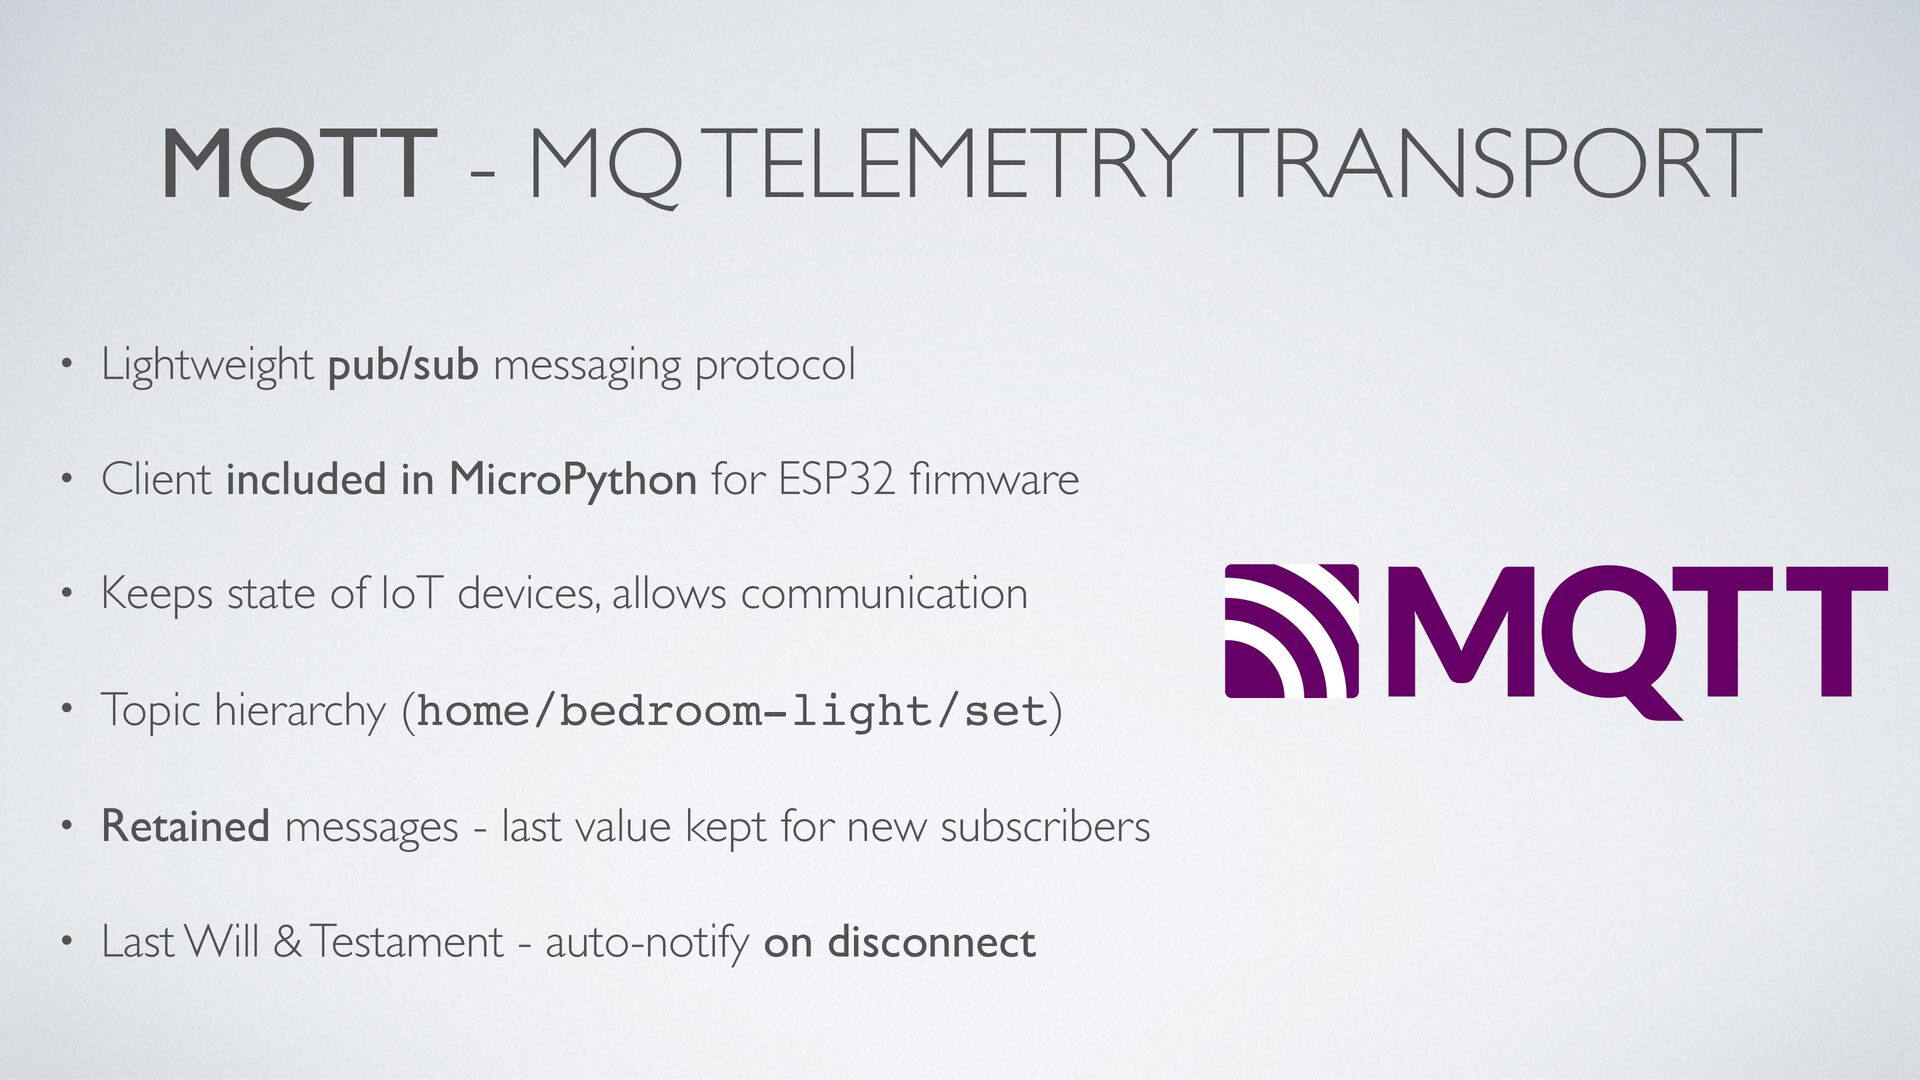
  14. MQTT - MQ TELEMETRY TRANSPORT • Lightweight pub/sub messaging protocol

    • Client included in MicroPython for ESP32 firmware • Keeps state of IoT devices, allows communication • Topic hierarchy (home/bedroom-light/set) • Retained messages - last value kept for new subscribers • Last Will & Testament - auto-notify on disconnect
  15. MQTT TOPICS AND MESSAGES Common pattern: <prefix>/<device>[/<action>] Device status topic:

    home/my_device {"state": "ON", "brightness": 100, "color_temp": 200} Controller command topic: home/my_device/set {"state": "OFF", "transition": 5} • Pattern used by the open-source ZigBee2MQTT • Integrate, read and control your ZigBee devices • Requires a ZigBee2MQTT compatible hub (or dongle) https://www.zigbee2mqtt.io
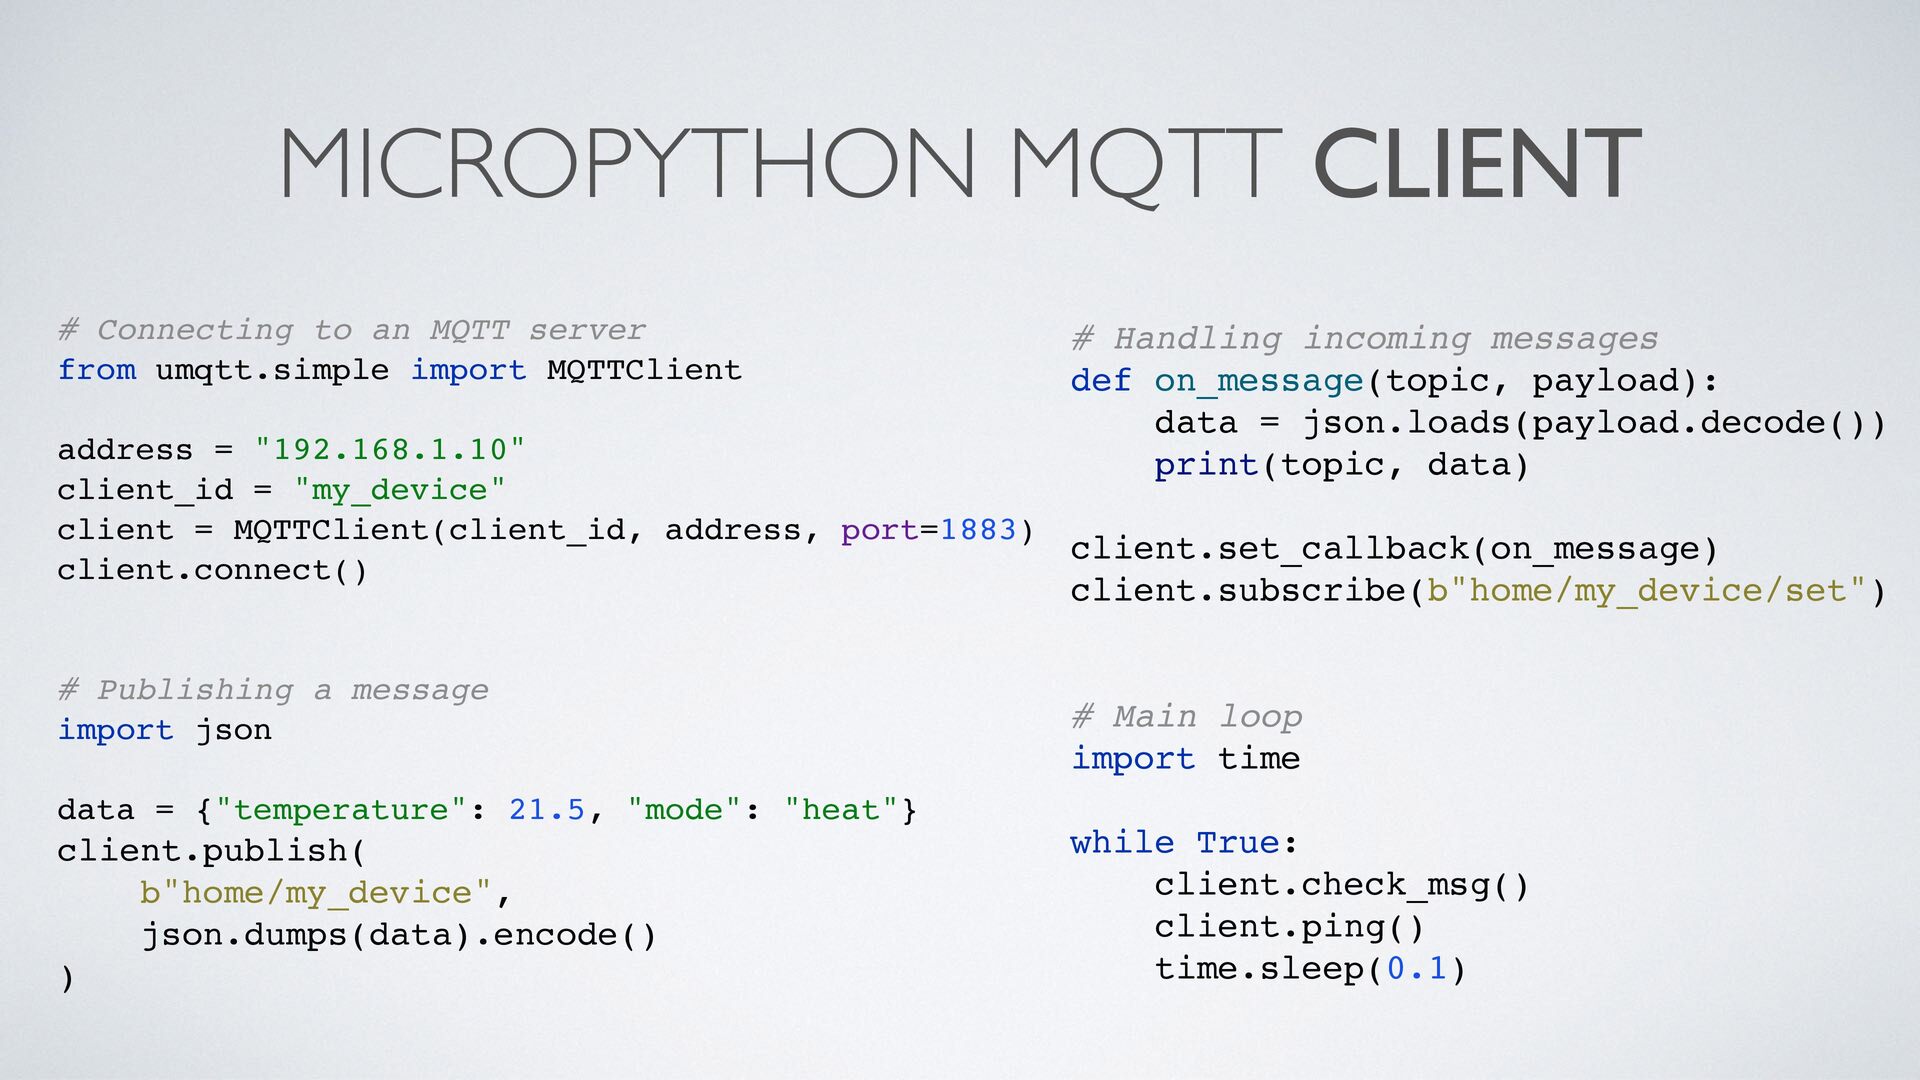
  16. MICROPYTHON MQTT CLIENT # Connecting to an MQTT server from

    umqtt.simple import MQTTClient address = "192.168.1.10" client_id = "my_device" client = MQTTClient(client_id, address, port=1883) client.connect() # Publishing a message import json data = {"temperature": 21.5, "mode": "heat"} client.publish( b"home/my_device", json.dumps(data).encode() ) # Handling incoming messages def on_message(topic, payload): data = json.loads(payload.decode()) print(topic, data) client.set_callback(on_message) client.subscribe(b"home/my_device/set") # Main loop import time while True: client.check_msg() client.ping() time.sleep(0.1)
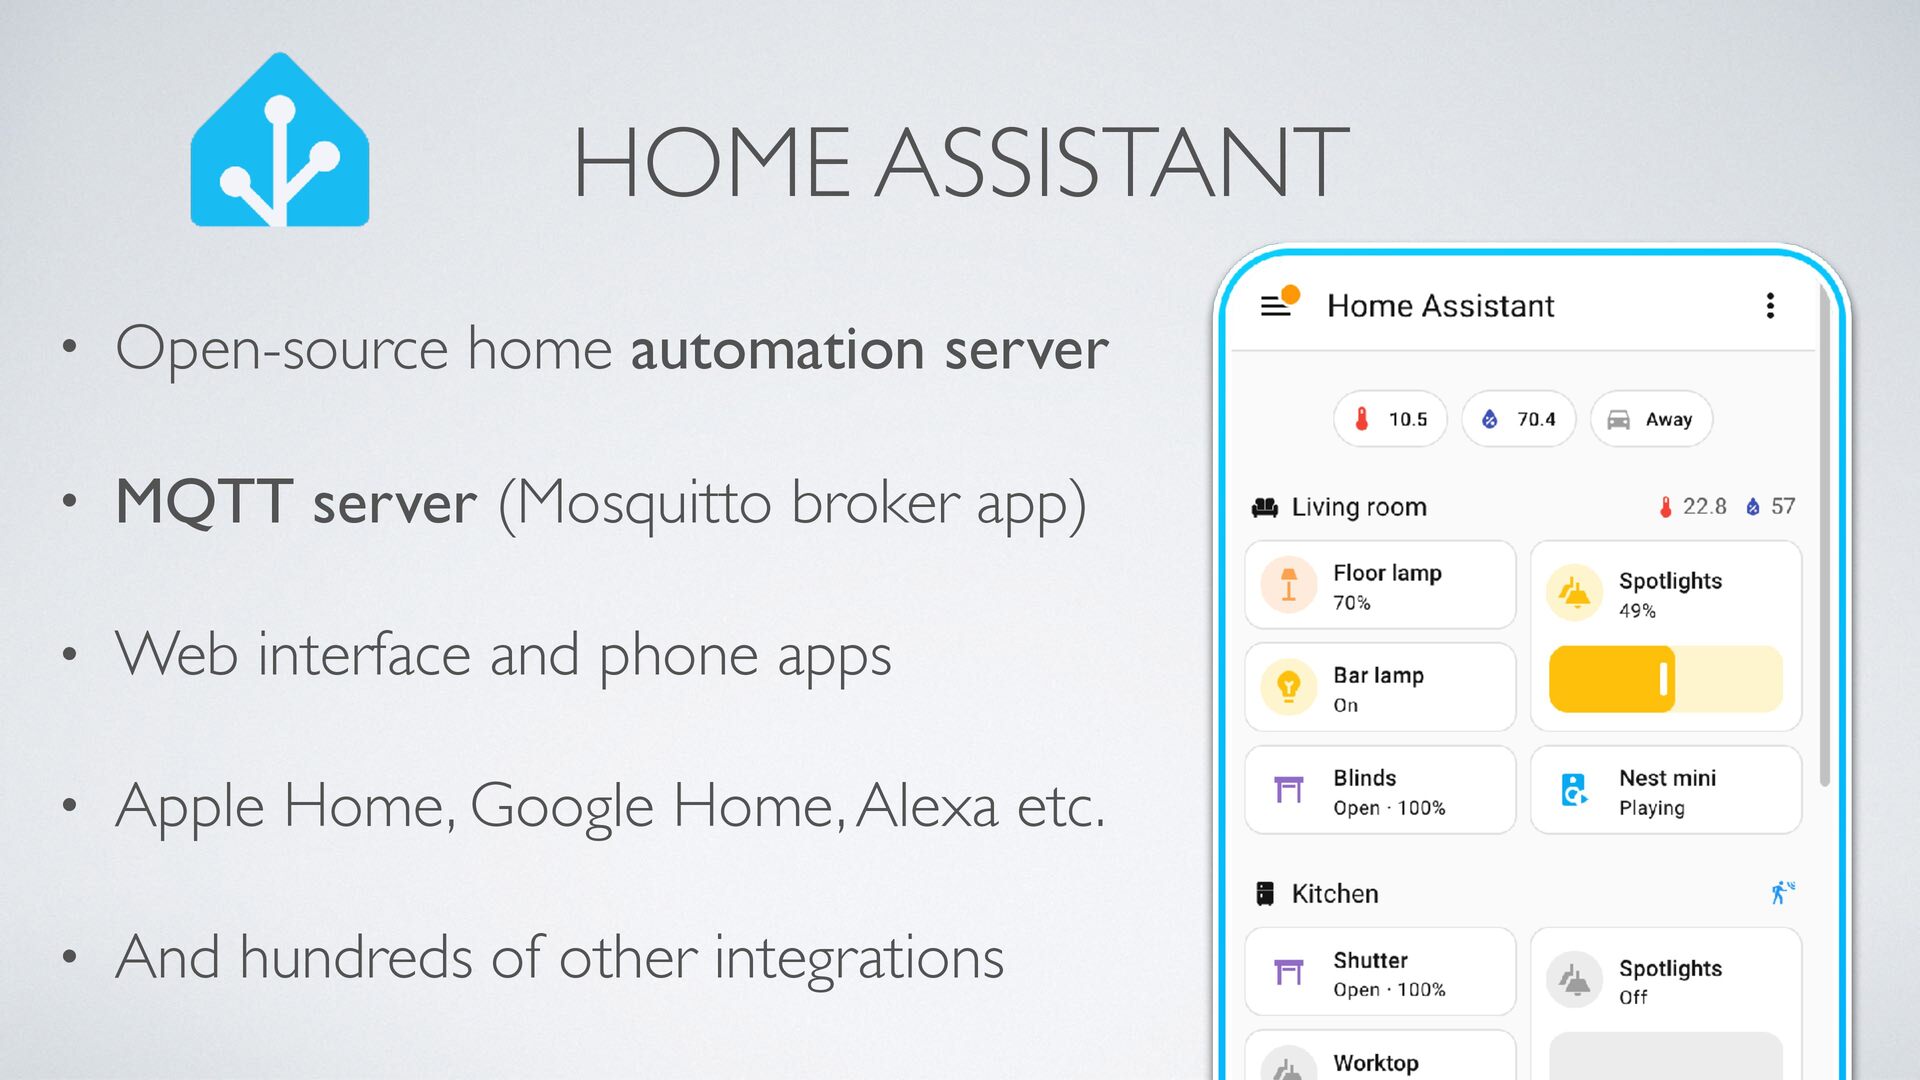
  17. HOME ASSISTANT • Open-source home automation server • MQTT server

    (Mosquitto broker app) • Web interface and phone apps • Apple Home, Google Home, Alexa etc. • And hundreds of other integrations
  18. REGISTER YOUR DEVICE Home Assistant monitors config topics for MQTT

    Discovery: <prefix>/<component_type>/<id>/config homeassistant/light/my_light/config My Device Device registers by sending a discovery message: import json from umqtt.simple import MQTTClient discovery = json.dumps({ "name": "Switch", "unique_id": "my_device_switch_01", "state_topic": "home/my_device/switch/state", "command_topic": "home/my_device/switch/set", "device": {"identifiers": ["my_device_01"], "name": "My Device"}, }).encode() client = MQTTClient("my_device_01", "192.168.1.10", port=1883) client.connect() client.publish(b"homeassistant/switch/my_device_switch/config", discovery, retain=True)
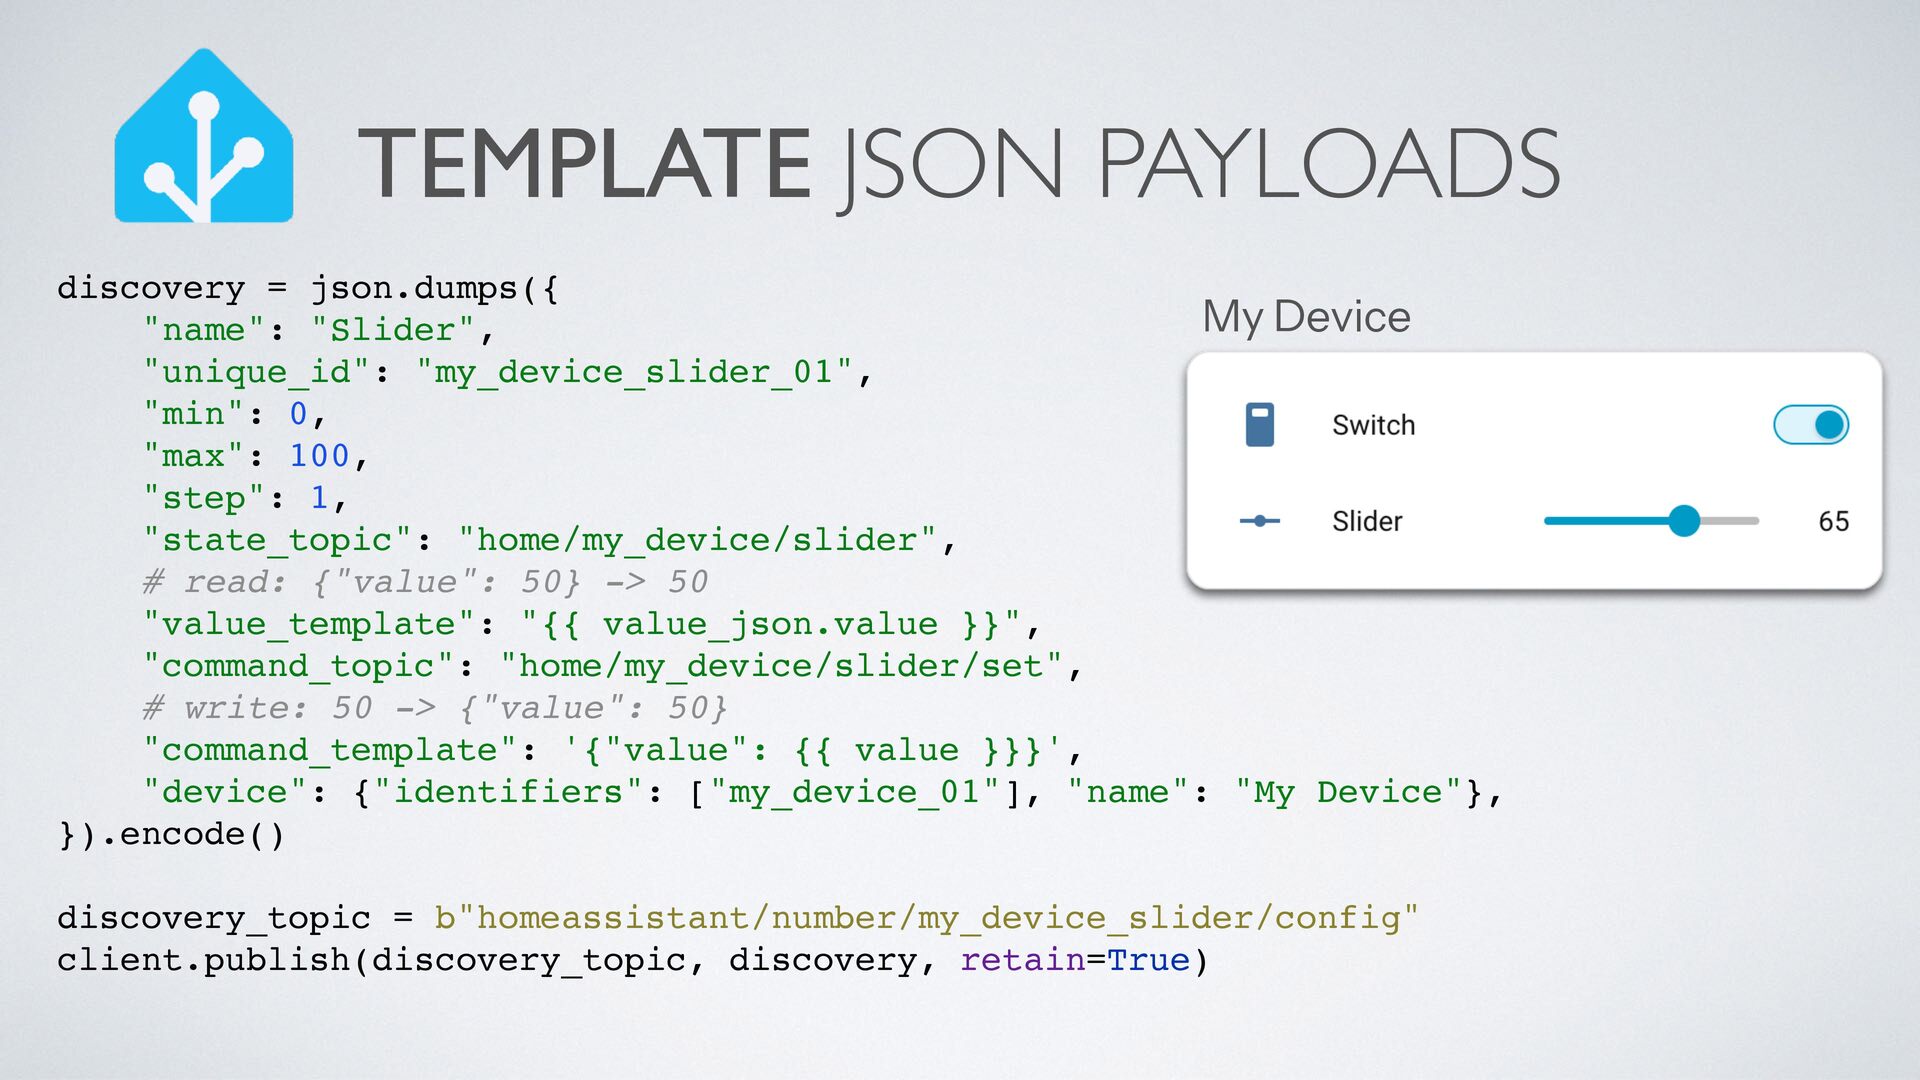
  19. TEMPLATE JSON PAYLOADS discovery = json.dumps({ My Device "name": "Slider",

    "unique_id": "my_device_slider_01", "min": 0, "max": 100, "step": 1, "state_topic": "home/my_device/slider", # read: {"value": 50} -> 50 "value_template": "{{ value_json.value }}", "command_topic": "home/my_device/slider/set", # write: 50 -> {"value": 50} "command_template": '{"value": {{ value }}}', "device": {"identifiers": ["my_device_01"], "name": "My Device"}, }).encode() discovery_topic = b"homeassistant/number/my_device_slider/config" client.publish(discovery_topic, discovery, retain=True)
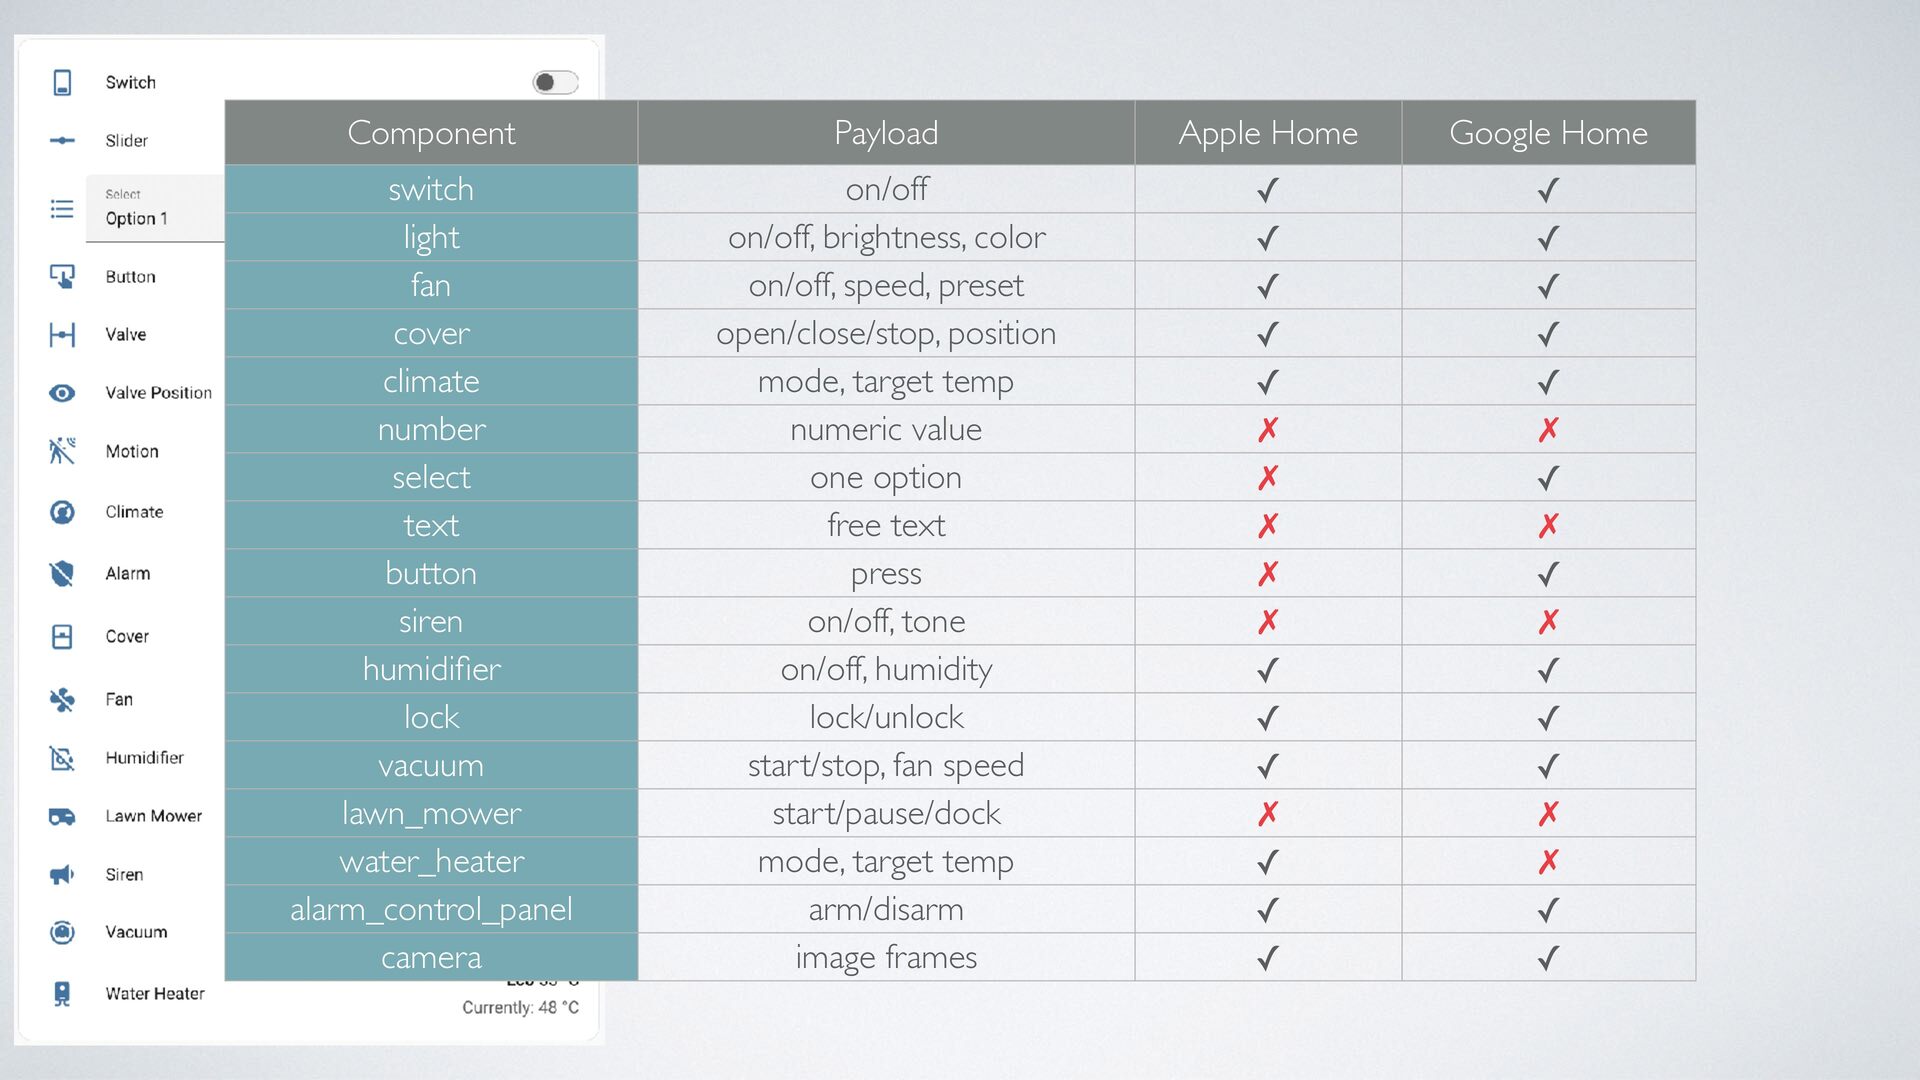
  20. Component Payload Apple Home Google Home switch light fan cover

    climate number select text button siren humidifier lock vacuum lawn_mower water_heater alarm_control_panel camera on/off on/off, brightness, color on/off, speed, preset open/close/stop, position mode, target temp numeric value one option free text press on/off, tone on/off, humidity lock/unlock start/stop, fan speed start/pause/dock mode, target temp arm/disarm image frames ✓ ✓ ✓ ✓ ✓ ✗ ✗ ✗ ✗ ✗ ✓ ✓ ✓ ✗ ✓ ✓ ✓ ✓ ✓ ✓ ✓ ✓ ✗ ✓ ✗ ✓ ✗ ✓ ✓ ✓ ✗ ✗ ✓ ✓
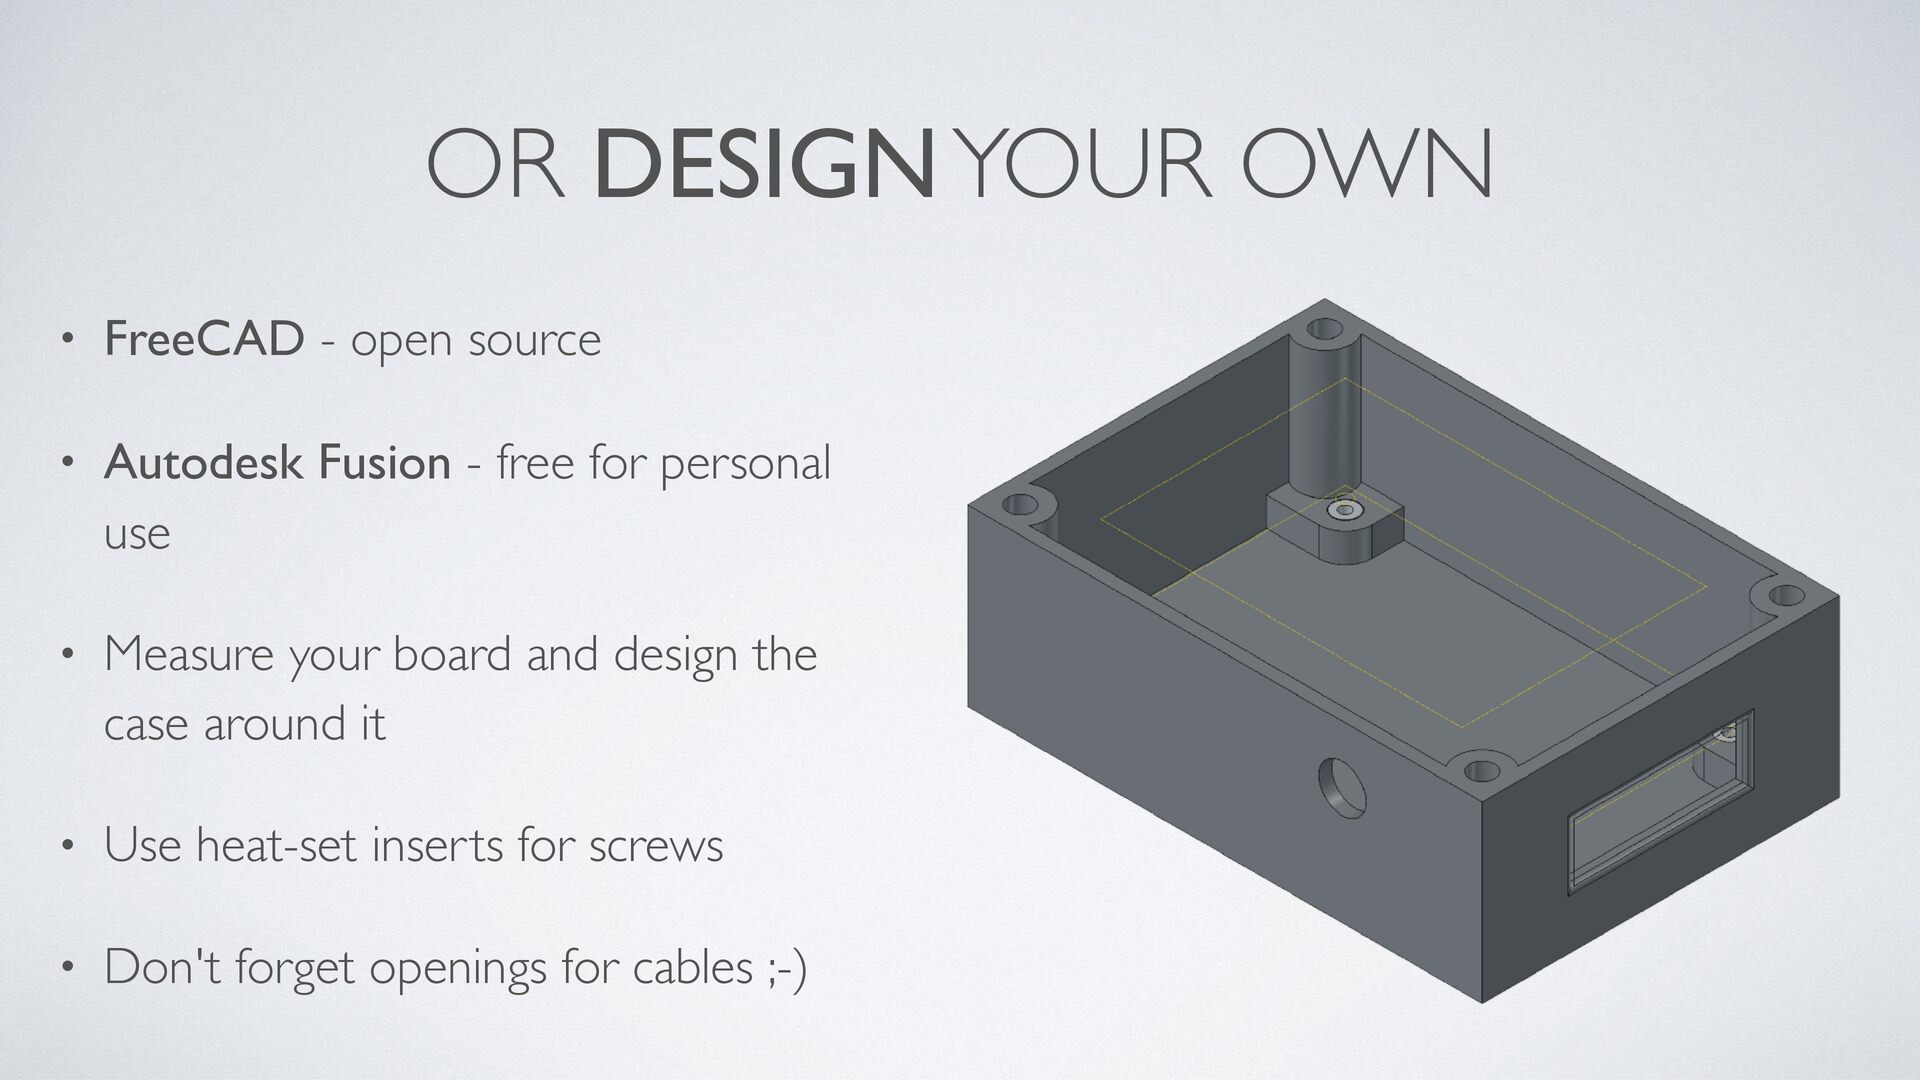
  21. OR DESIGN YOUR OWN • FreeCAD - open source •

    Autodesk Fusion - free for personal use • Measure your board and design the case around it • Use heat-set inserts for screws • Don't forget openings for cables ;-)
  22. ADDITIONAL IMAGE CREDITS • • Some component pictures come from

    these fine online shops: • Switch, sensor and other pictures from botland.pl • Original pyboard image from Pakronics • Transparent acrylic case picture from Temu • Capacitive touchpad image from Robotshop Home Assistant phone screen picture from Home-Assistant.io