Upgrade to Pro — share decks privately, control downloads, hide ads and more …

Popplet Tutorial

Popplet Tutorial

A tutorial of how to use the concept mapping web2.0 site Popplet

russellbuzz

March 27, 2012
Tweet

Other Decks in Education

Transcript

  1. The Popplet “Dashboard” The Dashboard is where you will be

    able to see all of the projects You’ve worked on, completed or not, in Popplet. Click here to begin making a new Popplet.
  2. Creating a New Popplet You will need to give your

    Popplet a name. You can also choose the color of the Popplet. Click “Make it So!” to create the new Popplet.
  3. Creating a New Popplet Here is what your screen will

    look like when you start a new Popplet project. Double-click on the screen to create a new concept bubble.
  4. The Popplet Bubble! You can edit the Popplet bubble to

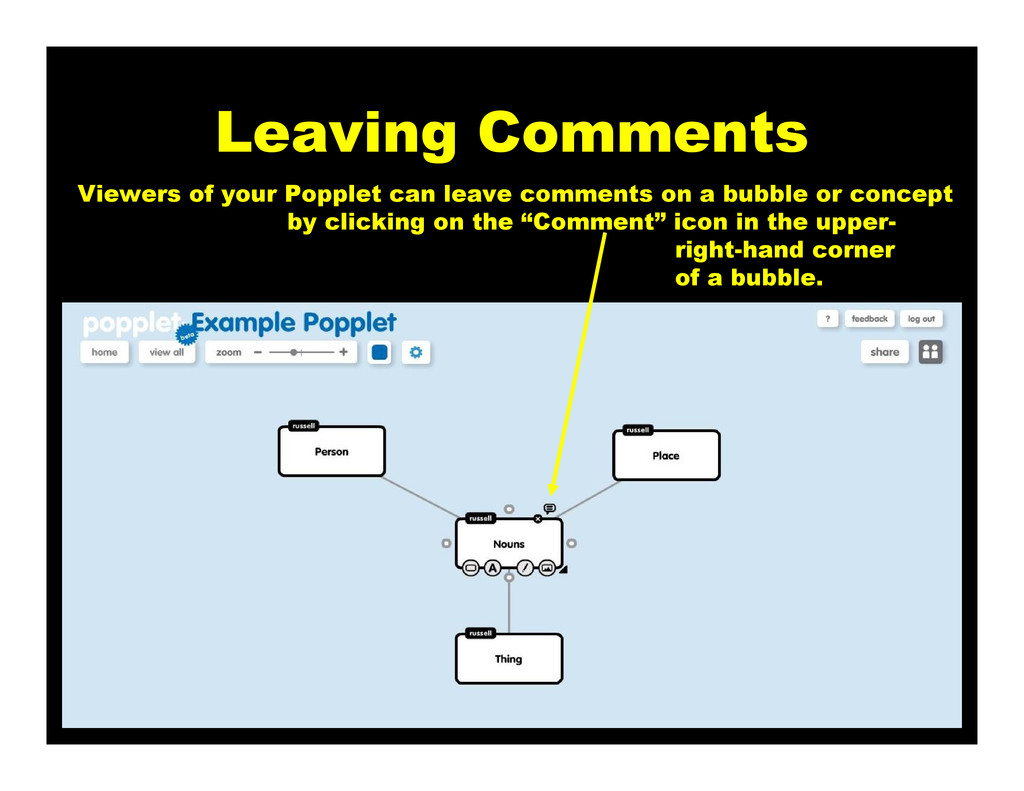
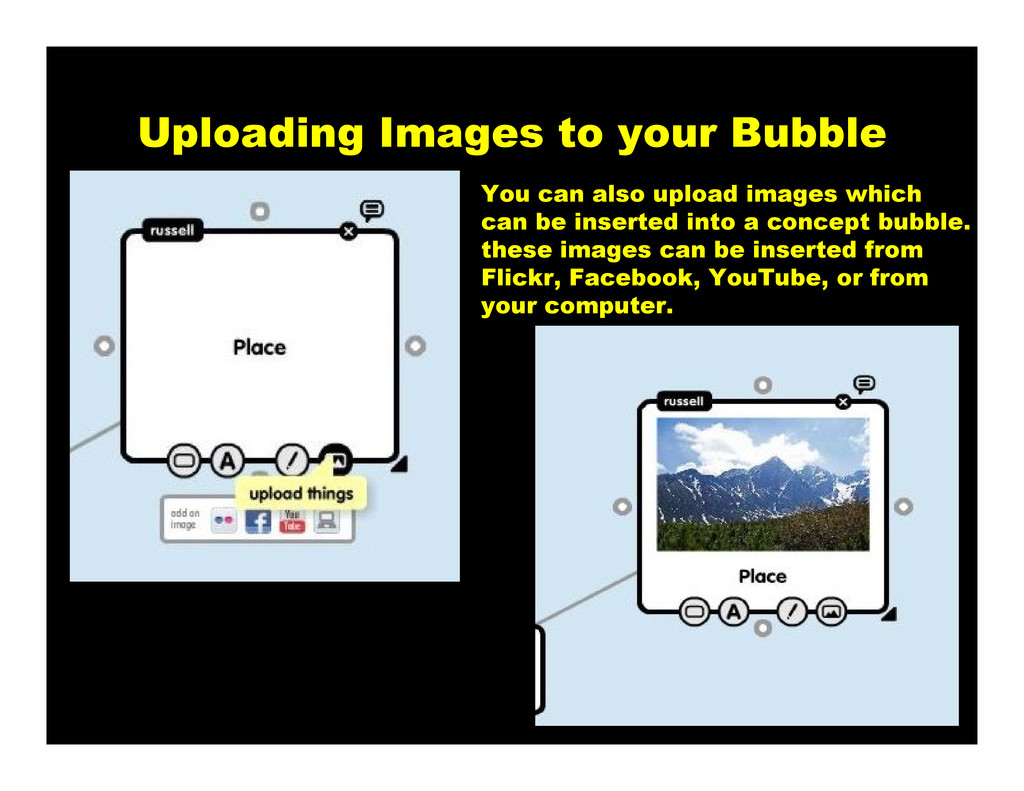
    decorate them in a number of ways, including… • Changing the color of the border of the bubble • Typing in text • Drawing inside the bubble • Uploading images
  5. Placing Your Bubbles You can place your Popplet bubbles by

    clicking your mouse button on the “handle” of the bubble. Drag and move where you want. Double-click on the screen to create additional bubbles.
  6. Zooming In and Out You can zoom in or out

    using this slider in order to see all of the screen at once, or to see one section in greater detail.
  7. Connecting Bubbles Together Connect the bubbles together by clicking on

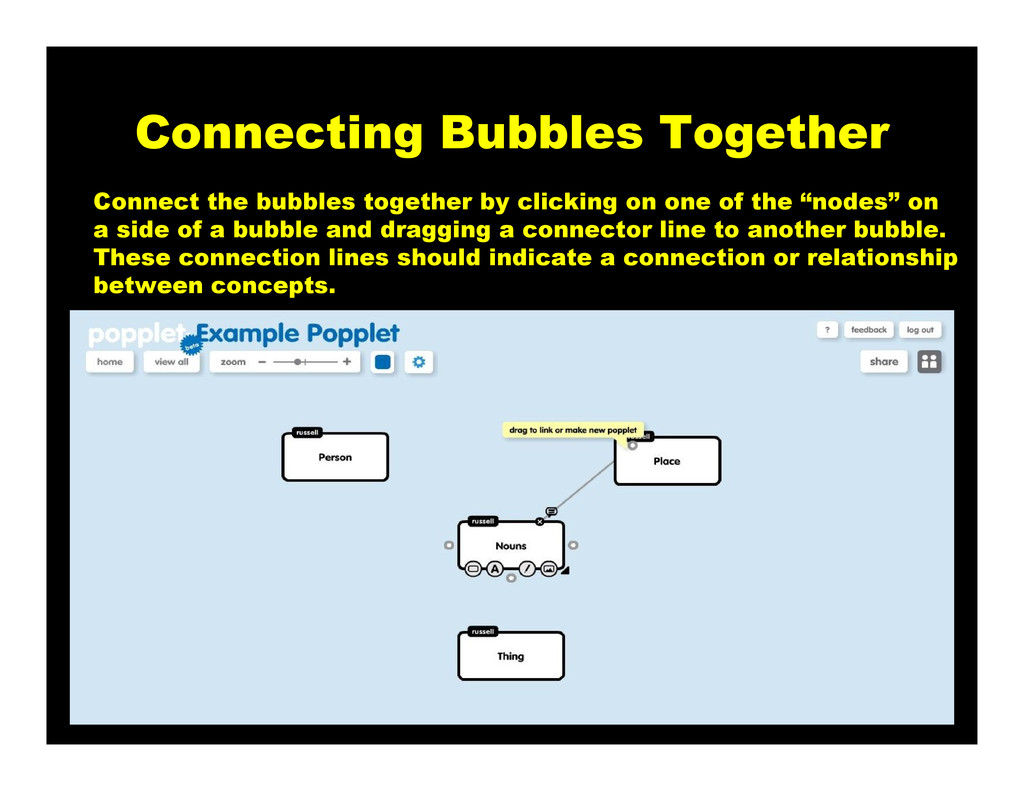
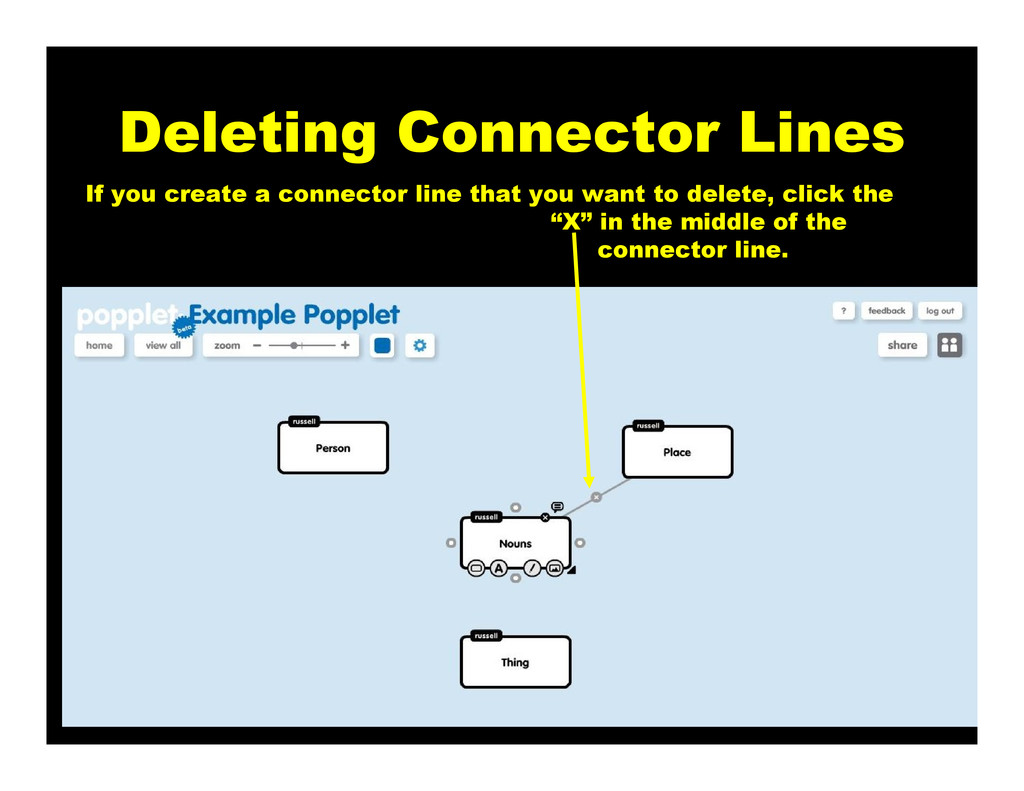
    one of the “nodes” on a side of a bubble and dragging a connector line to another bubble. These connection lines should indicate a connection or relationship between concepts.
  8. Deleting Connector Lines If you create a connector line that

    you want to delete, click the “X” in the middle of the connector line.
  9. Leaving Comments Viewers of your Popplet can leave comments on

    a bubble or concept by clicking on the “Comment” icon in the upper- right-hand corner of a bubble.
  10. Adding a Drawing to a Bubble You can add a

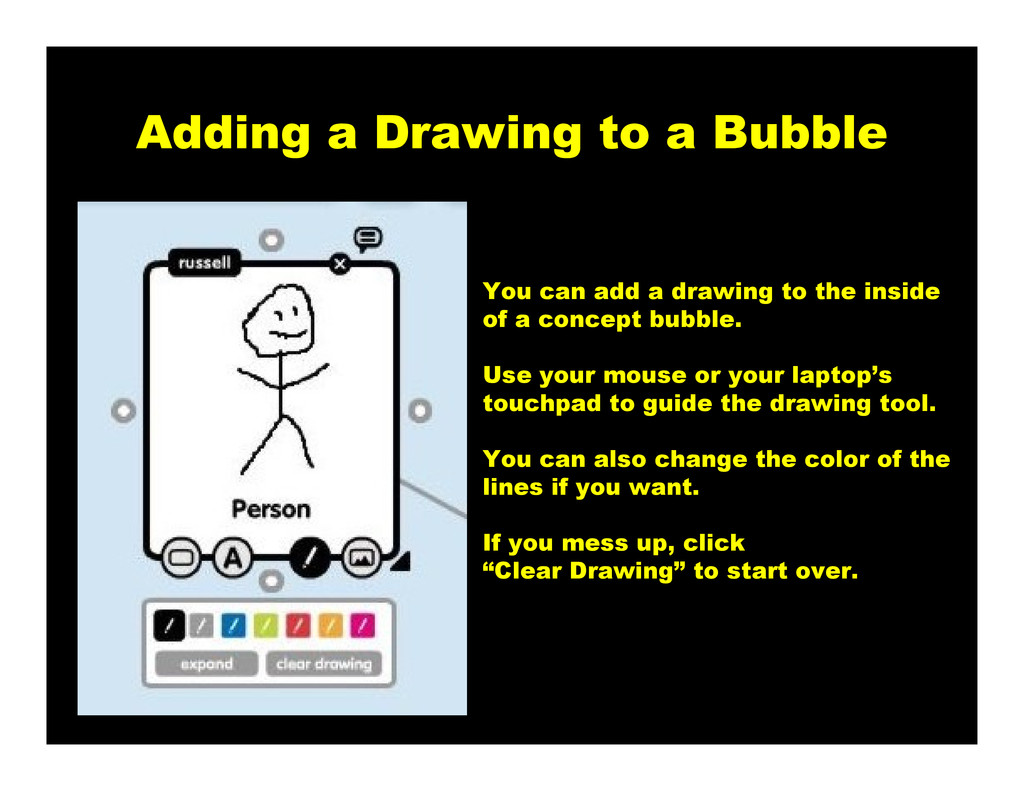
    drawing to the inside of a concept bubble. Use your mouse or your laptop’s touchpad to guide the drawing tool. You can also change the color of the lines if you want. If you mess up, click “Clear Drawing” to start over.
  11. Uploading Images to your Bubble You can also upload images

    which can be inserted into a concept bubble. these images can be inserted from Flickr, Facebook, YouTube, or from your computer.
  12. The Popplet Menu Bar The Menu Bar allows you to:

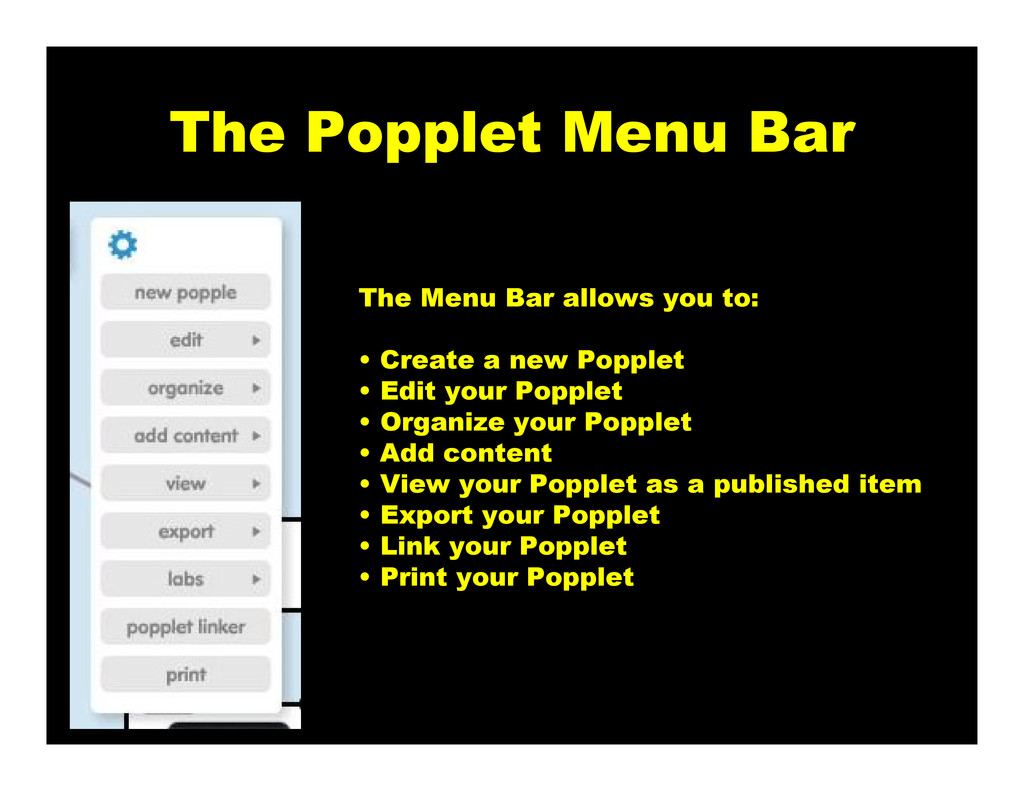
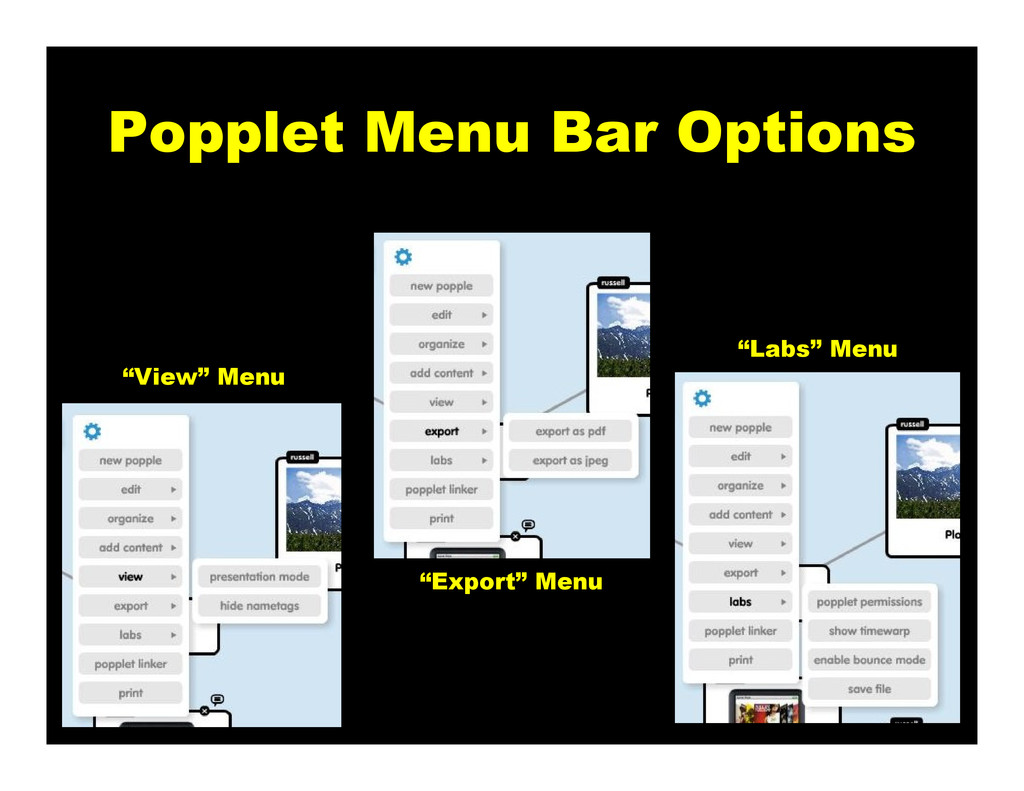
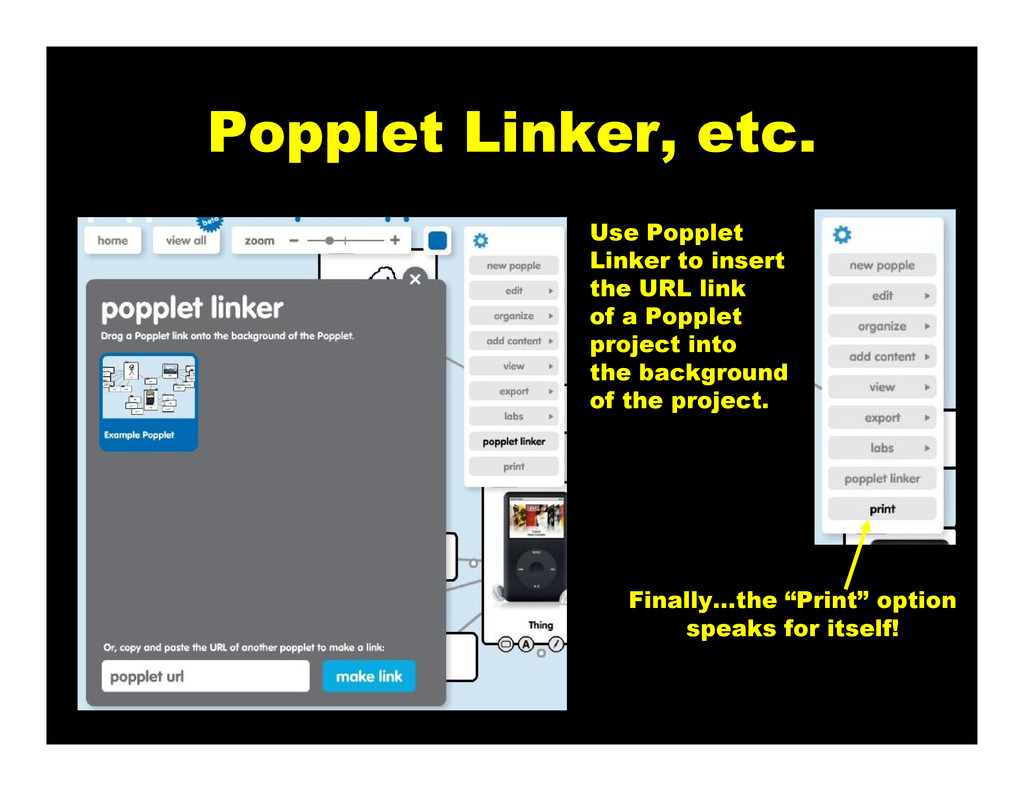
    • Create a new Popplet • Edit your Popplet • Organize your Popplet • Add content • View your Popplet as a published item • Export your Popplet • Link your Popplet • Print your Popplet
  13. Popplet Menu Bar Options “Edit” Menu “Organize” Menu “Add Content”

    Menu You can add content from Flickr, Facebook, Amazon, YouTube, or Google Maps!
  14. Popplet Linker, etc. Use Popplet Linker to insert the URL

    link of a Popplet project into the background of the project. Finally…the “Print” option speaks for itself!
  15. Sharing Your Popplet You can share your Popplet project through

    Facebook, Twitter, through e-mail, or by embedding it into a wiki page or your Moodle page!
  16. Sharing with other Popplet users Finally, you can share your

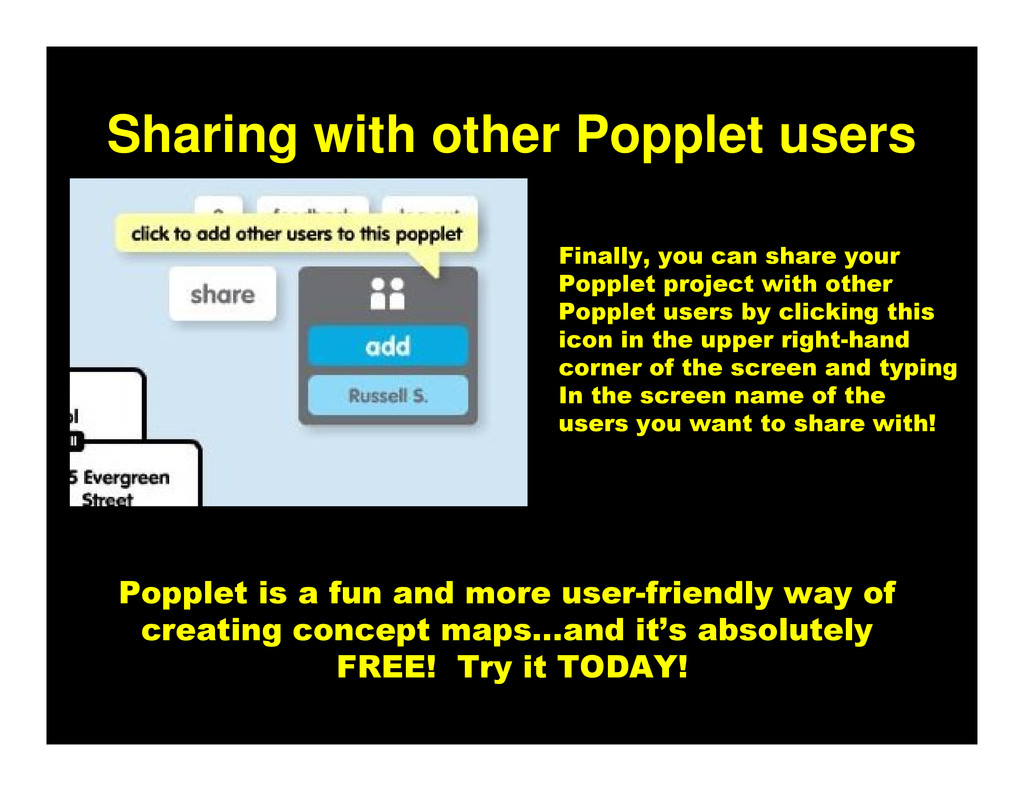
    Popplet project with other Popplet users by clicking this icon in the upper right-hand corner of the screen and typing In the screen name of the users you want to share with! Popplet is a fun and more user-friendly way of creating concept maps…and it’s absolutely FREE! Try it TODAY!