Upgrade to Pro — share decks privately, control downloads, hide ads and more …

2019 Bali - Realible Deployments with Kubernetes and Istio

2019 Bali - Realible Deployments with Kubernetes and Istio

How to deploy Green and Blue Istio on K8s

Estu Fardani

October 06, 2019
Tweet

More Decks by Estu Fardani

Other Decks in Technology

Transcript

  1. Reliable Deployments with Kubernetes and Istio Implement blue/green deployments and

    canary roll outs Estu Fardani [email protected] tuanpembual.wordpress.com @tuanpembual
  2. What is Istio • Istio is an open source independent

    service mesh that provides the fundamentals you need to successfully run a distributed microservice architecture. • Istio lets you connect, secure, control, and observe services.
  3. What is a service mesh? • The term service mesh

    is used to describe the network of microservices that make up such applications and the interactions between them
  4. Why use Istio? • Istio makes it easy to create

    a network of deployed services with load balancing, service-to-service authentication, monitoring, and more, with few or no code changes in service code
  5. Blue-Green Deployment • The blue-green deployment approach does this by

    ensuring you have two production environments, as identical as possible. At any time one of them, let's say blue for the example, is live.
  6. Canary Release • Canary release is a technique to reduce

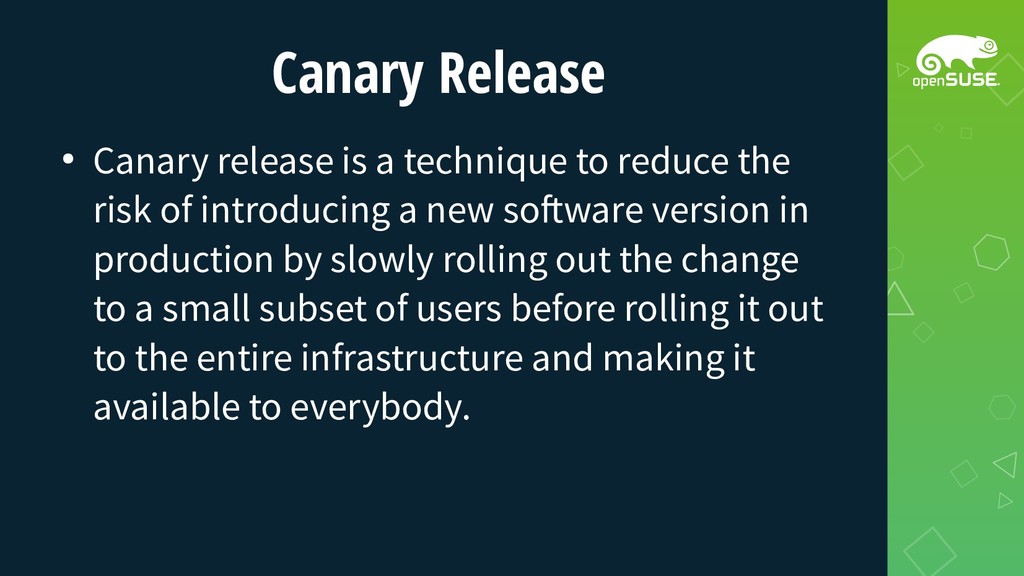
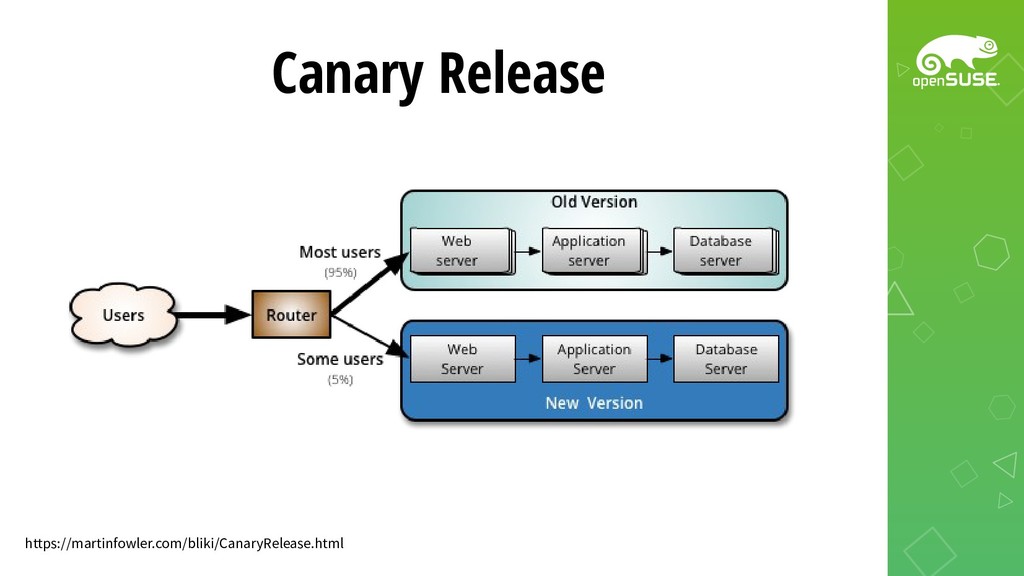
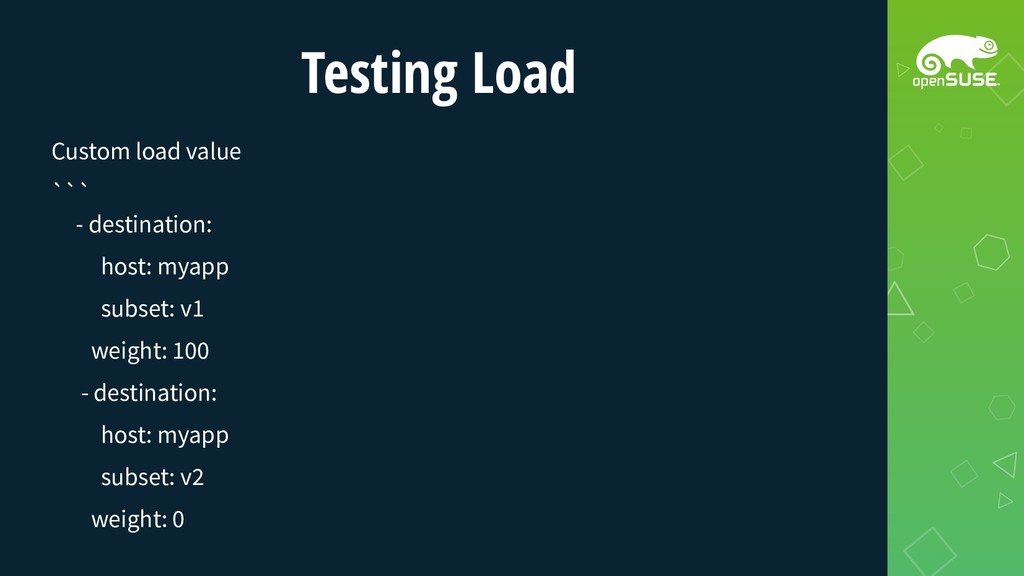
    the risk of introducing a new software version in production by slowly rolling out the change to a small subset of users before rolling it out to the entire infrastructure and making it available to everybody.
  7. Go to Labs • We will create kubernetes cluser using

    minikube • Create vm on local or cloud(vagrant, digital ocean, aws)
  8. Go to Labs Install tools: • Docker without sudo •

    Kubectl • Minikube • Security group • Gist.
  9. Go to Labs Warming up: $ minikube start –vm-driver=none $

    kubectl run hello-minikube --image=gcr.io/google_containers/echoserver:1.4 --port=8080 $ kubectl expose deployment hello-minikube --type=NodePort $ kubectl get services $ kubectl delete services hello-minikube $ kubectl delete deployment hello-minikube
  10. Go to Labs (2) $ curl -L https://git.io/getLatestIstio | ISTIO_VERSION=1.3.0

    sh - $ cd istio-1.3.0 $ for i in install/kubernetes/helm/istio-init/files/ crd*yaml; do kubectl apply -f $i; done
  11. Go to Labs (3) $ vim install/kubernetes/istio-demo.yaml line 17647 ```

    apiVersion: v1 kind: Service metadata: name: istio-ingressgateway namespace: istio-system annotations: labels: chart: gateways heritage: Tiller release: istio app: istio-ingressgateway istio: ingressgateway spec: ``` save n exit
  12. Testing deploy 2 version apps $ vim my-app.yaml $ kubectl

    apply -f my-app.yaml $ kubectl get pods $ kubectl get svc
  13. Listen Apps Open two console: $ kubectl port-forward --address 0.0.0.0

    deployment/myapp-v1 8080:80 $ kubectl port-forward --address 0.0.0.0 deployment/myapp-v2 8081:80
  14. Create Gateway $ vim app-gateway.yaml $ kubectl apply -f app-gateway.yaml

    # edit, save and update $ kubectl replace -f app-gateway.yaml
  15. Testing Load Custom load value ``` - destination: host: myapp

    subset: v1 weight: 100 - destination: host: myapp subset: v2 weight: 0
  16. Debug Config $ ip addr # get local ipaddress $

    while : ;do export GREP_COLOR='1;33';curl -s 172.31.25.31:31380 \ | grep --color=always "V1" ; export GREP_COLOR='1;36';\ curl -s 172.31.25.31:31380 \ | grep --color=always "vNext" ; sleep 1; done
  17. See the magic ### FROM: * https://www.radishlogic.com/kubernetes/running- minikube-in-aws-ec2-ubuntu/ * https://thenewstack.io/tutorial-blue-green-

    deployments-with-kubernetes-and-istio/ * https://cheatsheet.dennyzhang.com/cheatsheet- minikube-a4
  18. Conclusion • It is still prove of concept at the

    simple case. • Production, of course not simple as my demo. • Ping me after this workshop :D