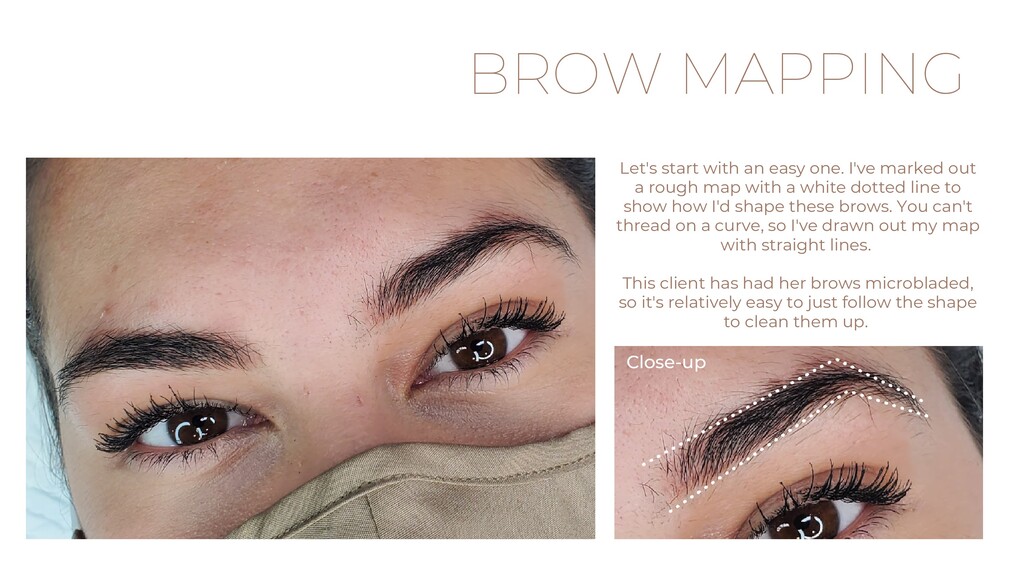
out a rough map with a white dotted line to show how I'd shape these brows. You can't thread on a curve, so I've drawn out my map with straight lines. This client has had her brows microbladed, so it's relatively easy to just follow the shape to clean them up. Close-up
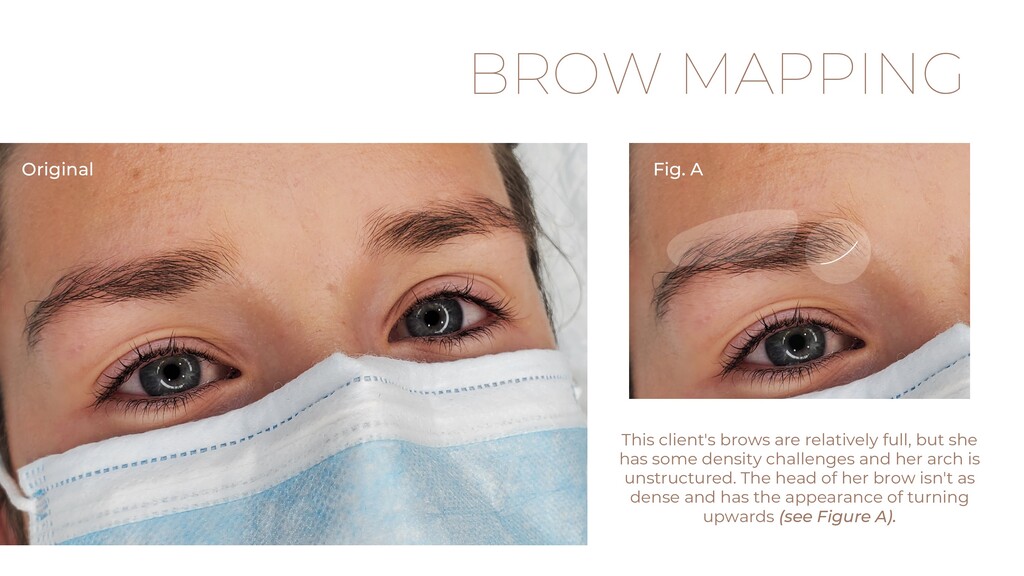
has some density challenges and her arch is unstructured. The head of her brow isn't as dense and has the appearance of turning upwards (see Figure A). Original Fig. A
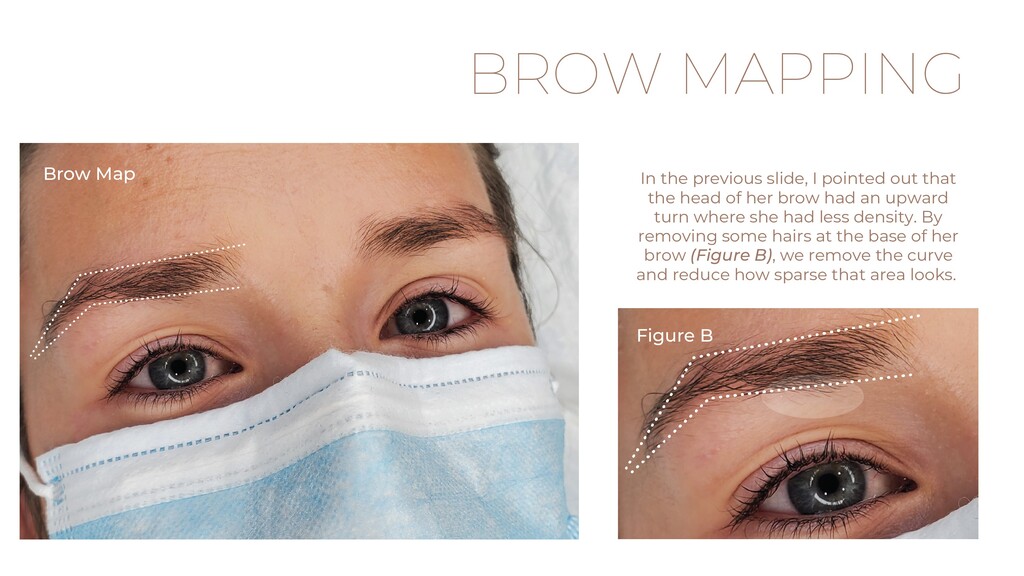
the head of her brow had an upward turn where she had less density. By removing some hairs at the base of her brow (Figure B), we remove the curve and reduce how sparse that area looks. Brow Map Figure B
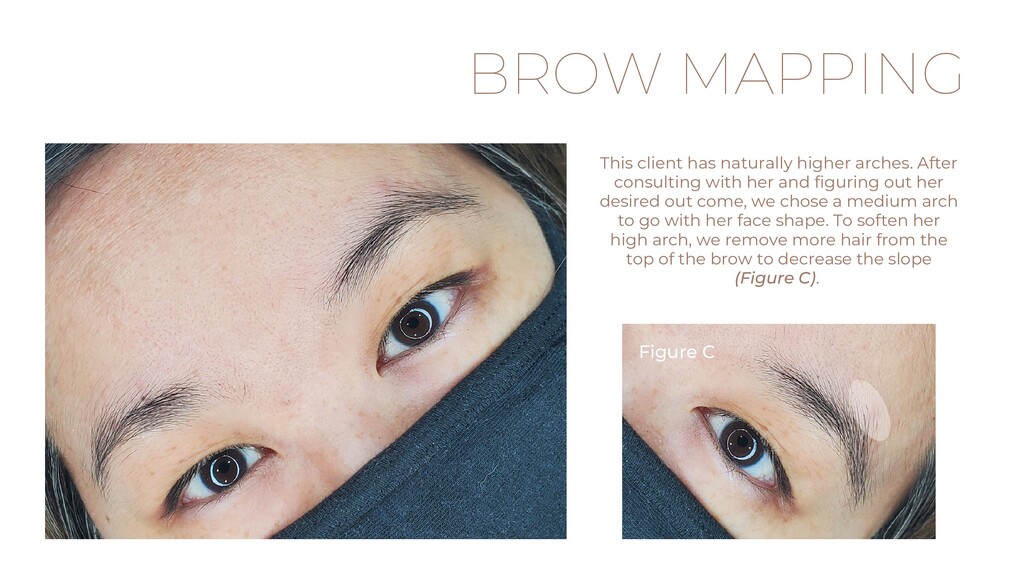
with her and figuring out her desired out come, we chose a medium arch to go with her face shape. To soften her high arch, we remove more hair from the top of the brow to decrease the slope (Figure C). Figure C Figure C
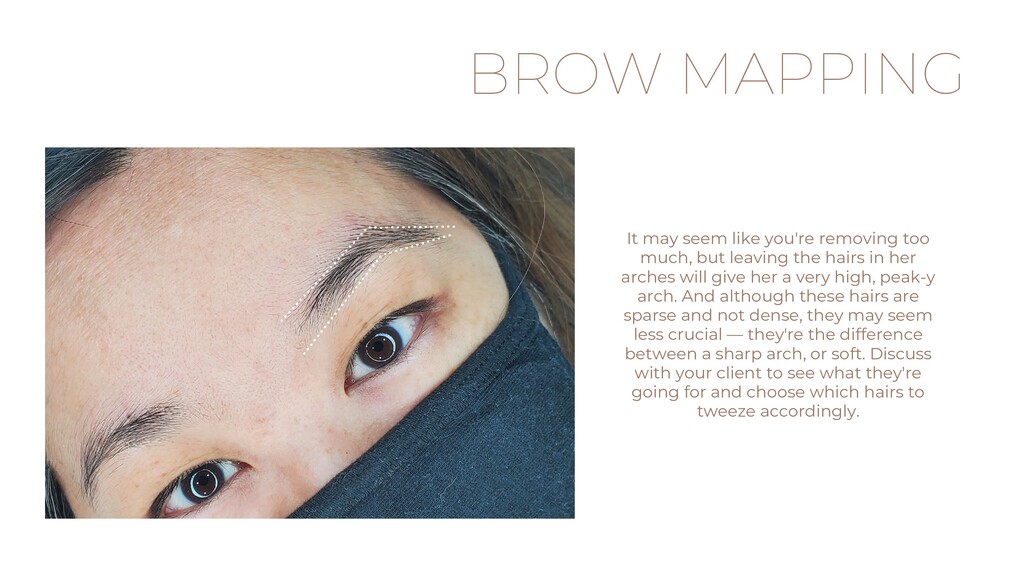
but leaving the hairs in her arches will give her a very high, peak-y arch. And although these hairs are sparse and not dense, they may seem less crucial — they're the difference between a sharp arch, or soft. Discuss with your client to see what they're going for and choose which hairs to tweeze accordingly.
her own, and her shape isn't awful; the brow on the right side of this photo looks more hooked (Figure D), and she has some density issues. This can be solved easily by shaping her brows symmetrically and filling in any gaps with tint/henna or makeup. Figure D
that slope to be smooth and gradual, and the line connecting head-to-arch should be relatively straight. By removing some of the hairs below the line drawn (Figure E), we adjust that angle and decrease her brow's slope to reduce the hook. The asymmetry isn't very obvious, but the brow on the right side of the photo comes down further than the left, so those hairs don't belong anyway. Figure E