504, 507 getInt method, 180 getInteractionModes method, 125 getKeyStates method, 196 getLabel method, 107 getLandmarks methods, 508 getLastKnownLocation method, 505 getLastModified method, 138, 312 getLatitude method, 506 getLayerAt method, 202 getLength method, 311, 314 getLocalAddress method, 301 getLocalPort method, 301 getLocation method, 154, 263, 281, 505, 506 getLocationMethod method, 505 getLocationOnScreen method, 263 getLocationStrings method, 153, 160 getLongitude method, 506 getMessage method, 403 getMessageParts method, 383 getMidlet method, 391 getMIMEType method, 383 getMin method, 477 getMinContentHeight method, 125, 477 getMinContentWidth method, 125, 477 getMinimumHeight method, 107 getMinimumSize method, 240 getMinimumWidth method, 107 getName method, 166, 508 getNextRecordID method, 142 getNumRecords method, 138, 145 getOutputBlockSize method, 430 getPath method, 166 getPayloadData method, 381 getPayloadText method, 380 getPort method, 301, 313, 326 getPref method, 477 getPrefContentHeight method, 125, 131, 477 getPrefContentWidth method, 125, 131, 477 getPreferredHeight method, 107 getPreferredSize method, 240 getPreferredWidth method, 107 getProperty method, 27, 242, 406, 419, 457, 463, 464 getProtocol method, 313 getProtocolName method, 326 getProtocolVersion method, 326 getQualifiedCoordinates method, 505, 508 getReadSymbologies method, 440 getReason method, 175 getRecord method, 142 getRecordType method, 437 getResource method, 242 getResourceAsStream method, 242, 469 getResponseCode method, 312, 314 getResponseMessage method, 312 getRuntime method, 27 getSecurityInfo method, 326 getSelectedFlags method, 114 getSelectedIndex method, 114 getServerCertificate method, 326 getSize method, 138, 202, 263 getSizeAvailable method, caution with, 146 getSnapshot method, 461–465, 494 getSocketOption method, 301 getSpeed method, 505 getStartContentId method, 382 getState method, 460 getString method, 110, 118, 180 getStringArray method, 180 getSubject method, 383 getSupportedContentTypes method, 457, 492 getSupportedFields method, 179 getSupportedProtocols method, 457 getSupportedTargetTypes method, 435 getSystemResource method, 242 getSystemResourceAsStream method, 242 getTargetComponent method, 478 getText method, 371 getTimeBase method, 453 getTimeout method, 118 getTimestamp method, 380, 382, 505 getType method, 311, 360 getURL method, 167, 313 getValue method, 360 ▪INDEX 551
![mainForm = new Form("String Item Demo", new Item[] { get_stringItem1(),](https://files.speakerdeck.com/presentations/074658e1521c4d538e859a9ca6d95143/slide_127.jpg)
![public void add_location( String l ) { String locations[]; int](https://files.speakerdeck.com/presentations/074658e1521c4d538e859a9ca6d95143/slide_139.jpg)
![} else { byte b[] = l.toBytes(); openStore(); store.addRecord(b, 0,](https://files.speakerdeck.com/presentations/074658e1521c4d538e859a9ca6d95143/slide_173.jpg)
![private void load() { try { int v; byte b[];](https://files.speakerdeck.com/presentations/074658e1521c4d538e859a9ca6d95143/slide_192.jpg)
![addr[Contact.ADDR_COUNTRY] = country; addr[Contact.ADDR_POSTALCODE] = street; c.addStringArray(Contact.ADDR, Contact.ATTR_NONE, addr); c.commit();](https://files.speakerdeck.com/presentations/074658e1521c4d538e859a9ca6d95143/slide_209.jpg)
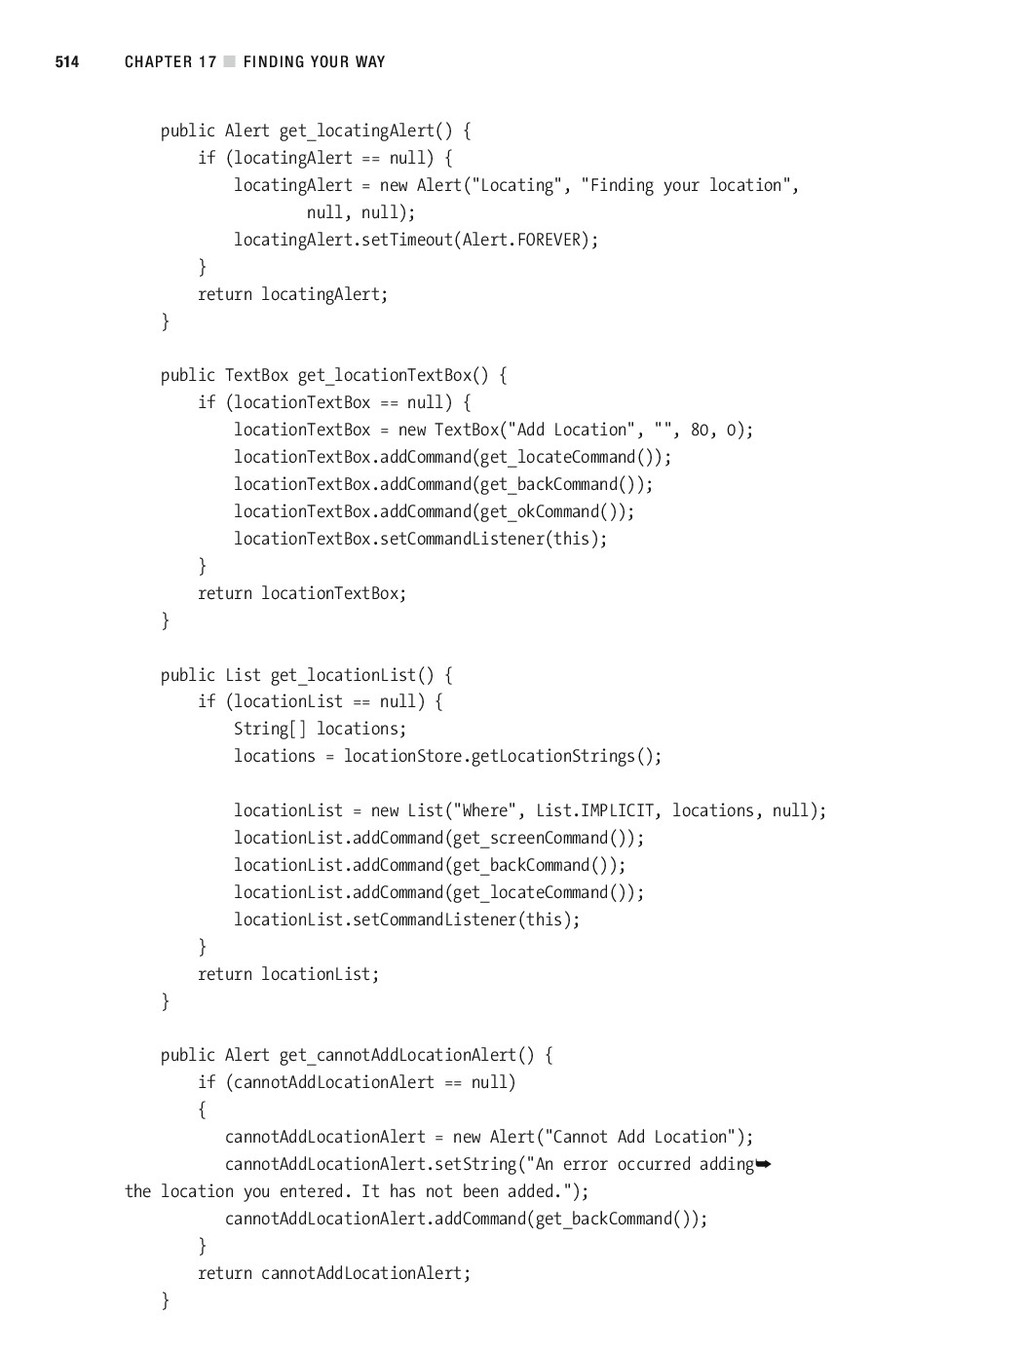
![public List get_locationList() { if (locationList == null) { String[]](https://files.speakerdeck.com/presentations/074658e1521c4d538e859a9ca6d95143/slide_337.jpg)
![public void fromBytes(byte[] b) { ByteArrayInputStream bais = new ByteArrayInputStream(b);](https://files.speakerdeck.com/presentations/074658e1521c4d538e859a9ca6d95143/slide_362.jpg)
![protocol:[slotid]; target Each part is defined as follows: • protocol:](https://files.speakerdeck.com/presentations/074658e1521c4d538e859a9ca6d95143/slide_428.jpg)
![public class ISO14443Example implements TargetListener { byte[] commandAPDU = ...;](https://files.speakerdeck.com/presentations/074658e1521c4d538e859a9ca6d95143/slide_448.jpg)
![public ProcessVisualTag(byte[] d) { data = d; imageClass = new](https://files.speakerdeck.com/presentations/074658e1521c4d538e859a9ca6d95143/slide_451.jpg)