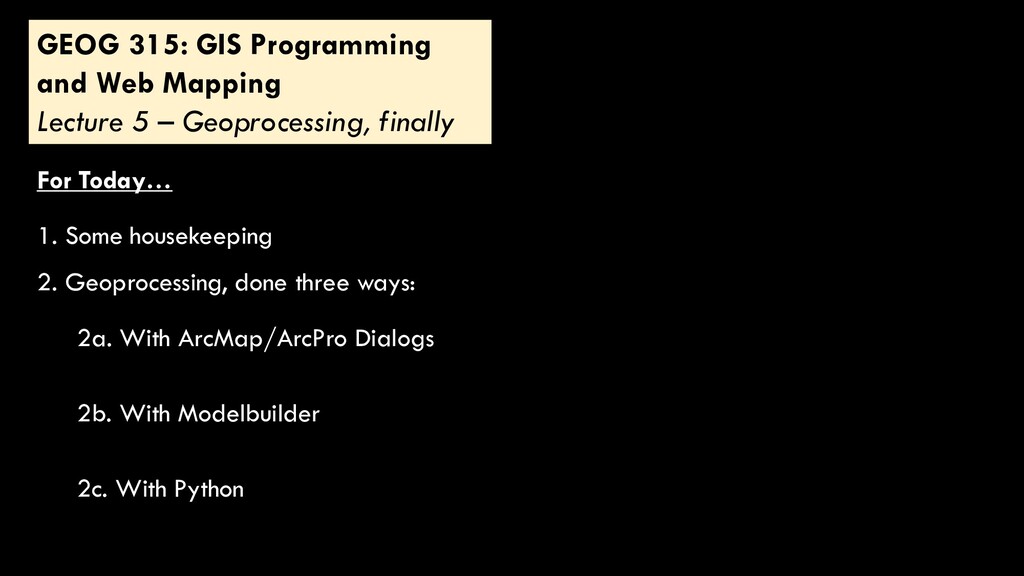
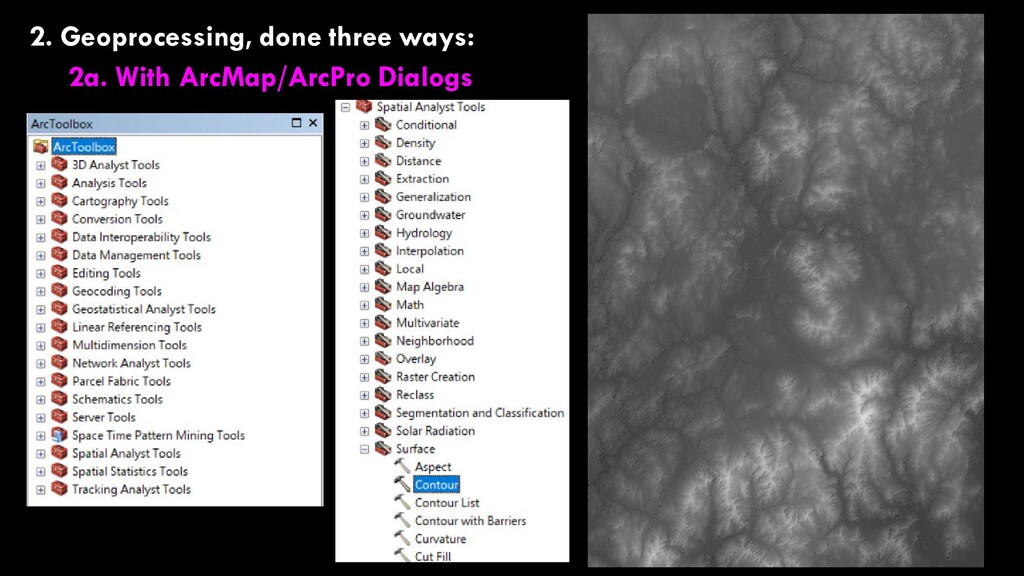
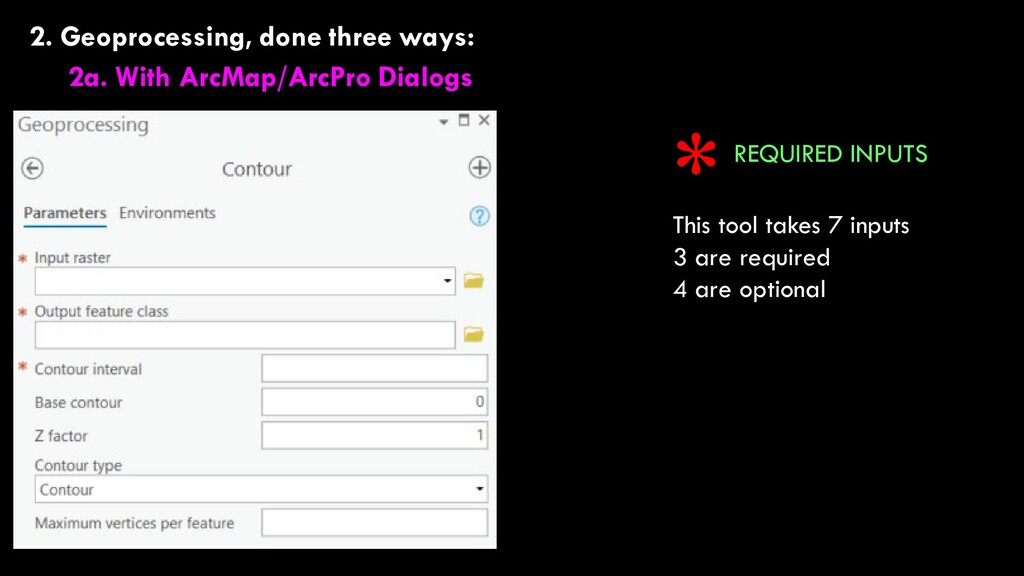
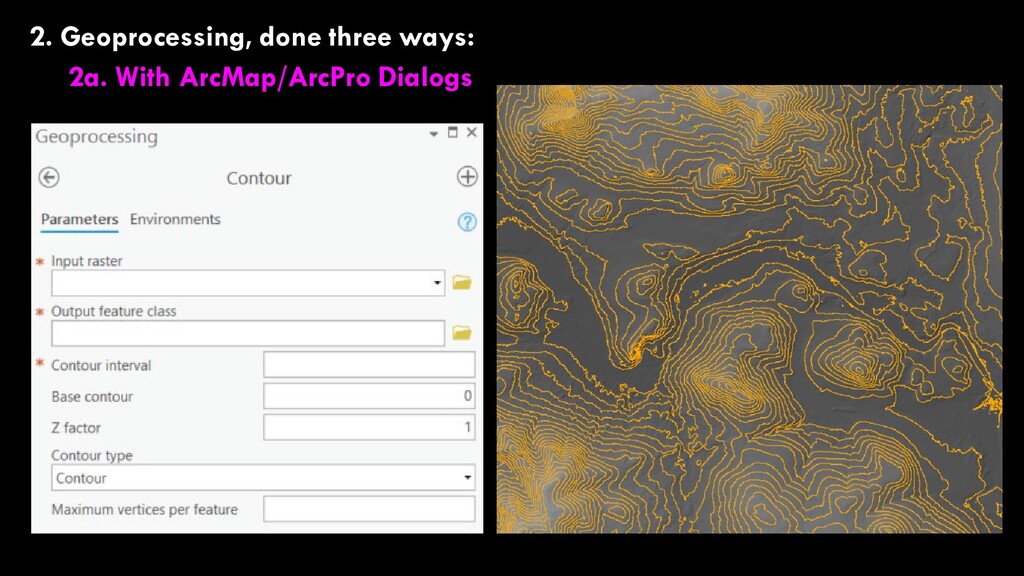
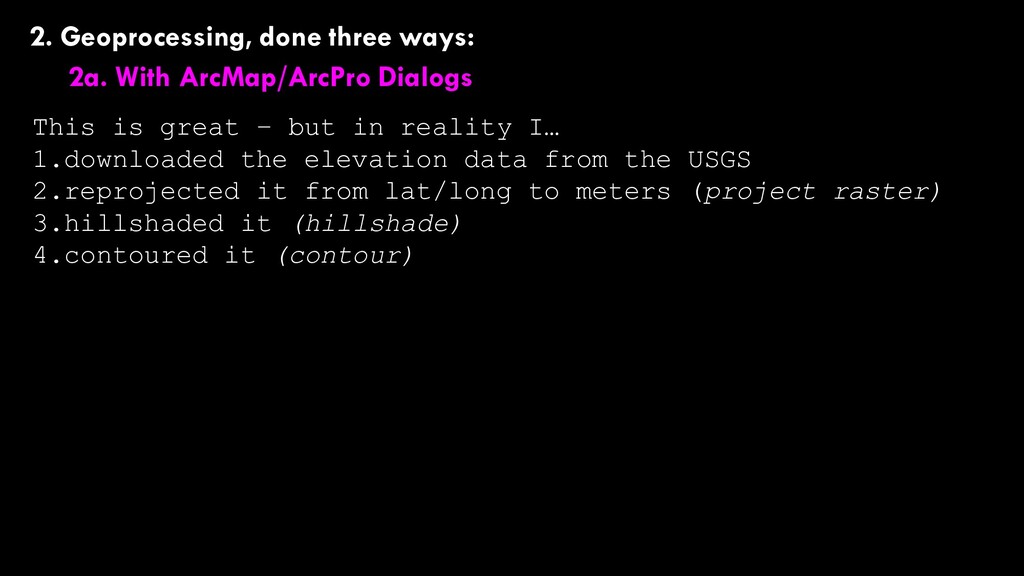
Geoprocessing, finally For Today… 1. Some housekeeping 2. Geoprocessing, done three ways: 2a. With ArcMap/ArcPro Dialogs 2b. With Modelbuilder 2c. With Python
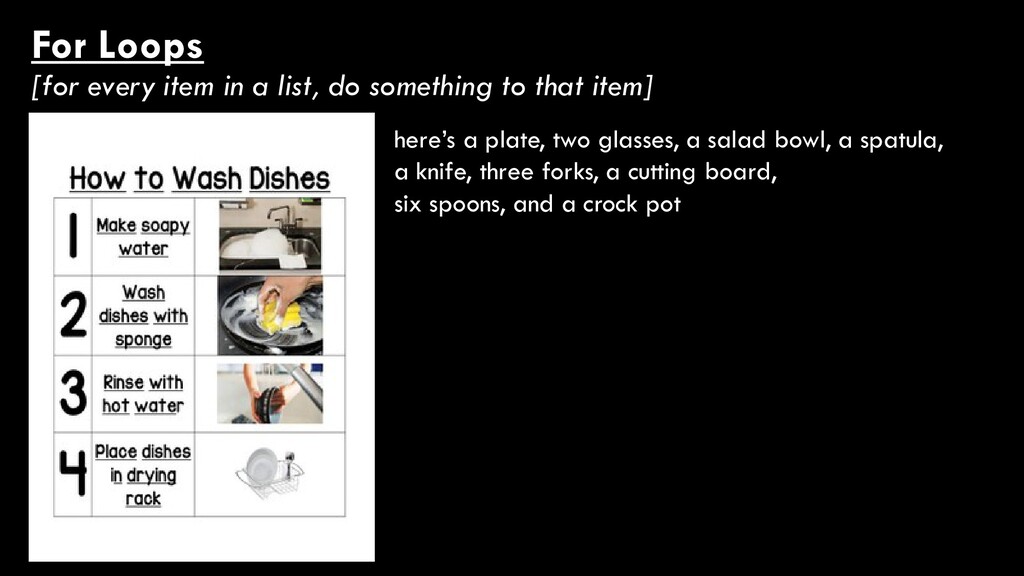
to that item] here’s a plate, two glasses, a salad bowl, a spatula, a knife, three forks, a cutting board, six spoons, and a crock pot Make soapy water for each dish in the list of dishes: wash dish with sponge rinse with hot water place in drying rack
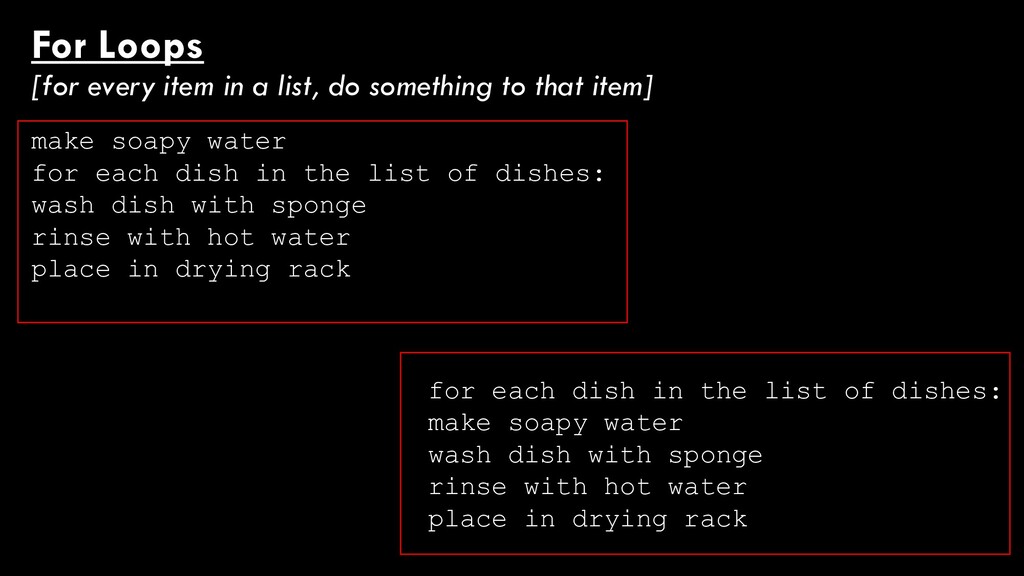
to that item] for each dish in the list of dishes: make soapy water wash dish with sponge rinse with hot water place in drying rack make soapy water for each dish in the list of dishes: wash dish with sponge rinse with hot water place in drying rack
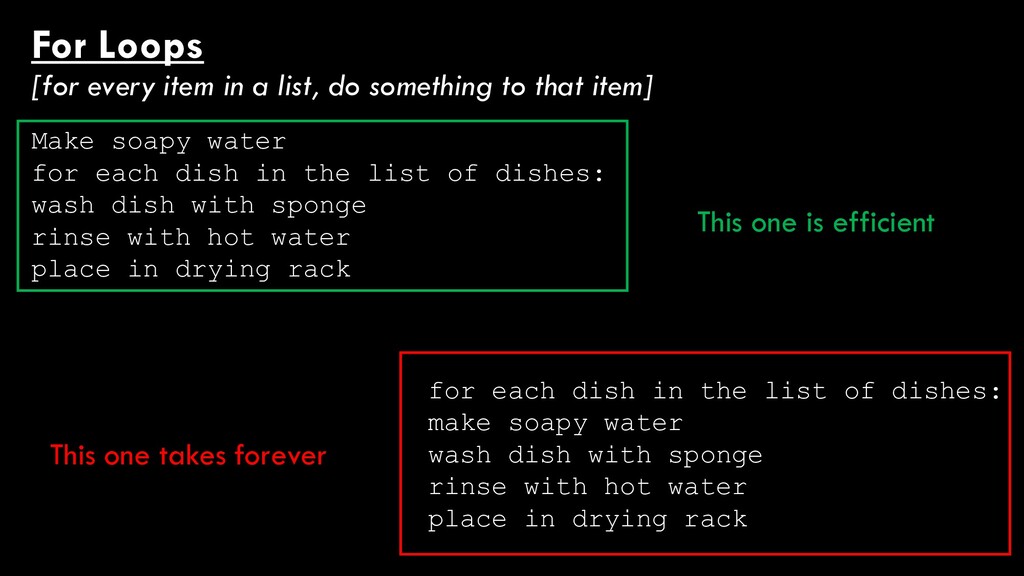
to that item] for each dish in the list of dishes: make soapy water wash dish with sponge rinse with hot water place in drying rack Make soapy water for each dish in the list of dishes: wash dish with sponge rinse with hot water place in drying rack This one is efficient This one takes forever
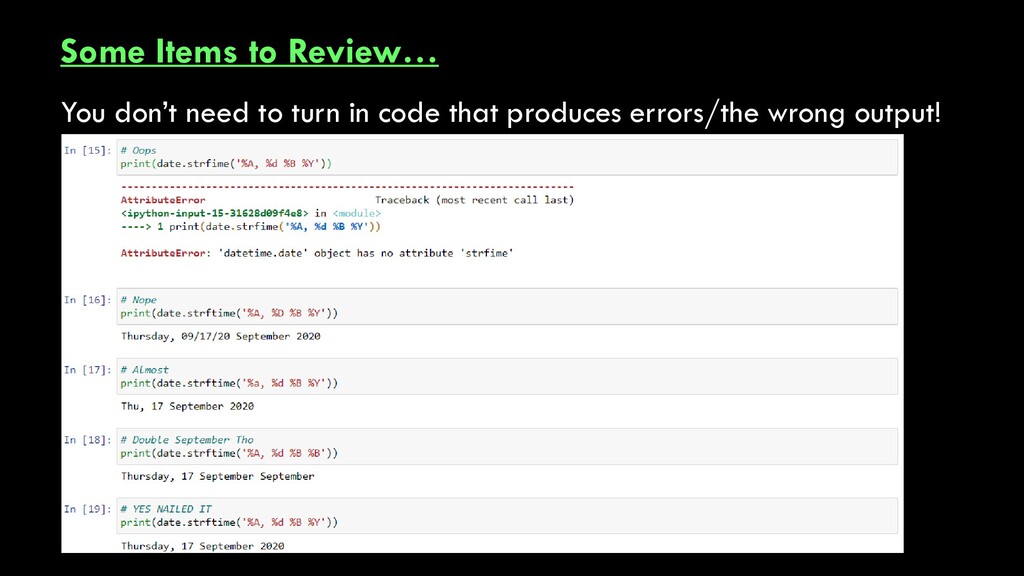
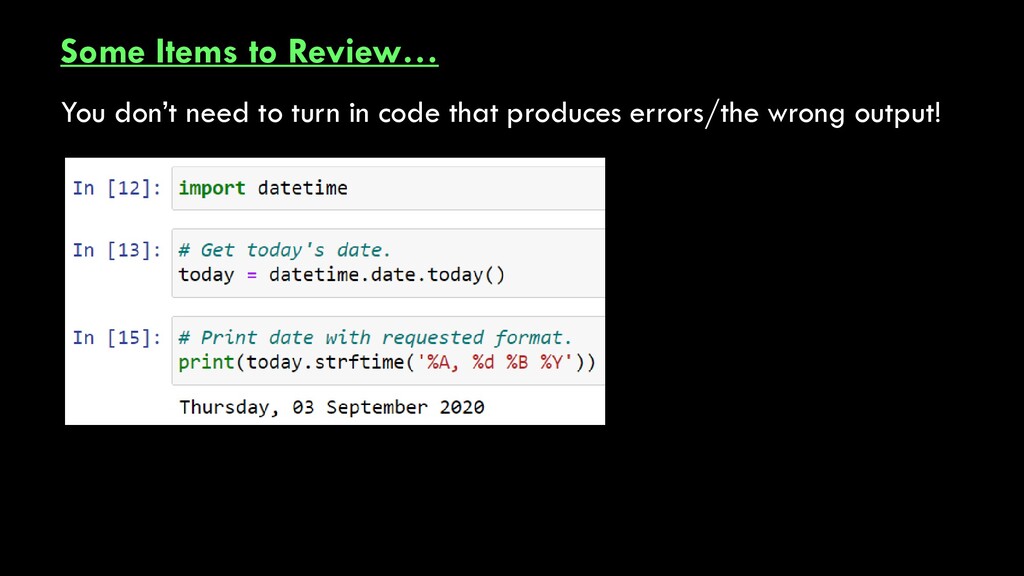
code that produces errors/the wrong output*! *Unless you’re unable to get the answer! Then turn in what you’ve got (and comment it) so I can give partial credit
Geoprocessing, finally For Today… 1. Some housekeeping 2. Geoprocessing, done three ways: 2a. With ArcMap/ArcPro Dialogs 2b. With Modelbuilder 2c. With Python
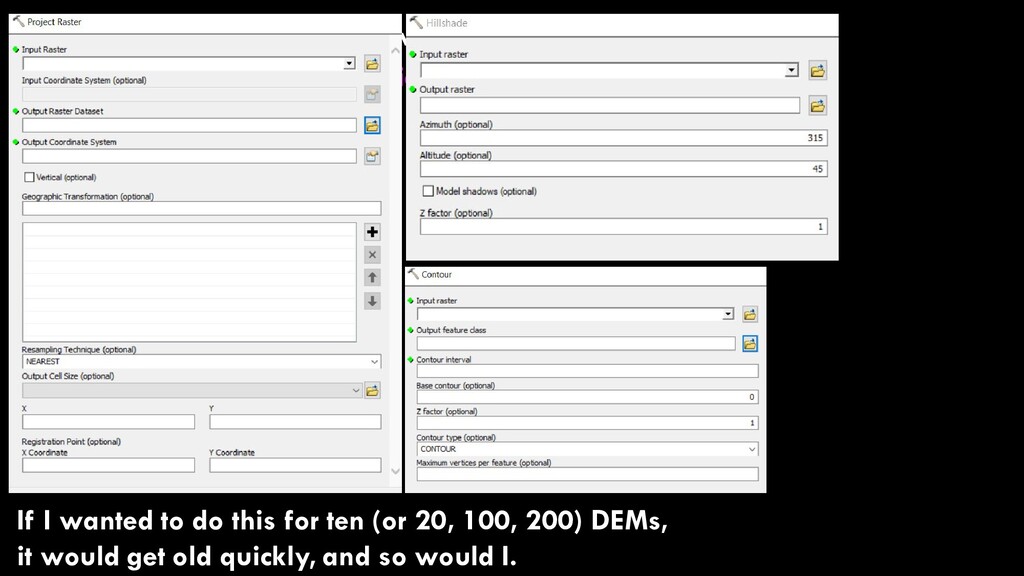
is great – but in reality I… 1.downloaded the elevation data from the USGS 2.reprojected it from lat/long to meters (project raster) 3.hillshaded it (hillshade) 4.contoured it (contour)
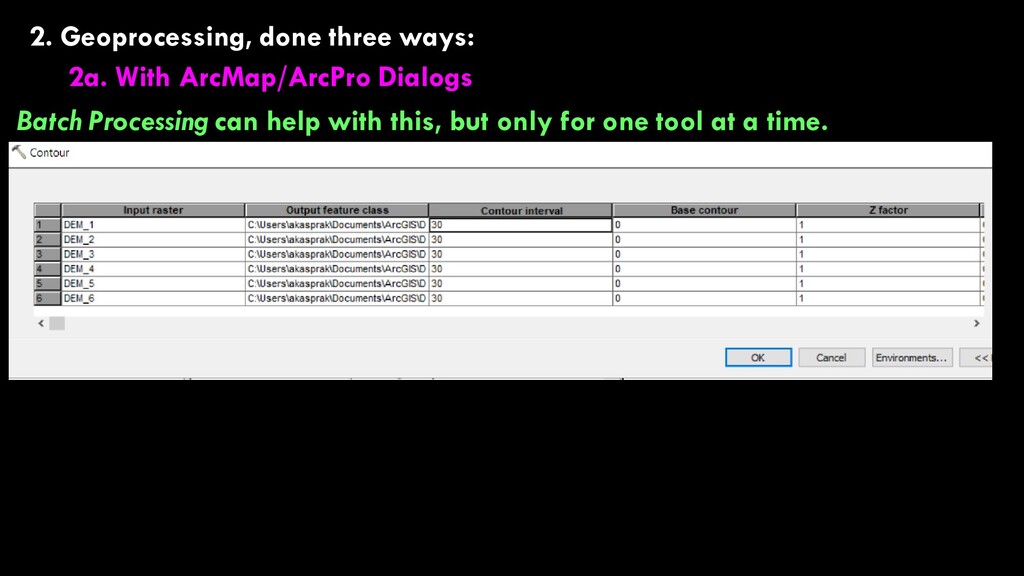
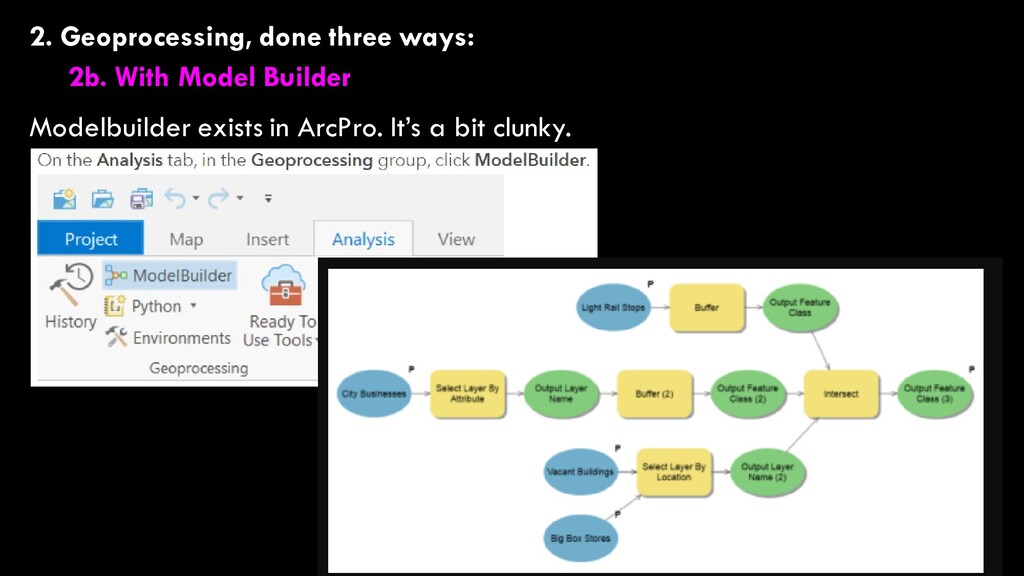
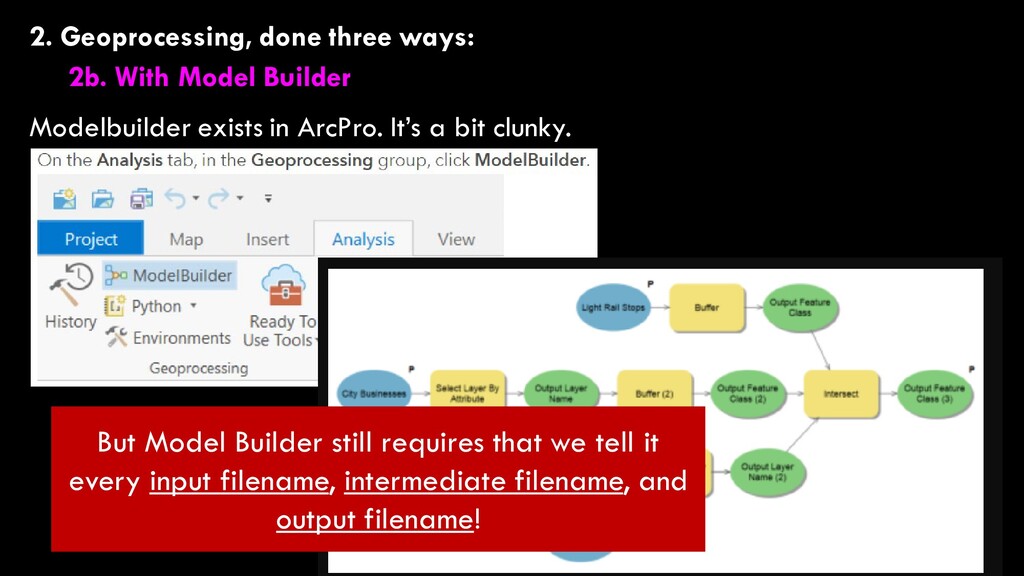
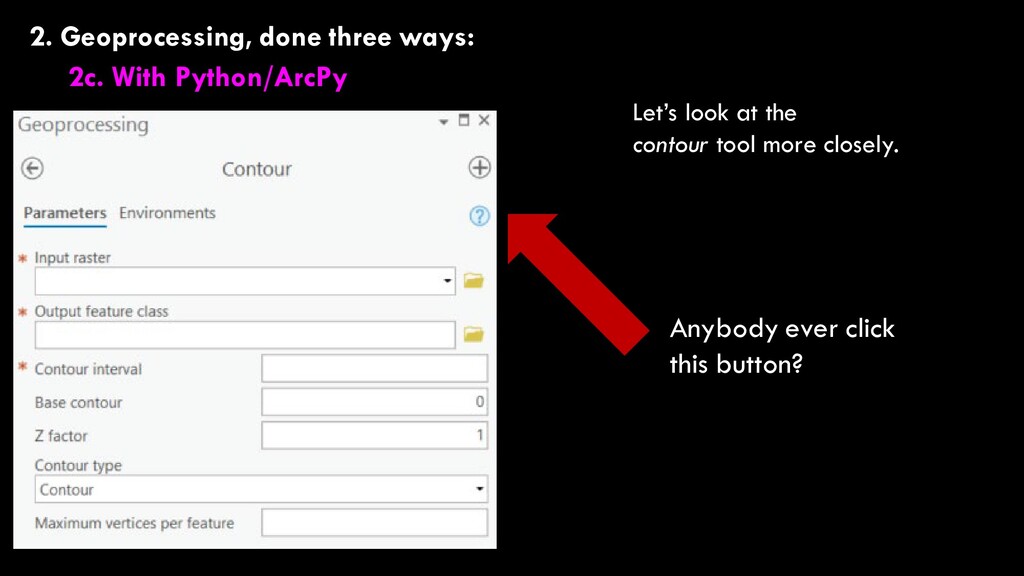
exists in ArcPro. It’s a bit clunky. But Model Builder still requires that we tell it every input filename, intermediate filename, and output filename!
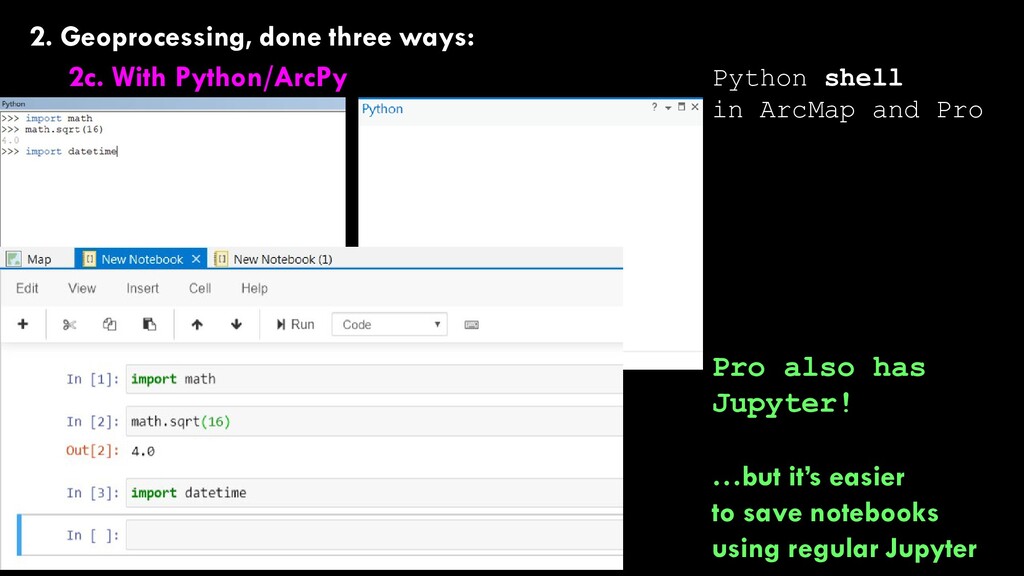
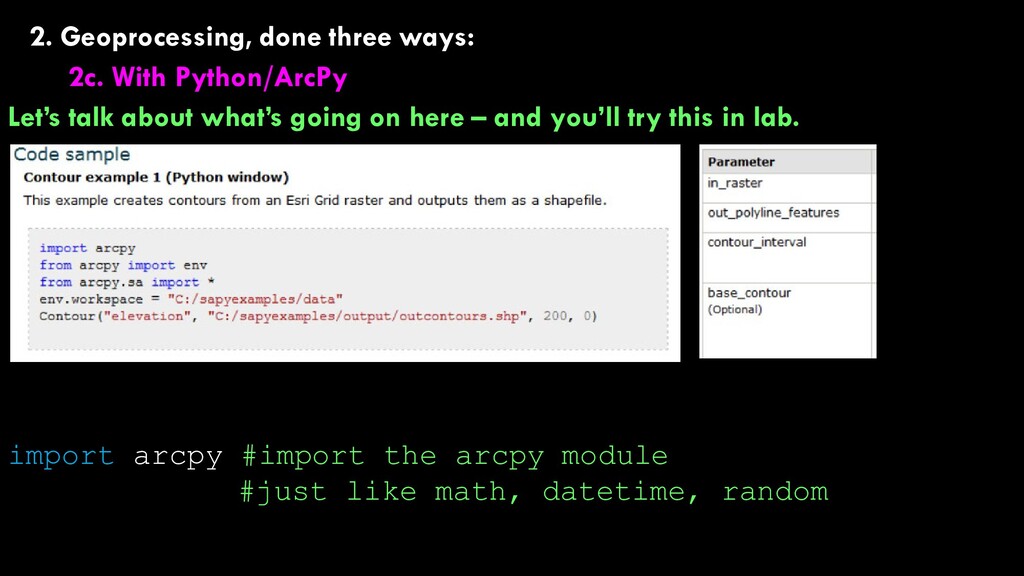
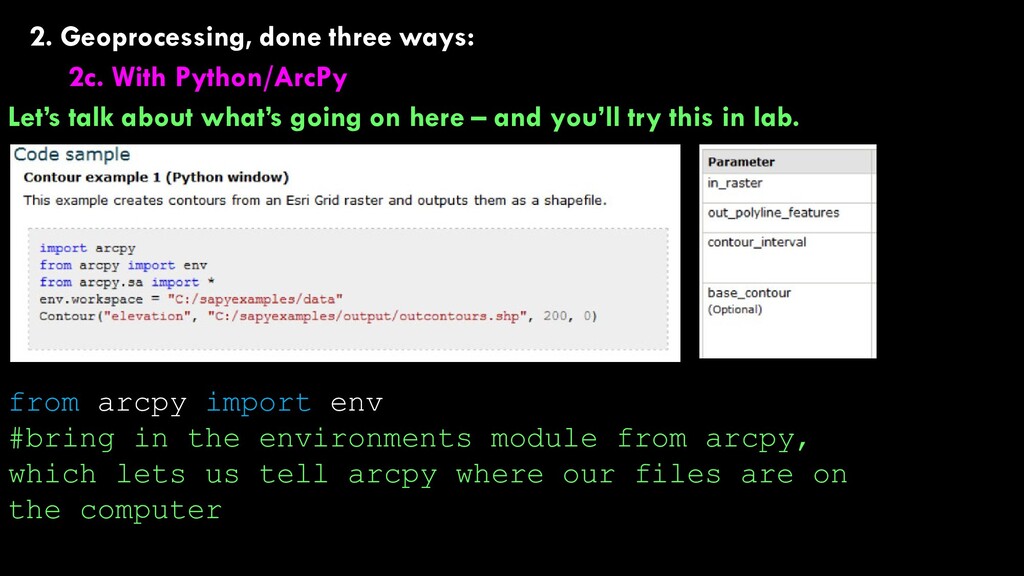
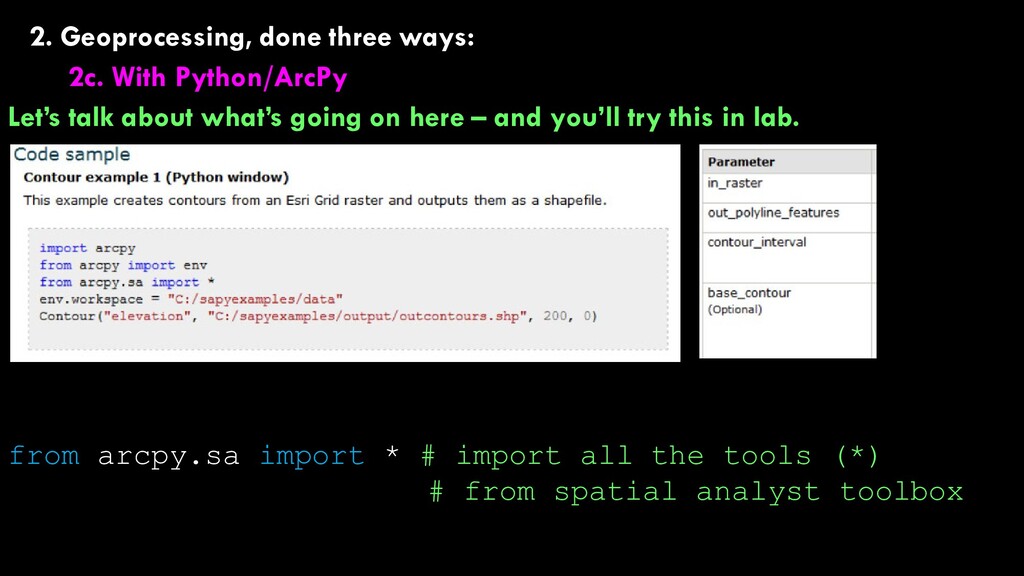
about what’s going on here – and you’ll try this in lab. from arcpy import env #bring in the environments module from arcpy, which lets us tell arcpy where our files are on the computer
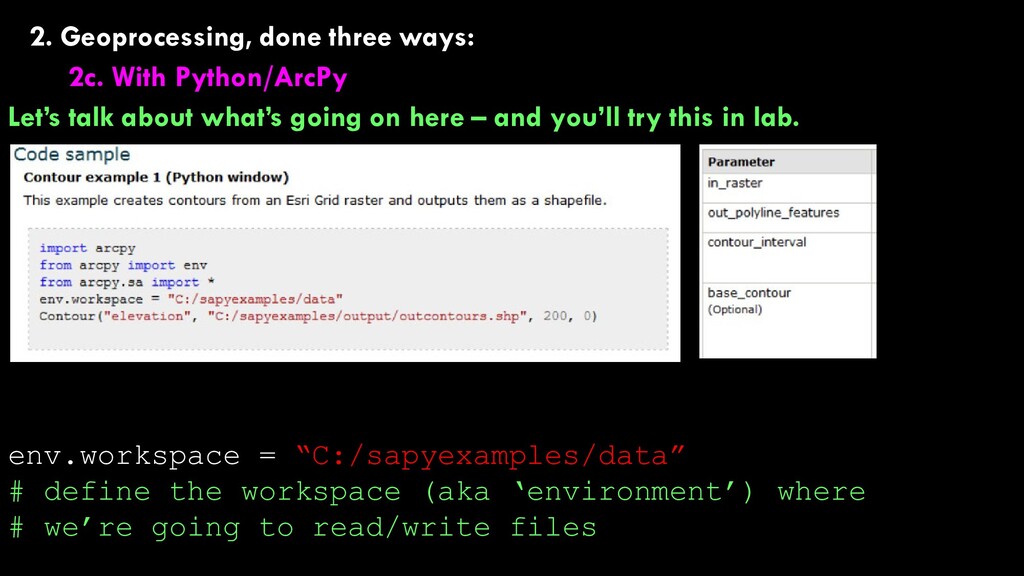
about what’s going on here – and you’ll try this in lab. env.workspace = “C:/sapyexamples/data” # define the workspace (aka ‘environment’) where # we’re going to read/write files
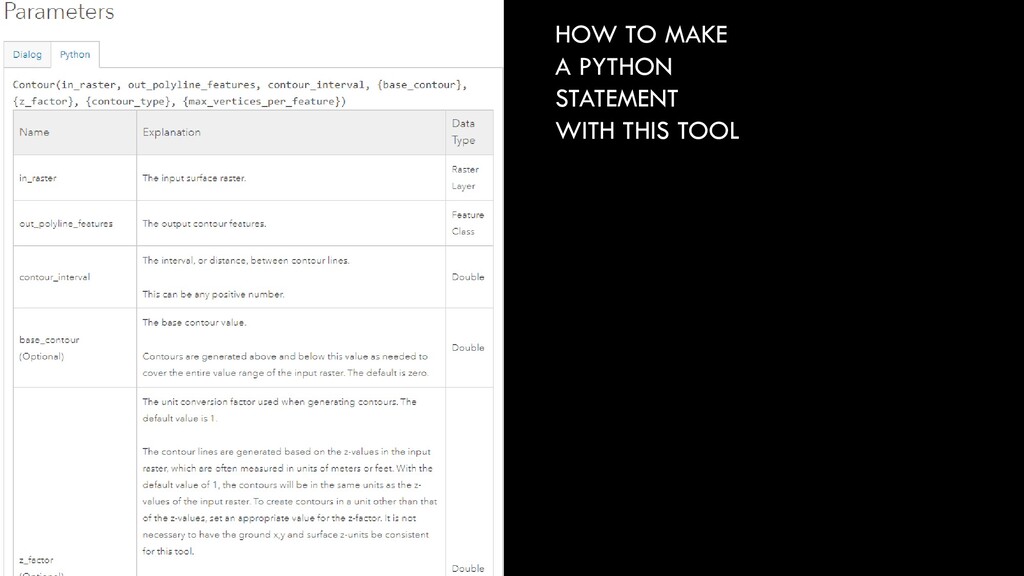
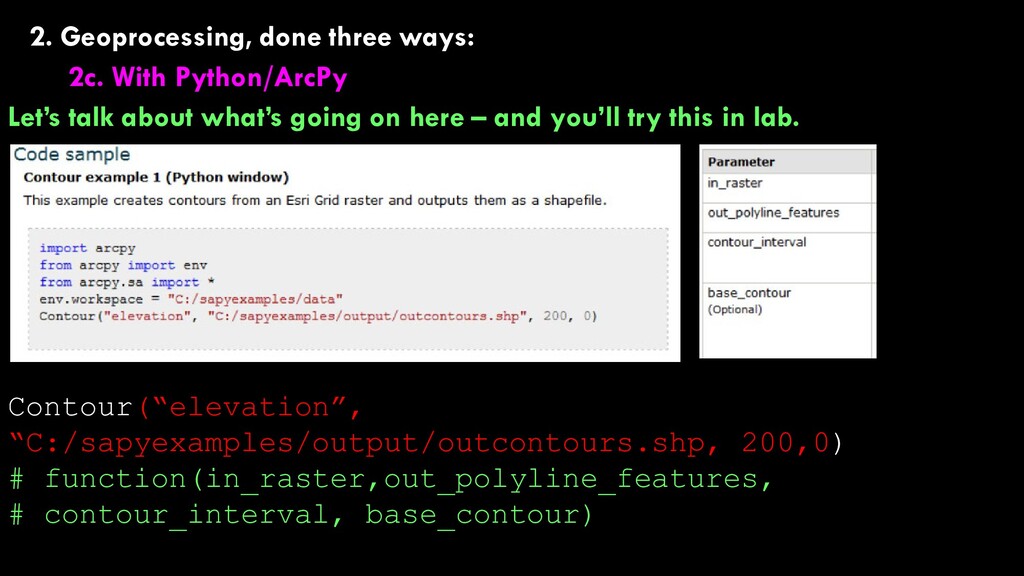
about what’s going on here – and you’ll try this in lab. Contour(“elevation”, “C:/sapyexamples/output/outcontours.shp, 200,0) # function(in_raster,out_polyline_features, # contour_interval, base_contour)
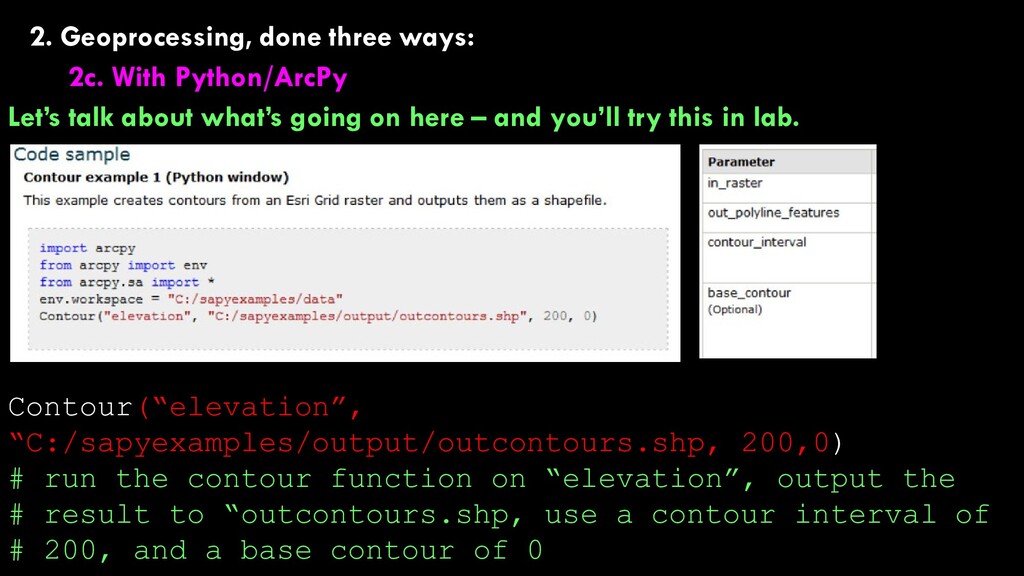
about what’s going on here – and you’ll try this in lab. Contour(“elevation”, “C:/sapyexamples/output/outcontours.shp, 200,0) # run the contour function on “elevation”, output the # result to “outcontours.shp, use a contour interval of # 200, and a base contour of 0
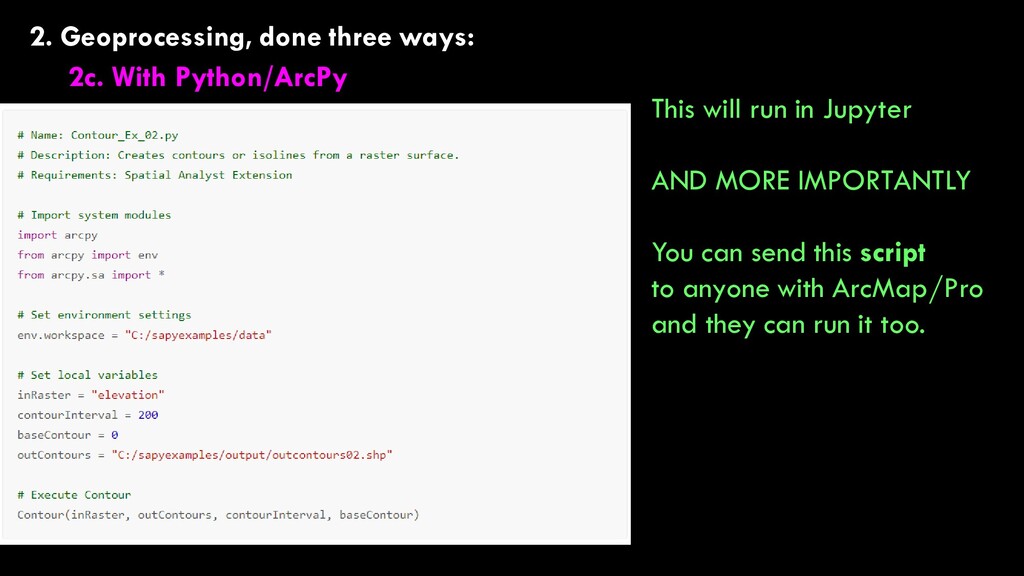
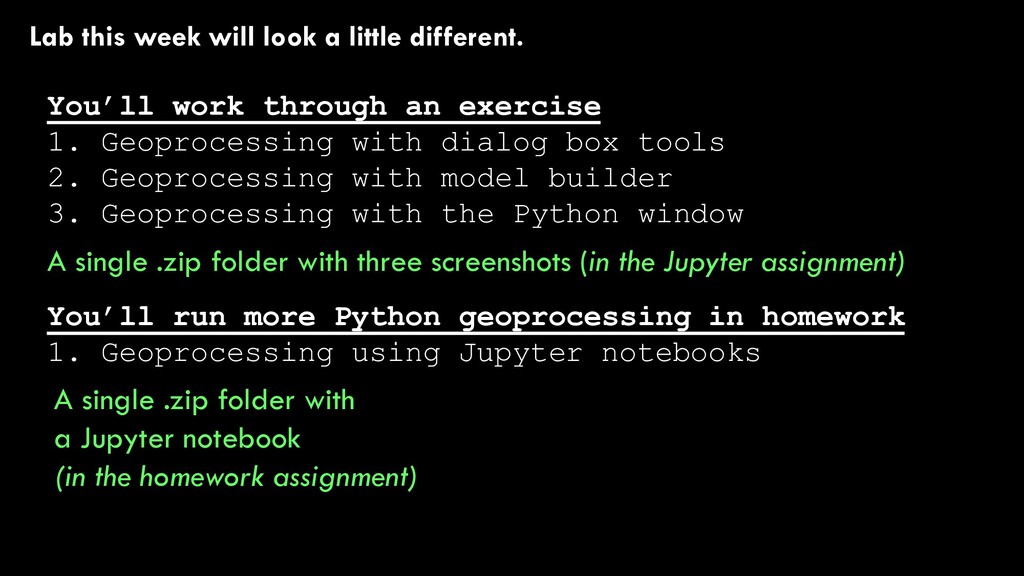
through an exercise 1. Geoprocessing with dialog box tools 2. Geoprocessing with model builder 3. Geoprocessing with the Python window You’ll run more Python geoprocessing in homework 1. Geoprocessing using Jupyter notebooks A single .zip folder with three screenshots (in the Jupyter assignment) A single .zip folder with a Jupyter notebook (in the homework assignment)